
M—bius build 3.0 : Crash testing Miatas like he works for the NHTSA

Thread Starter


Joined: Oct 2005
Posts: 15,197
Total Cats: 1,398
From: Oregon City, OR
Edit: quoting Mobius to get his post to the top of the build thread. More details below.
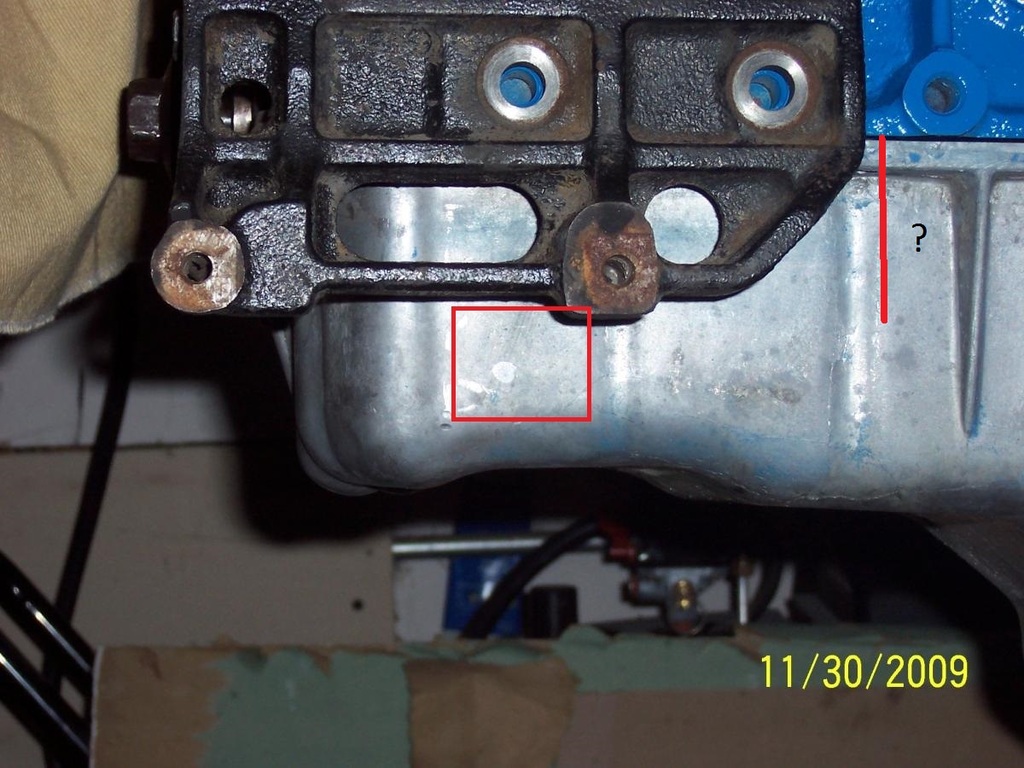
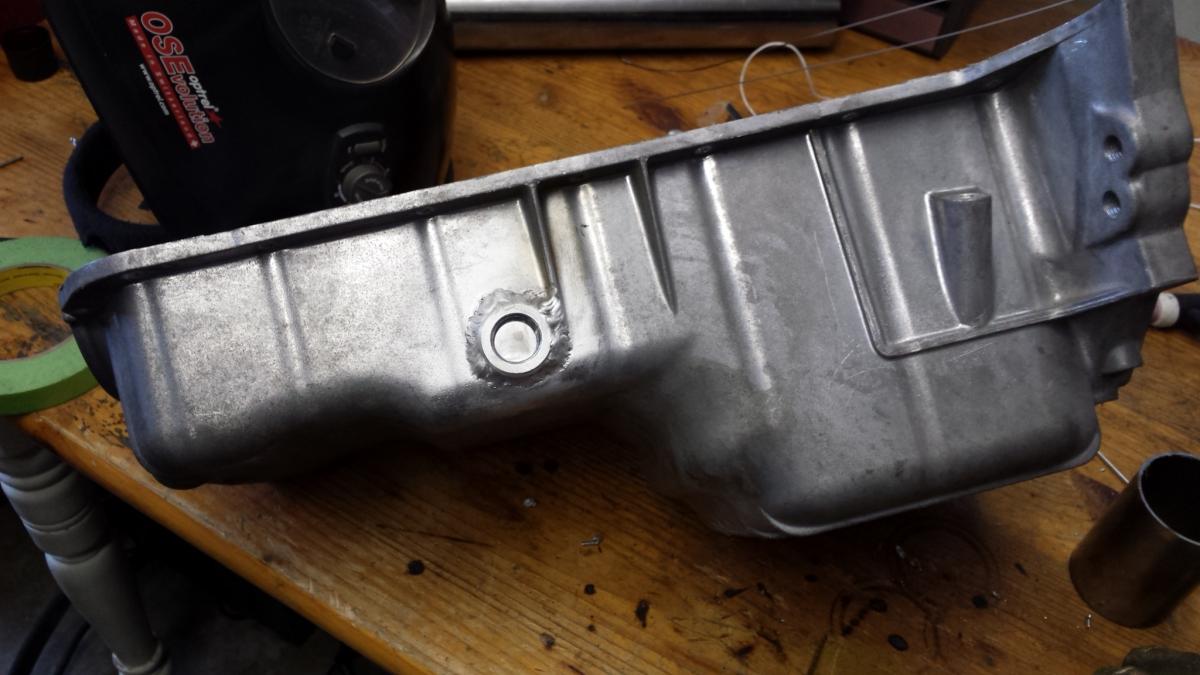
Calling all peoples with a VVT engine and cast iron AC bracket on an engine stand!!
I need the dimension of the red line, oil pan to bottom of threaded boss. My drill is waiting...
Build 1.0 is listed here: Mobius build thread: brotrex and bromex galore. 01 LS, rotrex, xidas, 6uls, etc.
That vehicle was fun, reasonably fast, utterly predictable. Build 2.0 aims to be fun, reasonably faster, and utterly predictable.
What carries over to build 2.0 from build 1.0
engine
cnc head, +1 valves
manley rods
arp head studs
acl race bearings
stock pistons
transmission
TSE brakes, upgraded to v2.0 for no spacer goodness
hardtop
Marrad seat, Schroth enduro harness
Hard dog M2 Hardcore Hardtop w/harness bar
maybe the poly bushings
ABS components
CoT wing & mounts
Build 2.0 will be using the following chassis, conveniently cared for by Curly as his daily driver for a couple of years:
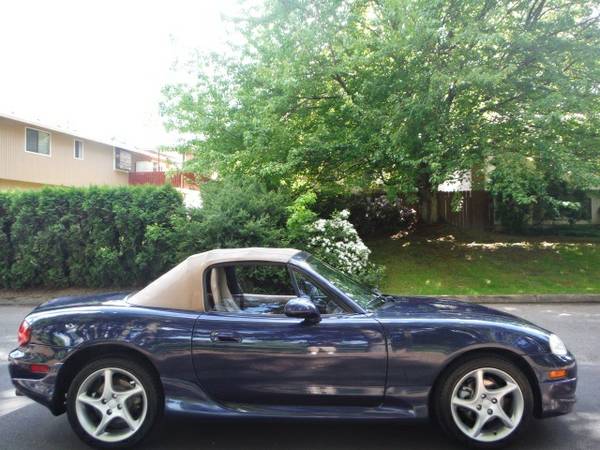
Also an '01 LS. So everything will be quite familiar.
That vehicle was fun, reasonably fast, utterly predictable. Build 2.0 aims to be fun, reasonably faster, and utterly predictable.
What carries over to build 2.0 from build 1.0
engine
cnc head, +1 valves
manley rods
arp head studs
acl race bearings
stock pistons
transmission
TSE brakes, upgraded to v2.0 for no spacer goodness
hardtop
Marrad seat, Schroth enduro harness
Hard dog M2 Hardcore Hardtop w/harness bar
maybe the poly bushings
ABS components
CoT wing & mounts
Build 2.0 will be using the following chassis, conveniently cared for by Curly as his daily driver for a couple of years:
Also an '01 LS. So everything will be quite familiar.
I need the dimension of the red line, oil pan to bottom of threaded boss. My drill is waiting...

Last edited by curly; May 16, 2016 at 12:02 AM.
Reply
 0
0

0

Not sure if this will help a whole lot, but this is my input...
The npt bung hits dead middle on the oil line; DO NOT drill there with the pan on. The hole that is plugged definitely interfered with the ac compressor itself. Even if you got it low enough, getting a -10 line there will be difficult...
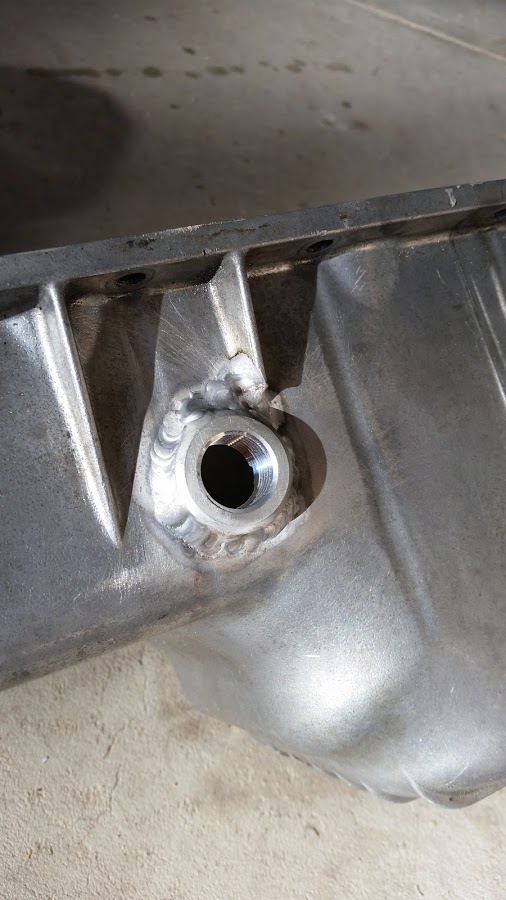
You can probably guestimate the distances in my photo. Really the spot I chose is freaking perfect with a 45* fitting. If the engine is on the stand I would without hesitation remove the pan to do the drilling.
Edit: found more pics; it looks like my fitting actually runs a little over the oil line, so the top of the oil feed is in the middle of my fitting. You can kind of see how I filed the fitting to curve around it.

The npt bung hits dead middle on the oil line; DO NOT drill there with the pan on. The hole that is plugged definitely interfered with the ac compressor itself. Even if you got it low enough, getting a -10 line there will be difficult...
You can probably guestimate the distances in my photo. Really the spot I chose is freaking perfect with a 45* fitting. If the engine is on the stand I would without hesitation remove the pan to do the drilling.
Edit: found more pics; it looks like my fitting actually runs a little over the oil line, so the top of the oil feed is in the middle of my fitting. You can kind of see how I filed the fitting to curve around it.
Last edited by leboeuf; Feb 24, 2016 at 03:12 PM. Reason: Savington clarified situation
Reply
0
0
Joined: Apr 2014
Posts: 18,643
Total Cats: 1,870
From: Beaverton, USA
You're welding a 1/2 npt bung on there right Josh?
I agree, I would go with leboeuf's location, as long as it doesn't interfere with anything else in the TSE setup.
I agree, I would go with leboeuf's location, as long as it doesn't interfere with anything else in the TSE setup.
Reply
0
0

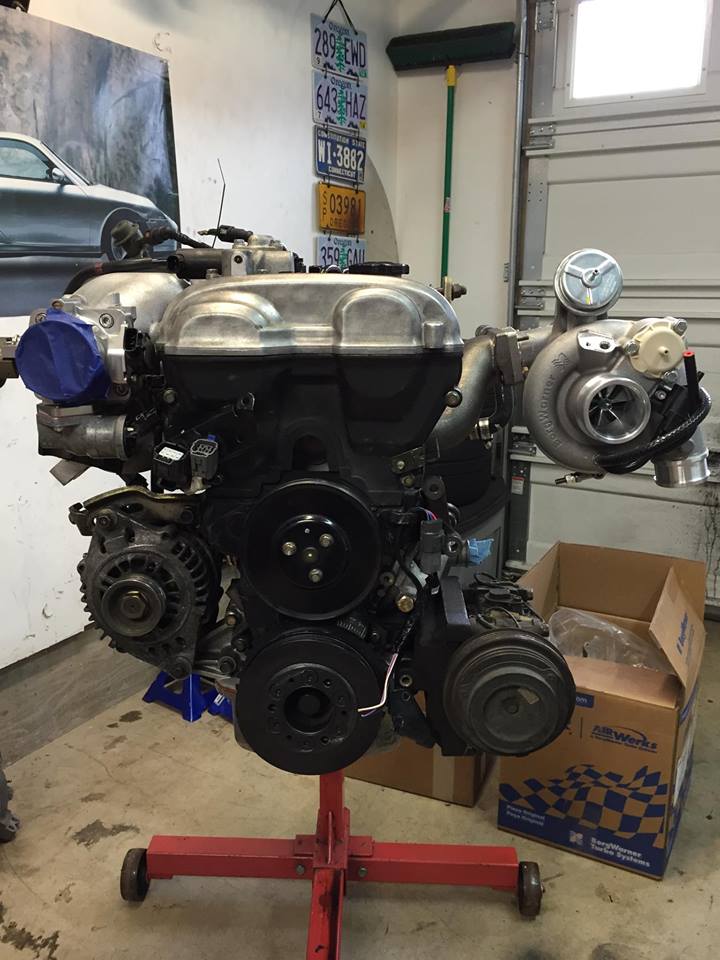
I'm guessing the pan is off and you don't have an AC bracket handy? My spare engine, pan and bracket are at Gesso's so I'm no help.
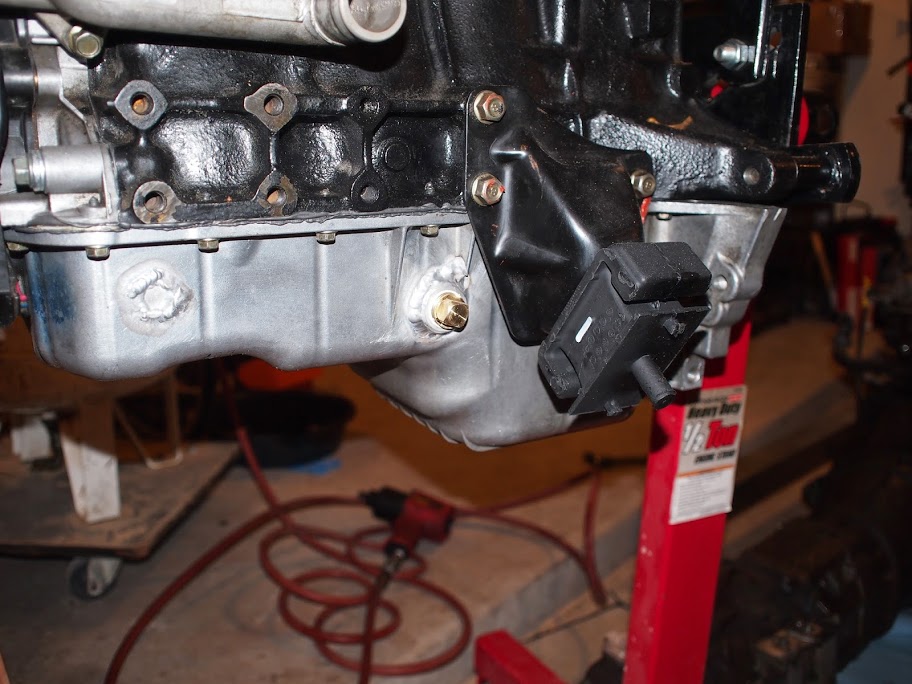
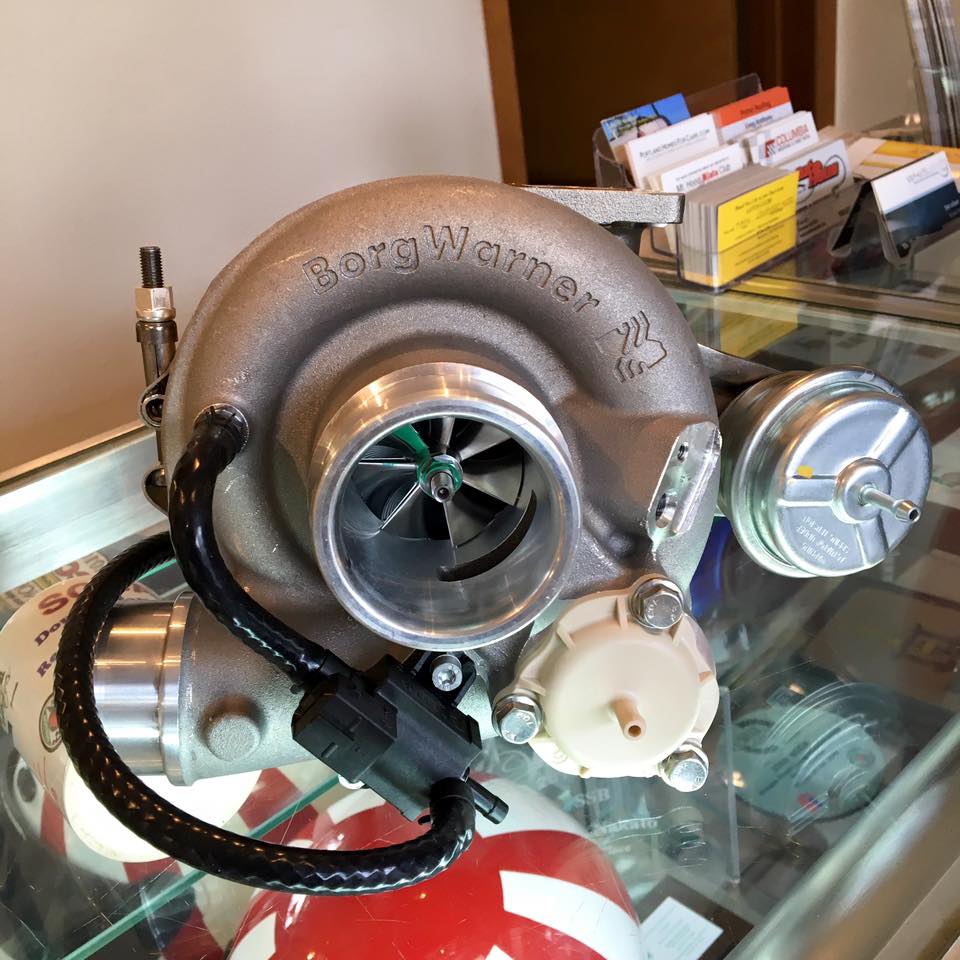
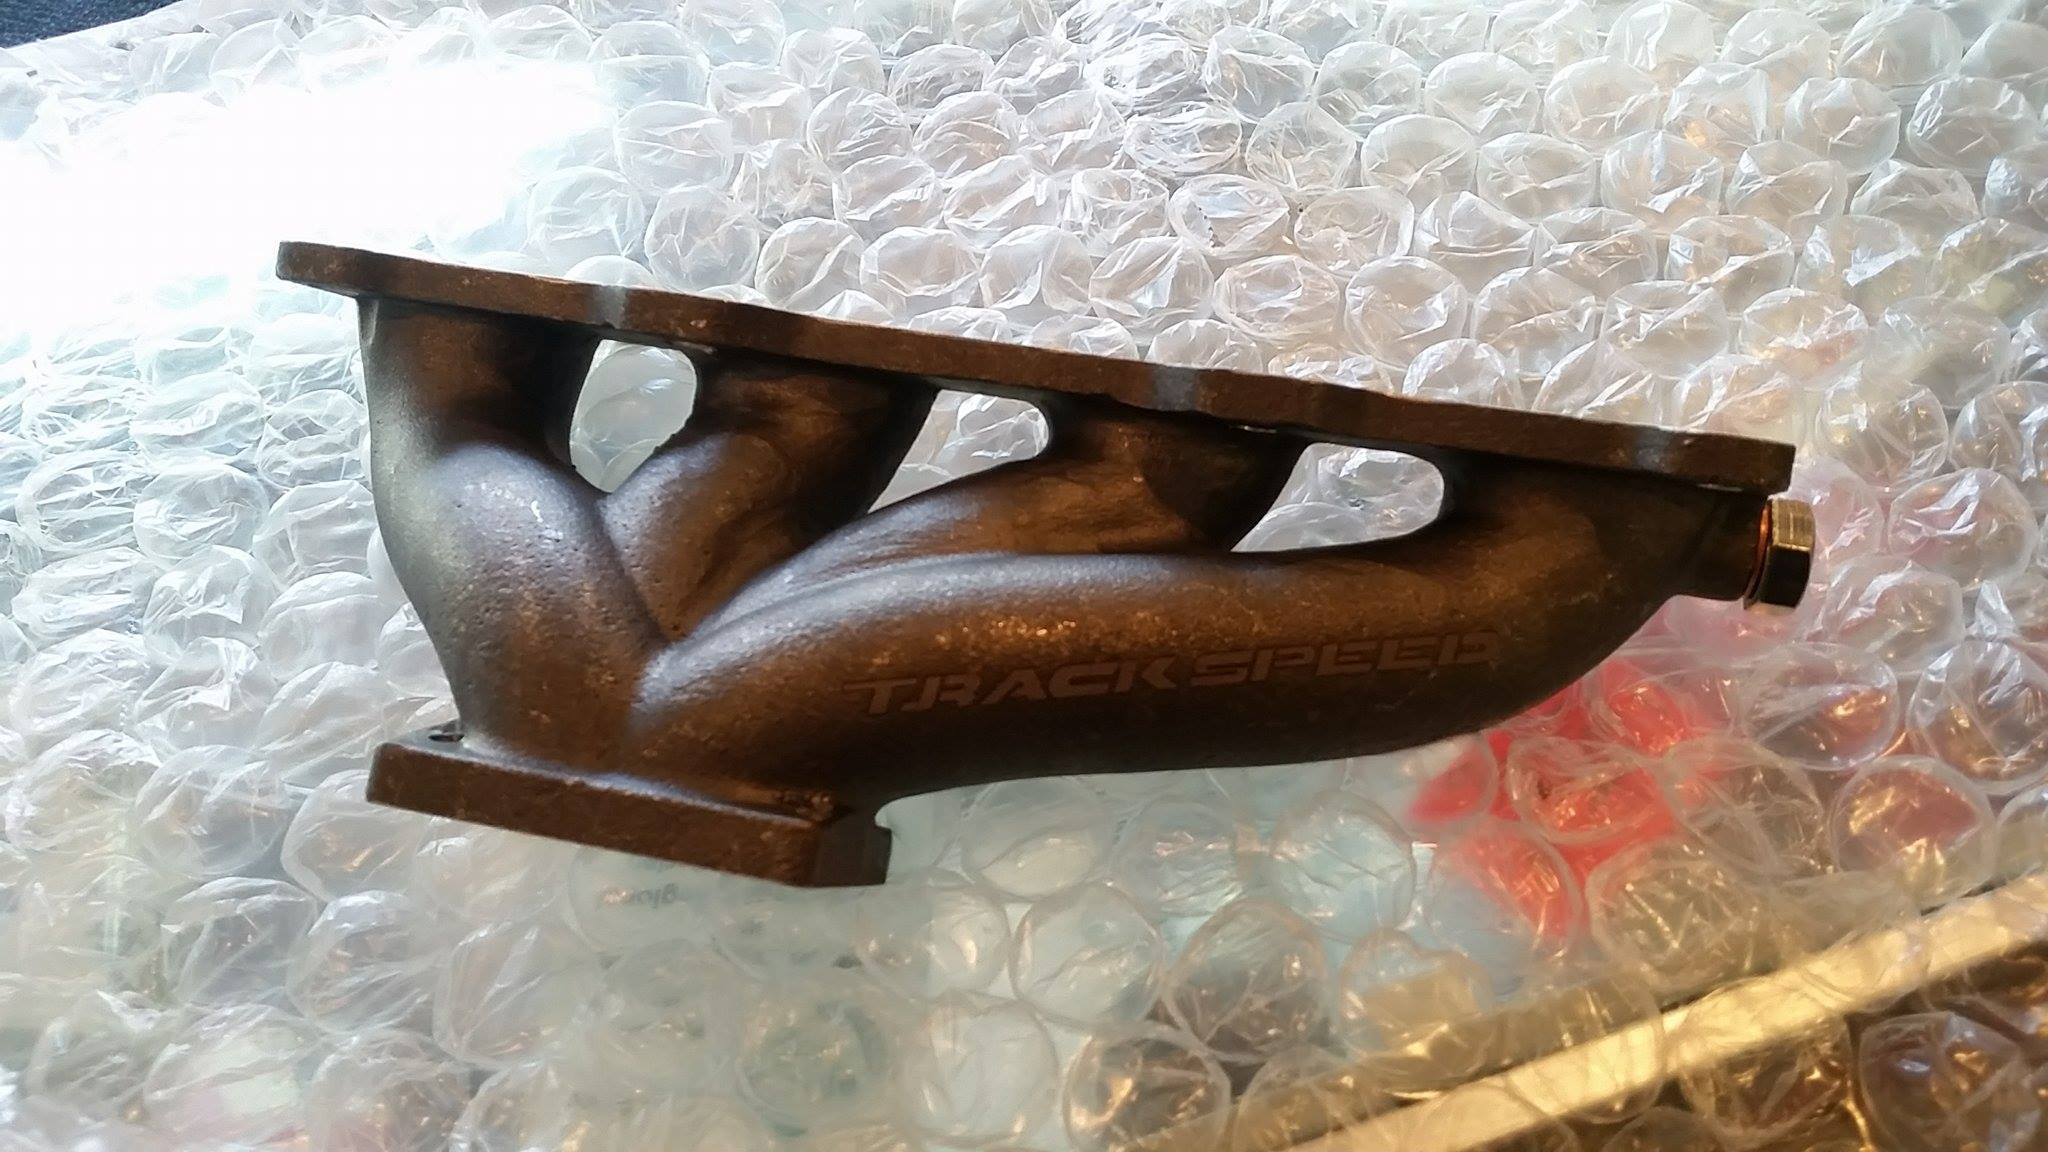
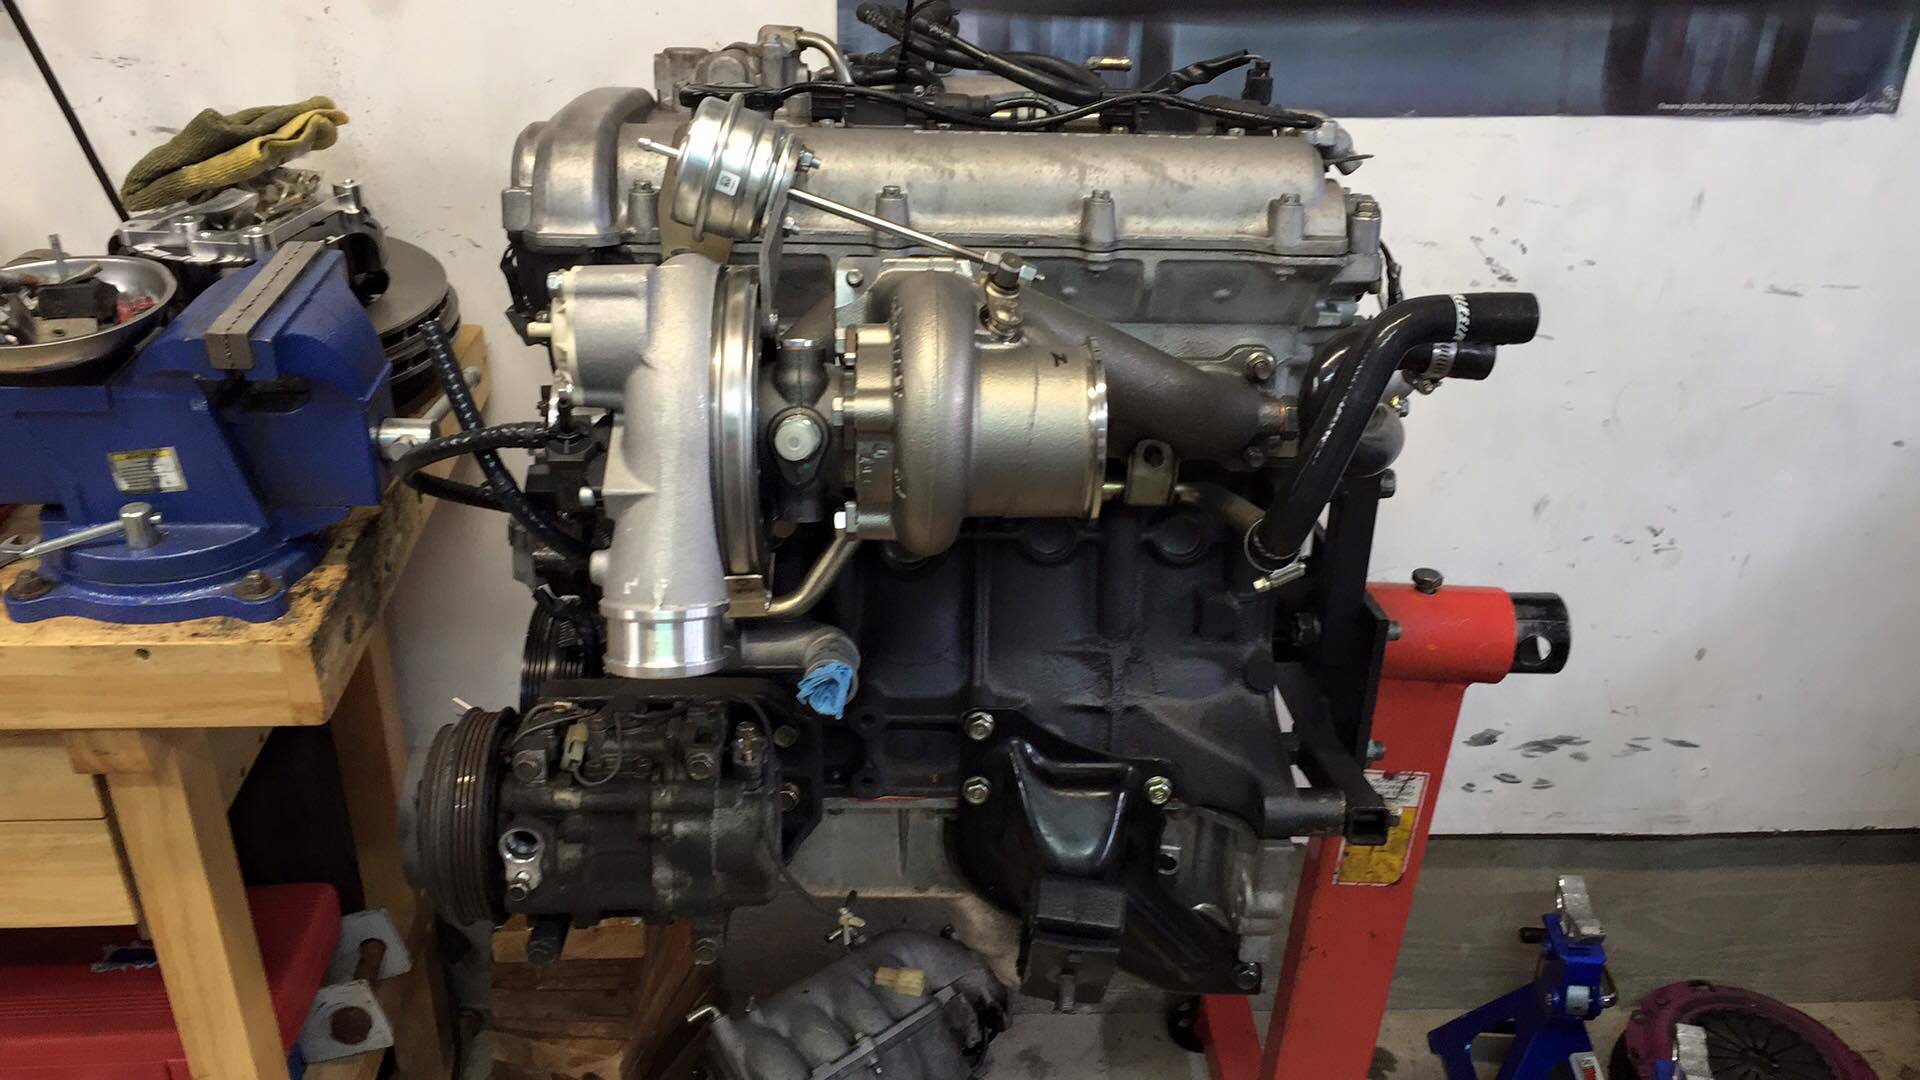
This is where I put mine, its straight vertical drop with my ARTech manifold. The TSE manifold setup puts the EFR CHRA and thus oil drain in almost the same position front to back so this image may actually be helpful. If you are putting the drain under the AC bracket I'm guessing it'll end up sloping toward the front of the car?
My bung is pretty much PERFECTLY in line the the PS fittings on the rack, so leboeufs location is probably better. I feel like I'd rather have it slope slightly to the rear than to the front.
Besides, Richard does not need AC, just tell him it does not fit and move on
Reply
0
0

Not sure if this will help a whole lot, and I think I posted this in savington's thread and he took it personal and had my post removed, but this is my input...
The npt bung hits dead middle on the oil line; DO NOT drill there with the pan on. The hole that is plugged definitely interfered with the ac compressor itself. Even if you got it low enough, getting a -10 line there will be difficult...
You can probably guestimate the distances in my photo. Really the spot I chose is freaking perfect with a 45* fitting. If the engine is on the stand I would without hesitation remove the pan to do the drilling.
 Your location is great if you have the pan off, but you want to make sure that you have clearance for the oil line to drop through that area. On our kits, you definitely won't make it down there without contacting the lower coolant hose (hence my desire to not have people follow your instructions and end up pissed off when it doesn't work with the rest of our parts).
Reply
0
0
Thread Starter
Joined: Oct 2005
Posts: 15,197
Total Cats: 1,398
From: Oregon City, OR
Yes, there's a newborn at the curly residence, the engine is on a stand in the garage with an incredibly well sealed oil pan, the manifold and turbo is at work with no stud kit yet (I think), and the car is at my friend's house, so I'm flying a little blind. The AC and PS lines are what concern me about any location than the red square in my original picture, which is what Savington suggested with his experience in a AC and PS NB2, which is what Richard's new car is.
I love to leave the pan on, since it's only my time to drill and tap. Removing requires professional cleaning, then I might as well weld a bung on, then I'd want new pan seals and pickup gasket, plus half a tube of orange RTV. So now we're talking about ~$200 for Richard.
Edit: mixing manifold will not be flipped.
Edit2: Savington, is this still the best location for engine out?
Reply
0
0
I'm a little interested in the interference? It looks like your manifold puts the turbo a little more towards the rear of the car than mine and would make the motor mount area even more advantageous. You could *probably* aim a little higher and miss the oil feed line...
I did remove the old hard line section and replace it with a "bendy" hose. The oil drain fits neatly between the lower hose and the motor mount and avoids the a/c system all together.
Post a pic of how you got around the a/c compressor?
Edit: Congrats Curly!
Last edited by leboeuf; Feb 24, 2016 at 03:38 PM.
Reply
0
0
Hahaha is it that bad? I'm just having a relevant conversation with myself and maybe Savington inside Mobius' thread.
Really, I'm trying to get Savington to post his technique to route the oil drain. Whatever he did is probably what you should do.
If you want to put your drain in the location I did you can probably get away with it, but you'll need to drill higher (like near the oil pan lip) in order to not hit the oil sump line inside the pan. Also I should mention that I'm not using the stock lower coolant hose and that my setup is on an NA.
I'll snap some more pictures of the drain tonight if you'd like?
Reply
0
0
Build 1.0 is listed here: Mobius build thread: brotrex and bromex galore. 01 LS, rotrex, xidas, 6uls, etc.
That vehicle was fun, reasonably fast, utterly predictable. Build 2.0 aims to be fun, reasonably faster, and utterly predictable.
What carries over to build 2.0 from build 1.0
engine
cnc head, +1 valves
manley rods
arp head studs
acl race bearings
stock pistons
transmission
TSE brakes, upgraded to v2.0 for no spacer goodness
hardtop
Marrad seat, Schroth enduro harness
Hard dog M2 Hardcore Hardtop w/harness bar
maybe the poly bushings
ABS components
CoT wing & mounts
Build 2.0 will be using the following chassis, conveniently cared for by Curly as his daily driver for a couple of years:
Also an '01 LS. So everything will be quite familiar.
Last edited by Mobius; Feb 28, 2016 at 11:52 PM.
Reply
0
0
Plan for build 2.0
The plan is moar, and better, than before.
Things have magically happened in Curly's garage:
I sense at least one keg of beer for Curly's kegerator in my future.
The plan is moar, and better, than before.
Things have magically happened in Curly's garage:
I sense at least one keg of beer for Curly's kegerator in my future.
Last edited by Mobius; Feb 28, 2016 at 11:51 PM.
Reply
0
0


Joined: Apr 2014
Posts: 18,643
Total Cats: 1,870
From: Beaverton, USA
Suspension bits for 2.0
Poly bronze conversion and rear sphericals. Also some delrin LCA bushings when we can get our hands on his V8r arms.

Poly bronze conversion and rear sphericals. Also some delrin LCA bushings when we can get our hands on his V8r arms.
Reply
0
0

Elite Member
Joined: Oct 2013
Posts: 1,822
Total Cats: 144
From: NorthWest NJ
In for goodness.
Was the harness you are transfering in use when the last car met it's end? I am curious if reusing a harness that has seen that loading is an ok thing? (I assume you know what you are doing, but now I am curious)
Was the harness you are transfering in use when the last car met it's end? I am curious if reusing a harness that has seen that loading is an ok thing? (I assume you know what you are doing, but now I am curious)
Reply
0
0

Richard, is this going to be a double-duty car? If mainly for track/HPDE, I've been really happy having a cage in the car. The Harddog cage is nice, although it's not for W2W.
Reply
1
1


