
Mini_FD '99 Flyin' Miata Turbo Build


Bannisheded
Joined: Aug 2014
Posts: 129
Total Cats: -172

FDs on the other hand have retained their value, they are timeless machines to be exact. to remind you FDs are 1993-1995 cars and still look compared to sport cars available today, and in such condition they are hard to find.
Reply
 -5
-5

-5


Joined: Sep 2010
Posts: 8,157
Total Cats: 1,095
From: Lake Forest, CA

Reply
0
0

I can't believe how futuristic the gauge cluster is arranged. It's one of my favorite parts about the car.
Also the car gave inspiration to the nb. I see so many parts and angles of the fd that are similar.
Also the car gave inspiration to the nb. I see so many parts and angles of the fd that are similar.
Reply
0
0


Newb
Joined: Apr 2010
Posts: 11
Total Cats: 0
 Should've thought about it before!
Reply
0
0
I installed two new Mazda belts. Sucked because I did it all on no knowledge. In doing so I did break a bolt head off the airpump which we tried to extract. Made a new tap and the new bolt pattern wouldn't fit through the bracket underneath the airpump. So I said **** it. I'll get one at pettit racing for cheap.
Not so much, it cost 100 but it was a low mileage pump. I could have deleted the pump but I'd rather do so with a powerfc so the car runs better if I did a delete without the powerfc. Anyways I got everything together and it's running perfect. I also installed a new mazda fuel filter.
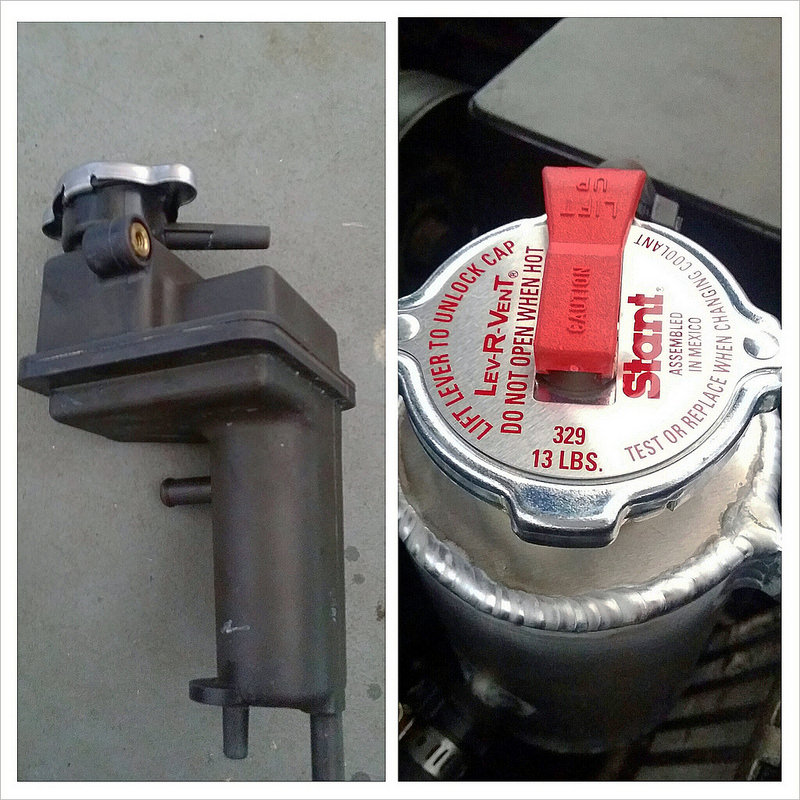
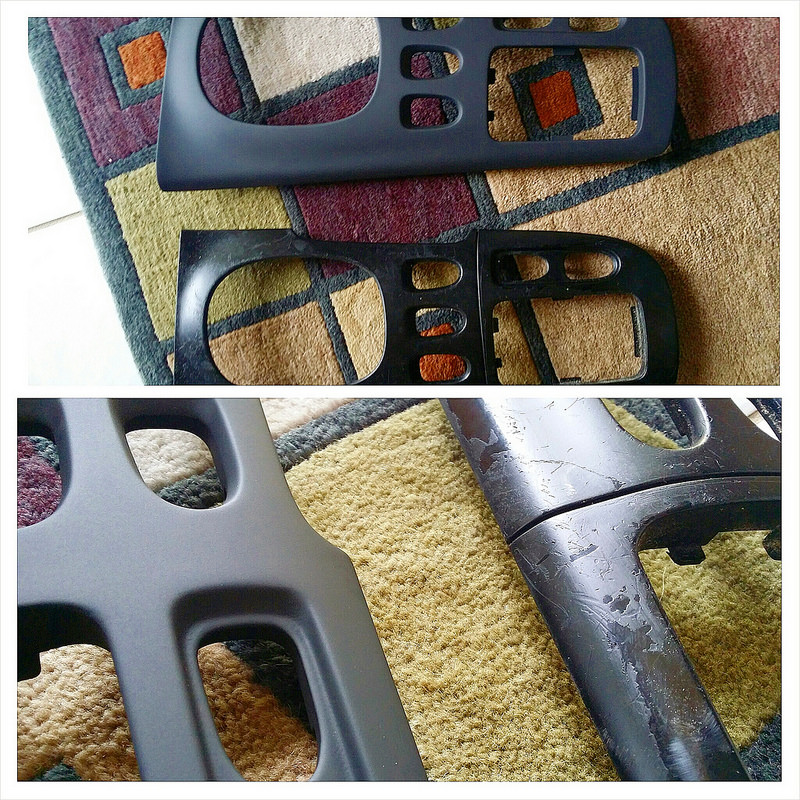
Tomorrow the aluminum air separator tank will go in with a new from mazda center console bezel.
Not so much, it cost 100 but it was a low mileage pump. I could have deleted the pump but I'd rather do so with a powerfc so the car runs better if I did a delete without the powerfc. Anyways I got everything together and it's running perfect. I also installed a new mazda fuel filter.
Tomorrow the aluminum air separator tank will go in with a new from mazda center console bezel.
Reply
0
0
Interior shot for those who asked. Cell phone quality no filter
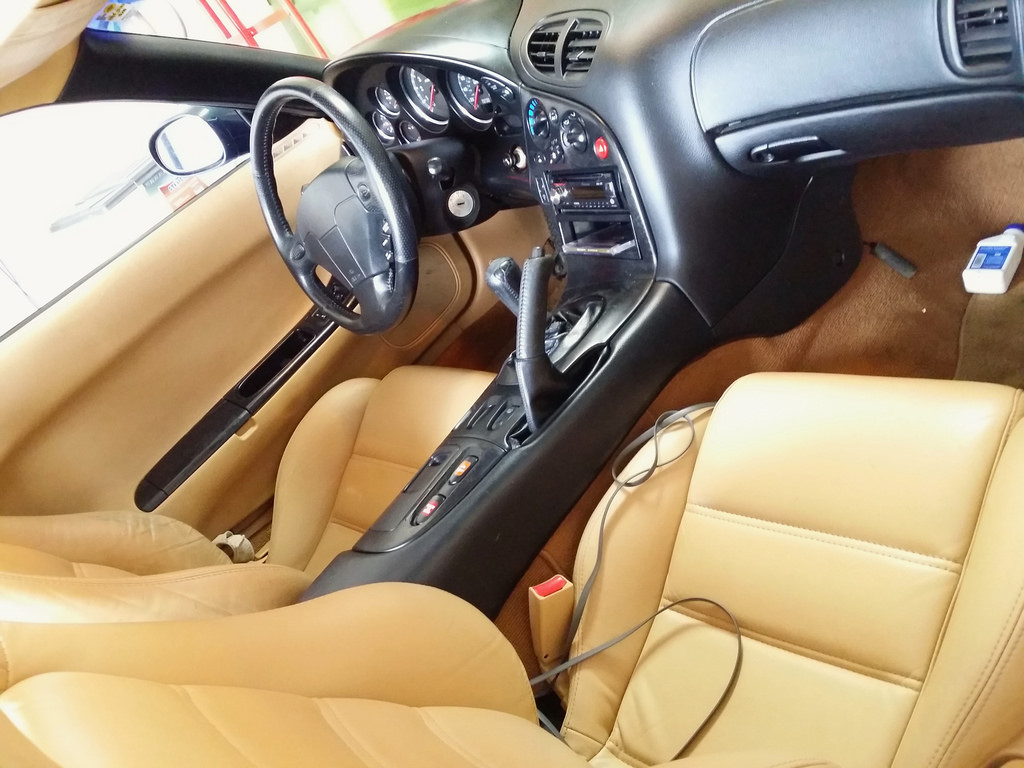
2014-09-22_10-32-14 by rocketeerbandit, on Flickr
2014-09-22_10-31-05 by rocketeerbandit, on Flickr
2014-09-22_10-32-14 by rocketeerbandit, on Flickr
2014-09-22_10-31-05 by rocketeerbandit, on Flickr
Reply
0
0
Update:
IMG_20140925_113004 by rocketeerbandit, on Flickr
IMG_20140925_091341 by rocketeerbandit, on Flickr
IMG_20140925_113004 by rocketeerbandit, on Flickr
IMG_20140925_091341 by rocketeerbandit, on Flickr
Reply
0
0
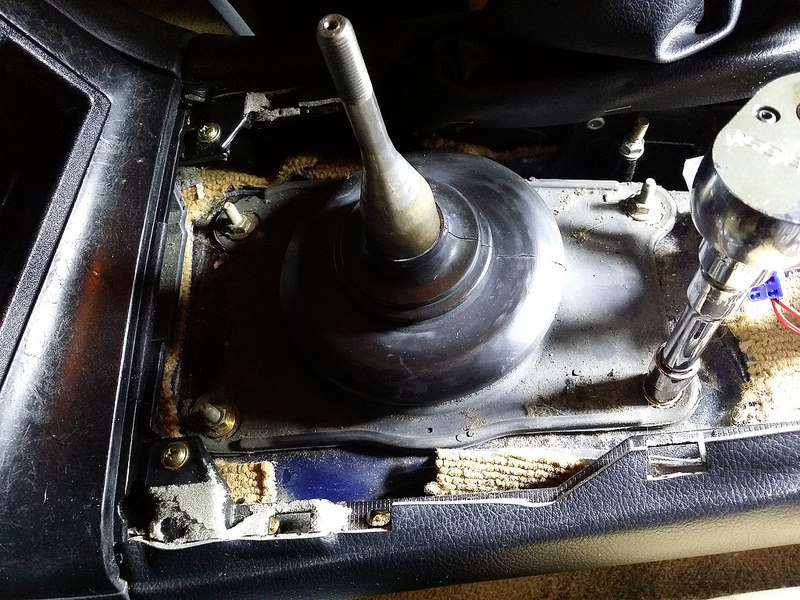
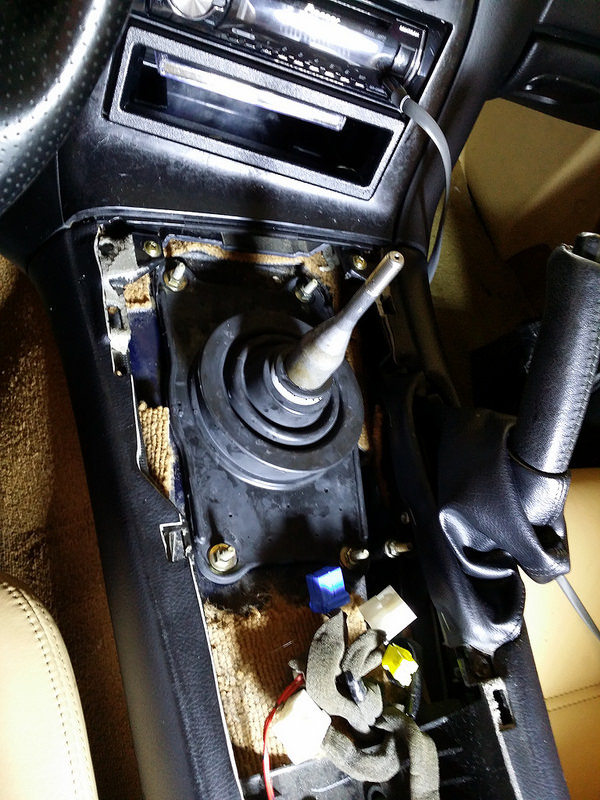
I have contributed my first "How to Thread" on a shifter rebuild.
This is what I performed this morning"
This morning I gathered the parts to rebuild the shifter top to bottom.
 20140930_074513 by rocketeerbandit, on Flickr
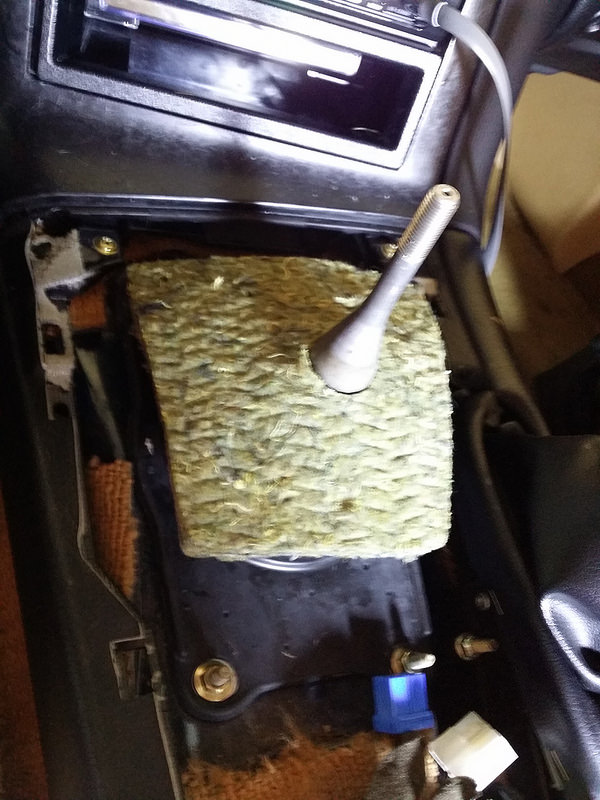
I started by removing the Center Console Bezel and un-clipping the connectors to the fog lights, defroster, bulb to the ashtray etc.
There are 4 10 mm bolts for the upper dust boot.
 20140930_071956 by rocketeerbandit, on Flickr
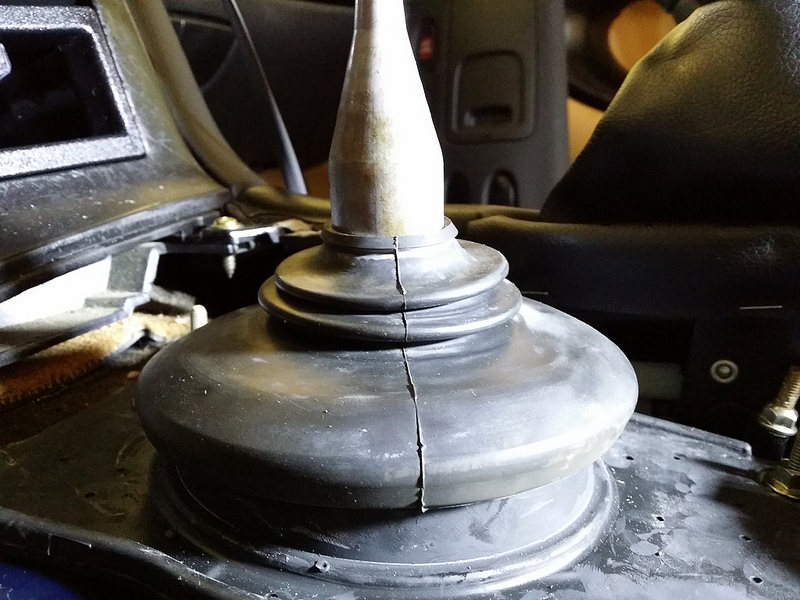
One of the reason why I am rebuilding the shifter is because I know how 21 years is on rubber. Especially brittle mazdas' shifts boots from my previous ownership of a 99 miata. They are very similar in design and parts. So this rebuild is very familiar to me.
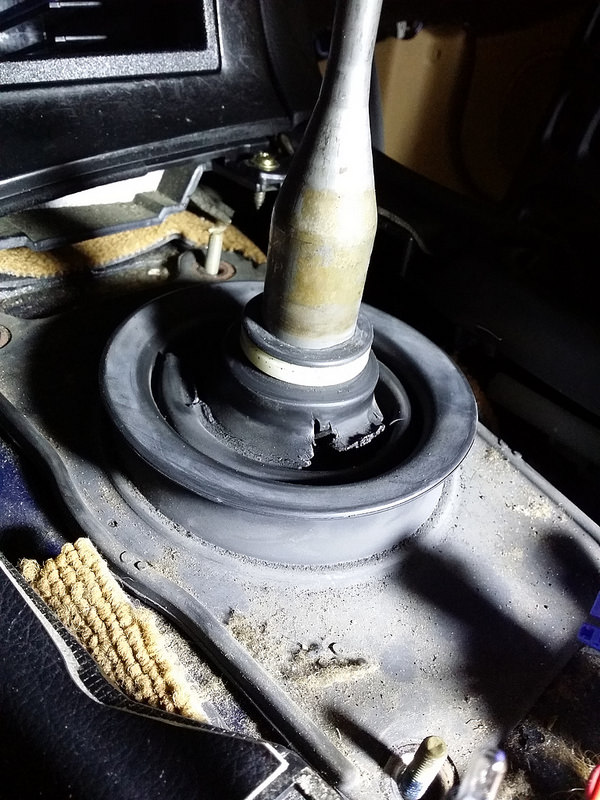 20140930_072301 by rocketeerbandit, on Flickr
After removing the upper boot, you can see the lower boot torn as well being held in place with 3 10mm bolts.
 20140930_072405 by rocketeerbandit, on Flickr
In the file folder of receipts that I inherited with the purchase of my rx7 last month from the one owner who saved everything, I saw that the bushings were replaced a while back but still wanted to do the job myself to have that security of knowing it is new and done in my ownership of the vehicle.
 20140930_072944 by rocketeerbandit, on Flickr
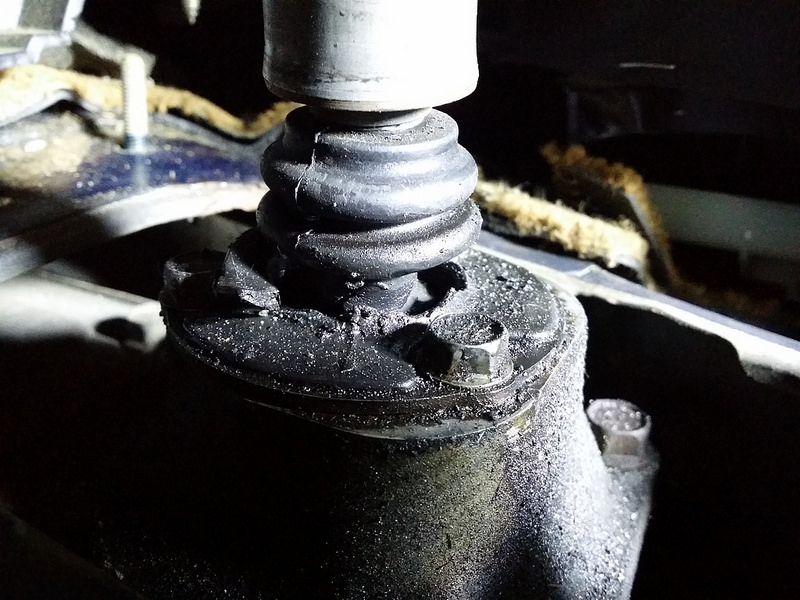
The Paper Gasket that is married to the lower dust boot from factory is now stuck on the turret. I had to scrape it off carefully
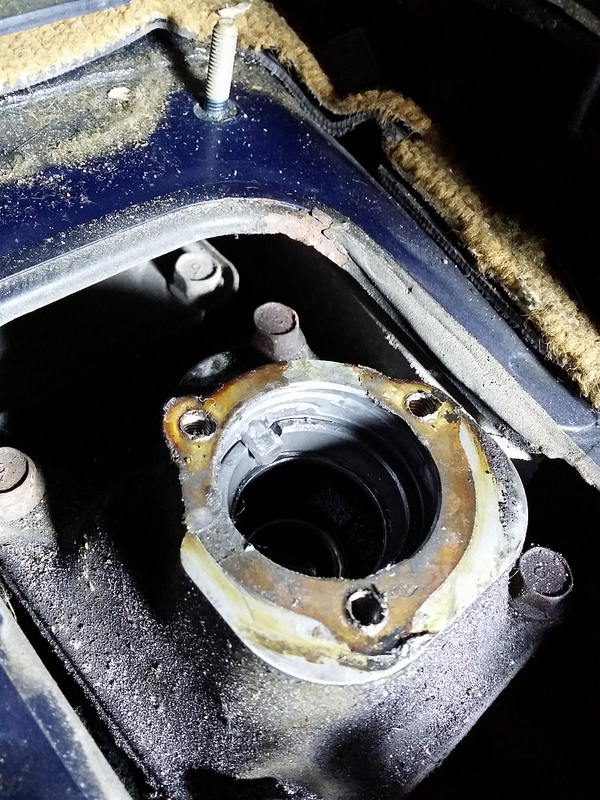 20140930_073058 by rocketeerbandit, on Flickr
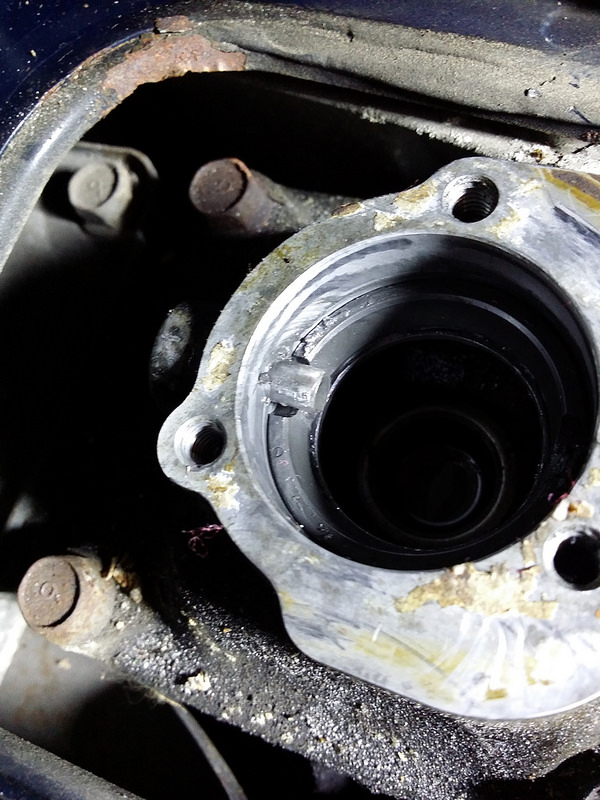
Down in the turret you can see a bushing and underneath that is a spring washer. To get this out I need to use a hammer and a socket extension that fit perfectly to nudge that pin back.
replace the broken spring washer on the bottom of the lip first then the bushing. The cutout of the bushing should be facing where the pin will be reinserted. I used a crowbar to push the pin back in. This was the only part that I felt need attention.
 20140930_073811 by rocketeerbandit, on Flickr
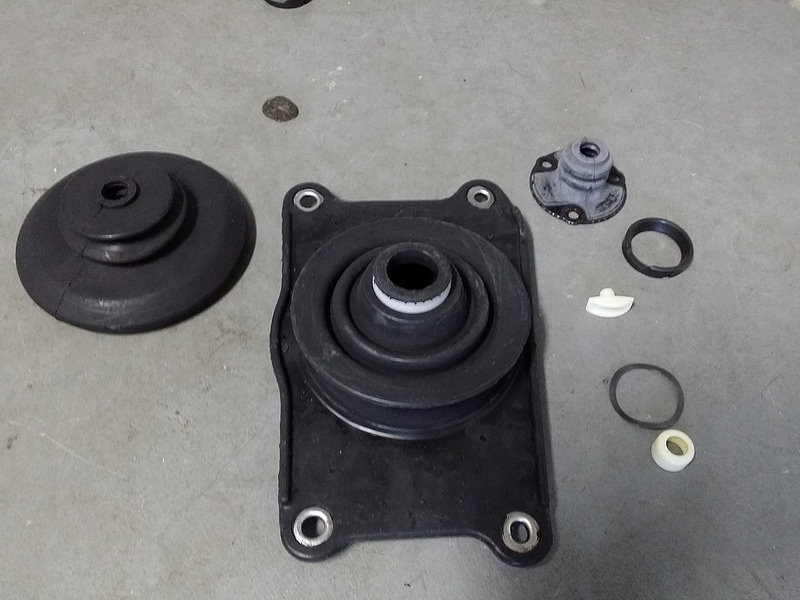
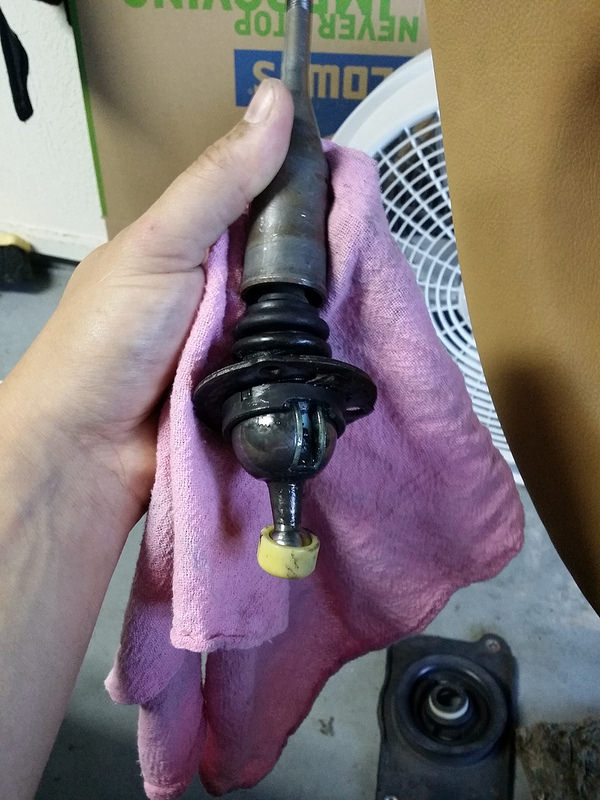
When I removed the bushing the flex washer was broken so be careful not letting the fragmented parts fall in the turret. This is what I pulled out
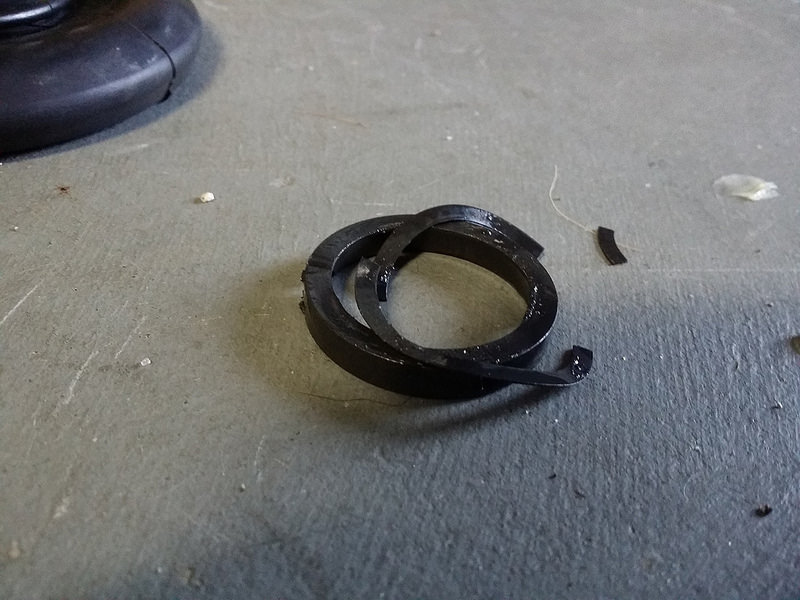 20140930_074159 by rocketeerbandit, on Flickr
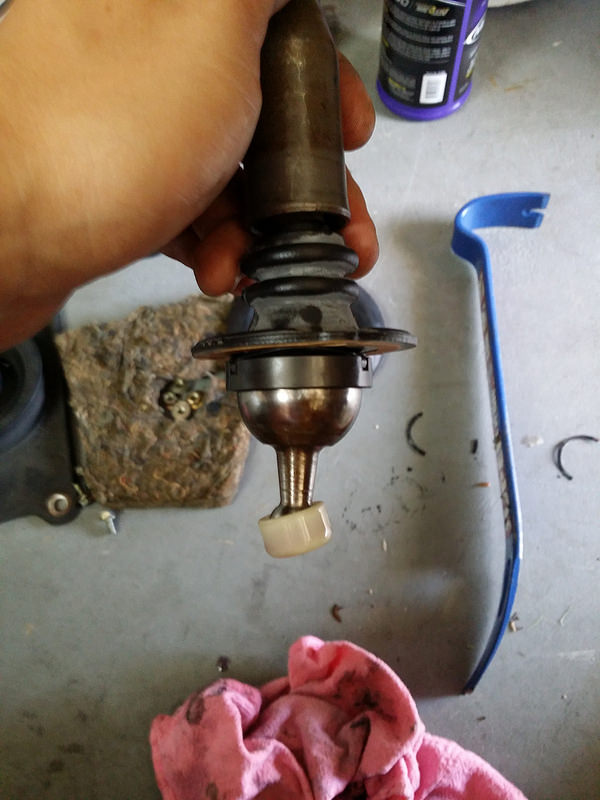
I reassembled the shifter with new parts and very mildly lubed the shifter to slide the lower dust boot over. Prior to doing so make sure the new bushing and clamp flexed washer is connected. You can see indention on the bushing where the washer clamps over. Be gently not to bend the clamps. The was faces up.
I put 4oz. of transmission fluid in the turret.
 20140930_080925 by rocketeerbandit, on Flickr
Now we need to make sure the bushing that we inserted on the side of the shifter ball is facing that Pin we talked about earlier. I used a rubber mallet to tap the shifter back in place with the bottom bushing inserting into the turret. Again, gentle.
I slipped the upper boot over the shifter with some lube so it was easy to slide over and tightend the nuts done in a star formation.
 20140930_082529 by rocketeerbandit, on Flickr
The top boot I received goes over the shifter and has a lip to go over the dust boot/middle boot and fits perfect
 20140930_082657 by rocketeerbandit, on Flickr
Place the new heat shield over the shifter like so and reassemble the connectors to the center console and were done.
 20140930_082749 by rocketeerbandit, on Flickr
This is what I performed this morning"
This morning I gathered the parts to rebuild the shifter top to bottom.
20140930_074513 by rocketeerbandit, on FlickrI started by removing the Center Console Bezel and un-clipping the connectors to the fog lights, defroster, bulb to the ashtray etc.
There are 4 10 mm bolts for the upper dust boot.
20140930_071956 by rocketeerbandit, on FlickrOne of the reason why I am rebuilding the shifter is because I know how 21 years is on rubber. Especially brittle mazdas' shifts boots from my previous ownership of a 99 miata. They are very similar in design and parts. So this rebuild is very familiar to me.
20140930_072301 by rocketeerbandit, on FlickrAfter removing the upper boot, you can see the lower boot torn as well being held in place with 3 10mm bolts.
20140930_072405 by rocketeerbandit, on FlickrIn the file folder of receipts that I inherited with the purchase of my rx7 last month from the one owner who saved everything, I saw that the bushings were replaced a while back but still wanted to do the job myself to have that security of knowing it is new and done in my ownership of the vehicle.
20140930_072944 by rocketeerbandit, on FlickrThe Paper Gasket that is married to the lower dust boot from factory is now stuck on the turret. I had to scrape it off carefully
20140930_073058 by rocketeerbandit, on FlickrDown in the turret you can see a bushing and underneath that is a spring washer. To get this out I need to use a hammer and a socket extension that fit perfectly to nudge that pin back.
replace the broken spring washer on the bottom of the lip first then the bushing. The cutout of the bushing should be facing where the pin will be reinserted. I used a crowbar to push the pin back in. This was the only part that I felt need attention.
20140930_073811 by rocketeerbandit, on FlickrWhen I removed the bushing the flex washer was broken so be careful not letting the fragmented parts fall in the turret. This is what I pulled out
20140930_074159 by rocketeerbandit, on FlickrI reassembled the shifter with new parts and very mildly lubed the shifter to slide the lower dust boot over. Prior to doing so make sure the new bushing and clamp flexed washer is connected. You can see indention on the bushing where the washer clamps over. Be gently not to bend the clamps. The was faces up.
I put 4oz. of transmission fluid in the turret.
20140930_080925 by rocketeerbandit, on FlickrNow we need to make sure the bushing that we inserted on the side of the shifter ball is facing that Pin we talked about earlier. I used a rubber mallet to tap the shifter back in place with the bottom bushing inserting into the turret. Again, gentle.
I slipped the upper boot over the shifter with some lube so it was easy to slide over and tightend the nuts done in a star formation.
20140930_082529 by rocketeerbandit, on FlickrThe top boot I received goes over the shifter and has a lip to go over the dust boot/middle boot and fits perfect
20140930_082657 by rocketeerbandit, on FlickrPlace the new heat shield over the shifter like so and reassemble the connectors to the center console and were done.
20140930_082749 by rocketeerbandit, on Flickr
Reply
0
0
Reply
0
0
Joined: Sep 2010
Posts: 8,157
Total Cats: 1,095
From: Lake Forest, CA
but it's 260 RELIABLE horsepower and torque. It's up to it.
Reply
0
0
So a few things:
Kept checking my oil levels and the oil gauge on the cluster was acting sporadic. Oil wwas decreasing but I wasn't seeing much on the ground where I parked. Just a drip. So I called Lowes automotive and brought the car in where the motor was completely rebuilt by the shop.-
Come to find out, the oil send get unit seal was leaking and it was replaced under there warranty even being the second owner. They were very helpful. Thought the motor is not a year old yet.
So I found out yesterday that the drivers side fan isn't kicking on. Checked the fuse and it's still intact. The passenger is working fine. I confirmed the malfunction turning on the ac when both fans are supposed to kick on.-
So I'm trying to find out if I should get a new oem fan motor or go after market and purchase a fan setup like spal?
Also, does anyone know of any nice gauges other aem
Reply
0
0

Reply
0
0
I think I want to do a tach instead of digital this time and make it classy
I just ordered two new fan motors. Gonna replace both while I'm down in there. Mazda sold me the pair for a little under 200 each which is 7 dollars above cost for them. They were awesome and helpful. They are probably going to be installed tomorrow
I just ordered two new fan motors. Gonna replace both while I'm down in there. Mazda sold me the pair for a little under 200 each which is 7 dollars above cost for them. They were awesome and helpful. They are probably going to be installed tomorrow
Reply
0
0


