Round 2: Wannabe turbo NB6C

 08-14-2015, 02:06 AM
#42
Junior Member

Thread Starter
Join Date: Aug 2005
Location: Cayman Islands
Posts: 440
Total Cats: 17
Look's like I'll stop trying to reinvent the wheel and just go with the standard intercooler pipe routing.
Got some more done tonight.

Managed to get a bolt stuck and had to cut it
Got some more done tonight.
Managed to get a bolt stuck and had to cut it

Reply
 0
0

0
08-15-2015, 08:51 PM
#43
Junior Member
Thread Starter
Join Date: Aug 2005
Location: Cayman Islands
Posts: 440
Total Cats: 17
Jumping all over the place. I ran the saw for a bit to make some pizza slices for the down pipe.
While the saw was running I setup the drivers side of the cage to weld on the A pillar tab. Used a step bit to open up an existing hole and welded in a 10x1.5mm nut. The difference is amazing. Before the tab I the front bar would shake separate from the car, now if I try to shake it the whole car moves. I need to do the passenger side and top of the A pillar.
We are having an Autocross meet in 2 weeks. I am hoping we spark enough interest to do them again regularly.
Reply
0
0
08-16-2015, 08:42 PM
#44
Junior Member
Thread Starter
Join Date: Aug 2005
Location: Cayman Islands
Posts: 440
Total Cats: 17
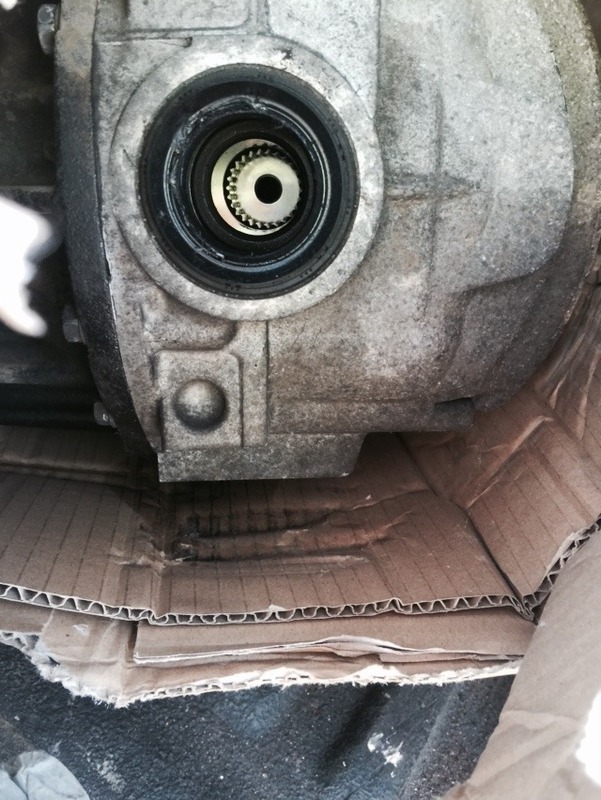
Full day of work until the mig wire ran out 
Finally finished the patches for the drivers side seat belt area
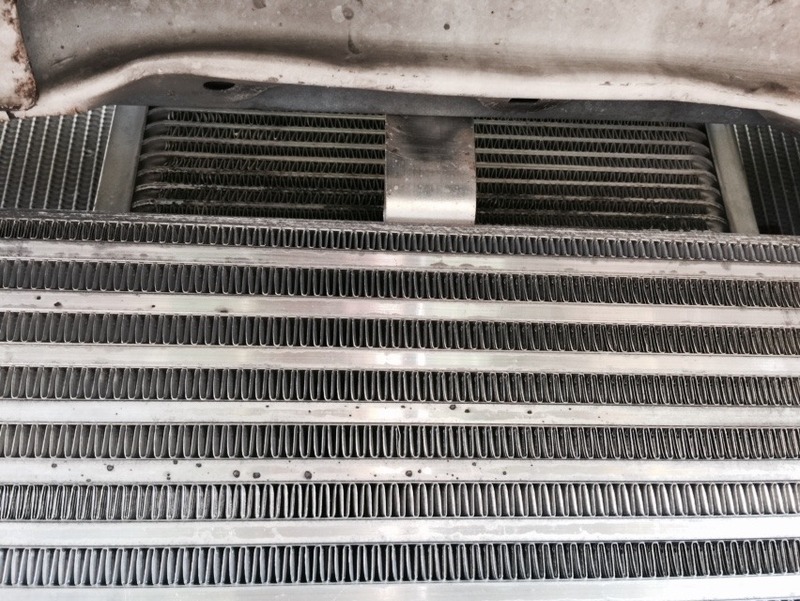
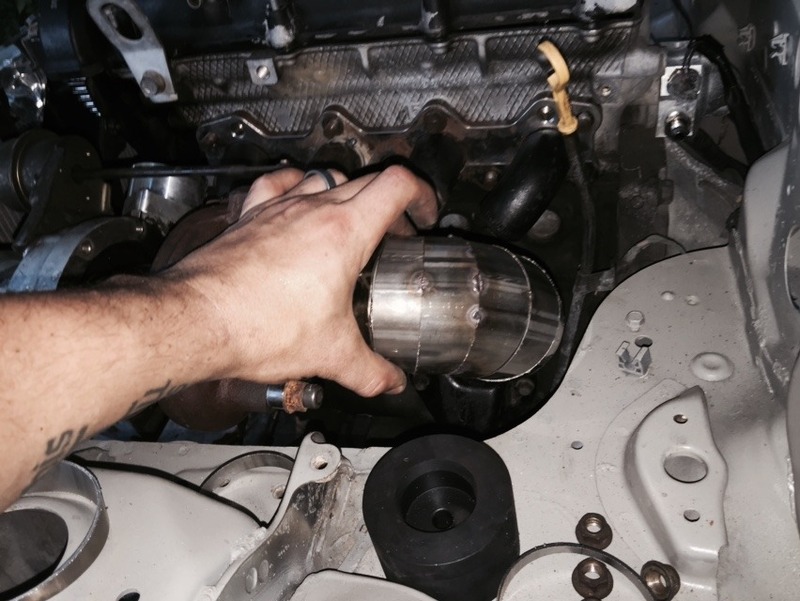
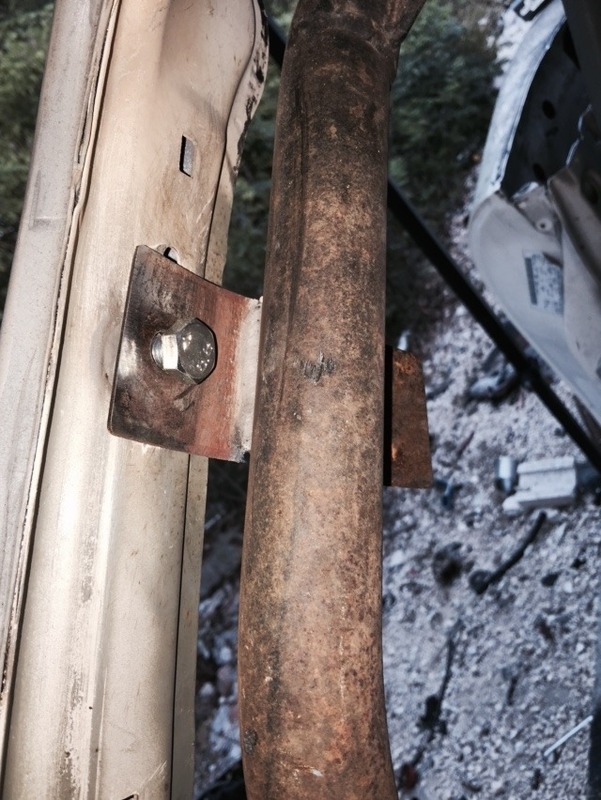
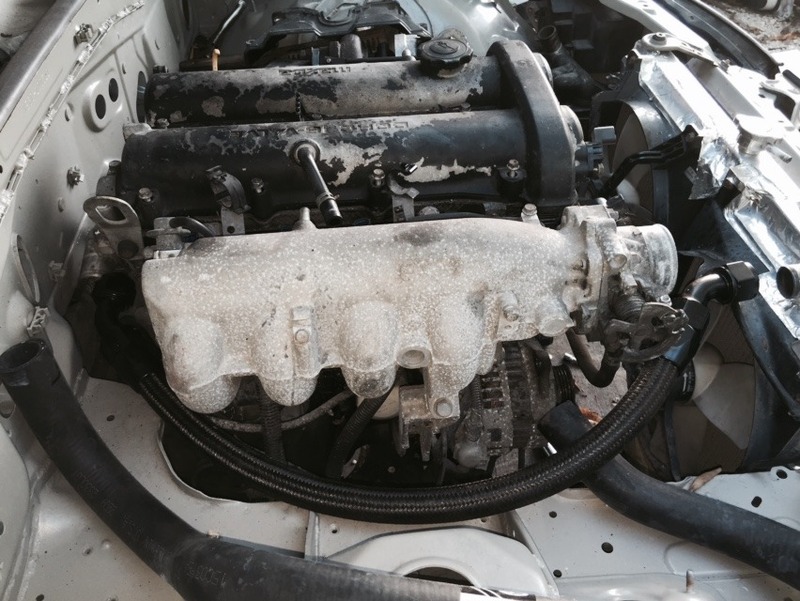
Welded on a mounting tab for the intercooler core. Rested the oil cooler above it. I figure if you guys can get results with it by the steering rack horizontal to the ground, I can get results in this location with some ducting.

Shot of the core from the front
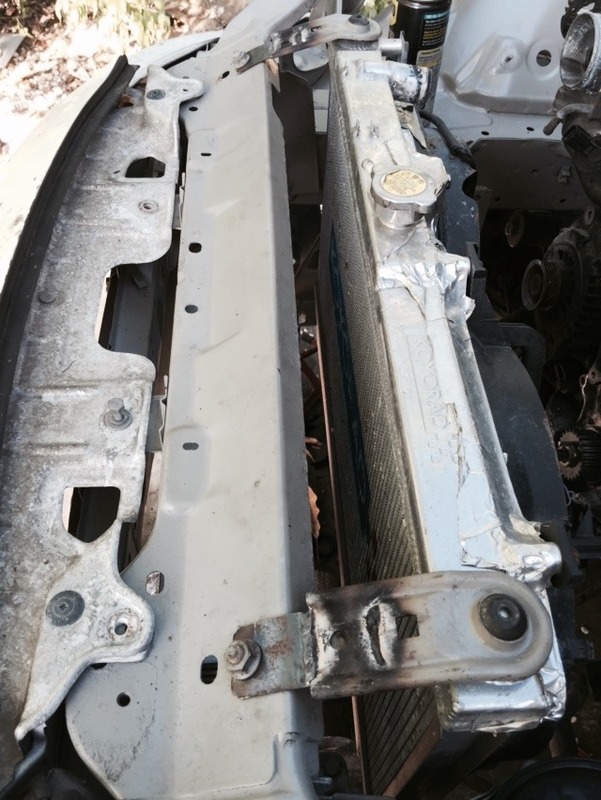
Extended the upper radiator brackets. I am going around the radiator for the intercooler piping but wanted to minimize the cutting of the body
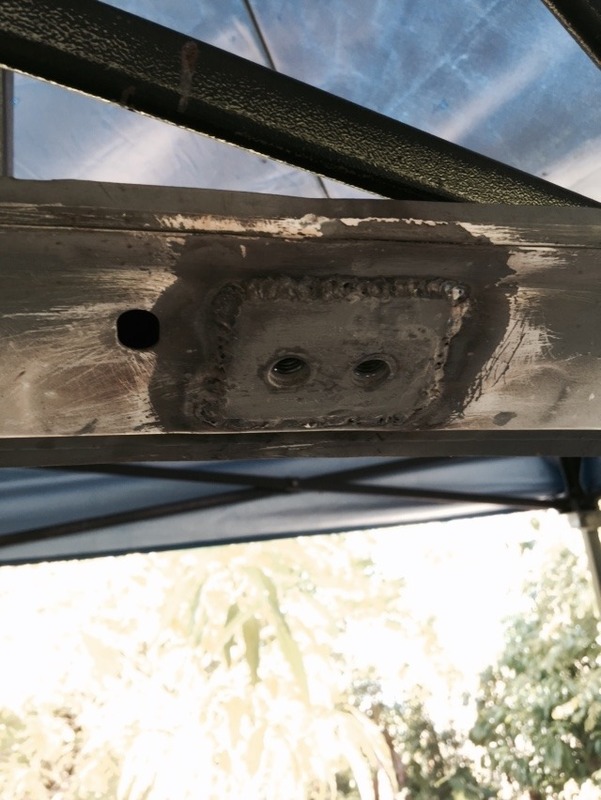
Dem mounting tab tacks
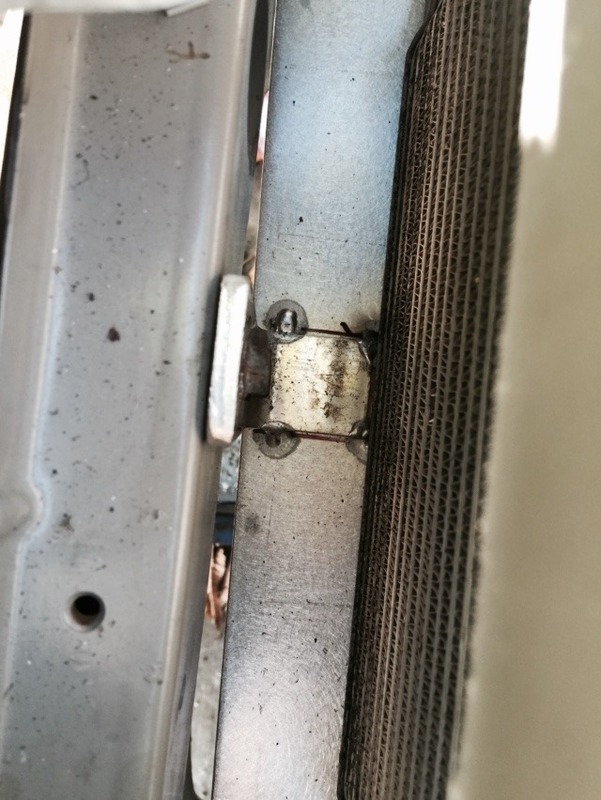
Shot of the captive nut/plate for the cage to bolt to
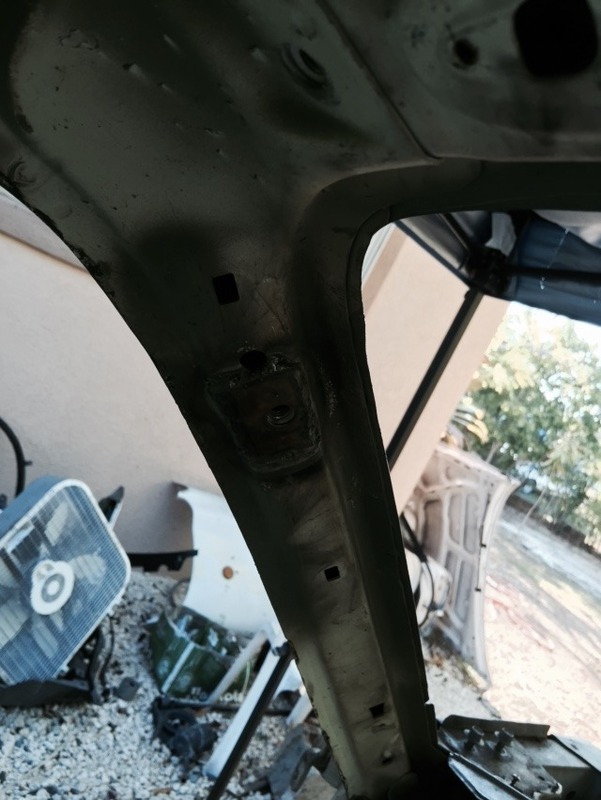
All of your map light are belong to this. The cage cross bar at the top of the windshield now bolts to this.
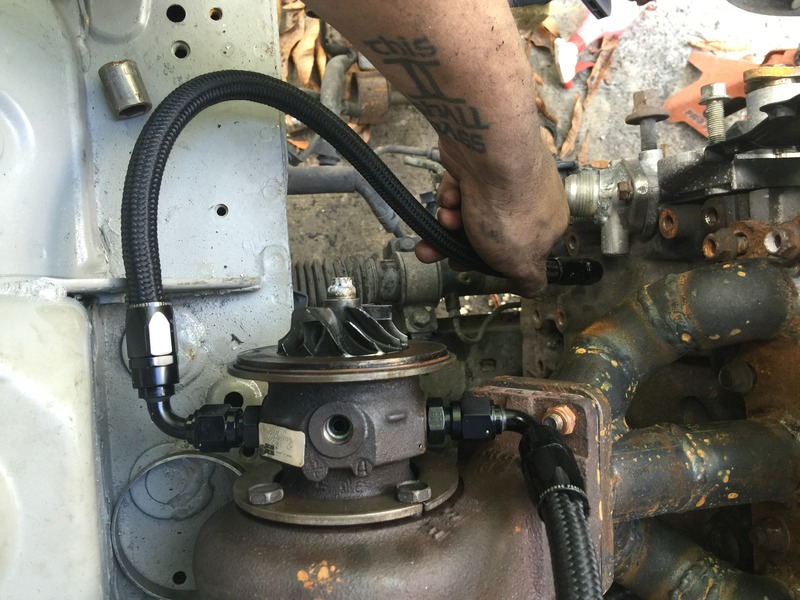
-16AN hose/fittings leftover from a different project is the perfect length and the fittings work perfectly. I'll need/want Turbo_tims adapter though
I beg of you be gentle. I ground down the welds because I have little consistency on round thin material so please ignore what I could not reach with the flap wheel. It will be covered in exhaust wrap
I am DONE for the day.
Finally finished the patches for the drivers side seat belt area
Welded on a mounting tab for the intercooler core. Rested the oil cooler above it. I figure if you guys can get results with it by the steering rack horizontal to the ground, I can get results in this location with some ducting.
Shot of the core from the front
Extended the upper radiator brackets. I am going around the radiator for the intercooler piping but wanted to minimize the cutting of the body
Dem mounting tab tacks
Shot of the captive nut/plate for the cage to bolt to
All of your map light are belong to this. The cage cross bar at the top of the windshield now bolts to this.
-16AN hose/fittings leftover from a different project is the perfect length and the fittings work perfectly. I'll need/want Turbo_tims adapter though
I beg of you be gentle. I ground down the welds because I have little consistency on round thin material so please ignore what I could not reach with the flap wheel. It will be covered in exhaust wrap
I am DONE for the day.
Reply
0
0
08-17-2015, 03:23 PM
#45
Junior Member
Thread Starter
Join Date: Aug 2005
Location: Cayman Islands
Posts: 440
Total Cats: 17
Such JDM packaging tape, many cr.net points wow torsen. Going from a 4.3:1 to the 3.9:1 on this poor 1.6 will need the turbo. Wonder if I should swap the diff onto the 4.3 gears
I have to wait until tomorrow to get the coilovers and clutch :(
Last edited by Sirnixalot; 08-17-2015 at 03:59 PM.
Reply
0
0
08-19-2015, 06:50 PM
#48
Junior Member
Thread Starter
Join Date: Aug 2005
Location: Cayman Islands
Posts: 440
Total Cats: 17


Awwwwww yisssss mothafuckin coilovers. Tomorrow I'm clearing the 12k springs to swap onto the front coilovers and move the 7k springs to the rear. No bump stops are on these so I'll need to get some.

The small boxes hold the edfc stuff. I'm going to have to reset the damping to the middle and spend some time playing with it when it's time.


24.2lbs on my bathroom scale for the ORC 309 clutch. Supposedly holds 250lbft so Ill be ok
Reply
0
0
08-20-2015, 05:09 PM
#51
Junior Member
Thread Starter
Join Date: Aug 2005
Location: Cayman Islands
Posts: 440
Total Cats: 17

12kg/mm springs.....looks like the springs will be color mismatched, oh bother

I am seat mounts away now from being able to sit in it while turning the wheel and making car noises

Some OEM nissan turbo gaskets and turbo nut locking things. I am hoping these will tide me over with regular studs and the copper colored lock nuts until I get the FM hardware.
Also traded some tires for all the lines and fittings to plumb the turbo so that's sorted too
Reply
0
0
08-23-2015, 07:25 PM
#52
Junior Member
Thread Starter
Join Date: Aug 2005
Location: Cayman Islands
Posts: 440
Total Cats: 17

Passenger side rocker seam

Passenger rear firewall/fuel tank area

Lower part of the rear firewall/floor

Front part of the cage coated in Rustoleum Ford gloss grey

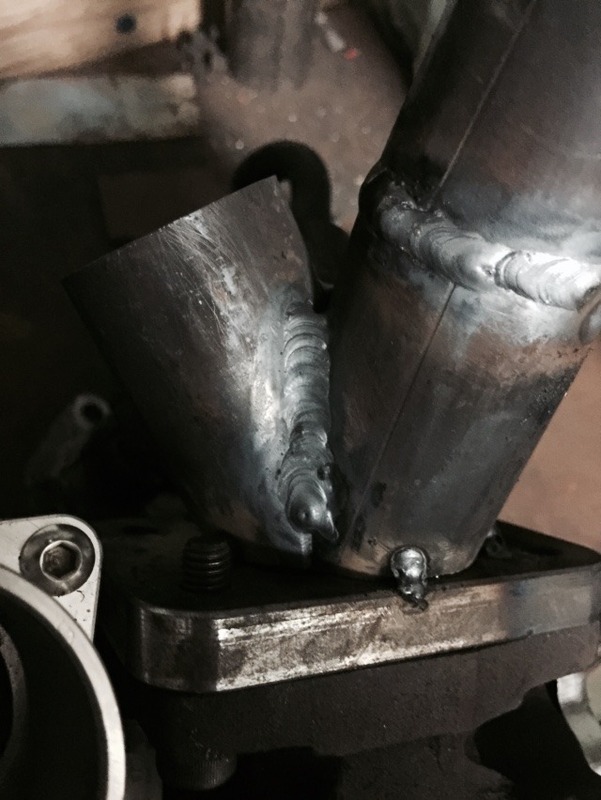
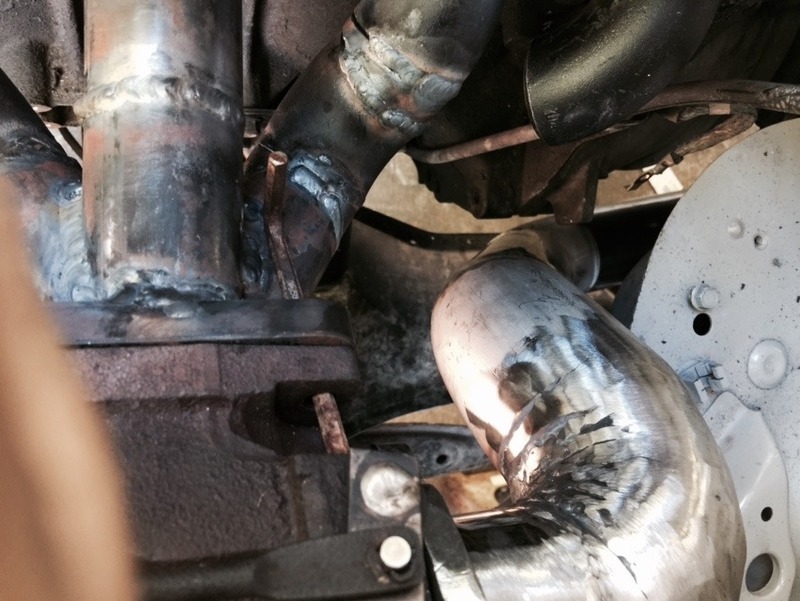
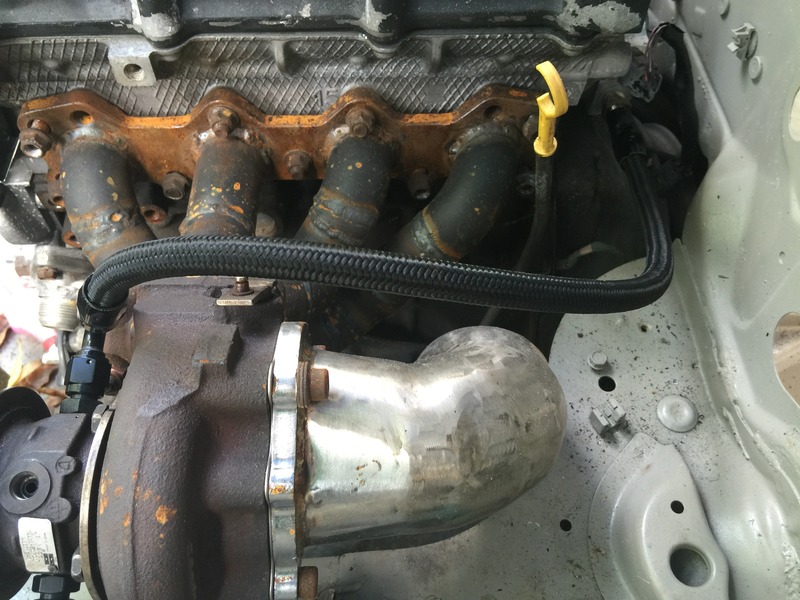
Shot of the down pipe. I may add one small pizza slice near the front to bring it a little to the left. I still need to add a flex section

Another downpipe shot

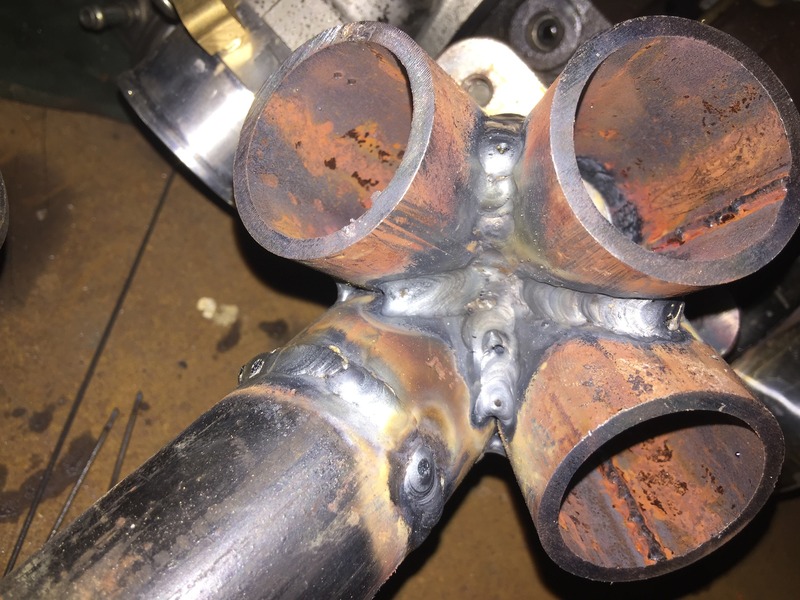
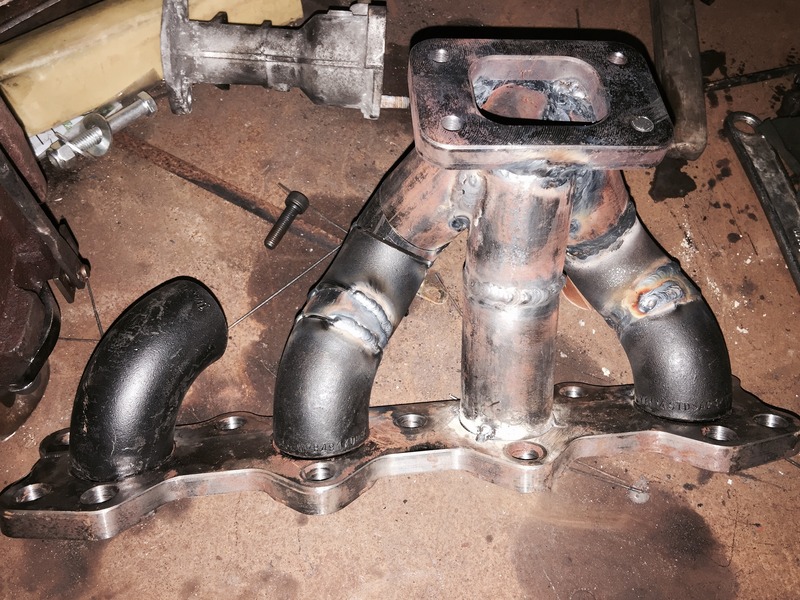
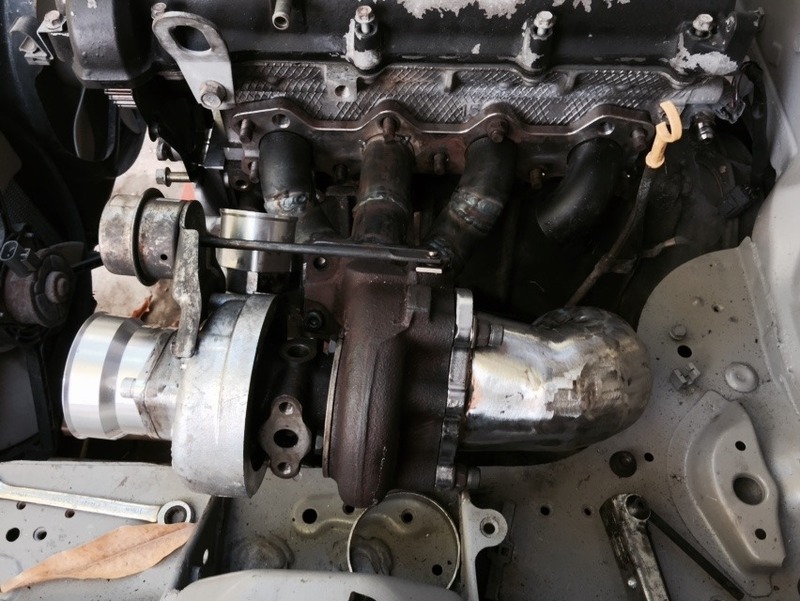
Finished welding up the manifold and reclocked the CHRA

-16AN bung welded to a shortened mixing manifold. Tapped the throttle body coolant port for a 1/8NPT fitting to use for the turbo coolant. Have to weld the next one onto the Kia water neck then order 2 more for the radiator

Swapped the 7kg/mm springs to the rear and installed the new 12kg/mm springs on the front. Tomorrow I'll order some bumpstops from the Honda dealer.
I am off on tuesday so I'll get back on the seams and hopefully have that finished to get the underside painted
Last edited by Sirnixalot; 08-24-2015 at 04:23 PM.
Reply
0
0
08-25-2015, 09:11 PM
#55
Junior Member
Thread Starter
Join Date: Aug 2005
Location: Cayman Islands
Posts: 440
Total Cats: 17
Another full day of action and I am pleased to announce the seam welding is finished
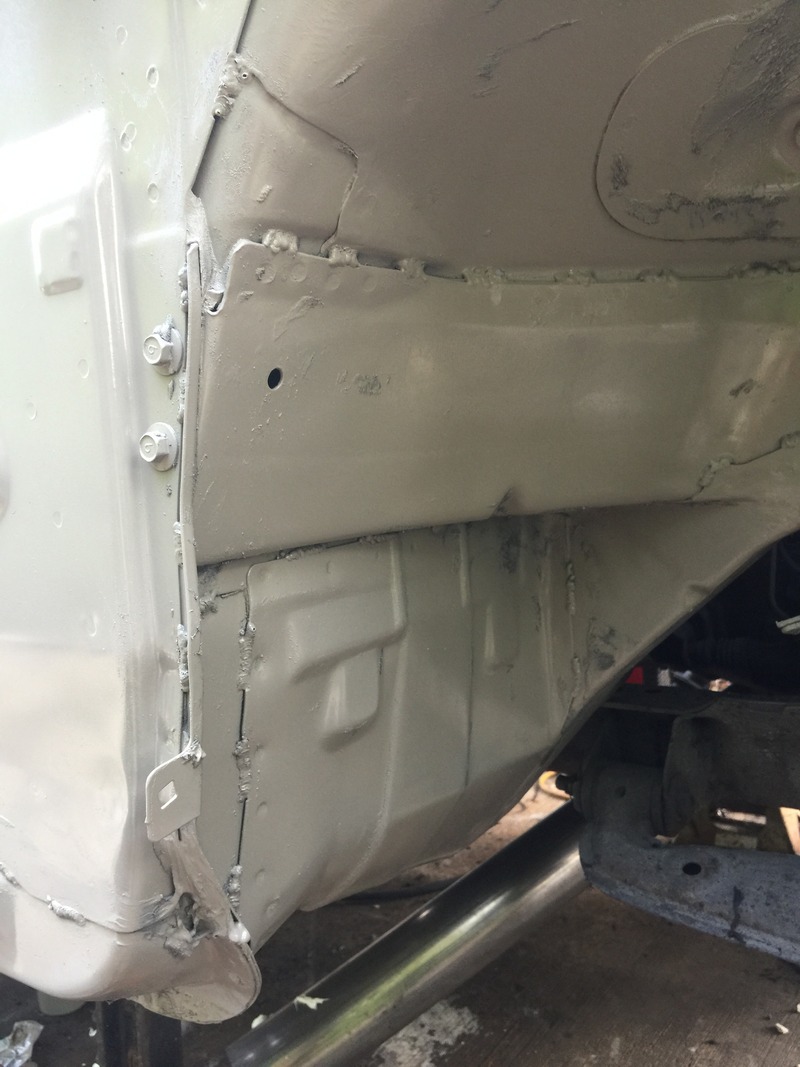
Drivers wheel well

Passenger fender area space
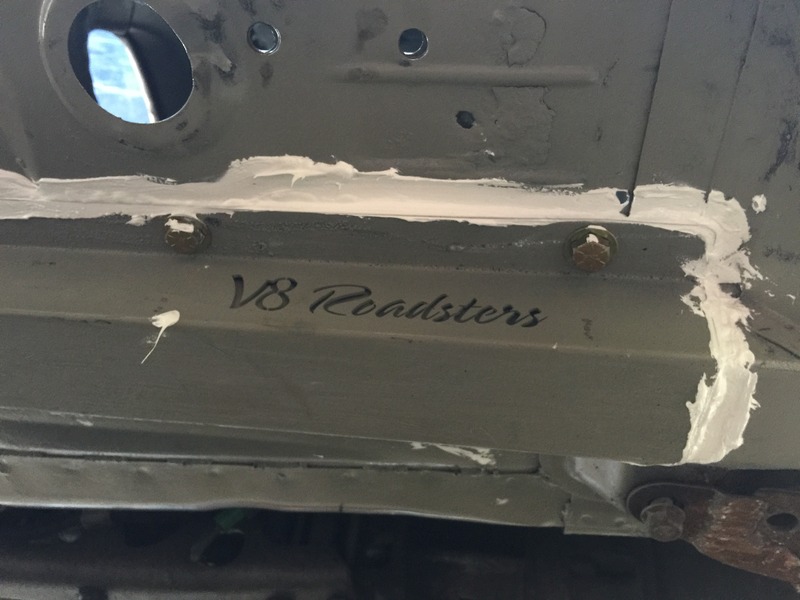
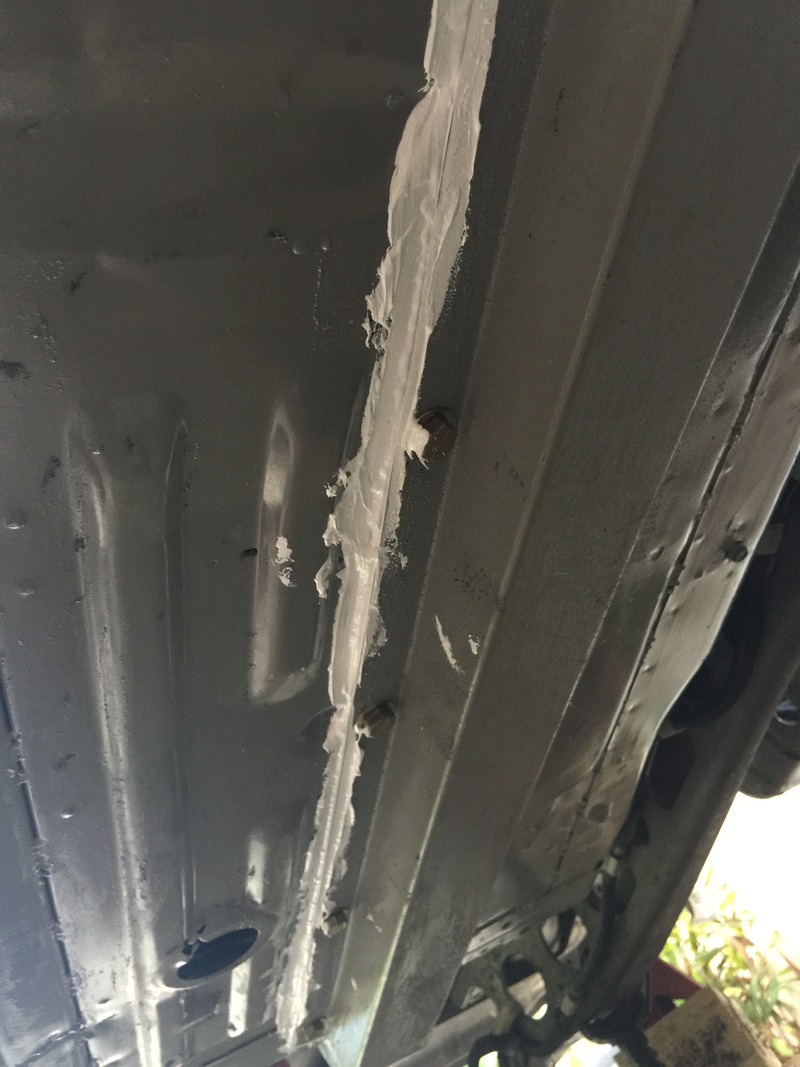
3M 5200 marine adhesive/sealant. It ain't pretty but it will stop rust from getting to the frame rails.
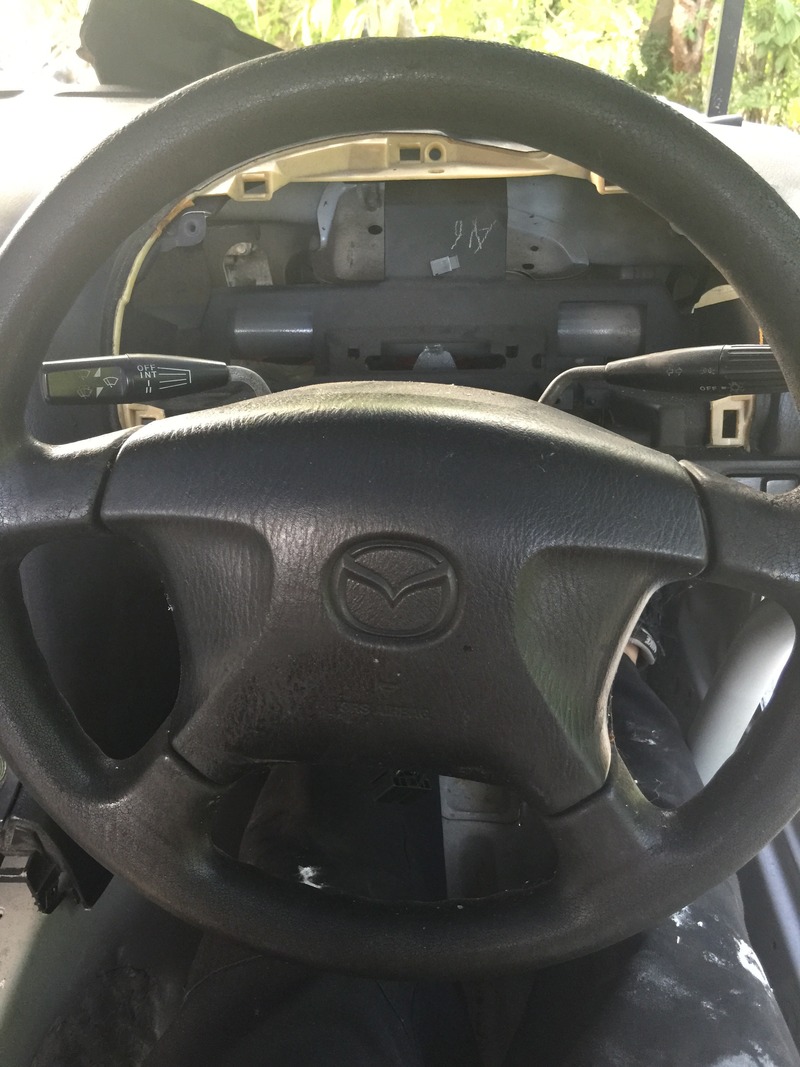
Temporarily put in the dash and steering rack to get an idea about seat placement. The sparco evo 2+ is not feasable. I have another smaller unknown brand seat that I'll use

Before I am tarred and feathered out autocross events are pretty low speed and tight and the handbrake will come in .....handy
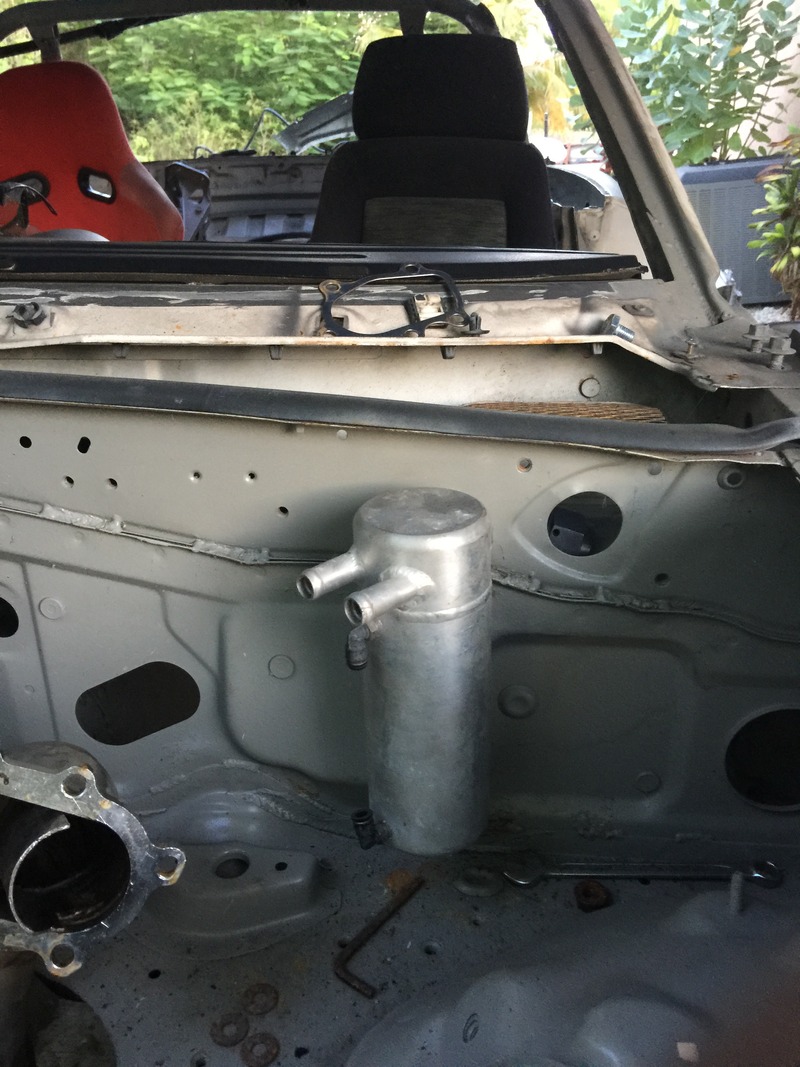
Catch can, no name red seat in background
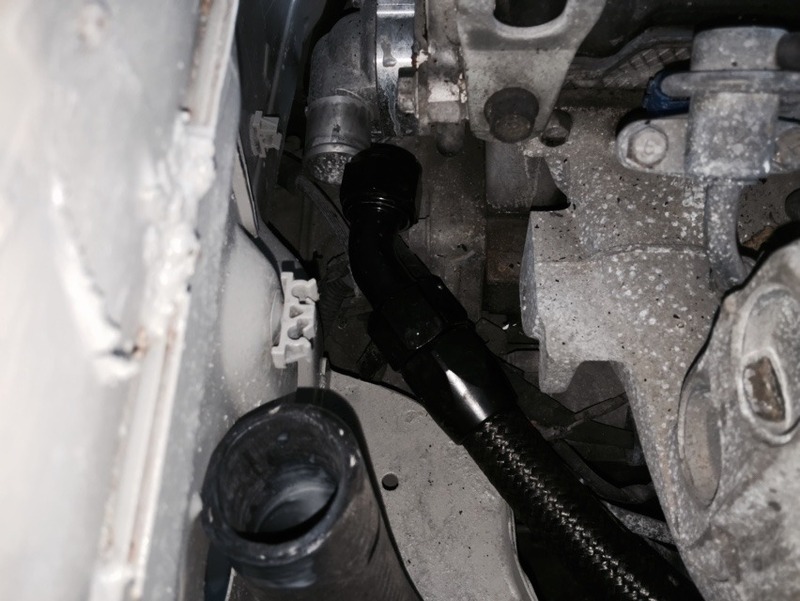
One coolant line
I need a 1/8NPT to -6AN 90* adapter and some fire sleeve and the coolant lines are done
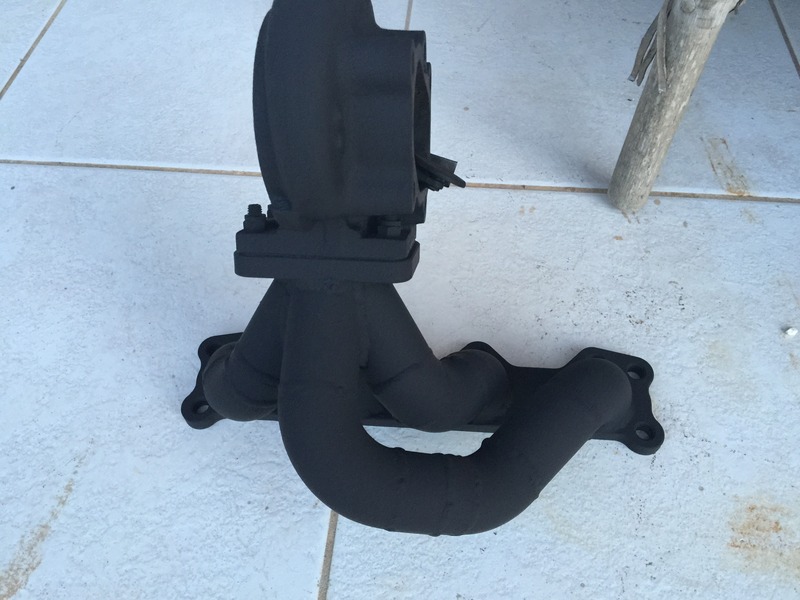
Sprayed manifold with some muratic acid, washed it off with water and wiped it dry then gave the manifold a coat of VHT flame proof. Instructions call for last curing temp to be 600* but my lowly oven can only muster 525*. Will be wrapping it soon
My brother will be tackling all the seams with 3M seam sealant and then taking the car as is to paint. Got a gallon of BMW A30 Interlagos Blue metallic to have him spray on. Letting him choose if it will be gloss or matte.
In the meanwhile my to do list stands as
Drop motor/trans/front subframe
Clean up & paint front subframe & control arms
Clean up & paint front brake calipers
Get all 4 rotors resurfaced
Put motor on stand
Pull oil pan to weld on -10AN oil drain bung
Pull cylinder head to degunk (valvetrain is covered in whats best described as tar)
Reinstall cylinder head with new Cometic gasket
Install timing belt & ****
Install rear main seal
Install new clutch/flywheel
I need to order
Intercooler piping & couplers
Turbo oil feed fitting & drain adapter
Oil cooler lines & fittings
Innovate PSB-1

Drivers wheel well

Passenger fender area space


3M 5200 marine adhesive/sealant. It ain't pretty but it will stop rust from getting to the frame rails.

Temporarily put in the dash and steering rack to get an idea about seat placement. The sparco evo 2+ is not feasable. I have another smaller unknown brand seat that I'll use

Before I am tarred and feathered out autocross events are pretty low speed and tight and the handbrake will come in .....handy

Catch can, no name red seat in background

One coolant line

I need a 1/8NPT to -6AN 90* adapter and some fire sleeve and the coolant lines are done

Sprayed manifold with some muratic acid, washed it off with water and wiped it dry then gave the manifold a coat of VHT flame proof. Instructions call for last curing temp to be 600* but my lowly oven can only muster 525*. Will be wrapping it soon
My brother will be tackling all the seams with 3M seam sealant and then taking the car as is to paint. Got a gallon of BMW A30 Interlagos Blue metallic to have him spray on. Letting him choose if it will be gloss or matte.
In the meanwhile my to do list stands as
Drop motor/trans/front subframe
Clean up & paint front subframe & control arms
Clean up & paint front brake calipers
Get all 4 rotors resurfaced
Put motor on stand
Pull oil pan to weld on -10AN oil drain bung
Pull cylinder head to degunk (valvetrain is covered in whats best described as tar)
Reinstall cylinder head with new Cometic gasket
Install timing belt & ****
Install rear main seal
Install new clutch/flywheel
I need to order
Intercooler piping & couplers
Turbo oil feed fitting & drain adapter
Oil cooler lines & fittings
Innovate PSB-1
Last edited by Sirnixalot; 08-25-2015 at 09:22 PM.
Reply
0
0
08-26-2015, 02:13 AM
#56
Junior Member

Join Date: Sep 2012
Location: New Zealand Christchurch
Posts: 208
Total Cats: -3
Are you sure the frame rails should be sealed up like that? I thought they were designed to let the water out if it gets in there. Where as now it will sit in there and rust it out. Just my two cents
Reply
0
0
08-26-2015, 09:14 AM
#57
Junior Member
Thread Starter
Join Date: Aug 2005
Location: Cayman Islands
Posts: 440
Total Cats: 17
There are no holes on the bottom of the V8R ones so I decided to just seal them up and spray undercoating inside the frame rails. I don't really plan on driving this in the rain so I am hoping I don't encounter any more issues.
Reply
0
0
 08-27-2015, 09:05 AM
#60
Junior Member
Thread Starter
Join Date: Aug 2005
Location: Cayman Islands
Posts: 440
Total Cats: 17
I guess I should break down what I have done to both the car frame rails and the V8R pieces
Step 1
Wirebrush wheel and get to bare metal
Step 2
Brush on some Ospho and let sit for 24hrs Ospho Rust Treatment - Since 1947
Step 3
Rustoleum self etching primer
Step 4
ACE rust stop paint
Step 5 is yet to be done. I need to find an applicator nozzle that will reach all the way up and down the inside of the OEM rails for the zeibart type rust proofing.
I was aiming to mitigate water that I would drive through settling in between the frame rails and the braces and coming through the bolt holes. For my climate I think this was the best compromise.
But you guys have given me some food for thought and I'll read up a little more, it's not like I can't remove the front and rear sections of sealant for some more breathing room between them.
Reply
0
0


