Taifighter is building a Miata
 03-11-2013, 05:59 PM
#21
IB Staff

Join Date: Jun 2012
Posts: 4
Total Cats: 0
Core Width: 20" Width with End Tanks is 26
Core Height: 6.5
Core Thickness: 3.25
Inlet Diameter: 2.5"
Outlet Diameter: 2.5"
Inlet/Outlet Location: Center
Approx. Flow Rate for this intercooler: 520 CFM at 1.5PSi pressure drop
Approx. HP Rating for this intercooler: 350 HP
Core Height: 6.5
Core Thickness: 3.25
Inlet Diameter: 2.5"
Outlet Diameter: 2.5"
Inlet/Outlet Location: Center
Approx. Flow Rate for this intercooler: 520 CFM at 1.5PSi pressure drop
Approx. HP Rating for this intercooler: 350 HP

Reply
 0
0

0
03-11-2013, 06:04 PM
#23
Elite Member

iTrader: (5)
Join Date: Oct 2011
Location: Detroit (the part with no rules or laws)
Posts: 5,677
Total Cats: 800
WTF staff?? ^^
I removed my tow hooks just like yours.
There is a bracket on the canister that has like a 10mm bolt. I just loosened it and pushed that canister up, and over to the passenger side a little. That gave me more than enough room. The rubber is a good idea though, i just slapped mine on using two of the existing two hook bolts.
I think i'm going to buy the HF heat knife to cut the top tabs on the bumper off.
I was gonna hit you up and ask how you mounted yours when I saw that the core would hit the AC canister if mounted to the frame where the tow hooks used to be. Upon further investigation of your build thread, I concluded it had to mount below it and I was just missing a piece off the car.
But I lost your number when I got this new WinMo phone from work ��
I bet yours went on faster.
But I lost your number when I got this new WinMo phone from work ��
I bet yours went on faster.
There is a bracket on the canister that has like a 10mm bolt. I just loosened it and pushed that canister up, and over to the passenger side a little. That gave me more than enough room. The rubber is a good idea though, i just slapped mine on using two of the existing two hook bolts.
I think i'm going to buy the HF heat knife to cut the top tabs on the bumper off.
Reply
0
0
 03-12-2013, 09:01 AM
#28
Senior Member
iTrader: (7)

Join Date: Sep 2009
Location: Royal Oak Michigan
Posts: 754
Total Cats: 68
Good to see my intercooler working out. I see you used some type of spacer? You can loosten the canister and lift it about 10mm. When I built these I actually had an NA with AC in the garage to test fit these. Looks great though! Thanks for the support.
Reply
0
0
03-12-2013, 09:17 AM
#31
Senior Member
iTrader: (7)
Join Date: Sep 2009
Location: Royal Oak Michigan
Posts: 754
Total Cats: 68
Not that the way you did it won't work just fine but you'd get the IC to sit a little higher if you did this. I should have included these photos with the intercooler.
Take a marker and draw a line on the canister mount:
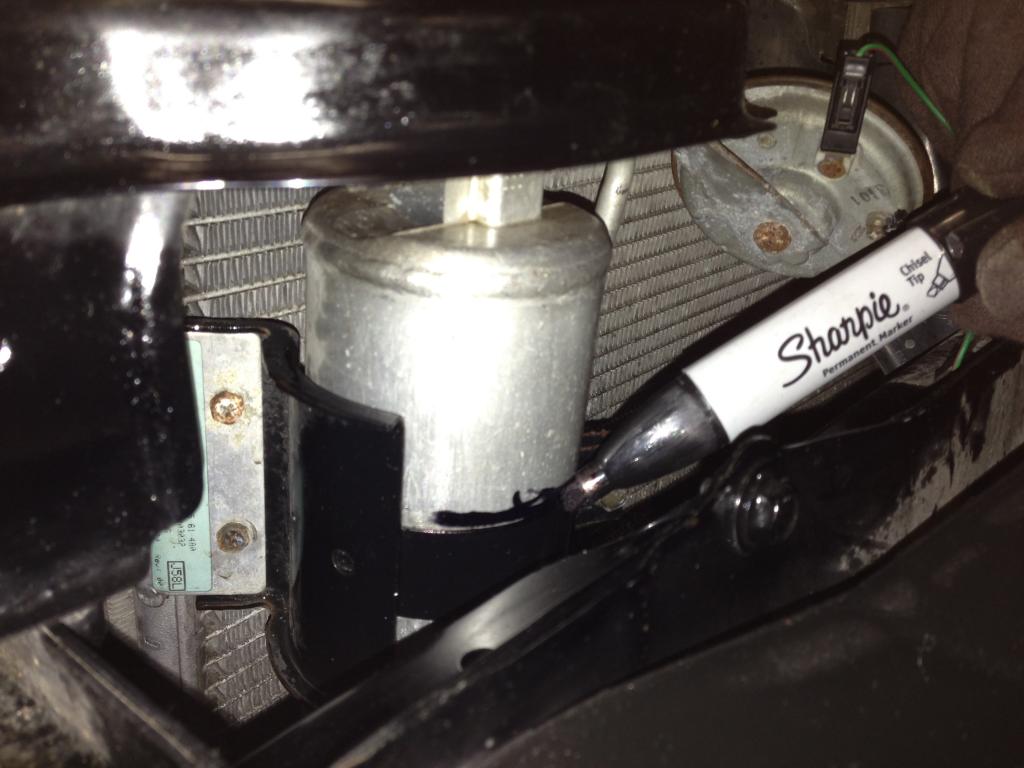
Then loosen the 10mm bolt on the mount, make sure it's free and the canister is broken loose from the clamp:
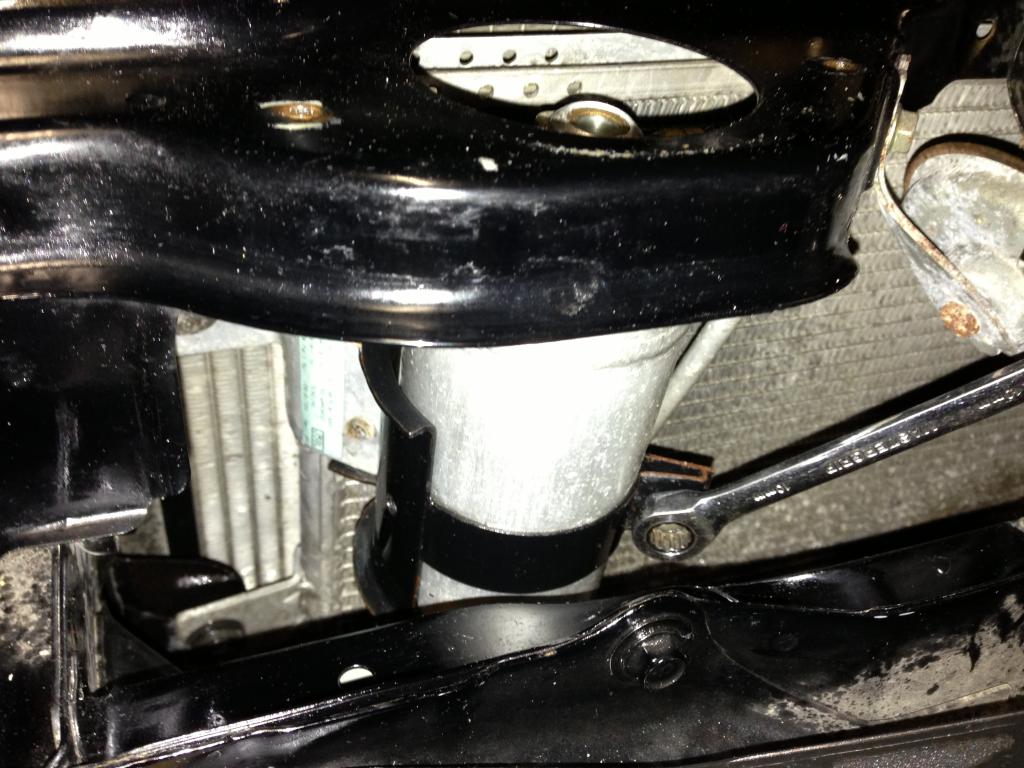
Then lift it up about 10-12mm and re-tighten:
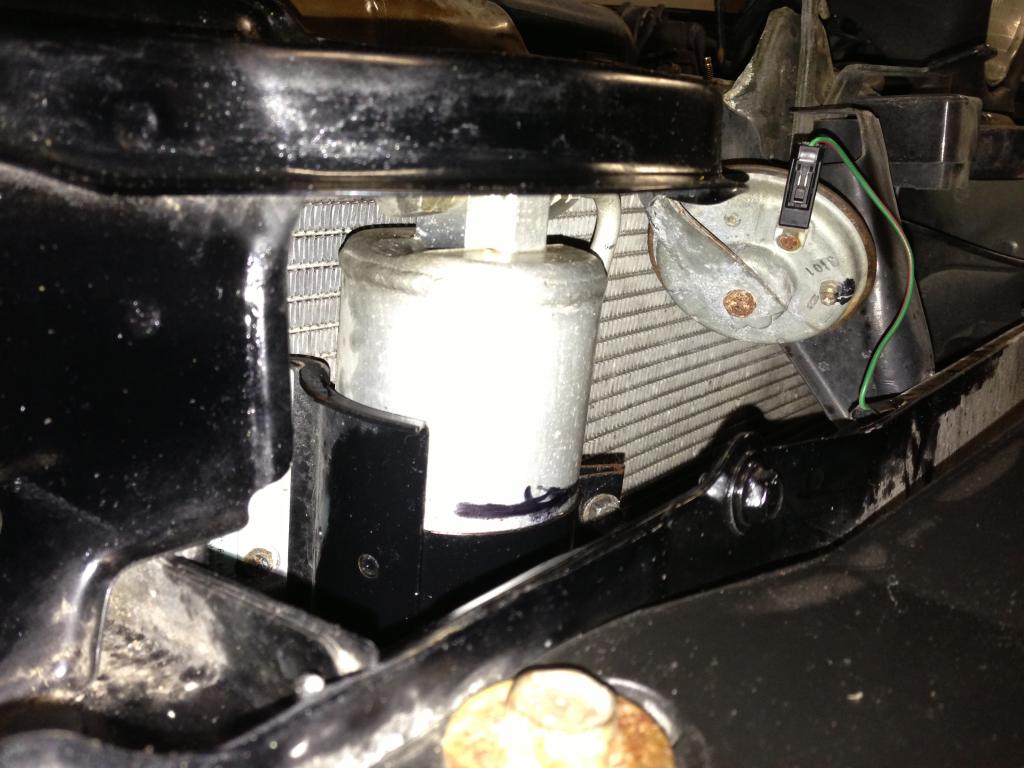
Should clear perfectly and you can get a nice flush mount with the mating surface on the tow hook mounting area. Should make the intercooler a little more ridged.
Take a marker and draw a line on the canister mount:
Then loosen the 10mm bolt on the mount, make sure it's free and the canister is broken loose from the clamp:
Then lift it up about 10-12mm and re-tighten:
Should clear perfectly and you can get a nice flush mount with the mating surface on the tow hook mounting area. Should make the intercooler a little more ridged.
Reply
0
0
03-12-2013, 09:26 AM
#32
Junior Member
Thread Starter
iTrader: (1)

Join Date: Mar 2012
Location: Northwest Indiana
Posts: 111
Total Cats: 0
The other reason for the spacers was because of the oil cooler which is now directly behind the intercooler. It might have to stay where it is for fitment purposes.
Reply
0
0
03-12-2013, 09:51 AM
#33
Senior Member
iTrader: (7)
Join Date: Sep 2009
Location: Royal Oak Michigan
Posts: 754
Total Cats: 68
Ok great - I just wanted to make sure it was not related to the fitment of the IC. I intended them to bolt right up. Good luck with the build boss. Looking great so far.
Reply
0
0
03-14-2013, 03:09 PM
#35
Junior Member
Thread Starter
iTrader: (1)
Join Date: Mar 2012
Location: Northwest Indiana
Posts: 111
Total Cats: 0
Good news: Innovate warrantied my mtx-l so it should be here soon. Yay.
Now I will hook up my dimming capabilities:
Also, you can take it from the back of the dimmer ****, same red/black wire goes there.
Pretty much anything in the interior that is backlit when the lights are on will have a red/black wire and a red wire going to it. The red/black is the switched +12, the red is the variable closure to ground through the dimmer ****. FYI- they're not using a rheostat, it's PWMed.
Last edited by Taifighter; 03-17-2013 at 08:05 PM.
Reply
0
0
03-14-2013, 11:25 PM
#36

Perfect for doing away with the tan lower dash. I used it on my lower dash in V8 Miata to great success. Mine was black but scratched up.
Have also used it on typical faded silver-looking black seats - right on the fabric. Nice black color that didn't come off.
Nice build thread so far.
Reply
0
0
03-16-2013, 08:46 PM
#37
Junior Member
Thread Starter
iTrader: (1)
Join Date: Mar 2012
Location: Northwest Indiana
Posts: 111
Total Cats: 0
Perfect for doing away with the tan lower dash. I used it on my lower dash in V8 Miata to great success. Mine was black but scratched up.
Have also used it on typical faded silver-looking black seats - right on the fabric. Nice black color that didn't come off.
Nice build thread so far.
Reply
0
0
 03-17-2013, 01:33 AM
#40
I'm not sure if it would work on carpet. One thing to try -and you can test it under the seat to see if it takes - at the grocery store or drug store they will sell little bottles of dye - commonly they will have RIT brand. It's really cheap and because it's a dye there is no build-up so it can't rub off. Try it under the seat first if you want to test it.
EDIT:
I just did a quick search and boom, there it is. Writeup on another forum.
Dying your carpet with Rit dye - DSM Forums
EDIT:
I just did a quick search and boom, there it is. Writeup on another forum.
Dying your carpet with Rit dye - DSM Forums
Reply
0
0


