

3d printed intake for N/A NA miatas


A lot of FSAE / FSG teams Rapid prototype their manifolds, lots of information on their forums. I was nearby for an early version exploding at a competition. The resulting talk was of pressure relief valves but in the end, most teams just went stronger. Pre throttle body, its still an issue for them.
PA66 with 30%GF via SLS has proven to be the most durable variation though it typically costs north of $1k to make. You would only use this method to create a mold and then fabricate one using other means unless you are wealthy or sponsored.
PA66 = nylon 66. 30% GF means 30% embedded with glass fibers for strength. External rib and strength elements are important just as though you were doing a PA66 molded design. Material choice is important as many consumer plastics will lose significant strength or melt under the hood.
Should be easy to model airflow through your design.
Reply
 0
0

0

Thread Starter
Joined: Jul 2012
Posts: 792
Total Cats: 143
From: durham NC
I don't know/use any cad software and can't do flow modeling myself. However, if someone is interested I can get them the model in any format that 3dsmax outputs.
Reply
0
0

Reply
0
0


Thread Starter
Joined: Jul 2012
Posts: 792
Total Cats: 143
From: durham NC
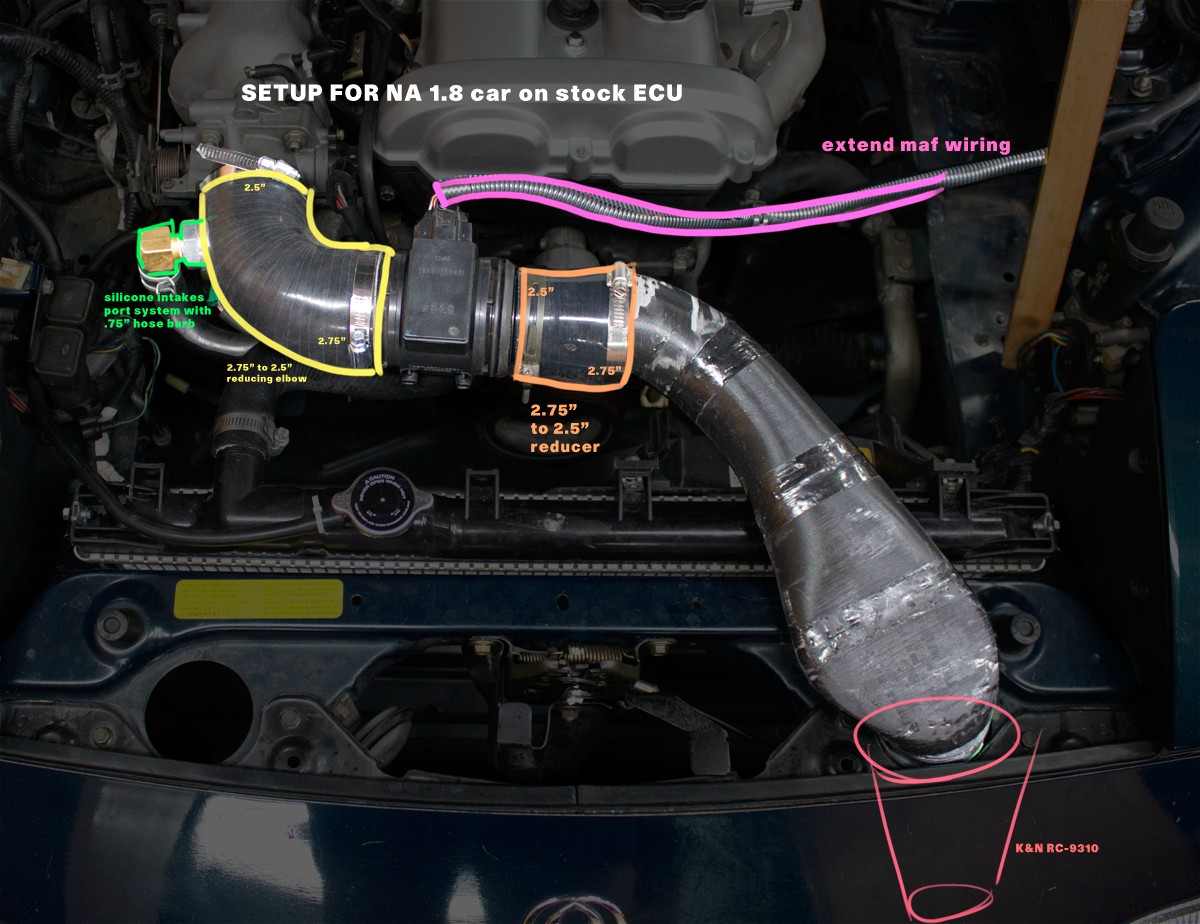
I made my first attempt to fit an AEM dryflow filter. I have the narrowest 70mm filter and it doesn't fit. For anyone else looking to do this, a 5.5" filter is too big. Next up is a k&n RC-9310 (4.75" base).
Reply
0
0

RC-9800 - K&N Universal Air Filters, Universal Chrome Filter direct from K&N
Reply
0
0

Newb
Joined: Aug 2009
Posts: 21
Total Cats: 0
Quality of SLA's can certainly vary. I can tell you that I use SLA's to prototype valves of all types, and mostly test them with compressed air. I've not had trouble with them leaking or breaking (we aren't after world class leak standards in this application).
Only trouble I've had over the years is surface finish and brittleness with high temp resins.
Just to toss my 2 cents in, SLA materials have come a long way, but the resins I'm familiar with shouldn't be trusted long term under the hood. Great for prototyping / proof of concept work. Great for then building some tooling from. At a minimum, I would take the SLA and use it as your base substrate for applying fiberglass / kevlar / carbon overlay. You'll want to increase the strength / toughness somehow.
Reply
0
0
Thread Starter
Joined: Jul 2012
Posts: 792
Total Cats: 143
From: durham NC
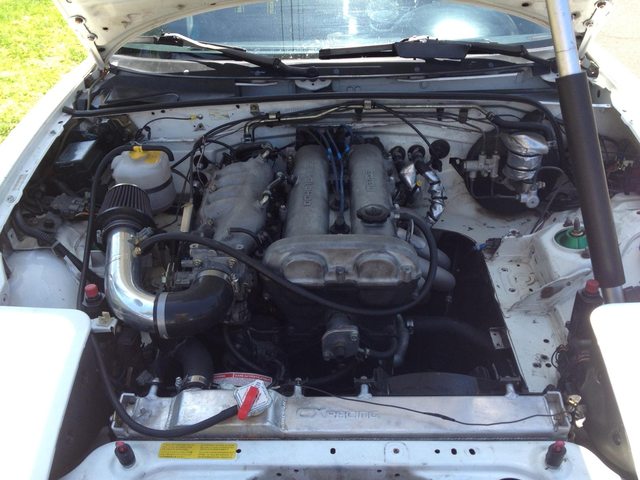
I finally got one of the prototypes running on my car (this one looks like dog **** on the outside but is nice and smooth inside). I am still on stock engine management so I am running the maf and had to source a few things to get it working. First test drive and it feels noticeably better than stock. I didn't feel any bogging or weakness in the mid range either. Hopefully dyno time will confirm my perception. I'll also get some IATs logged on the street to compare with other aftermarket intakes. My thought with this design is that it will work very well for auto-x where you sit still in grid for 10 minutes at a time with a hot engine.
I am getting a print of what I hope is the last design revision some time next week and if the fit is improved I will get a new model file onto thingiverse along with a full list of parts needed for people to get it running.
I am getting a print of what I hope is the last design revision some time next week and if the fit is improved I will get a new model file onto thingiverse along with a full list of parts needed for people to get it running.
Reply
0
0
Thread Starter
Joined: Jul 2012
Posts: 792
Total Cats: 143
From: durham NC
Oh also, there should be a commercially available composite version coming. I would rather let that company announce parts availability when they are ready but if the final cost is reasonable it will be a much stronger/better option.
Last edited by asmasm; Feb 27, 2014 at 06:41 PM.
Reply
0
0
Thread Starter
Joined: Jul 2012
Posts: 792
Total Cats: 143
From: durham NC
I ran an auto-x which was 6 runs with some time on the rev limiter and an hour and a half highway/back roads drive with no issues so far.
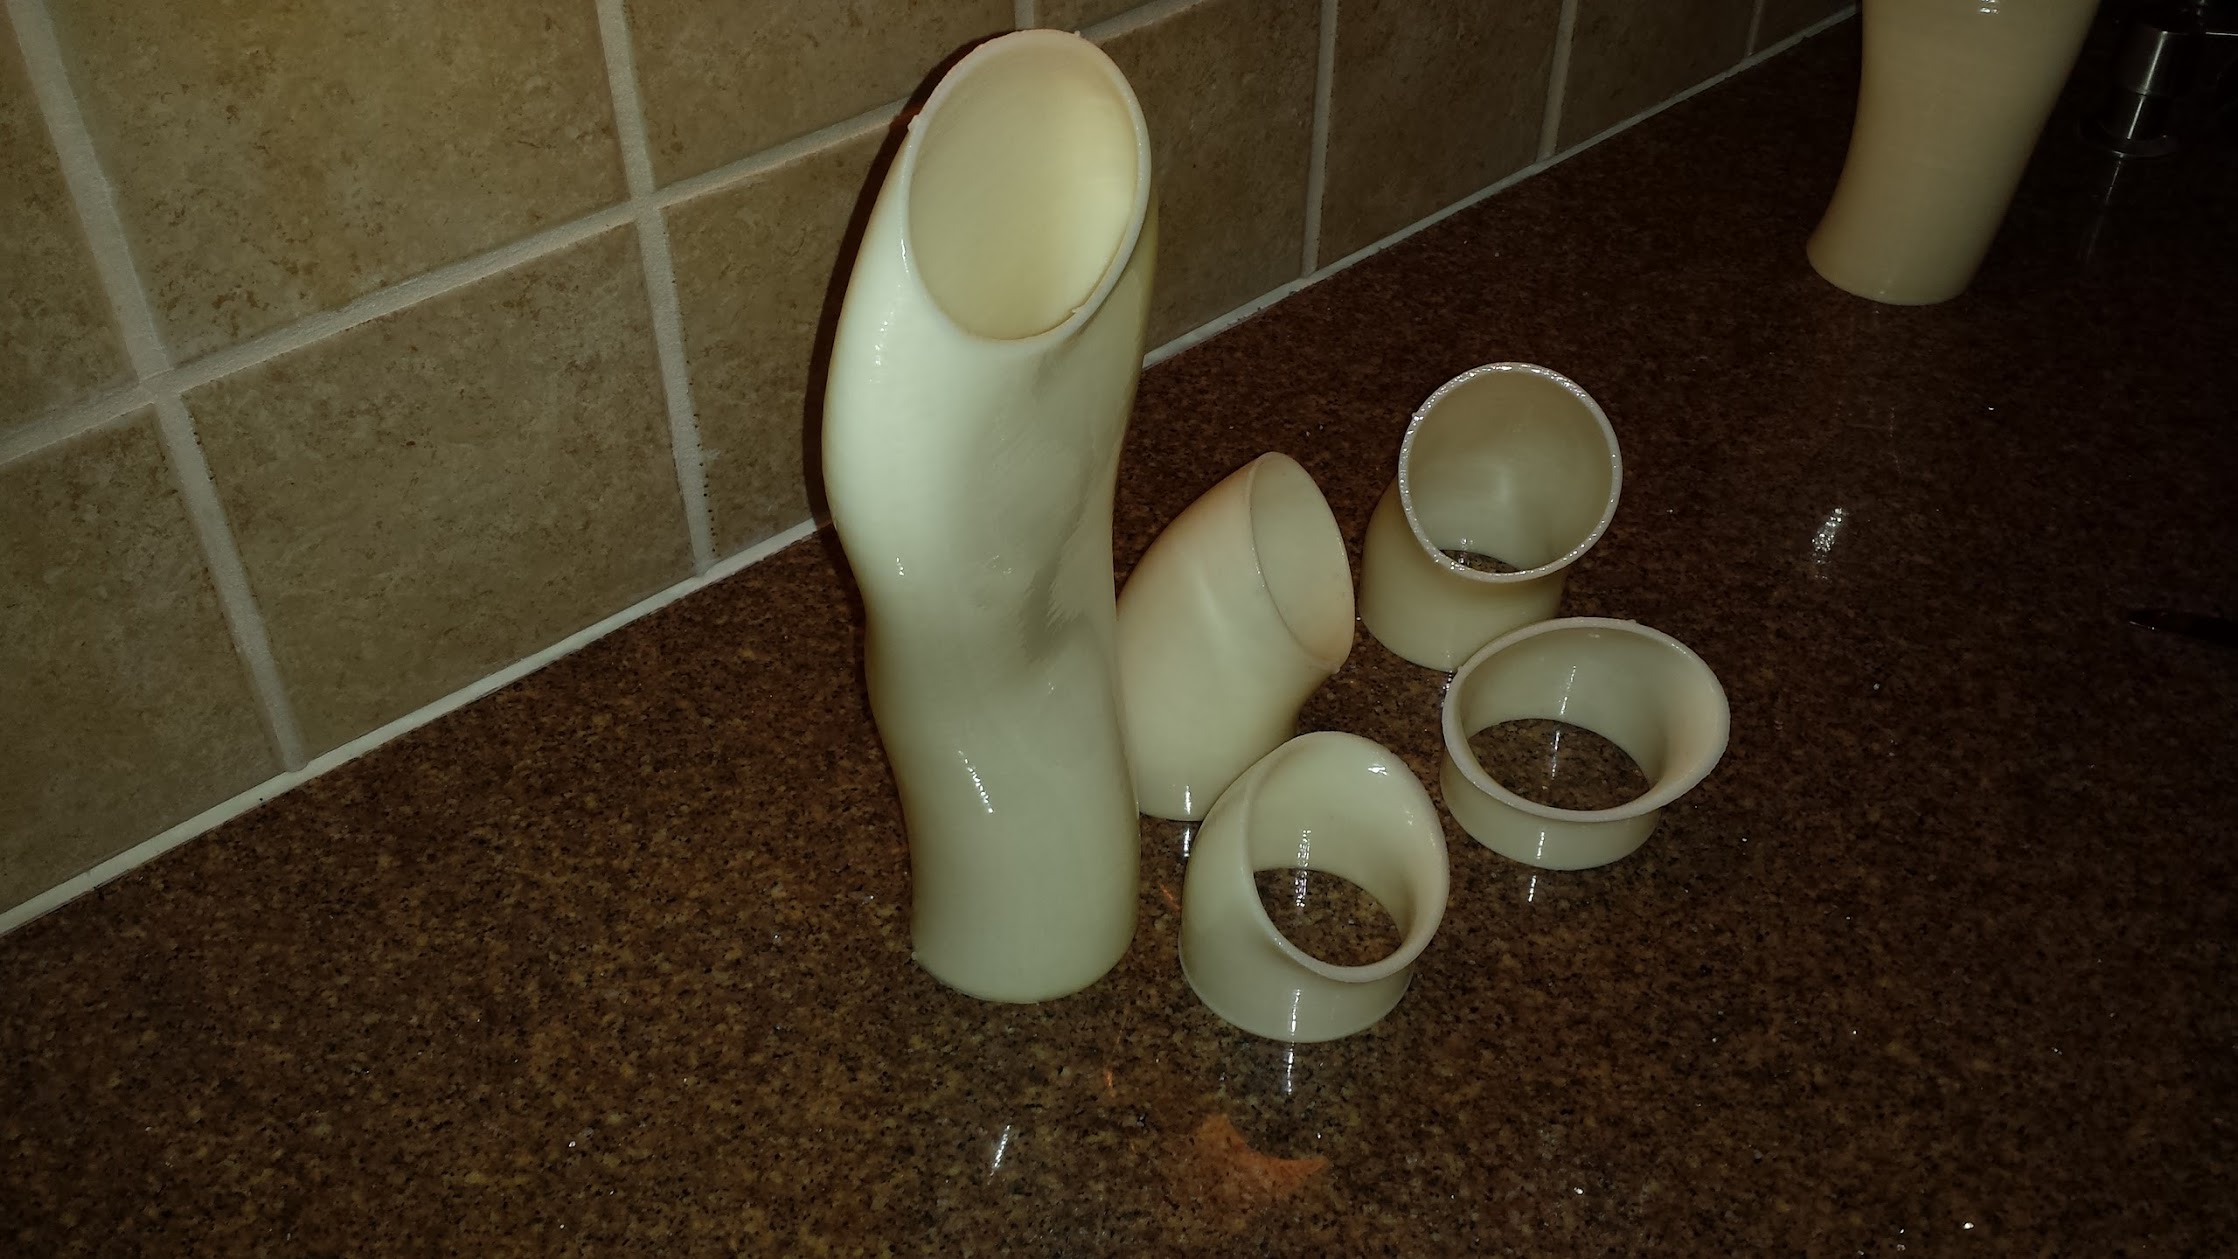
Here is a breakdown of parts needed:
You can re-install the cooling shroud, and I plan to put it back on soon. Also, I removed the stock hood prop but if you want to keep it on the car you can give it a slight bend to get it out of the way. It still works with the bend on it but the intake prevents you from using it.
Reply
0
0


Got a part number on that black elbow and the chrome piece ?
Reply
0
0
2.5" black 90* elbow.
Silicone 90
For the piping, buy one of the Mandrel Bent Aluminum 45/180 Bend, 2.5" and cut to size.
Stainless Steel Piping
Silicone 90
For the piping, buy one of the Mandrel Bent Aluminum 45/180 Bend, 2.5" and cut to size.
Stainless Steel Piping
Reply
0
0
Thread Starter
Joined: Jul 2012
Posts: 792
Total Cats: 143
From: durham NC
shiny:

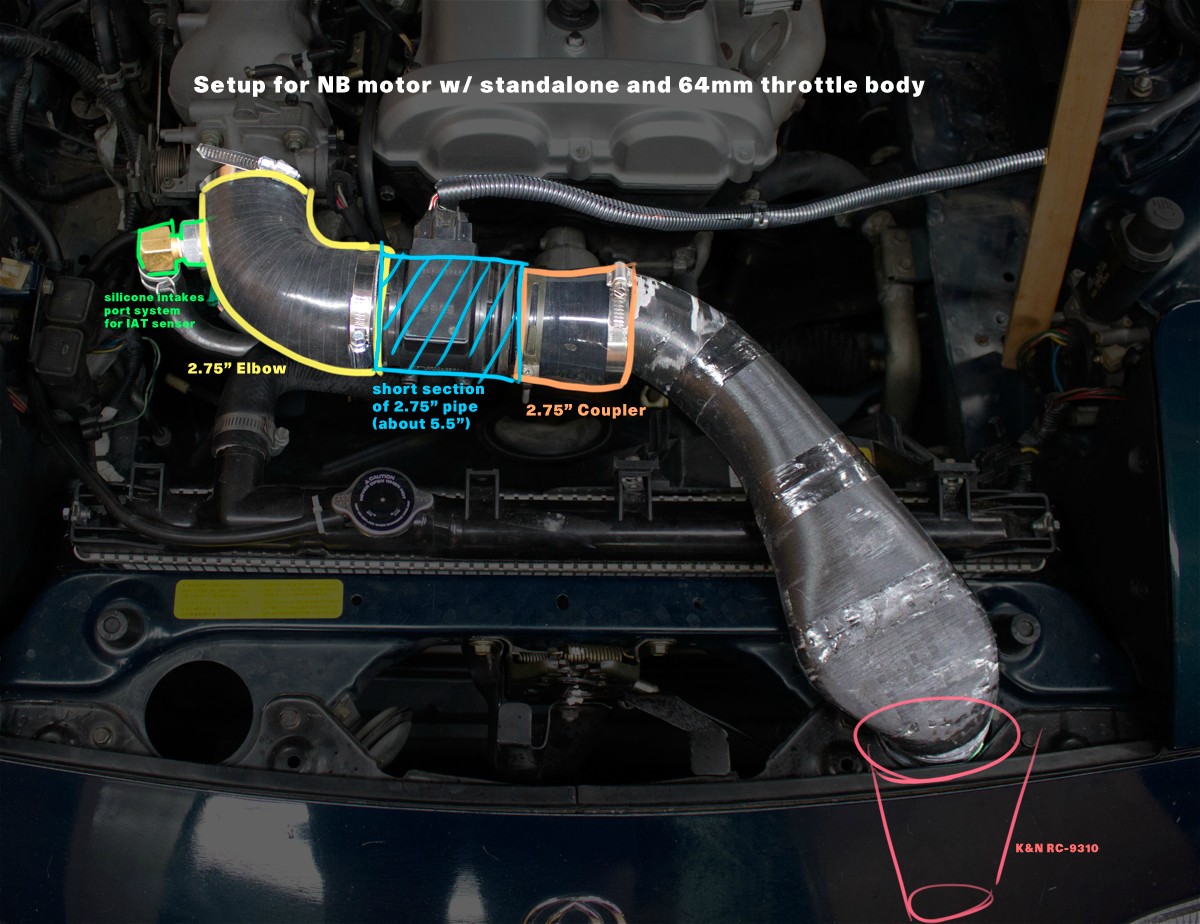
That design is totally done but I had an idea for how to make a superior duct that would be cheaper to get printed so now I am starting over. The new version is similar but doesn't incorporate the 45 degree bend as it nears the engine and I added more clearance to allow it to be rotated to face the throttle body. On cars with stock style radiators the implementation will be about the same except a large silicone 45 degree elbow is used instead of a straight coupler. The big advantage will be with for people who have aluminum flat topped radiators. With the duct rotated to face the throttle body and a 45 degree coupler on the TB the intake ends up being almost exactly 22" long:
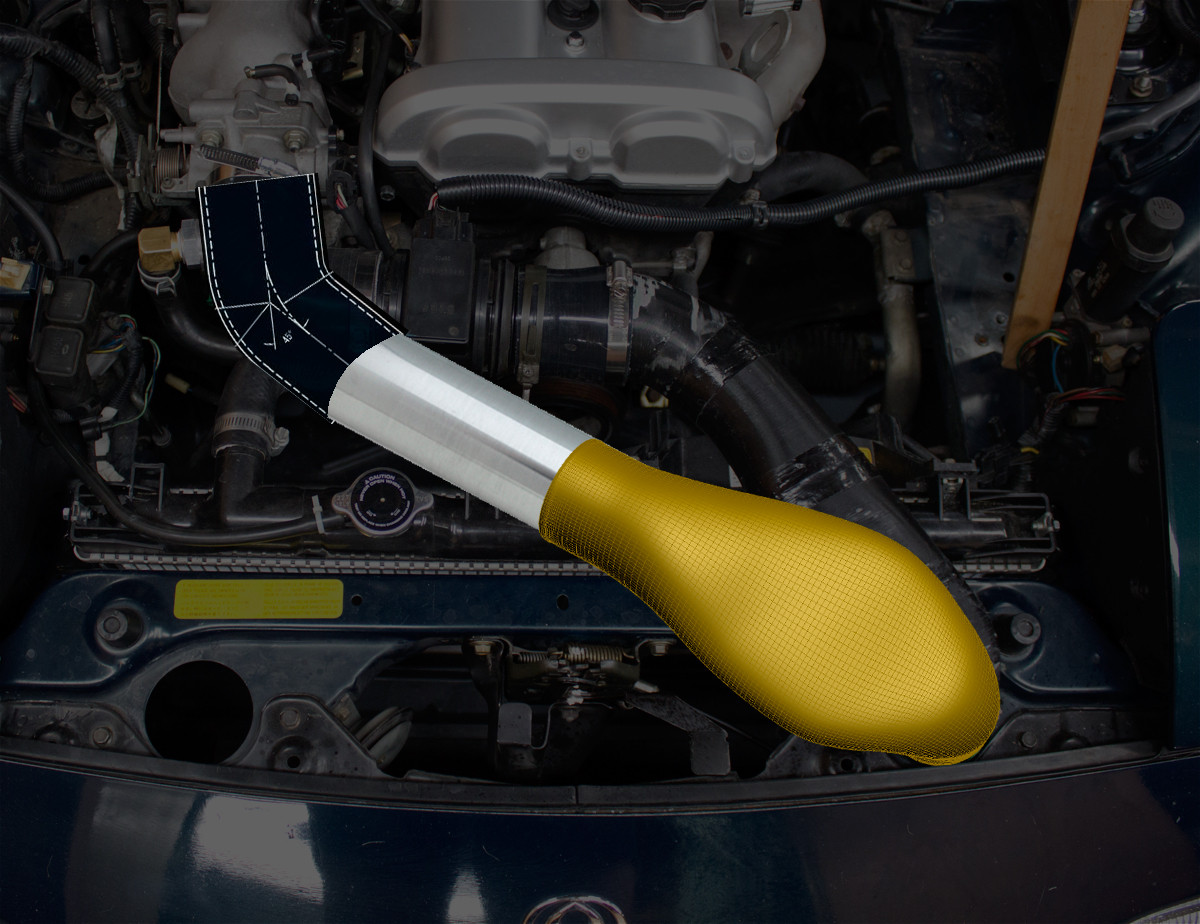
That design is totally done but I had an idea for how to make a superior duct that would be cheaper to get printed so now I am starting over. The new version is similar but doesn't incorporate the 45 degree bend as it nears the engine and I added more clearance to allow it to be rotated to face the throttle body. On cars with stock style radiators the implementation will be about the same except a large silicone 45 degree elbow is used instead of a straight coupler. The big advantage will be with for people who have aluminum flat topped radiators. With the duct rotated to face the throttle body and a 45 degree coupler on the TB the intake ends up being almost exactly 22" long:
Reply
1
1

Senior Member
Joined: Sep 2013
Posts: 923
Total Cats: 67
All of the dyno shops locally are a pain in the *** to deal with, so we're going going to do a foam pour on my car (TSE rad) and do some A/B testing as soon as I can get an appointment.
ETA: probably a week before TSE puts up their turbo kit :P
ETA: probably a week before TSE puts up their turbo kit :P
Reply
1
1

Thread Starter
Joined: Jul 2012
Posts: 792
Total Cats: 143
From: durham NC
Yeah, I have been planning to do a bent aluminum heat shield with a silhouette that matches the filter. Also, its kind of hard to tell from the pictures but there is about 4" between the edge of the filter and the radiator.
The 3d printer I am currently working with can get these out to people for about ~$130 shipped (CONUS). austin.floyd@3DprintGeeks.com The newer design should end up at $100 shipped. This is significantly more expensive than the other printers I have worked with but the part quality and strength is better. He is using a fine layer height which means these take something like 24 hours of time on his printer to produce. He also does an acetone vapor bath which smooths things out really well:
The design is also on thingiverse, I updated the files today. I have paid as little as $40 to have one of the early prototypes done so you can try and find a cheaper printer. However, that was with a larger layer height and less fill density. My break tests have showed those parts being significantly weaker. Also, having worked with 4 different printers on this so far, two of them started prints but were unable to make successful parts.
NA miata intake duct by AlecMoody - Thingiverse
I have messed around with the shapeways white strong and flexible material and it is extremely strong but I am concerned it won't hold up to the heat well enough. At some point I am going to cram a test piece into the radiator area and see what happens. Shapeways will also cost a fortune (something like $370) but it will be done quickly and in one piece.
Last edited by asmasm; Mar 13, 2014 at 02:31 PM.
Reply
0
0


