

Eric Anderson's Supercharged SSM Miata


Thread Starter

Joined: Jan 2011
Posts: 1,234
Total Cats: 283
From: Chattanooga, Tn
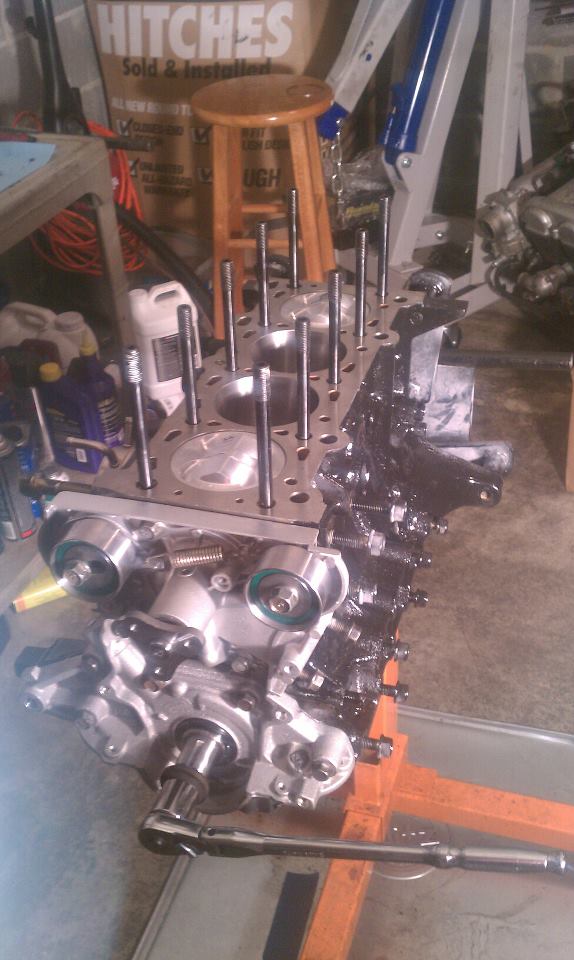
Made some progress this weekend. I debured the block, painted it then proceeded to clean it
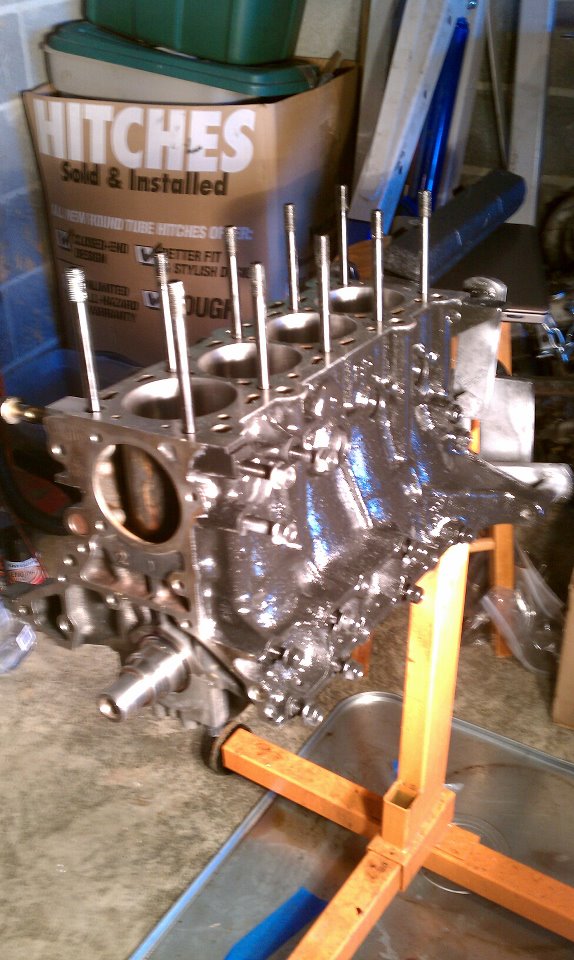
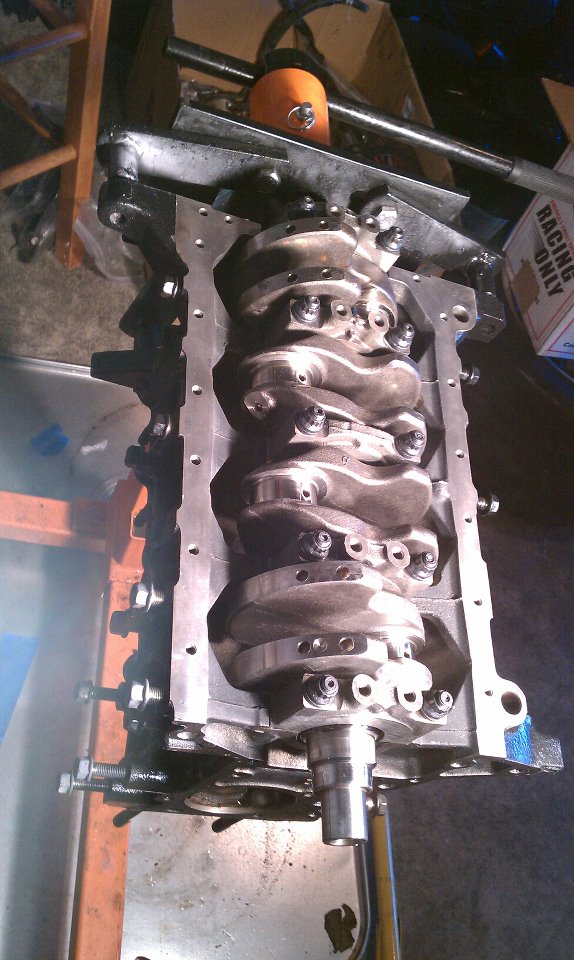
Got the crank in. .0017ths on the mains is just where I wanted it.
As I was starting to check the rod bearing oil clearance I discovered that the oil jets were hitting the bottoms of the new Weisco pistons. So a quick trip to ACE Hardware Racing Supply for some 10mmx1.25 bolts and the oil jets are deleted.
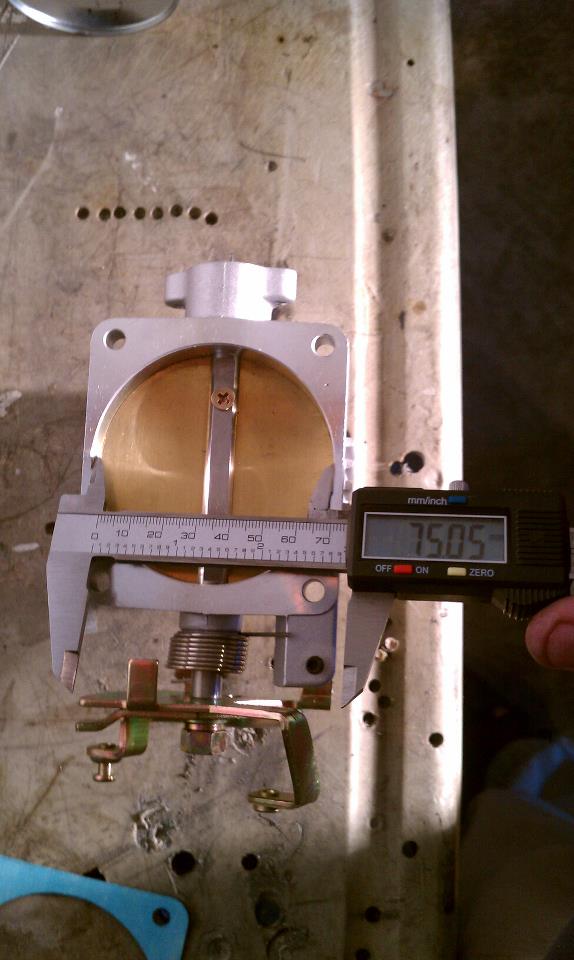
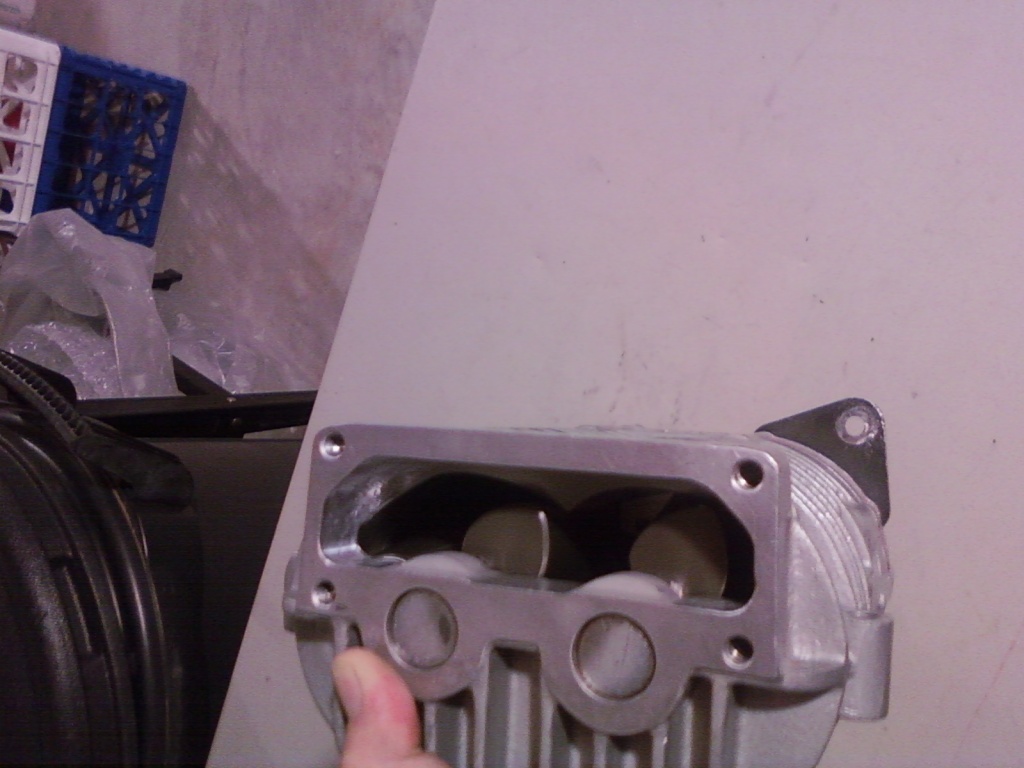
And having not checked the mail yesterday I missed this came in. 70mm throttle bodies are SOOOO last year.
Got the crank in. .0017ths on the mains is just where I wanted it.
As I was starting to check the rod bearing oil clearance I discovered that the oil jets were hitting the bottoms of the new Weisco pistons. So a quick trip to ACE Hardware Racing Supply for some 10mmx1.25 bolts and the oil jets are deleted.
And having not checked the mail yesterday I missed this came in. 70mm throttle bodies are SOOOO last year.
Reply
 0
0

0

I meant to ask you last night if the Miata throttle cable gets along with the Mustang throttle cam, or did you have to commit chicanery to get them to work together?
I absolutely abhor the throttle linkage nonsense that the Uber kit uses, but I haven't sat down and figured out if I'm going to have Motion Pro make me a cable, or if I'm going to have to figure something else out.
I absolutely abhor the throttle linkage nonsense that the Uber kit uses, but I haven't sat down and figured out if I'm going to have Motion Pro make me a cable, or if I'm going to have to figure something else out.
Reply
0
0
Thread Starter
Joined: Jan 2011
Posts: 1,234
Total Cats: 283
From: Chattanooga, Tn
I had to make some very minor mods to make it fit my application. The stock throttle cable will slide right in but you need to make some minor mods to prevent the cable from coming out.
Reply
0
0
Thread Starter
Joined: Jan 2011
Posts: 1,234
Total Cats: 283
From: Chattanooga, Tn
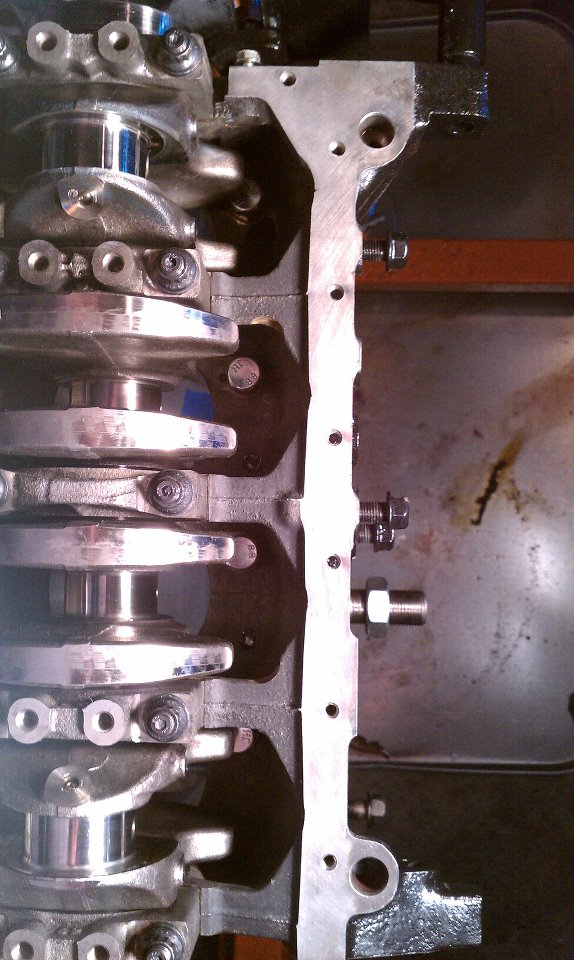
Short block is together

Just waiting on a few more parts before the head and blower go back on. So I went ahead and installed the RunCool hood louvers.
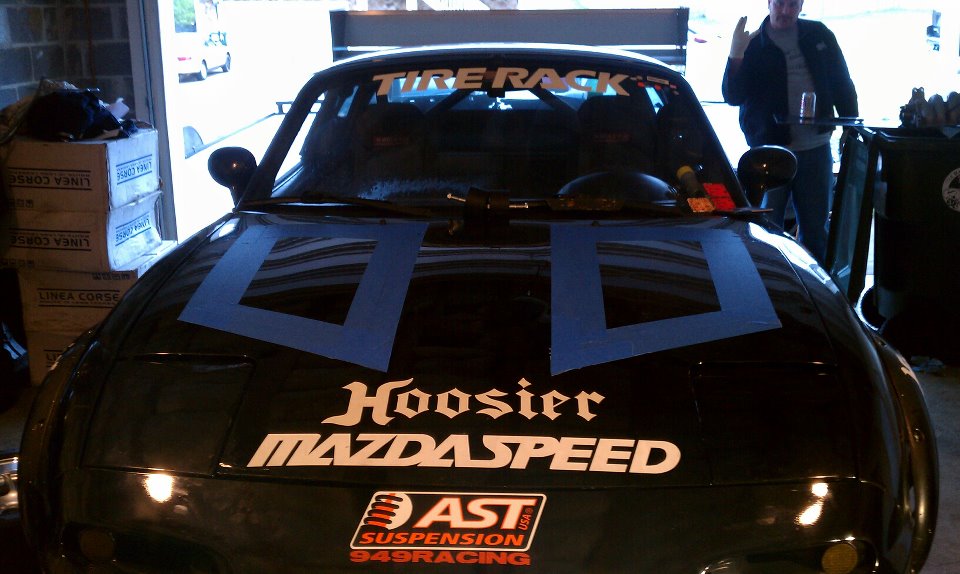

Just waiting on a few more parts before the head and blower go back on. So I went ahead and installed the RunCool hood louvers.
Reply
0
0


Thread Starter
Joined: Jan 2011
Posts: 1,234
Total Cats: 283
From: Chattanooga, Tn
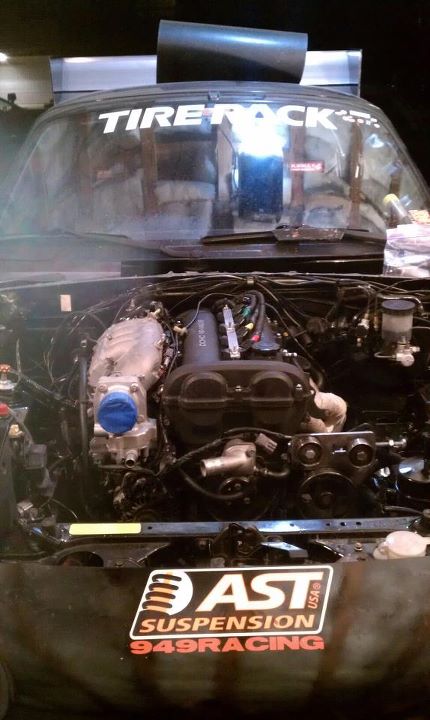
The new engine, new transmission, new clutch and new diff are all in the car now. New dlerin and spherical bushings are installed as are new ball joints and inner and outer tie rod ends. Still have to install the cooling system, new blower and intercooler...then it's off to DIY in Atlanta on Tuesday to be tuned. I hope it makes about 175-180hp.
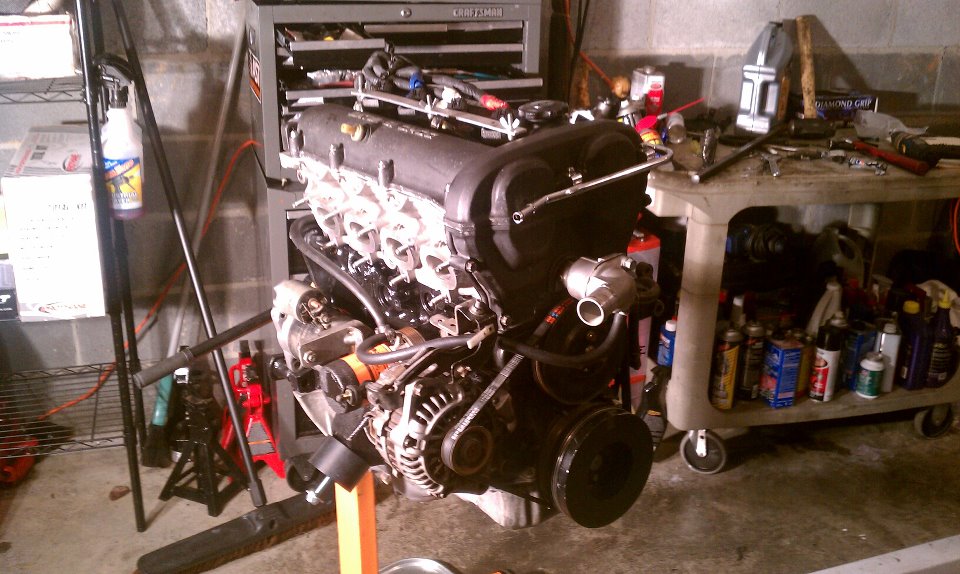
and a couple shots of the porting work on the blower.

and a couple shots of the porting work on the blower.
Reply
0
0
Thread Starter
Joined: Jan 2011
Posts: 1,234
Total Cats: 283
From: Chattanooga, Tn
And I had someone ask me about the Greyhound stickers all over the car. Well if you think the car is fast...here are some pics of the ONLY really fast thing at my house.
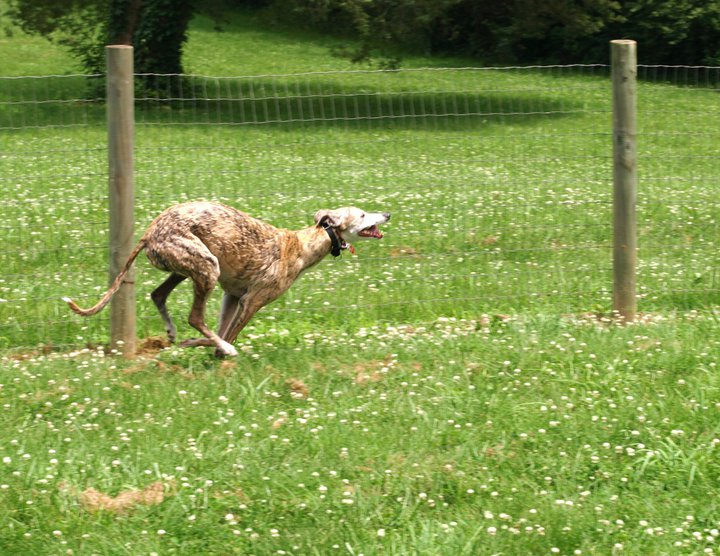
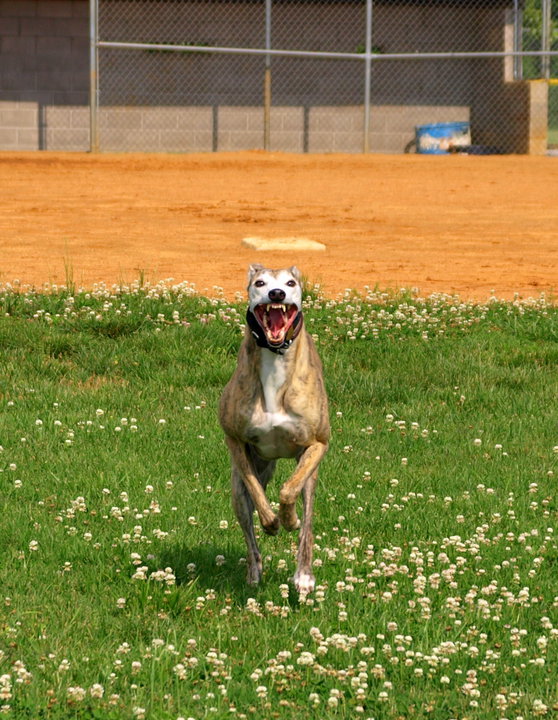


And here are a few races from before she retired. Here track name was Mulberry Semerun.
So to the earlier comment in this thread..."TNTUBA's dog is faster than your dog too"
And here are a few races from before she retired. Here track name was Mulberry Semerun.
So to the earlier comment in this thread..."TNTUBA's dog is faster than your dog too"
Reply
1
1

Thread Starter
Joined: Jan 2011
Posts: 1,234
Total Cats: 283
From: Chattanooga, Tn
WOW...it has been a LONG 3 months since I started gathering parts for this build. I am REALLY glad the motor ran when I turned the key. Took it to the CRSCCA Test N Tune and was able to get the rings seated and some rough tuning done. Now I just have to change the Oil and filter again and get it to Atlanta to see what kind of power it will make. I can tell you just from driving it around today it's A WAY LOT STRONGER than it was with the other motor.
Reply
0
0


