

New Wing to Test


Senior Member
Joined: Oct 2011
Posts: 842
Total Cats: 415
From: Northridge, CA
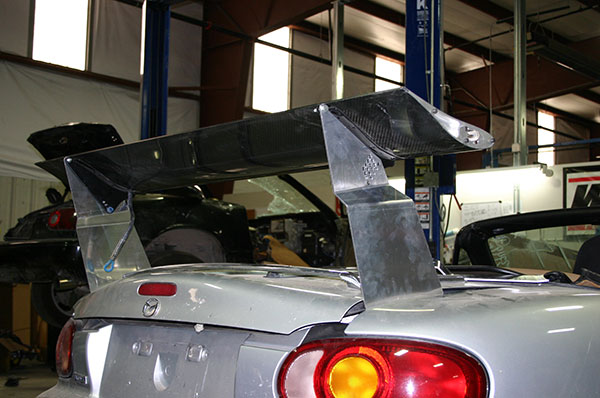
The piece that connects to the chassis is steel, the pedestals are aluminum.
It does flex side to side a bit and I'll probably add a steel cable to stiffen things up, but the plan is to spend only the minimum amount of time with these mounts anyway just to get a sense of mounting height.
The permanent mounts are going to be completely different.
I haven't made any end plates yet, I'll post more pics once I have those on (my wing came with the funny ones that work for left hand turns).
Reply
 0
0

0


Moti - looks good, what kind of height range off the deck lid does that provide? Is there any issue with the lower settings leaving too much of the upright sticking below the mount, too close to the ground?
-Ryan
-Ryan

Reply
0
0
Senior Member
Joined: Oct 2011
Posts: 842
Total Cats: 415
From: Northridge, CA
The adjustment goes from just a bit over the main hoop to 8" down, beyond that ground clearance will become an issue.
If I'd want to test lower than that, cutting another set of pedestals is a piece of cake now that I have all the measurements, the pieces are completely flat, just a quick cut and drill job
If I'd want to test lower than that, cutting another set of pedestals is a piece of cake now that I have all the measurements, the pieces are completely flat, just a quick cut and drill job
Reply
0
0

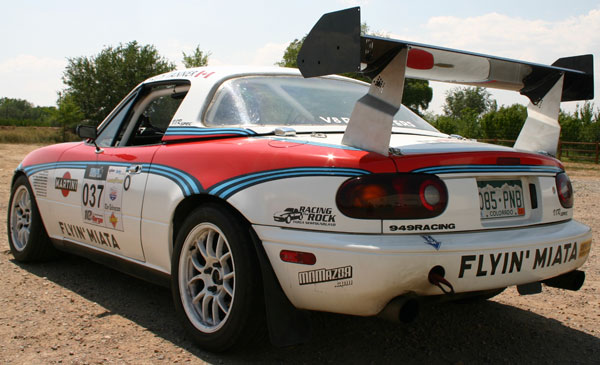
Nice fab work, as usual, Mine needed a brace between the two uprights to box the structure even with the wing bolted on. Wires are high drag so I added the cross brace down low behind the finish panel. Stiff and didn't cause any extra drag.
You made sounds like you planned on taking Creampuff w2w. In enduros, we worry about otherwise inconsequential contact taking us out of an enduro. So we integrated a lightweight tubular bumper bar in to the wing mount on Crusher.
Most readers in this thread are HPDE or PTE/TTE though so the crash bar is kind of overkill. You might think bout it though since you'll be in ST3 or ST2 eventually.
__________________


Reply
0
0
Senior Member
Joined: Oct 2011
Posts: 842
Total Cats: 415
From: Northridge, CA
Thanks 
It's the easiest point to connect to the chassis, especially without a rear bumper in place.
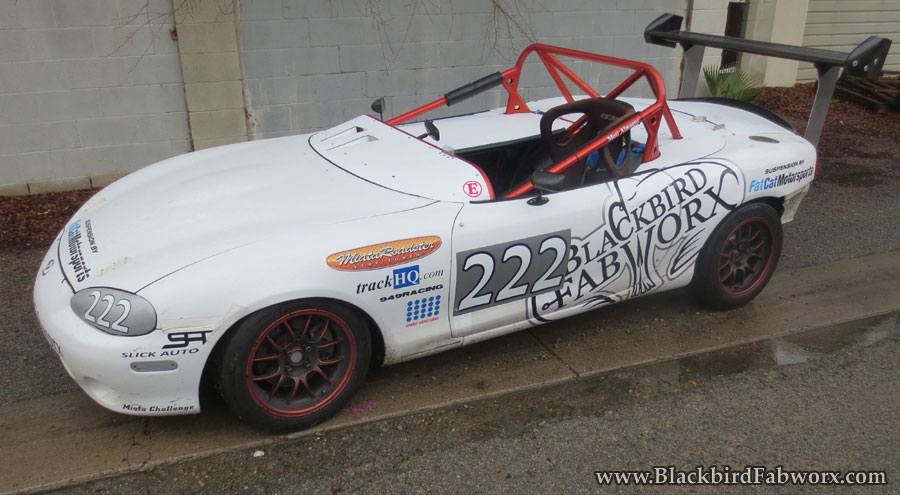
Makes for a perfect place to mount a wing for testing purposes without the need for modifications in any body panels.
If I was to mount the wing permanently I wouldn't do it that way though, I was kind of surprised to see that you installed the wing there on Crusher, being a w2w car... It looks to me like something that might be damaged in turn 1 of a race if you got a little love tap.
In a setup that depends on aero balance this might be the end of the race.
The way the wing is mounted on Ryan's car looks like a safer bet to me, the mounting location is generally out of harms way, the pedestals are much shorter, thus lighter and there's less flexing to start with.
And with even the lightest gauge small diameter tube you car reinforce the front of the mount directly to the frame rails inside the trunk and transfer the load to the exact same location with nearly zero additional weight.
I've pretty much decided not to go w2w with Creampuff and have been looking for another car to build a dedicated w2w car.
I'll keep running the MC and perhaps another time trial series like NASA TT or go attack some clocks..
It's the easiest point to connect to the chassis, especially without a rear bumper in place.
Makes for a perfect place to mount a wing for testing purposes without the need for modifications in any body panels.
If I was to mount the wing permanently I wouldn't do it that way though, I was kind of surprised to see that you installed the wing there on Crusher, being a w2w car... It looks to me like something that might be damaged in turn 1 of a race if you got a little love tap.
In a setup that depends on aero balance this might be the end of the race.
The way the wing is mounted on Ryan's car looks like a safer bet to me, the mounting location is generally out of harms way, the pedestals are much shorter, thus lighter and there's less flexing to start with.
And with even the lightest gauge small diameter tube you car reinforce the front of the mount directly to the frame rails inside the trunk and transfer the load to the exact same location with nearly zero additional weight.
I've pretty much decided not to go w2w with Creampuff and have been looking for another car to build a dedicated w2w car.
I'll keep running the MC and perhaps another time trial series like NASA TT or go attack some clocks..
Reply
0
0
If I was to mount the wing permanently I wouldn't do it that way though, I was kind of surprised to see that you installed the wing there on Crusher, being a w2w car... It looks to me like something that might be damaged in turn 1 of a race if you got a little love tap.
In a setup that depends on aero balance this might be the end of the race.
In a setup that depends on aero balance this might be the end of the race.

rev 2 of our PT wing and mounts will be very trick. You guys will see it at Miller
__________________
Reply
0
0
Senior Member
Joined: Oct 2011
Posts: 842
Total Cats: 415
From: Northridge, CA
Cool, looking forward to it.
The permanent mounts on Creampuff's wing are going to be very trick too
BTW, I think that as a temporary solution to stiffen the mounts a pair of cables in an X will do fine, and they probably don't need to extend all the way to the top so the drag can be cut down.
The ridiculous end plates will have to go.
Reply
0
0

Newb
Joined: Feb 2013
Posts: 17
Total Cats: 0
Cool, looking forward to it.
The permanent mounts on Creampuff's wing are going to be very trick too
BTW, I think that as a temporary solution to stiffen the mounts a pair of cables in an X will do fine, and they probably don't need to extend all the way to the top so the drag can be cut down.
The ridiculous end plates will have to go.
The permanent mounts on Creampuff's wing are going to be very trick too
BTW, I think that as a temporary solution to stiffen the mounts a pair of cables in an X will do fine, and they probably don't need to extend all the way to the top so the drag can be cut down.
The ridiculous end plates will have to go.
Reply
-1
-1


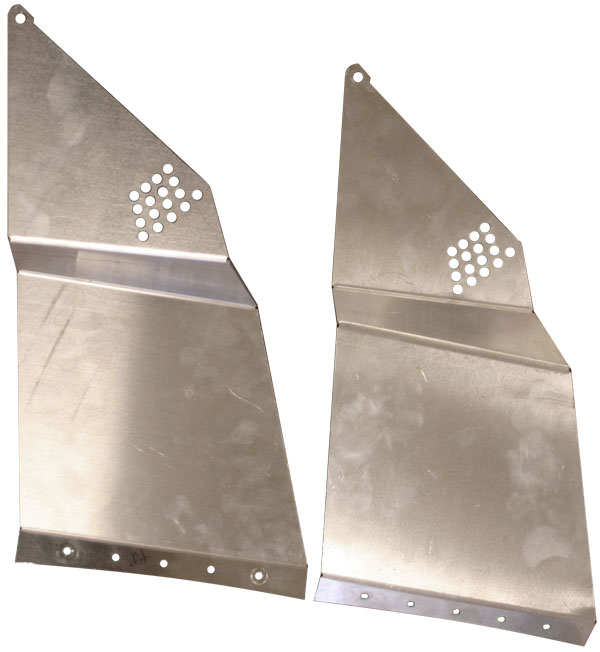
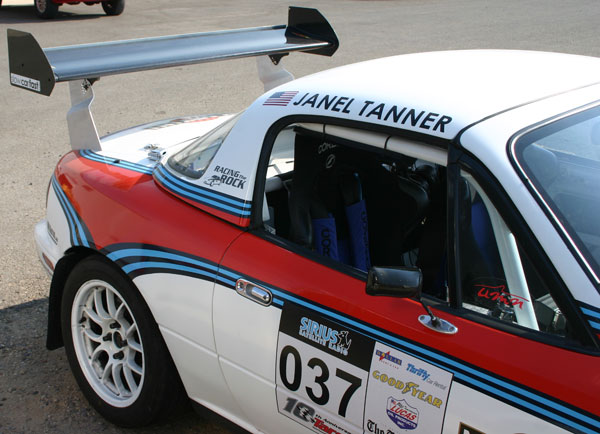
Finally! The bolt-on mounts are done, and we're starting the group buy. $99.95 for a set, bring your own wing.
That's the production version on the silver NB in the pictures. We put five holes along the bottom edge, which is probably overkill - but you can choose not to drill them if you want. I put rivnuts in my car to make it easier to pull them on and off, but you can also use nuts and bolts easily. The production version has a different bend pattern than the prototypes in order to give maximum trunk openage, and is slightly taller. The wing's set to be right at the edge of the car envelope - level with the roof and rear bumper.
The NA and NB ones are different - there's a 12� difference in the angle of the trunklid flange and 1.3� more twist per side on the newer cars.
We've got the group buy set to run until the end of February. We're probably not going to stock these as a regular item, so if you want a set then go in on the buy. Please note that posting "I'm in" isn't going to get you on the list, you have to actually give us payment info.
Flyin' Miata : Body : Body parts : COT wing mounts
Reply
0
0
Very radical Keith. Great to see this being offered to the community to make this wing a more accessible option without fabrication being necessary.
Just got my car weighed today and snapped a pic at the weigh station - first time on the road with the wing on the car, so I finally have a pic of it from more than 2 ft away from me in the garage:
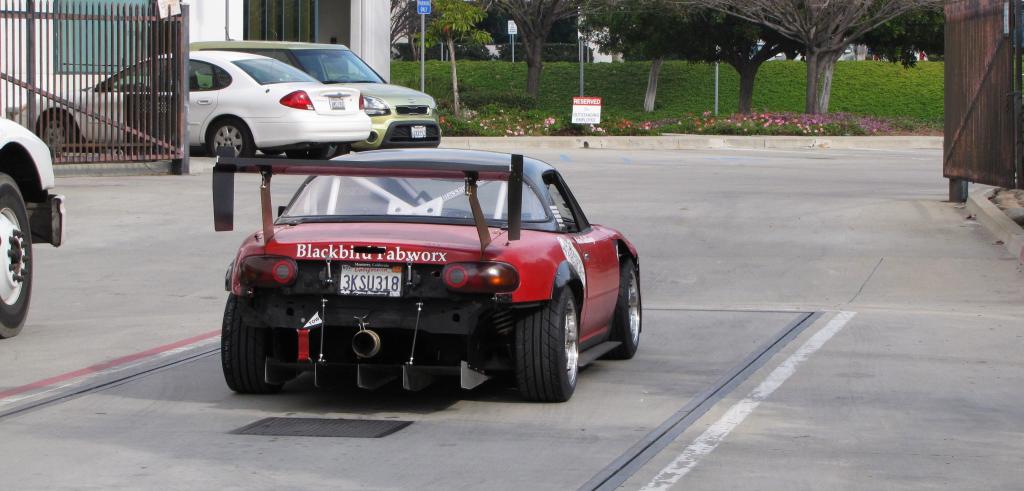
Just got my car weighed today and snapped a pic at the weigh station - first time on the road with the wing on the car, so I finally have a pic of it from more than 2 ft away from me in the garage:
Reply
0
0
Newb
Joined: Feb 2013
Posts: 17
Total Cats: 0
Very radical Keith. Great to see this being offered to the community to make this wing a more accessible option without fabrication being necessary.
Just got my car weighed today and snapped a pic at the weigh station - first time on the road with the wing on the car, so I finally have a pic of it from more than 2 ft away from me in the garage:
Just got my car weighed today and snapped a pic at the weigh station - first time on the road with the wing on the car, so I finally have a pic of it from more than 2 ft away from me in the garage:
Reply
0
0
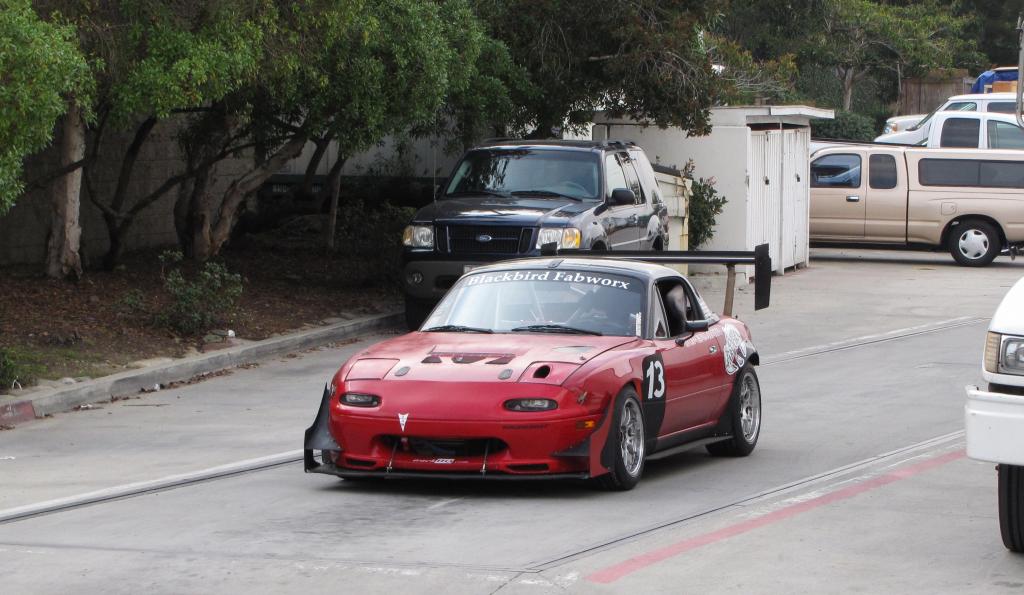
I don't exactly cruise around in it. I drive mostly just to/from tracks. I'm sure there are some law enforcement officers who would nitpick about the little things, but the turbo kit is CARB legal (have all the paperwork in the car), has a cat, all lights, etc.. Haven't been pulled over in a long time. *knock on wood* It probably helps that I dive very mellow on public roads. Always at the speed limit, always using turn signals, etc.
-Ryan
-Ryan
Reply
0
0

Newb
Joined: Oct 2011
Posts: 10
Total Cats: 0
Finally! The bolt-on mounts are done, and we're starting the group buy. $99.95 for a set, bring your own wing.
That's the production version on the silver NB in the pictures. We put five holes along the bottom edge, which is probably overkill - but you can choose not to drill them if you want. I put rivnuts in my car to make it easier to pull them on and off, but you can also use nuts and bolts easily. The production version has a different bend pattern than the prototypes in order to give maximum trunk openage, and is slightly taller. The wing's set to be right at the edge of the car envelope - level with the roof and rear bumper.
The NA and NB ones are different - there's a 12� difference in the angle of the trunklid flange and 1.3� more twist per side on the newer cars.
We've got the group buy set to run until the end of February. We're probably not going to stock these as a regular item, so if you want a set then go in on the buy. Please note that posting "I'm in" isn't going to get you on the list, you have to actually give us payment info.
Flyin' Miata : Body : Body parts : COT wing mounts
That's the production version on the silver NB in the pictures. We put five holes along the bottom edge, which is probably overkill - but you can choose not to drill them if you want. I put rivnuts in my car to make it easier to pull them on and off, but you can also use nuts and bolts easily. The production version has a different bend pattern than the prototypes in order to give maximum trunk openage, and is slightly taller. The wing's set to be right at the edge of the car envelope - level with the roof and rear bumper.
The NA and NB ones are different - there's a 12� difference in the angle of the trunklid flange and 1.3� more twist per side on the newer cars.
We've got the group buy set to run until the end of February. We're probably not going to stock these as a regular item, so if you want a set then go in on the buy. Please note that posting "I'm in" isn't going to get you on the list, you have to actually give us payment info.
Flyin' Miata : Body : Body parts : COT wing mounts
Reply
0
0
Senior Member
Joined: Oct 2011
Posts: 842
Total Cats: 415
From: Northridge, CA
End plates and chassis mounts came back from powder coating, pics on the car in the next couple of days hopefully and if not, I'll definitely have some from the Miata Challenge season opener this Sunday
Reply
0
0
Looks great. Very tempting. No external bodywork modifications is ++.
How do these mounts affect the weatherstripping (and therefore rain tolerance) of the trunk? For those of us with dual-purpose cars, especially those of us in the rainy NW, this is rather important.
How do these mounts affect the weatherstripping (and therefore rain tolerance) of the trunk? For those of us with dual-purpose cars, especially those of us in the rainy NW, this is rather important.
Reply
0
0

If you have the wing off, you'll need to put something in the holes if you're planning on serious water intrusion testing - but keep in mind that the holes are in a vertical flange underneath a 1/8" panel gap, so they're not liable to be a major problem. Still, options to fill them would be:
- put the nuts and bolts back in the holes, which also means you know where they are
- rubber plugs
- waterproof rivnuts
- duct tape
Reply
0
0
Excellent. The holes themselves were not my concern so much as the overall sealing of the trunk itself being compromised by missing weatherstripping.
And the obvious answer is 4), strip of duct tape
Edit: email sent to sales for group buy via paypal.
And the obvious answer is 4), strip of duct tape
Edit: email sent to sales for group buy via paypal.
Last edited by Mobius; Feb 8, 2013 at 02:12 AM.
Reply
0
0


