

Post your DIY aero pics


Junior Member
Joined: Jun 2005
Posts: 286
Total Cats: 235

Reply
 0
0

0

Some followup pictures from post #150, as requested.
Also some ground clearance test results.
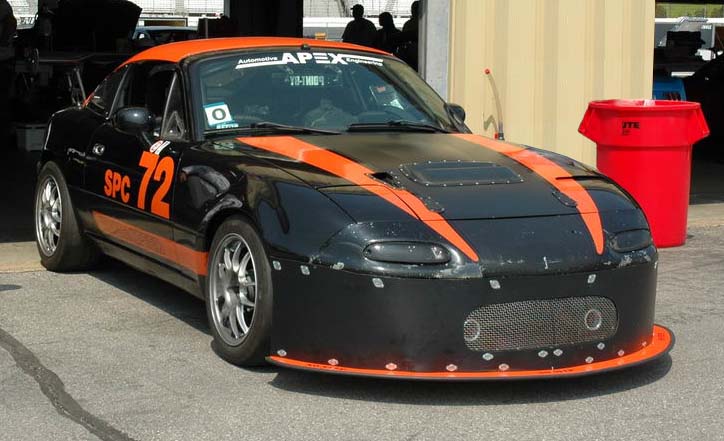
The car:
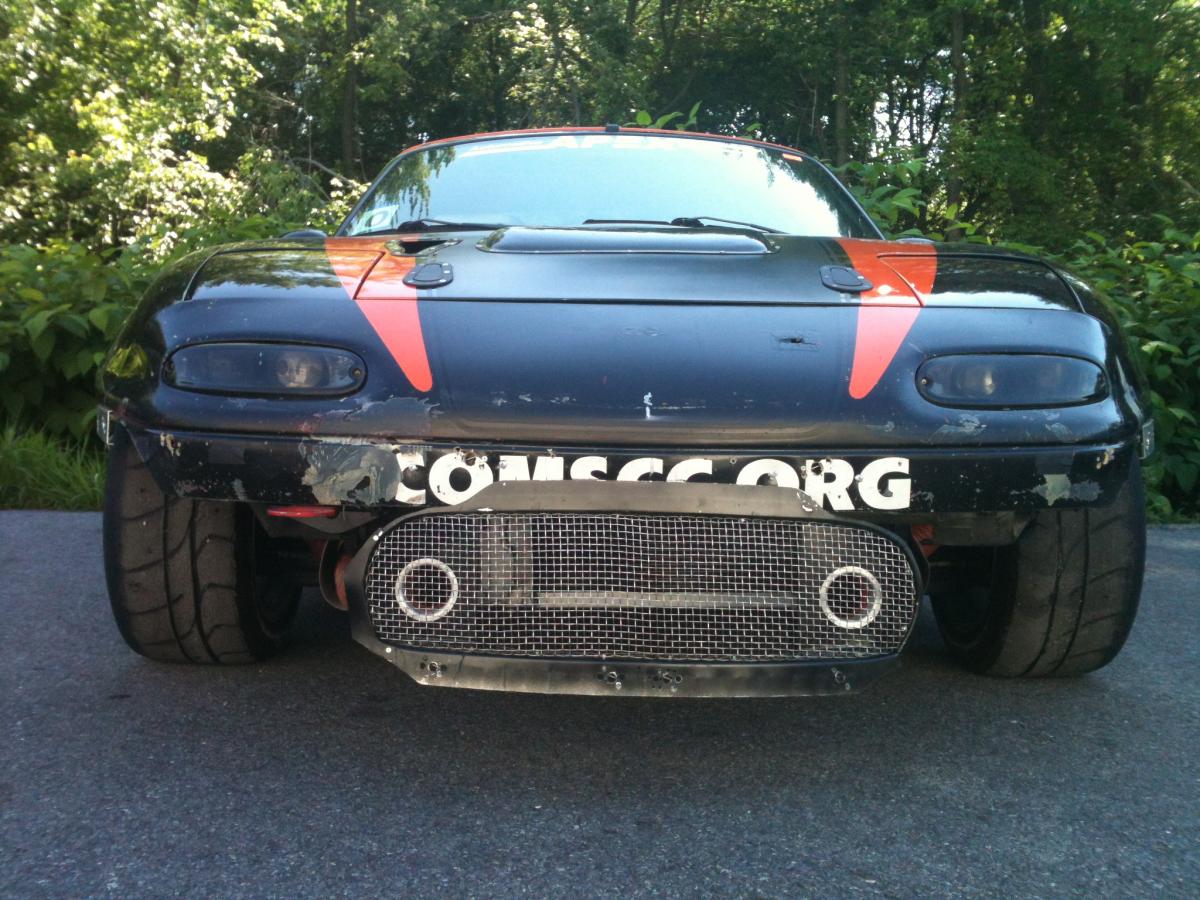
The combination front grill/air dam flange/brake ducts:
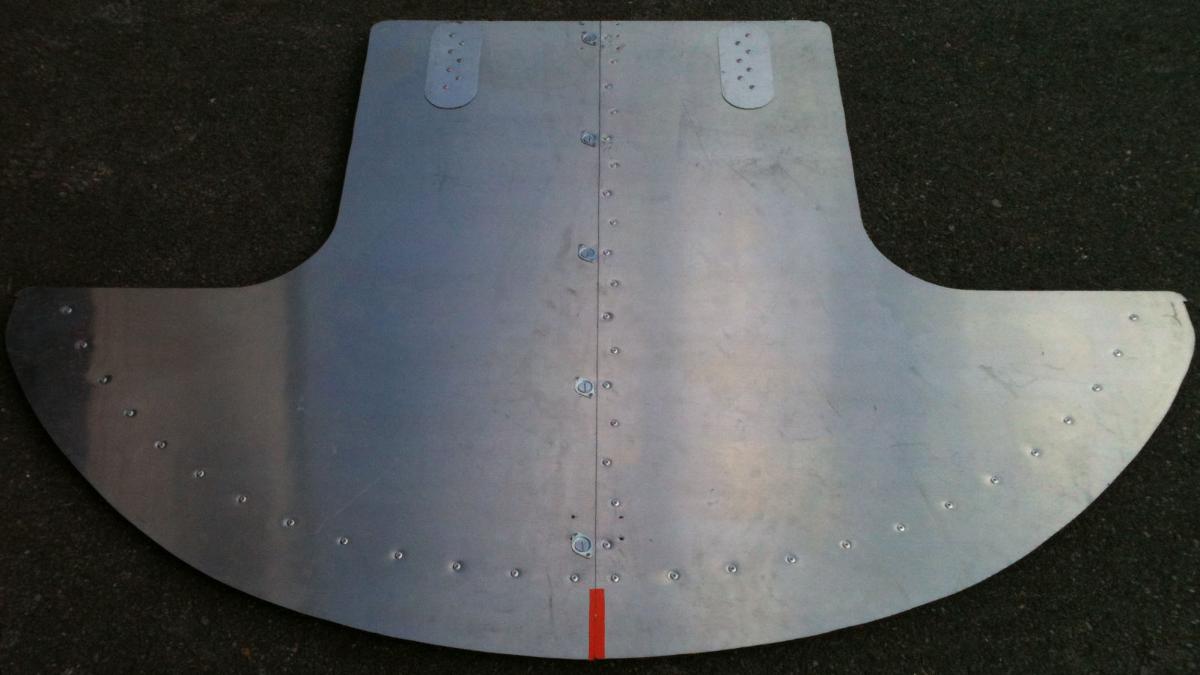
Under side of splitter
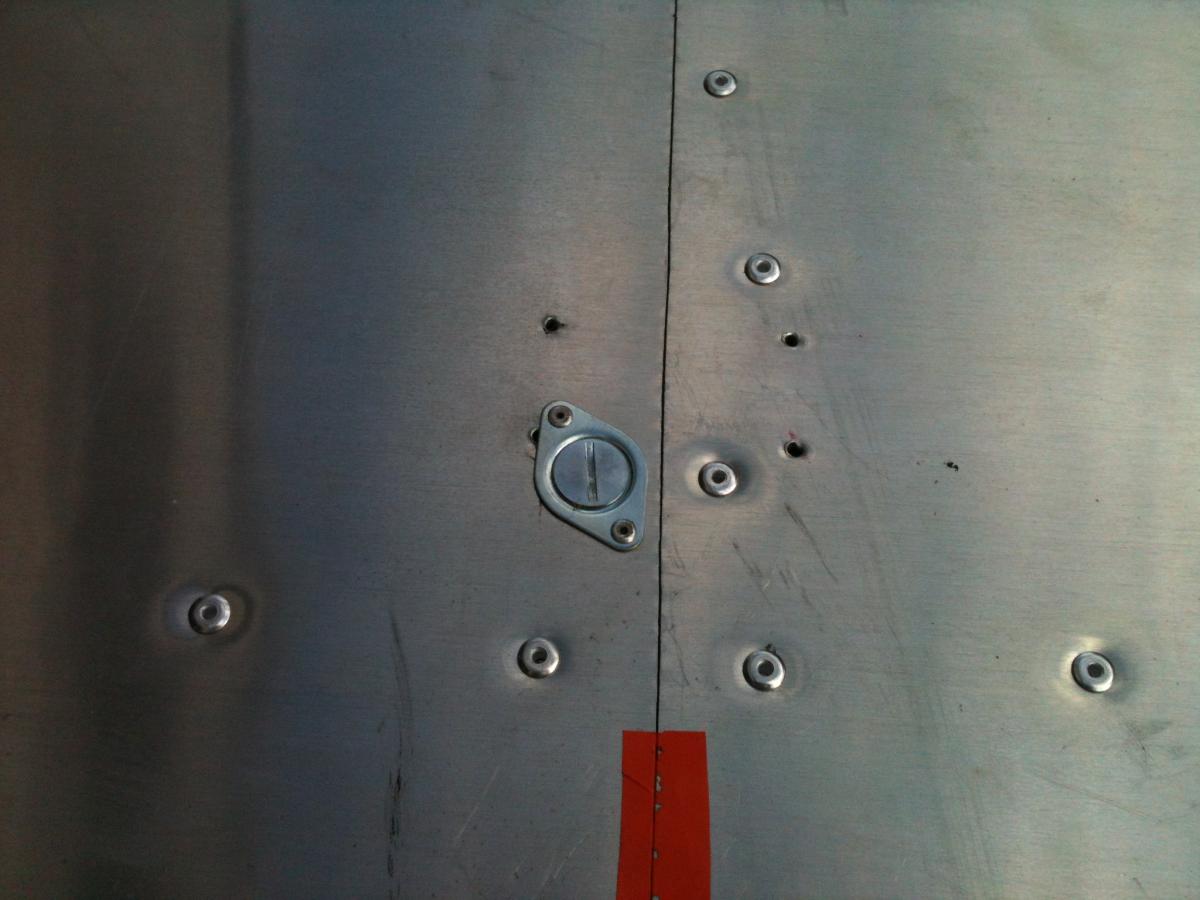
Close-up of underside showing splitter seam, dzus fastner, pop rivets:
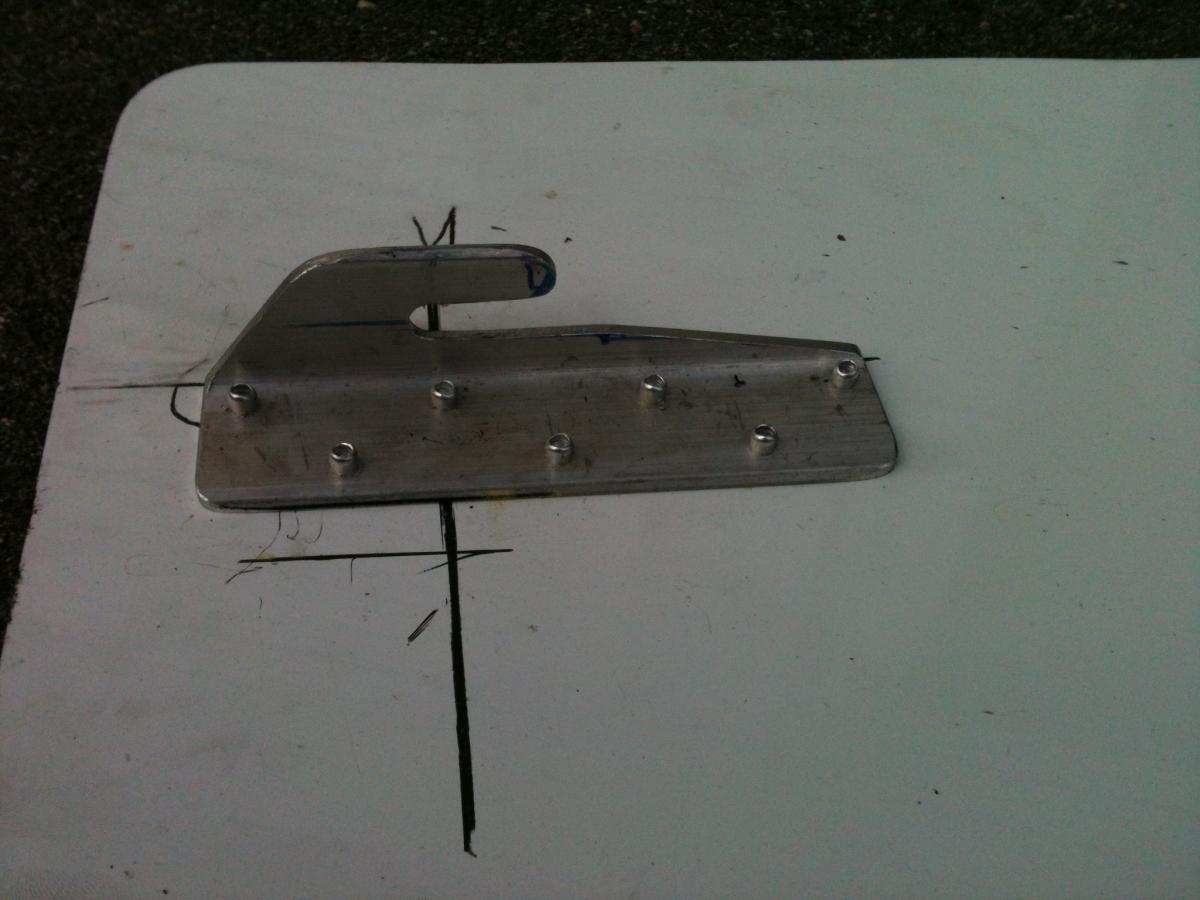
Splitter hook/hanger, on upper side (engine side) of splitter, at the tail-end of the splitter:
Chassis pins, welded in place, just behind engine mounts on sub frame. The splitter hooks hang from these pins:
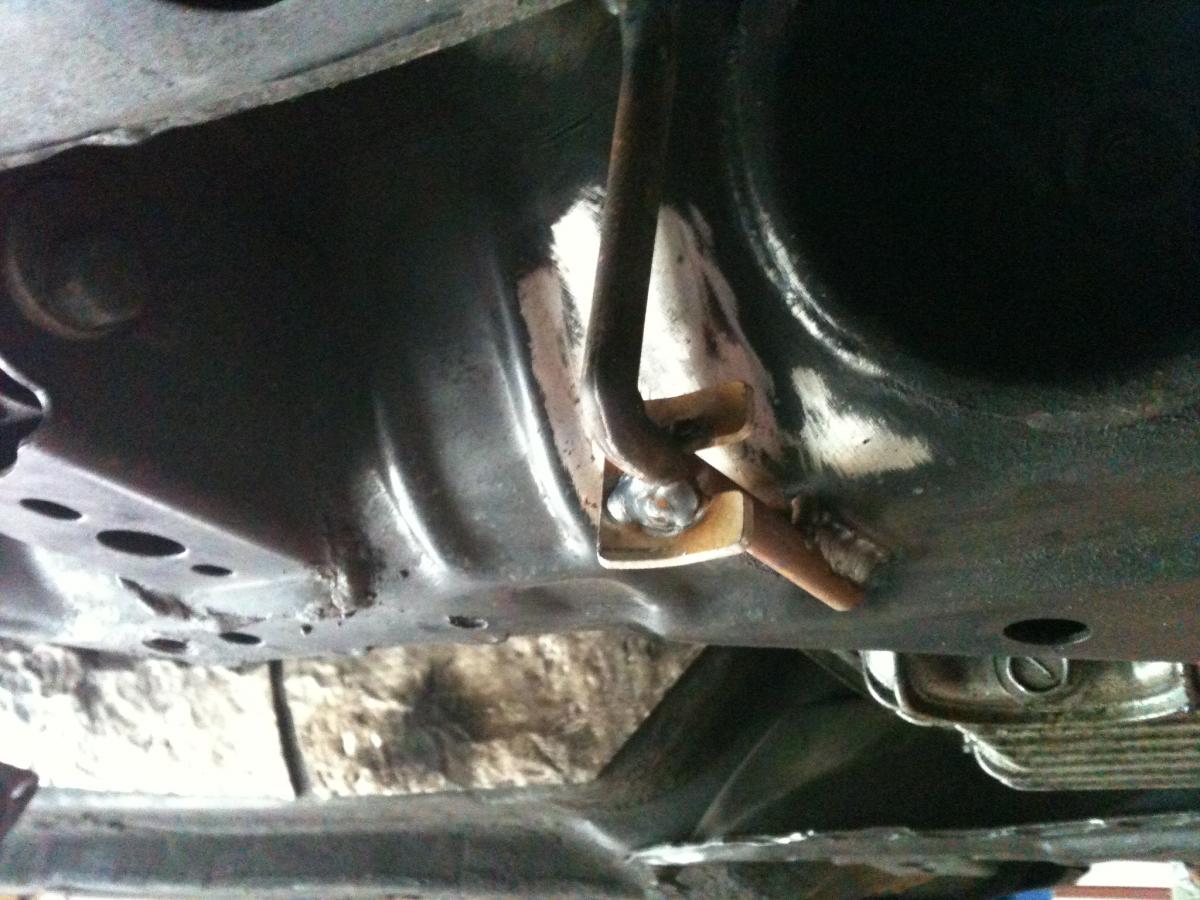
Splitter hooks slipped over chassis pins. In a sharp front impact, the back end of the splitter should slip right off of the hooks (in theory!)

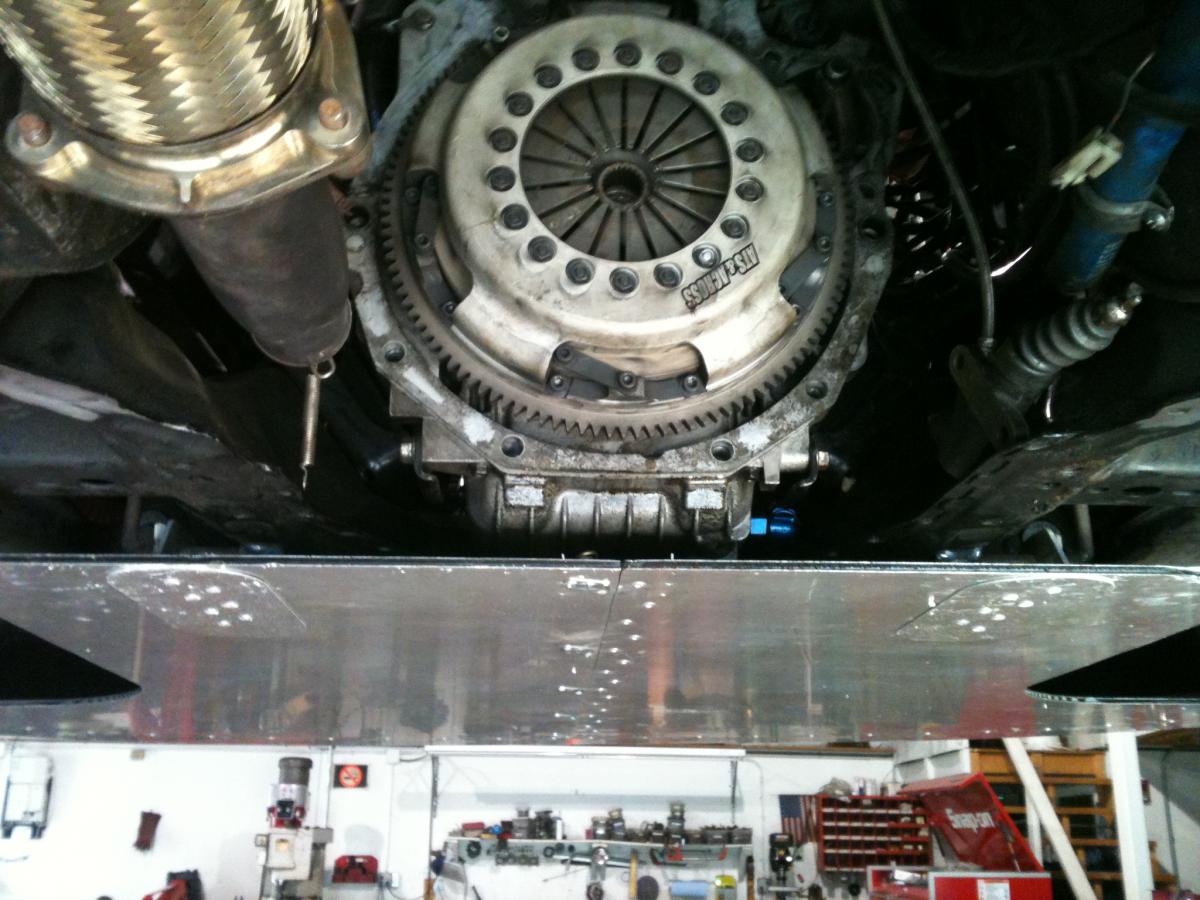
Flat-bottom of splitter as viewed from the rear with the splitter hooks attached to the chassis pins:
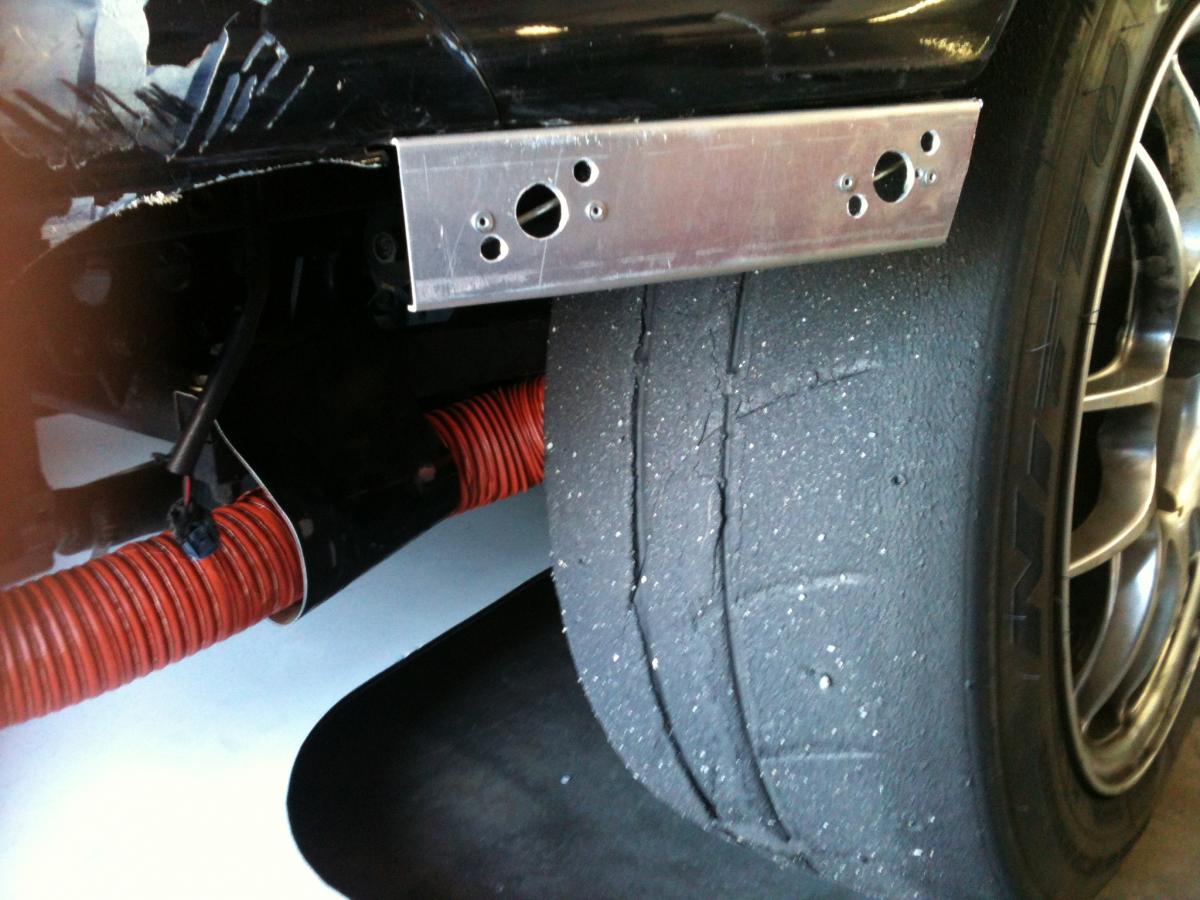
Fabricated aluminum dzus panel attached to front fenders serve as attachment points for the air dam. Not shown are the aluminum support arms, similar to the stock steel rods, which brace these brackets to the frame and push the fender out a bit, providing more coverage to the front of the tires:
PVC air dam. Seems to be a good mix of flexibility and rigidity. Lays flat and curls up easy, does not fold under air pressure. Top of air dam is attached to the front bumper. Middle, center of air dam is attached to the combination flange (grill/brake ducts), bottom of air dam is attached to splitter. The height/ground clearance of the splitter can be changed by using air dams of different lengths. The longer the air dam, the lower the splitter: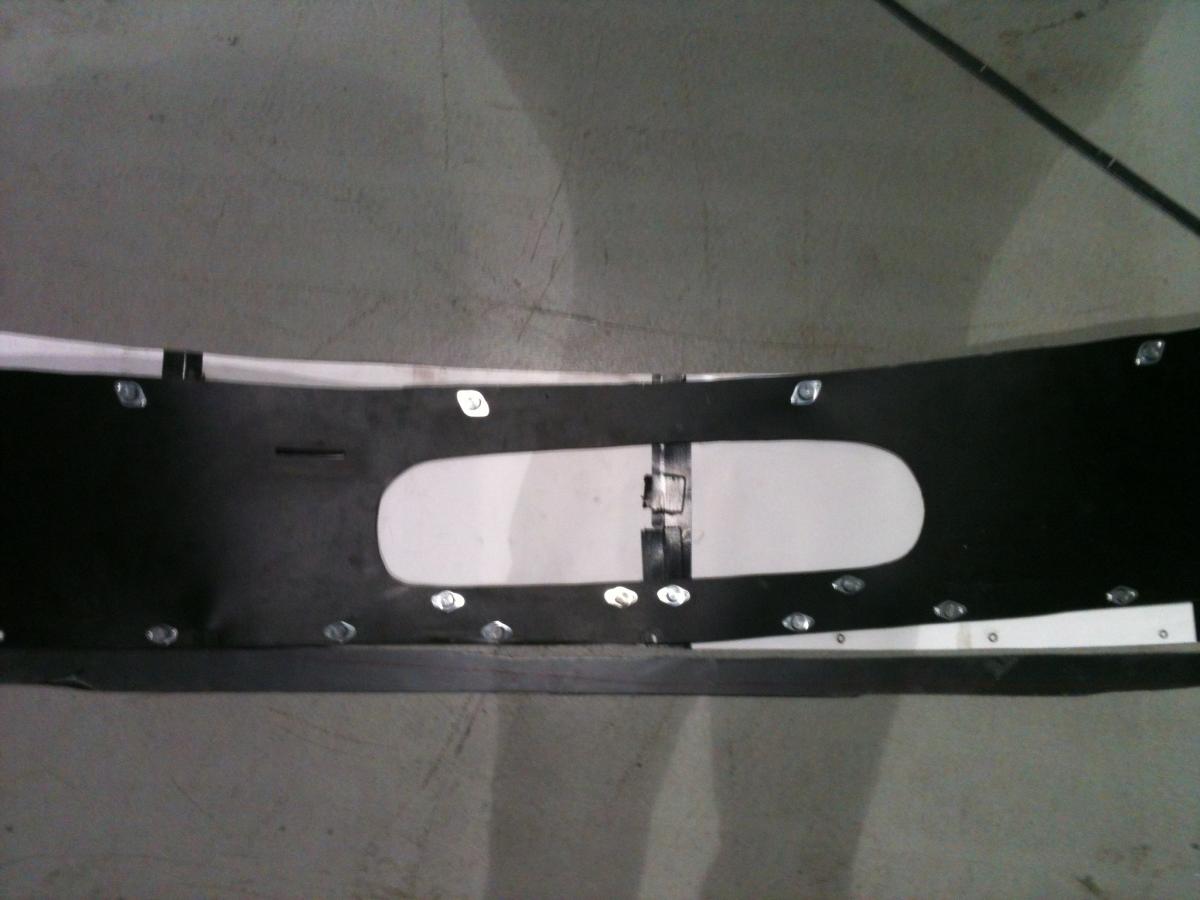
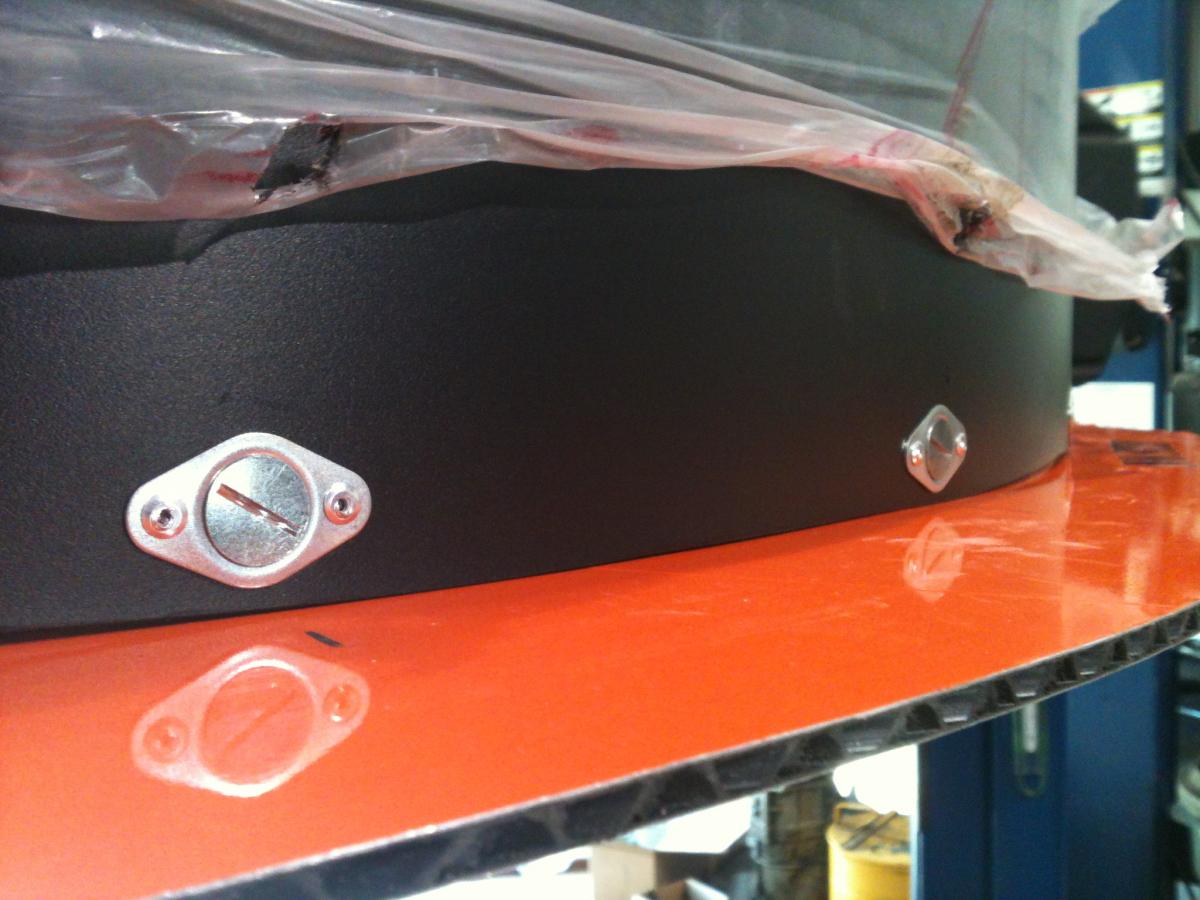
Close-up of dzus fastner holding bottom of air dam to the splitter:
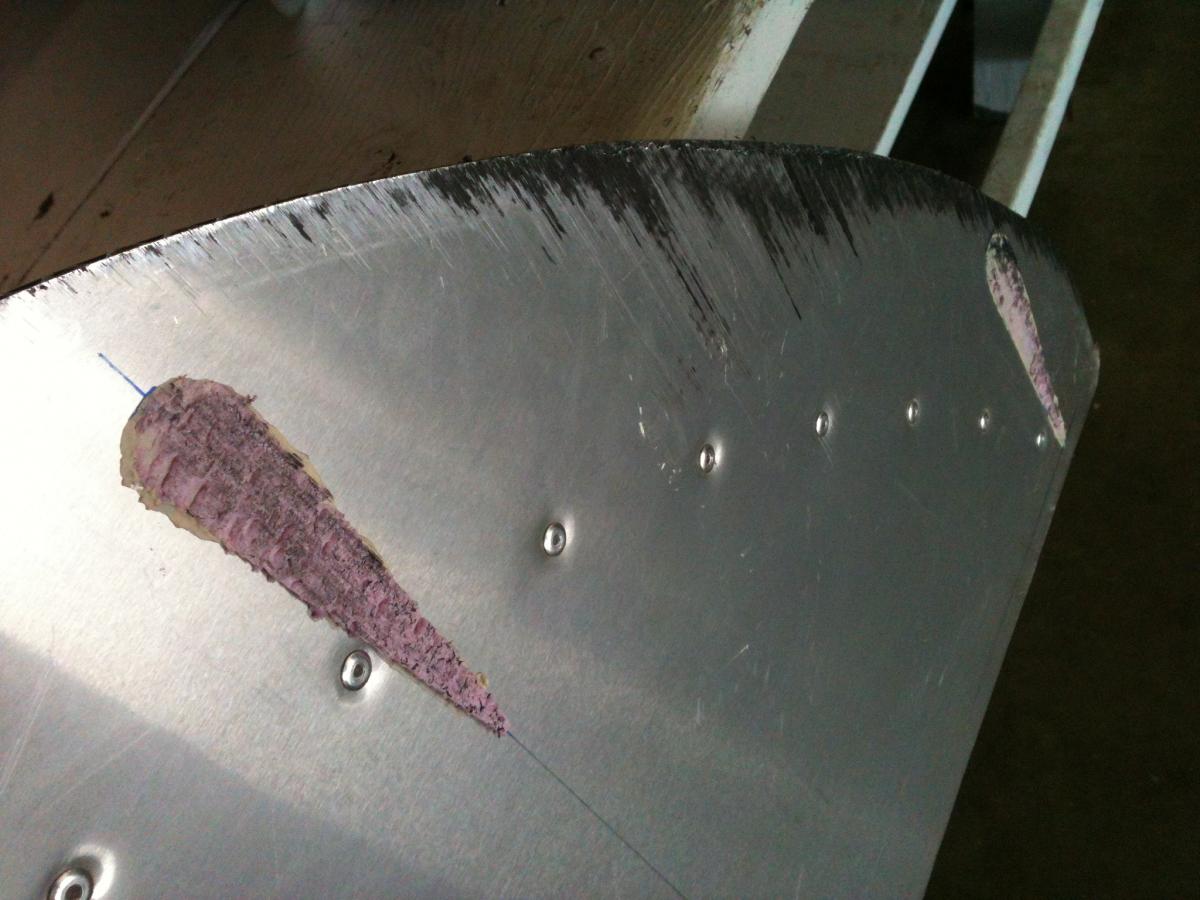
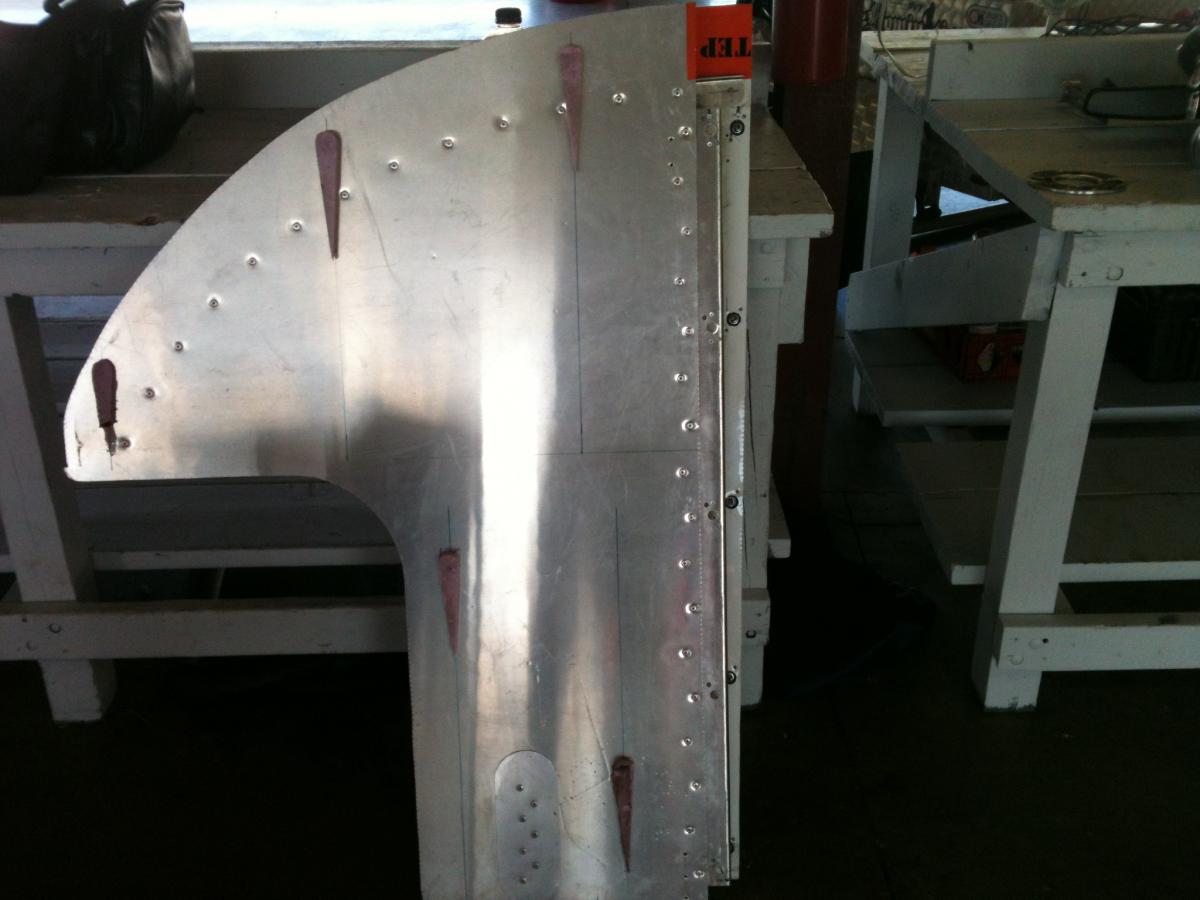
Ground clearance testing. 1" thick strips of pink insulation glued in place. The idea is to test and see how close the splitter is getting to the ground. Can we go lower?: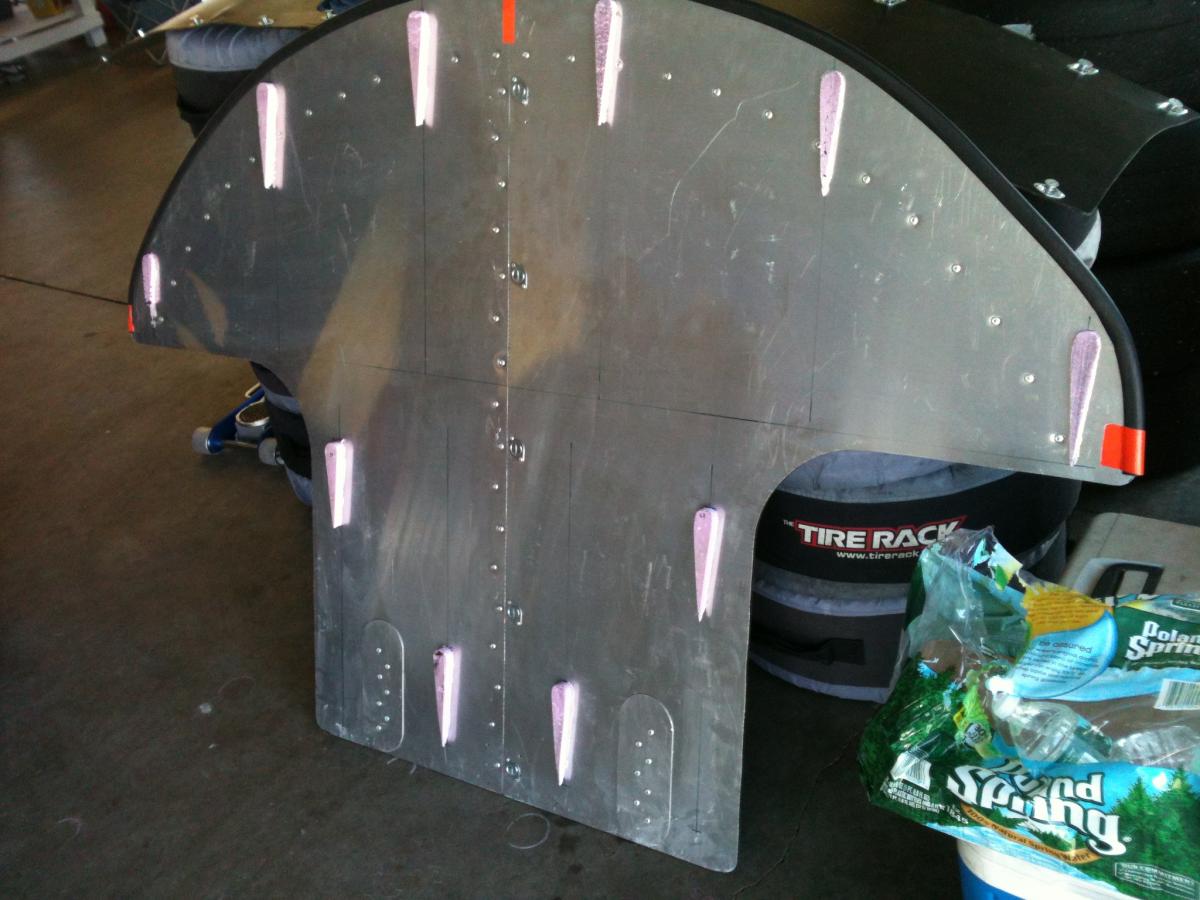
No! The strips of insulation worked great. You can see where some were planed down quite a bit while others were completely untouched:
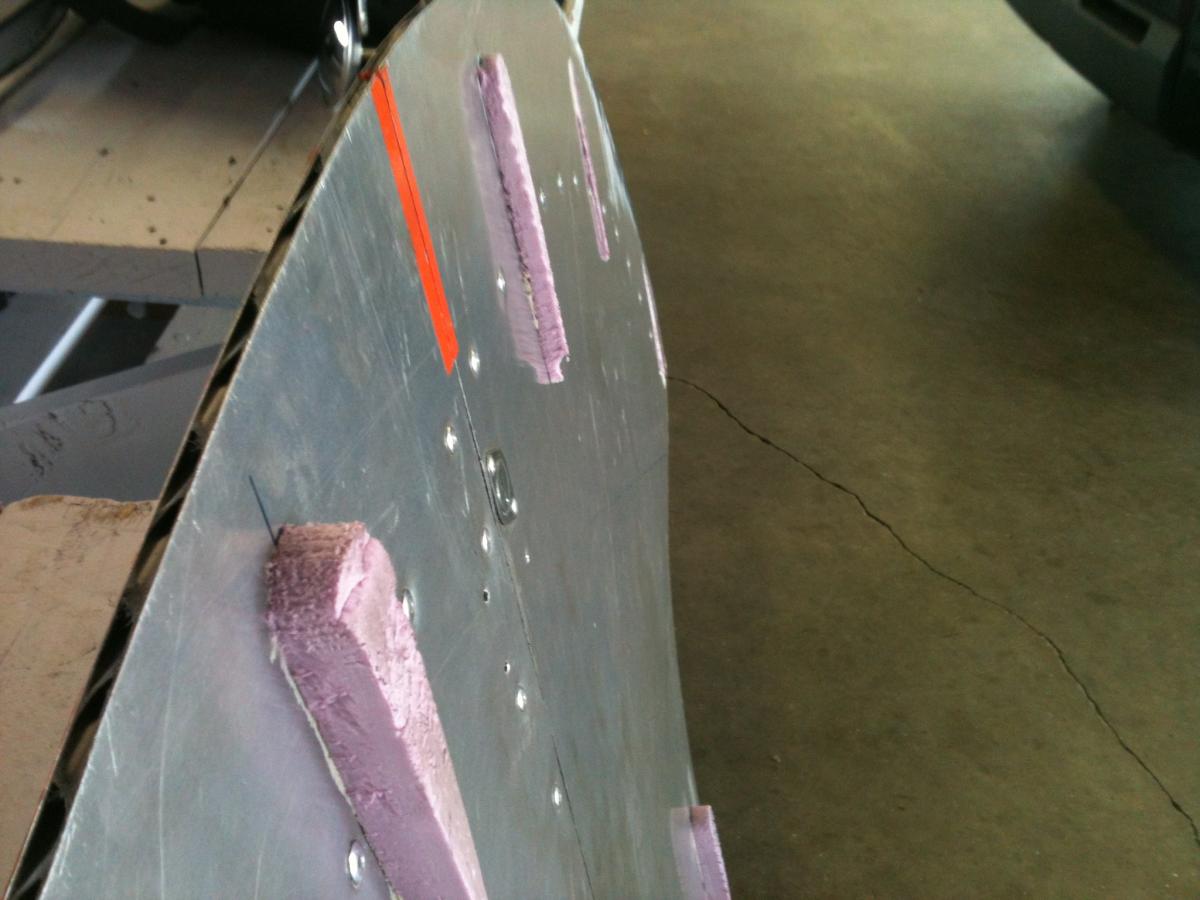
This end got the worst of it. At this particular track (NHMS), there are two right-hand turns with massive transitions. The front-left hand side of the car is under heavy load here, and scrapes. The black marks are track rubber. The alumalite itself is lightly scuffed but otherwise undamaged:
A reinforcement panel and 5 dzus fastners hold the two symmetrical splitter halves together solidly, and allow for easy break-down and transportation:
All-in-all I'm very happy with the way things have come together. The combination of parts seems to work well and is by far the easiest front aero to install, remove, and transport.
Assembled and on the car, the parts are sturdy enough to hold up to track abuse without caving in or coming off. The air dam has some flex which should help absorb small impacts, but still does not deform at high speeds.
Next step is to work on radiator / engine bay ducting/cooling. The cardboard ducting I made a the last track event seemed to work well, and should be a good template/starting point.
- Will
Also some ground clearance test results.
The car:
The combination front grill/air dam flange/brake ducts:
Under side of splitter
Close-up of underside showing splitter seam, dzus fastner, pop rivets:
Splitter hook/hanger, on upper side (engine side) of splitter, at the tail-end of the splitter:
Chassis pins, welded in place, just behind engine mounts on sub frame. The splitter hooks hang from these pins:
Splitter hooks slipped over chassis pins. In a sharp front impact, the back end of the splitter should slip right off of the hooks (in theory!)
Flat-bottom of splitter as viewed from the rear with the splitter hooks attached to the chassis pins:
Fabricated aluminum dzus panel attached to front fenders serve as attachment points for the air dam. Not shown are the aluminum support arms, similar to the stock steel rods, which brace these brackets to the frame and push the fender out a bit, providing more coverage to the front of the tires:
PVC air dam. Seems to be a good mix of flexibility and rigidity. Lays flat and curls up easy, does not fold under air pressure. Top of air dam is attached to the front bumper. Middle, center of air dam is attached to the combination flange (grill/brake ducts), bottom of air dam is attached to splitter. The height/ground clearance of the splitter can be changed by using air dams of different lengths. The longer the air dam, the lower the splitter:
Close-up of dzus fastner holding bottom of air dam to the splitter:
Ground clearance testing. 1" thick strips of pink insulation glued in place. The idea is to test and see how close the splitter is getting to the ground. Can we go lower?:
No! The strips of insulation worked great. You can see where some were planed down quite a bit while others were completely untouched:
This end got the worst of it. At this particular track (NHMS), there are two right-hand turns with massive transitions. The front-left hand side of the car is under heavy load here, and scrapes. The black marks are track rubber. The alumalite itself is lightly scuffed but otherwise undamaged:
A reinforcement panel and 5 dzus fastners hold the two symmetrical splitter halves together solidly, and allow for easy break-down and transportation:
All-in-all I'm very happy with the way things have come together. The combination of parts seems to work well and is by far the easiest front aero to install, remove, and transport.
Assembled and on the car, the parts are sturdy enough to hold up to track abuse without caving in or coming off. The air dam has some flex which should help absorb small impacts, but still does not deform at high speeds.
Next step is to work on radiator / engine bay ducting/cooling. The cardboard ducting I made a the last track event seemed to work well, and should be a good template/starting point.
- Will
Reply
8
8

Junior Member
Joined: Jun 2011
Posts: 409
Total Cats: 20
From: Houston
Fabricated aluminum dzus panel attached to front fenders serve as attachment points for the air dam. Not shown are the aluminum support arms, similar to the stock steel rods, which brace these brackets to the frame and push the fender out a bit, providing more coverage to the front of the tires:
Thanks for the pics of the rear mounts, that makes a lot of sense.
Two more questions for you if you dont mind: 1. Where is your oil cooler and how do you have it ducted? 2. Whats the NACA duct on the passenger side of the hood for?
Reply
1
1

Junior Member
Joined: Sep 2010
Posts: 80
Total Cats: 1
From: Denmark
What an amazing thread 
I don't see a lot of diffusers and also no "splitter style" side skirts (I really have no idea what they are called). Looking at the miata, I would think that that curved bottom of the sides would suck in quite a bit of air, especially with the lower undercar pressure from a splitter.
Not worth it?
I don't see a lot of diffusers and also no "splitter style" side skirts (I really have no idea what they are called). Looking at the miata, I would think that that curved bottom of the sides would suck in quite a bit of air, especially with the lower undercar pressure from a splitter.
Not worth it?
Reply
0
0

If I'm in a class that allows side aero I would run the thick brush stuff popular with 70-80's F1. More reliable than the slider plates, and you know, actually does something. Diffusers, who's in a class they're actually legal?
Reply
0
0
Junior Member
Joined: Jun 2011
Posts: 409
Total Cats: 20
From: Houston
Diffusers in SSM are sort of grey area. Bumper modification is legal, but under car aero isn't... and TBH I don't think a diffuser is really worth the effort or the stretching of the rules without a flat bottom anyways.
EDIT: This looks like it might work: http://precisionbrush.com/aircraft-h...or-brush-seals
Reply
0
0
I didnt think side aero was legal in SM since its kind of pointless without at least a flat floor. I forget where to get the thick brush stuff. I'll have to ask Bill where he gets the stuff for the A-mods this sunday. But yeah, diffusers in SM are kind of gray, I never wanted to push the issue when I was in sm before But we might have to put it up to the SEB at some point, or just plead for them to open up under car aero.
Reply
0
0
Junior Member
Joined: Jun 2011
Posts: 409
Total Cats: 20
From: Houston
Yea, I'm not sure how I feel about under car aero. The class is already a god damned arms race, so you might as well open up aero too... but on the other hand I'd really rather not do it (and have to deal with the additional cooling problems it would cause) so I don't mind it being illegal :P
Reply
0
0
Yup its an arms race for sure. You have to look at it this way. There is no car built to the limit of the rules in SM, any car. Because no one is running carbon fiber control arms and billet aluminum hubs and uprights. But that really goes beyond the purpose of the class. It has street in the name, which means you should be able to drive the car to the event, swap tires and drive.
Reply
0
0
Junior Member
Joined: Jun 2011
Posts: 409
Total Cats: 20
From: Houston
Exactly. All of us around here have no delusions about it. We are only competitive because we all have somewhat similar budgets and aren't that interested in out spending one another... but if some jackass decides to show up in a ZR1 tomorrow, we'd all be screwed.
Most of the records where set by a guy with huge ***** in a busted *** C4 that he later sold for less than a good set of tires, lol
Most of the records where set by a guy with huge ***** in a busted *** C4 that he later sold for less than a good set of tires, lol
Reply
0
0
Lets bring this back up. For some reason I thought it was a sticky.
Aero is happening here. Plywood splitter, going with 1/4" pine, extending 6 inches forward of the bumper and no wider than the bumper. Ok maybe 5.5 inches forward, dont want to be like dave. Air dam mounted in the same place as this car's sister CSP car, using the air dam as tire blockers as well. And in the back going with a custom made dual element wing. I'm going to make it by using the laser cutter to cut wing sections out of home insulation foam and run aluminum tubes through it for strength and alignment then throw a layer or two of glass over it, then gelcoat for smoothness. Its going to be either swan neck or end plate mounted because and surface disturbance on the bottom of a low speed wing just kills its ability to make downforce. My wing limit is 8 sqft measured by chord length, camber does not matter, and I'm limited to 2 elements. I can also use 15% of the wing area as canards and I plan to do so but they wont be done for iteration 1. We've also decided that since the sister car is 10AE blue with red that this car is going to be red with blue, mostly for the lols.
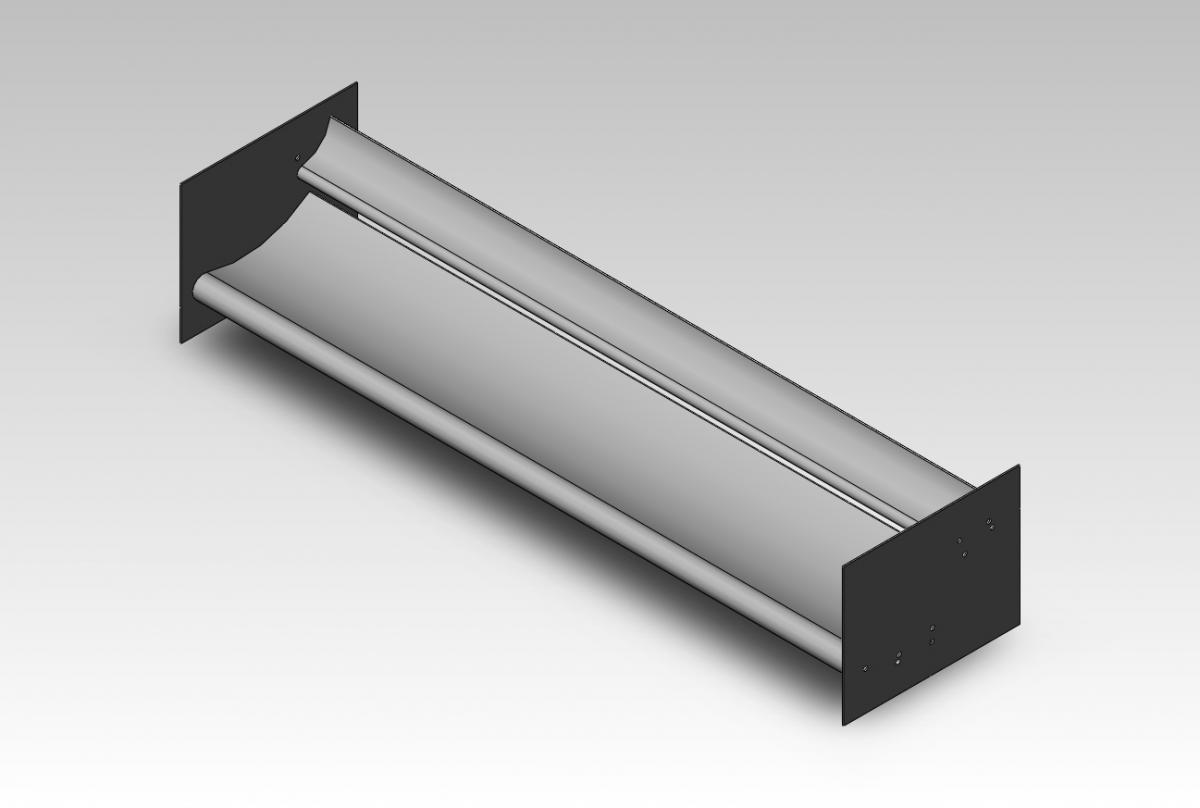
Here's the model of the wing. The best I could get in the simulation was 160 pounds at 60mph with 40 pounds of drag. 4:1 is better than I need I would have gladly made 200 lb of downforce and 100 lb of drag, but I just couldnt get any more downforce from it. As a bonus in low downforce settings it only makes 13 pounds of drag at 80 mph while still making 113 pounds of downforce, I feel that downforce number is a tad optimistic. The crux of the whole thing is going to be mounting it, swan neck is easy if you dont want to adjust the main plane angle. Endplate mount is easy to adjust the angle but putting a 60" wide wing on a miata with endplate mounts at SSM legal height means endplate mounts would only be 7 inches long but have to go outward 7.5 inches, and that would put an insane moment on the mounts to the chassis and likely just rip the mounts out of the chassis from the downforce. Anyways heres the wing, I need to get back to work.
Aero is happening here. Plywood splitter, going with 1/4" pine, extending 6 inches forward of the bumper and no wider than the bumper. Ok maybe 5.5 inches forward, dont want to be like dave. Air dam mounted in the same place as this car's sister CSP car, using the air dam as tire blockers as well. And in the back going with a custom made dual element wing. I'm going to make it by using the laser cutter to cut wing sections out of home insulation foam and run aluminum tubes through it for strength and alignment then throw a layer or two of glass over it, then gelcoat for smoothness. Its going to be either swan neck or end plate mounted because and surface disturbance on the bottom of a low speed wing just kills its ability to make downforce. My wing limit is 8 sqft measured by chord length, camber does not matter, and I'm limited to 2 elements. I can also use 15% of the wing area as canards and I plan to do so but they wont be done for iteration 1. We've also decided that since the sister car is 10AE blue with red that this car is going to be red with blue, mostly for the lols.
Here's the model of the wing. The best I could get in the simulation was 160 pounds at 60mph with 40 pounds of drag. 4:1 is better than I need I would have gladly made 200 lb of downforce and 100 lb of drag, but I just couldnt get any more downforce from it. As a bonus in low downforce settings it only makes 13 pounds of drag at 80 mph while still making 113 pounds of downforce, I feel that downforce number is a tad optimistic. The crux of the whole thing is going to be mounting it, swan neck is easy if you dont want to adjust the main plane angle. Endplate mount is easy to adjust the angle but putting a 60" wide wing on a miata with endplate mounts at SSM legal height means endplate mounts would only be 7 inches long but have to go outward 7.5 inches, and that would put an insane moment on the mounts to the chassis and likely just rip the mounts out of the chassis from the downforce. Anyways heres the wing, I need to get back to work.
Reply
0
0

COSMOS. And I would not bet on them being 100%. I can change only a couple parameters and get downforce numbers anywhere between 47 and 300 with that same profile. Though my goals and conditions for this most mimic life, IMO, so it should be close.
Reply
0
0

Senior Member

Joined: Aug 2010
Posts: 613
Total Cats: 3
From: Maumelle, AR
Do you have a profile picture or files you could post? I need to cut me a foam core wing too, got all the stuff but stopped with the ebay wing.... need to get some foam and start cutting.
Reply
0
0
I can. But not right now. I kind am running 3 different versions of solid works. 2010 at work, 2011 at home and 2012 at school. File is currently saved in 2011 and I'm currently at work. So yeah.
Reply
0
0

Senior Member
Joined: Aug 2009
Posts: 515
Total Cats: 93
From: melbourne aus
I made one similiar, but 3 elements. Here is a wooltuft test. It works better than i could have guessed. Lots of understeer, even from under 50mph. I am making a new front diffuser/splitter to try get some steering back.


Reply
0
0

this is my creation

foam core, swan neck mounting, 56" width, 11" cord, carbon end plates. im going to smooth it and add min 2 layers of carbon fibre and vac bag it this winter.
foam core, swan neck mounting, 56" width, 11" cord, carbon end plates. im going to smooth it and add min 2 layers of carbon fibre and vac bag it this winter.
Reply
0
0

What's your plan for keeping the resin from melting the foam?
Reply
0
0


