

Post your DIY aero pics


Senior Member
Joined: Dec 2012
Posts: 624
Total Cats: 81
From: Charlotte, NC
Sweet, thanks. I went from a stock front bumper to this, and it's just disconcerting seeing something so "small" in comparison to the much broader looking front end, even though I know it should be fine.
Reply
 0
0

0


Indeed. I went back a little ways and cleaned up the thread. Keep it on topic please. Feel free to report the off topic crap when you see it, one of us will clean it up. Carry on fellas.
Reply
0
0

+1 on the small inlet size. It does not take as much as you think. Mine is no larger than stock despite the LS1.
Last edited by ZX-Tex; Jan 13, 2013 at 11:50 AM.
Reply
0
0

Senior Member
Joined: Oct 2011
Posts: 646
Total Cats: 62
From: The Race Track & St Pete FL
Reply
0
0


Reply
0
0
Senior Member
Joined: Oct 2011
Posts: 646
Total Cats: 62
From: The Race Track & St Pete FL
Reply
0
0
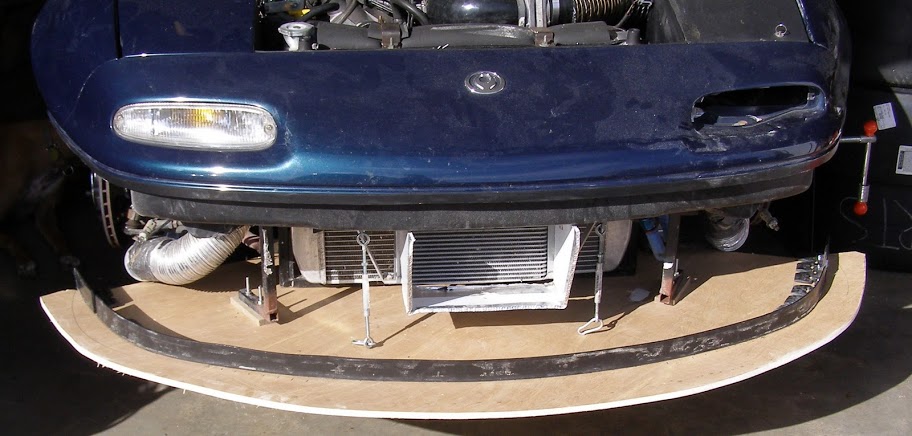
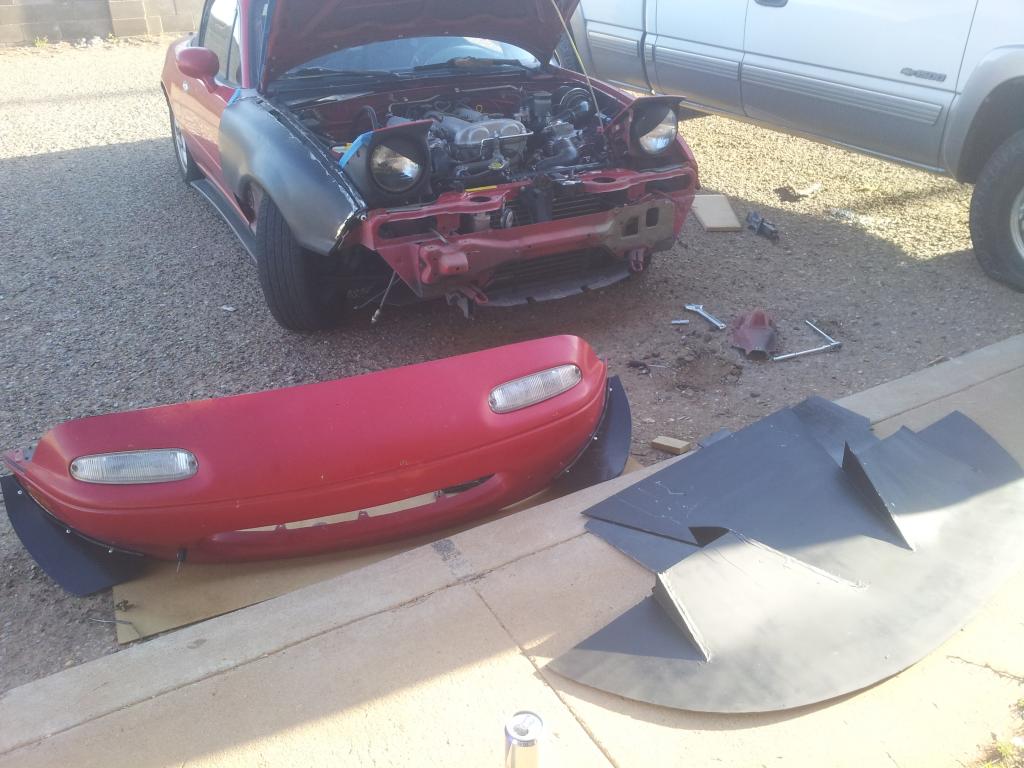
I did things very similar to many on this thread. Here is the splitter and air dam rough cut:
I ran a few pieces of 1/2" x 5/16th aluminum bar stock behind the bumper right behind the belt line indent and banged it into the shape of the bumper nose. I secured them through the front with countersunk 1/4-20 machine screws. Once this structure was behind the bumper skin, I was able to drill and tap through the air dam to mount it on the nose and have enough structure that I can take the air dam off as needed.
The air dam is attached to the splitter with 1" aluminum angle (1/4" stock) cut into 1" squares. These are also drilled and tapped with the same 1/4 - 20 stainless button head screws as the top of the air dam is mounted with.
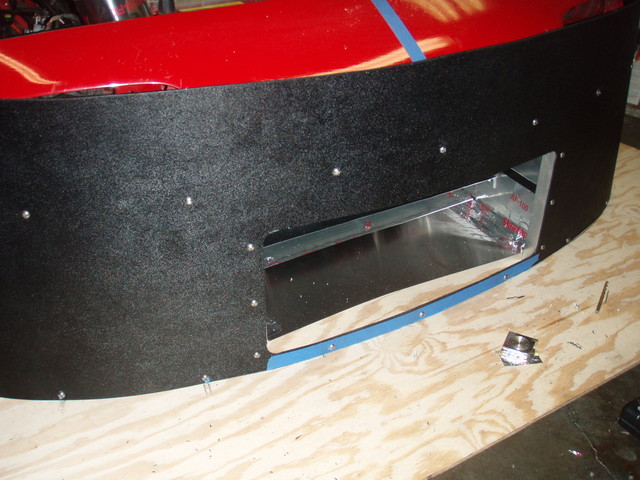
I ducted the heat exchangers in such a way as the splitter, air dam and bumper cover can be removed easily without disturbing the ducting. The leading edge of the box is just taped on 4 sides but otherwise share no structure with the aero work.
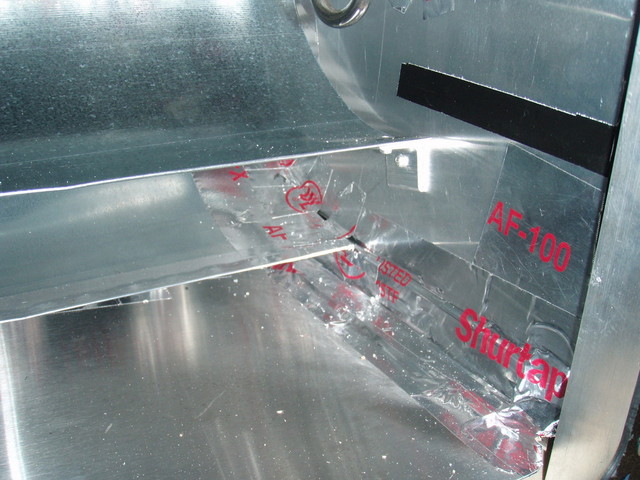
There are 3 sections to the ducting so each area gets a portion of the clean air. The lower most part is the oil cooler and brake ducts. The middle section goes directly to the intercooler (sealed 360*). The upper scoop goes directly to the radiator. The 'exhaust' of the intercooler runs into the radiator but the whole things seems pretty effective.
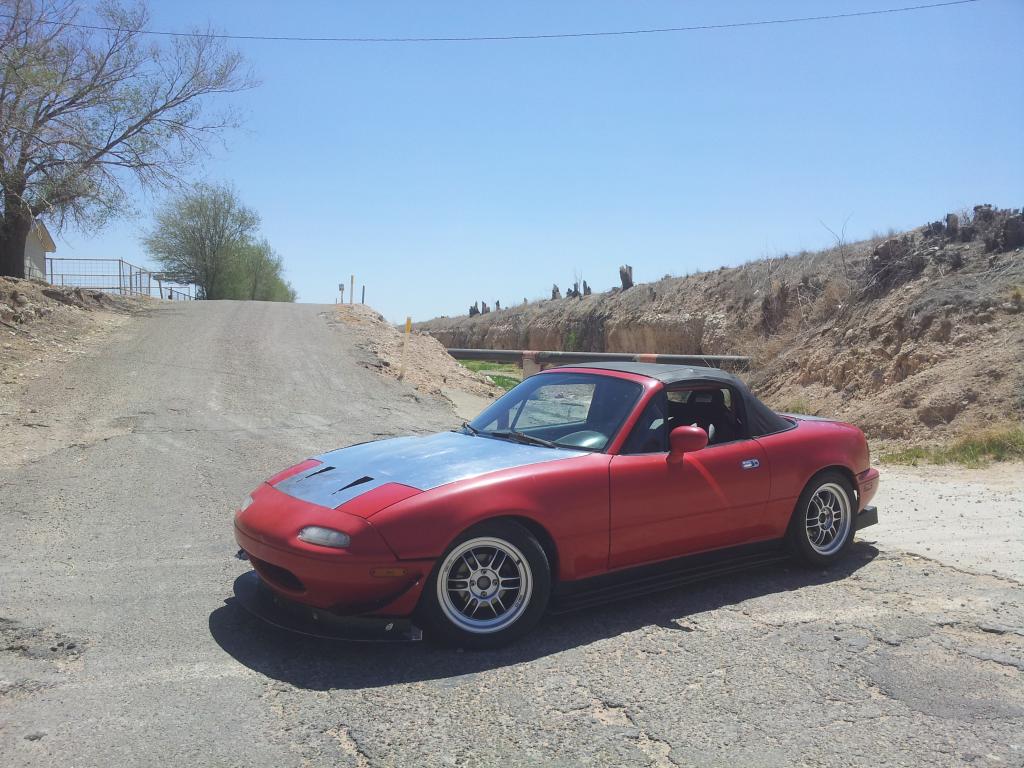
I chopped up the OEM hood with a mini scoop and some aluminum louvers to extract extra air. The performance on track when combined with the COT wing dropped 6.5 seconds off my best time from last year on a ~2 minute track. I also got a new tune which added some WHP but overall the aero was a HUGE gain. The setup is pretty balanced but I'm looking forward to more seat time to really see how things shape up.
I ran a few pieces of 1/2" x 5/16th aluminum bar stock behind the bumper right behind the belt line indent and banged it into the shape of the bumper nose. I secured them through the front with countersunk 1/4-20 machine screws. Once this structure was behind the bumper skin, I was able to drill and tap through the air dam to mount it on the nose and have enough structure that I can take the air dam off as needed.
The air dam is attached to the splitter with 1" aluminum angle (1/4" stock) cut into 1" squares. These are also drilled and tapped with the same 1/4 - 20 stainless button head screws as the top of the air dam is mounted with.
I ducted the heat exchangers in such a way as the splitter, air dam and bumper cover can be removed easily without disturbing the ducting. The leading edge of the box is just taped on 4 sides but otherwise share no structure with the aero work.
There are 3 sections to the ducting so each area gets a portion of the clean air. The lower most part is the oil cooler and brake ducts. The middle section goes directly to the intercooler (sealed 360*). The upper scoop goes directly to the radiator. The 'exhaust' of the intercooler runs into the radiator but the whole things seems pretty effective.
I chopped up the OEM hood with a mini scoop and some aluminum louvers to extract extra air. The performance on track when combined with the COT wing dropped 6.5 seconds off my best time from last year on a ~2 minute track. I also got a new tune which added some WHP but overall the aero was a HUGE gain. The setup is pretty balanced but I'm looking forward to more seat time to really see how things shape up.
Reply
0
0
Senior Member
Joined: Dec 2012
Posts: 624
Total Cats: 81
From: Charlotte, NC
Head to the garden center. It's a type of edging that is used to hold garden/pathway stones in place. It will be near the coiled stuff, but comes in 6 foot lengths.
Reply
0
0
Senior Member
Joined: Oct 2011
Posts: 646
Total Cats: 62
From: The Race Track & St Pete FL
Reply
0
0
Senior Member
Joined: Dec 2012
Posts: 624
Total Cats: 81
From: Charlotte, NC
Not sure if Lowes does, but Home Depot does. Here it is:
Valley View Industries Diamond-Lok 2-1/2 in. x 6 ft. Plastic Paver Edging-DLLF6-50 at The Home Depot
Valley View Industries Diamond-Lok 2-1/2 in. x 6 ft. Plastic Paver Edging-DLLF6-50 at The Home Depot
Reply
0
0

Is that the consensus? I have been thinking it would be prudent to design more 'breakaway' characteristics into the design. Currently, the air dam provides some vertical support to the splitter.
Reply
0
0
Senior Member
Joined: Dec 2012
Posts: 624
Total Cats: 81
From: Charlotte, NC
I have my dam connected to the radiator inlet duct with 4 dzus fasteners, but no dzus fasteners to the lip on the splitter. I didn't see any advantage to doing so, the ABS is stiff enough that it can't get pushed back at all.
In regards to the breakaway characteristics, I run a COT splitter, not a full undertray right now, and used a combination of cable mounts with some stitch welded 4130 stanchions. If I ever really hit the sucker hard, the cable mounts will probably keep it from flying under the car, but the stanchions will shear without doing any major front end damage. Using the front cable mounts also allows the splitter to flex upwards a little bit if it gets hung up on a trailer ramp, etc.
In regards to the breakaway characteristics, I run a COT splitter, not a full undertray right now, and used a combination of cable mounts with some stitch welded 4130 stanchions. If I ever really hit the sucker hard, the cable mounts will probably keep it from flying under the car, but the stanchions will shear without doing any major front end damage. Using the front cable mounts also allows the splitter to flex upwards a little bit if it gets hung up on a trailer ramp, etc.
Reply
0
0
I'm not worried about contact like in your picture. I'm worried about hitting the sand and having the nose of the car act like a giant snow shovel. I will give some more attention to the design characteristics needed to allow a clean breakaway.
Reply
0
0

Random google search found this: Plastic Nuts & Bolts.com I'd like to find something more official but it's a good start.
Reply
0
0

Junior Member
Joined: Jun 2011
Posts: 409
Total Cats: 20
From: Houston
Ive got my splitter mounted to my air dam, but the 1/4" abs is plenty flexible to allow the air dam to "crunch up" in a situation like BlackBird's. I had to have it loaded on a flatbed after an off-track excursion and it collapsed surprisingly far (it seemed like over a foot at the time, but who knows) without any permanent damage.
But the fear of shoveling is a whole other matter... that could be a problem, and some sort of breakaway is probably the best solution.
But the fear of shoveling is a whole other matter... that could be a problem, and some sort of breakaway is probably the best solution.
Reply
0
0

Senior Member
Joined: Oct 2011
Posts: 842
Total Cats: 415
From: Northridge, CA
The problem with having the splitter break away is that in too many occasions it breaks away at the wrong moment and the results can be quite dramatic.
A few months ago a car lost a splitter on track @ WSIR, causing it to go off track and wreck real bad, both driver and passenger were injured.
I fear that the potential for a momentary loss of steering can result in a major crash, and have no intention checking how it feels while going 130 around the banking @ ACS or T8 @ WSIR...
Moti
Reply
0
0
Senior Member
Joined: Oct 2011
Posts: 646
Total Cats: 62
From: The Race Track & St Pete FL
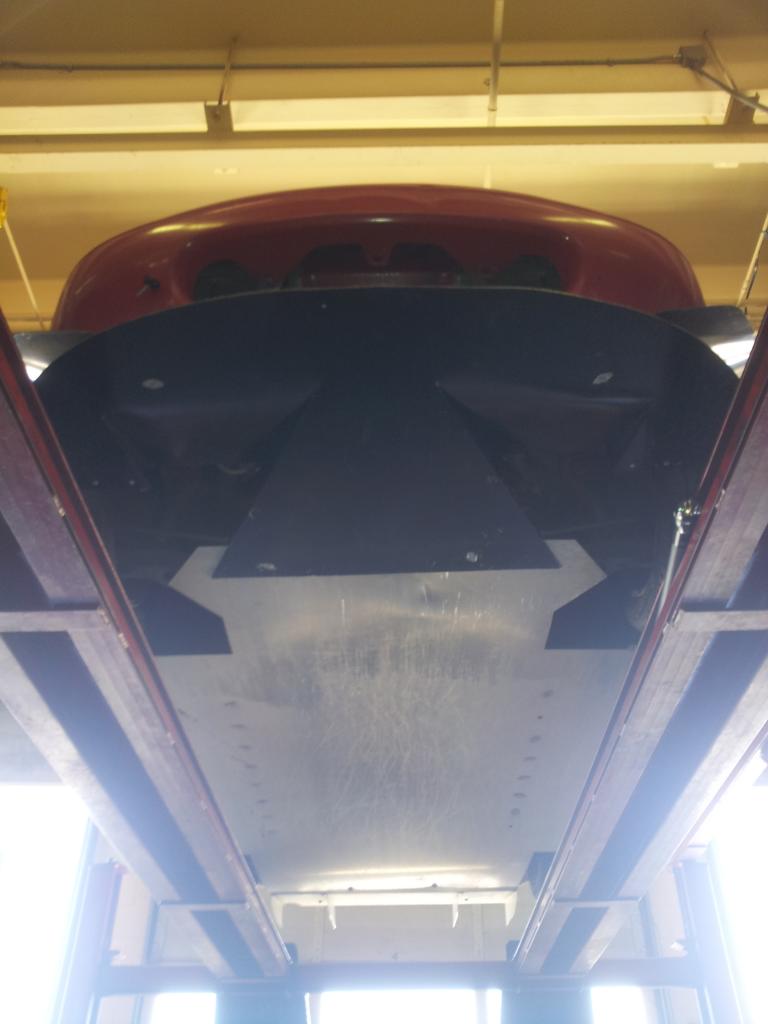
Dollars spent: $175
Hours spent: 10
How effective: 3 so much so I have insane oversteer
0=slower, 1, no improvement, 2 =slightly better,3= big improvement
Materials used: Harwood Dzus Fastners, Alupanel, 1" square tubing from Lowes Racing
Bracket location: Mounted to bumper mounts
Tracks tested on: Not Yet
Race/TT class built for:
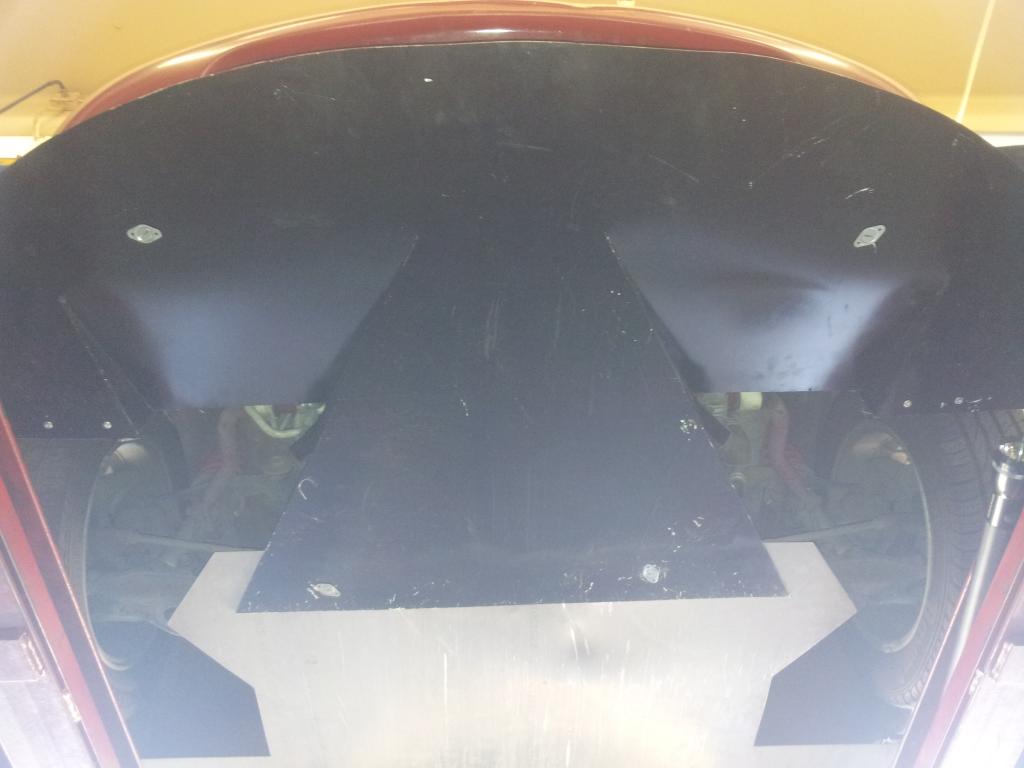
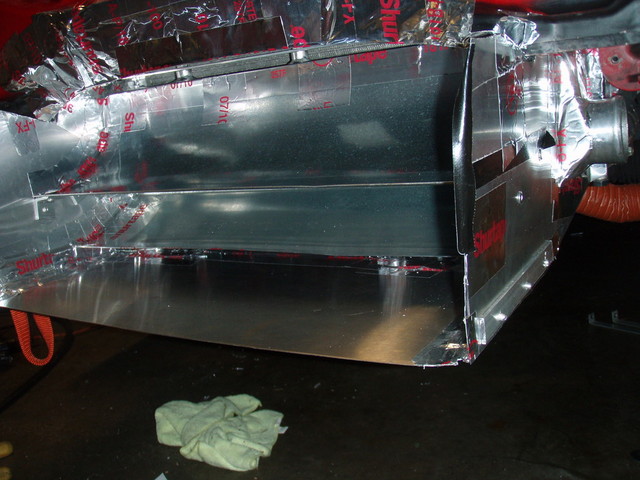
A pic of the under body, I making a NACA duct for cooling as I type (talented)

Reply
0
0


