
f20c engine conversion


Thanks for the props!
I looked at the autokonexion site, will most likely be ordering a carbon extractor hood from your shop.
Bumpers will be Racing Beat type II, and the flares will be from AWR. Here is a shot of the flares, they are blister fronts and bonded rears. I like the autokonexion fastback hard top, but I don't care for the bumpers or the fender flares. They are nice looking pieces, but just a touch to boy racer looking for my taste, no offense intended.
Here are a couple of pics of the flares I plan on using.
I know it has been discussed here before and most believe there is little merit in converting to a 5 lug pattern, but I think this may warrant a conversion. Ideas, opinions???
Reply
 0
0

0

dont know if you seen this thread or not! but it has tons of wheel and tire knowledge!
https://www.miataturbo.net/showthrea...=fender+flares
https://www.miataturbo.net/showthrea...=fender+flares
Reply
0
0
Fabbed up the inlet for the turbo last night. Will have it welded up and on the car Monday. Here are a few pics.
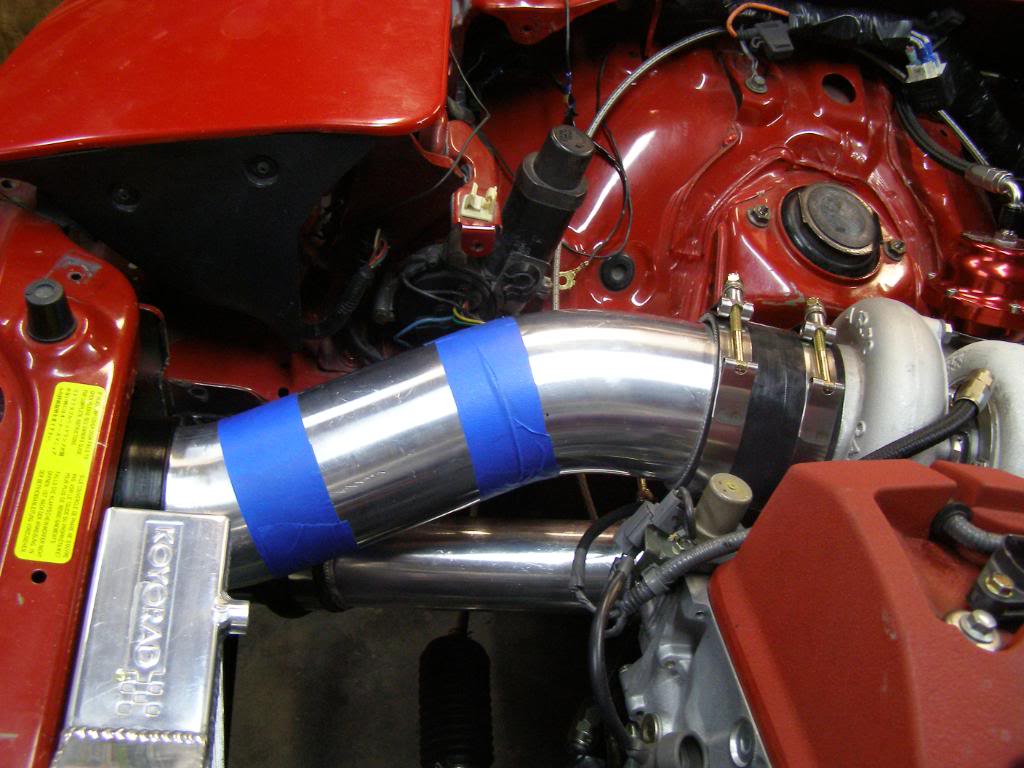
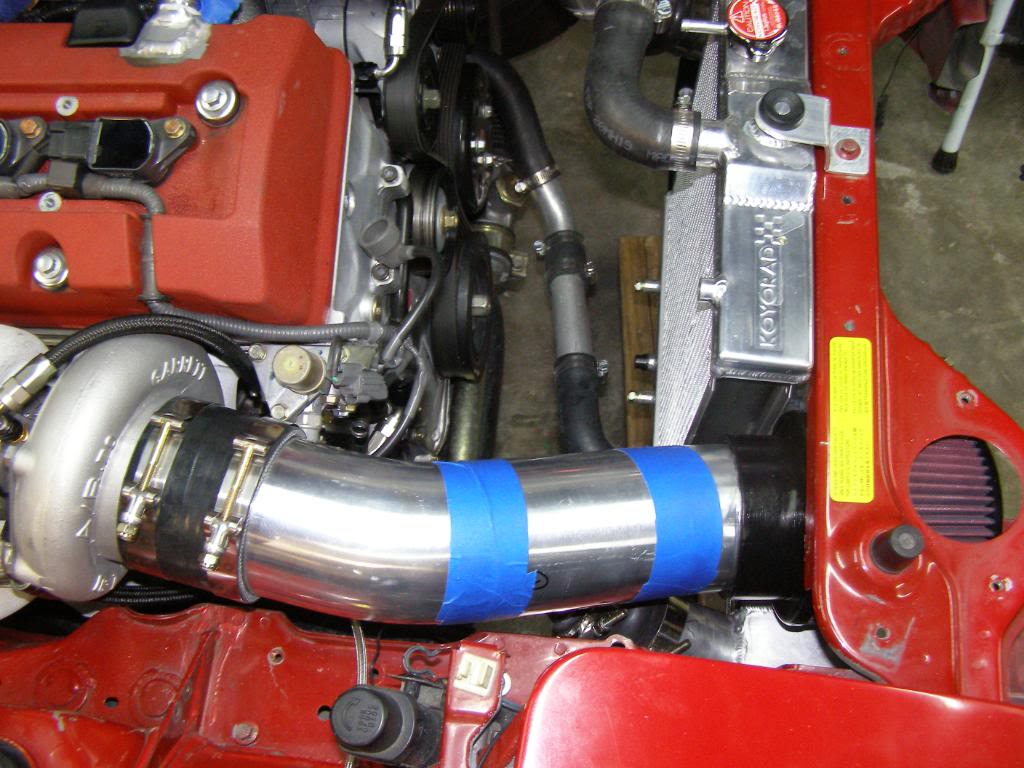
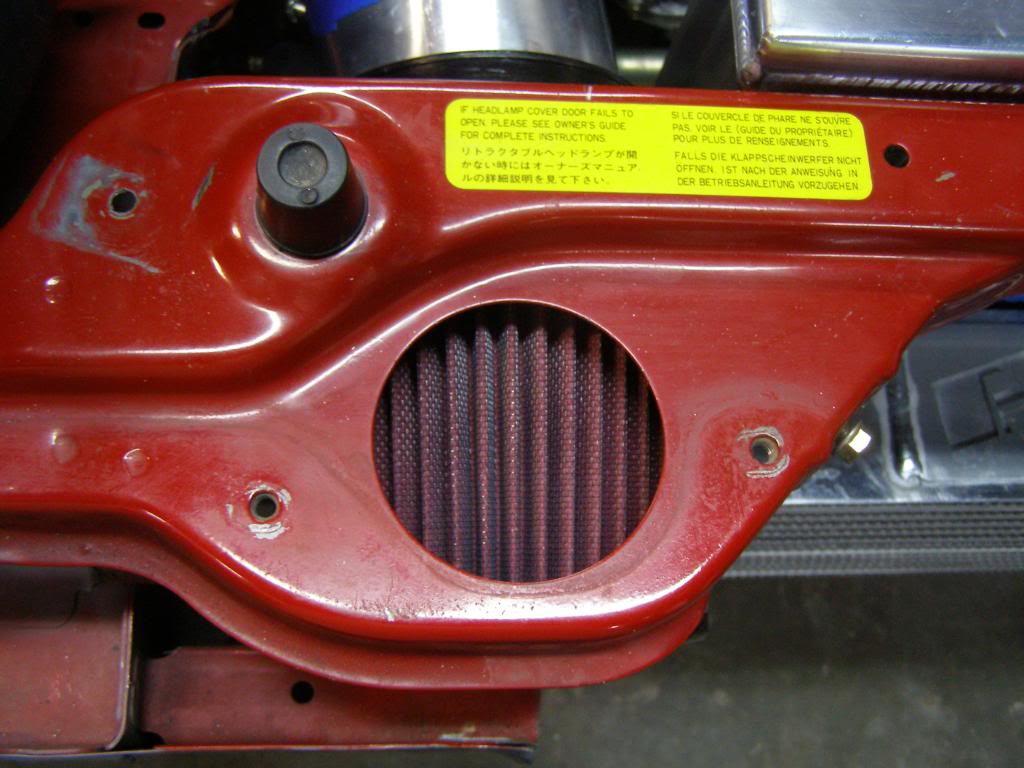
After the tune I will put the front bumper back on the car and figure out how to duct and shroud the filter.
After the tune I will put the front bumper back on the car and figure out how to duct and shroud the filter.
Reply
0
0

Okay guys, give me your opinions. The green car pictured here is on 285/40/18 in back and 245/40/18 in front. The wheels are one off custom pieces, needless to say, I don't have the kind of coin it takes to pop for 1/offs. I was thinking about running 275/40/17 and 245/40/17, I have been looking for decent 4x100 wheels, and haven't found anything, maybe I am looking in the wrong places. Any suggestions on where to look would be appreciated.
I know it has been discussed here before and most believe there is little merit in converting to a 5 lug pattern, but I think this may warrant a conversion. Ideas, opinions???
I know it has been discussed here before and most believe there is little merit in converting to a 5 lug pattern, but I think this may warrant a conversion. Ideas, opinions???
Reply
0
0

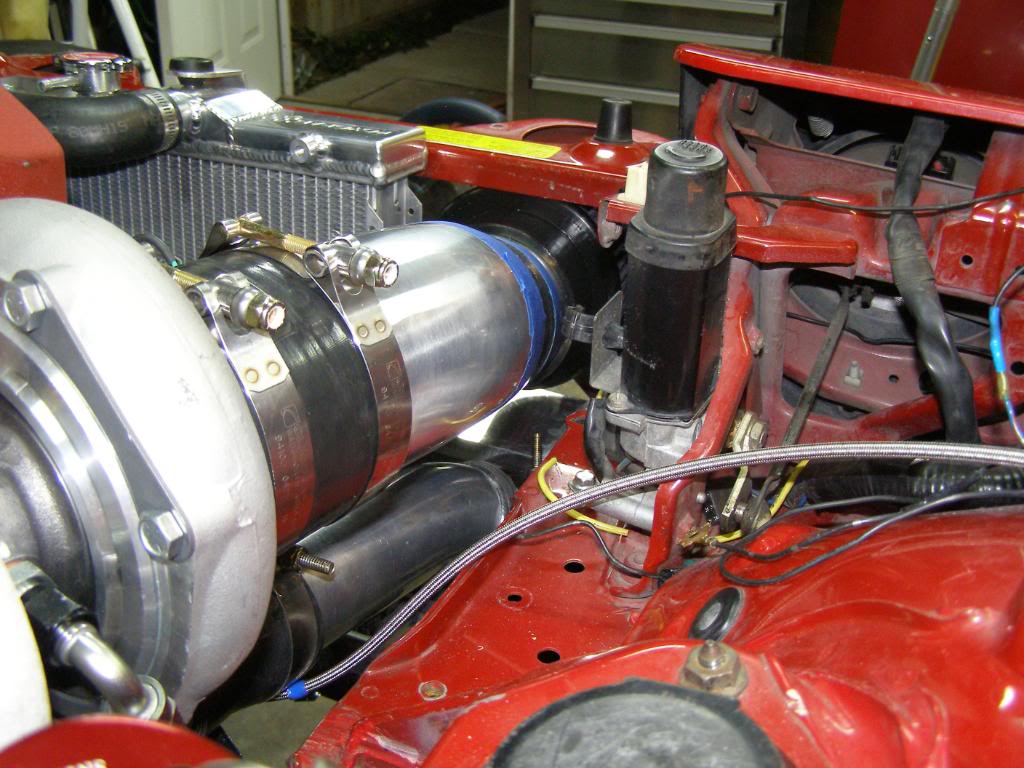
I thought about that but with 4" tubing, the radius is not tight enough to get the filter behind the headlight. Besides that currently is where the overflow reservoir lives, just don't have it installed yet. Im thinking that I will cut the bumper and place a mesh screen in the cutout, then box the area in. Just an idea at this point.
Reply
0
0
that little area you have behind the headlight motor, have a small aluminum box welded together to fit there and put a breather and a drain on it and voila, catch tank. Thats what im gonna have done
Reply
0
0

^^^^ Thank you
I have thought about AN lines for the radiator and may do so in the future. But for right now, they get the job done. -20 fittings are big big bucks as well, but they are on the wish list. I will be building a bracket that will hold the upper line off of the BOV.
I have thought about AN lines for the radiator and may do so in the future. But for right now, they get the job done. -20 fittings are big big bucks as well, but they are on the wish list. I will be building a bracket that will hold the upper line off of the BOV.
Reply
0
0
Dyno date is set, 1 week from today. My punch list is pretty short to get ready. I need to bolt on radiator fan, mount and plumb catch tank, mount overflow tank, install uego, and bolt on the front tie downs, other than that I think I am good to go.
Reply
0
0

Thanks for the well wishes guys!!
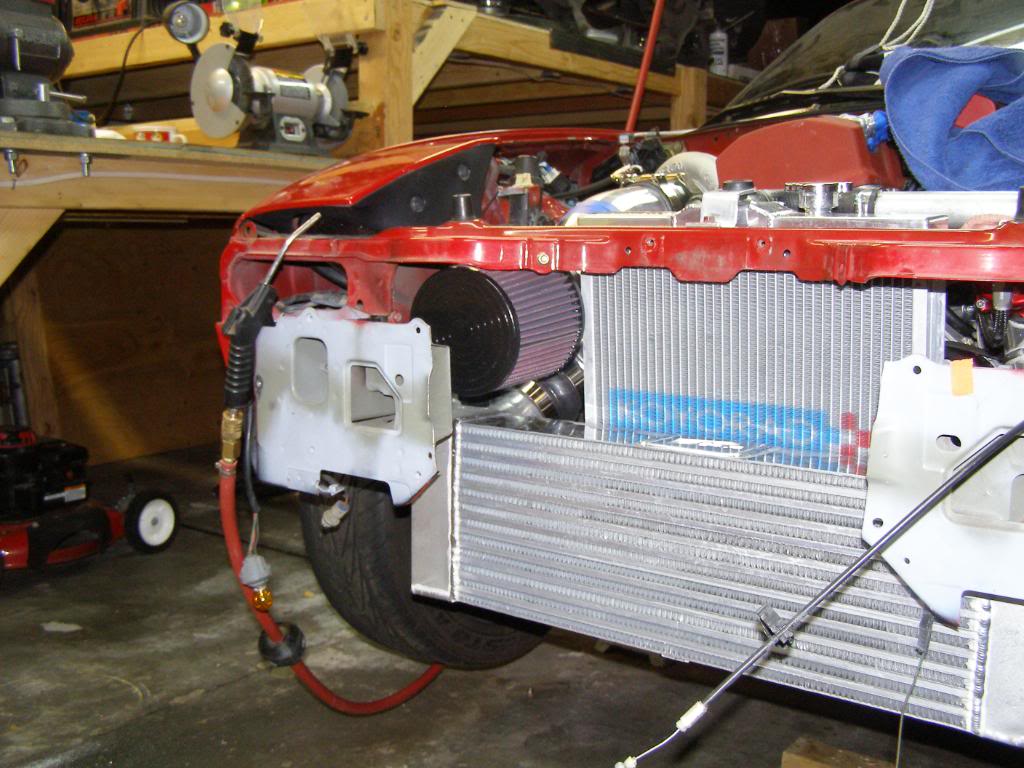
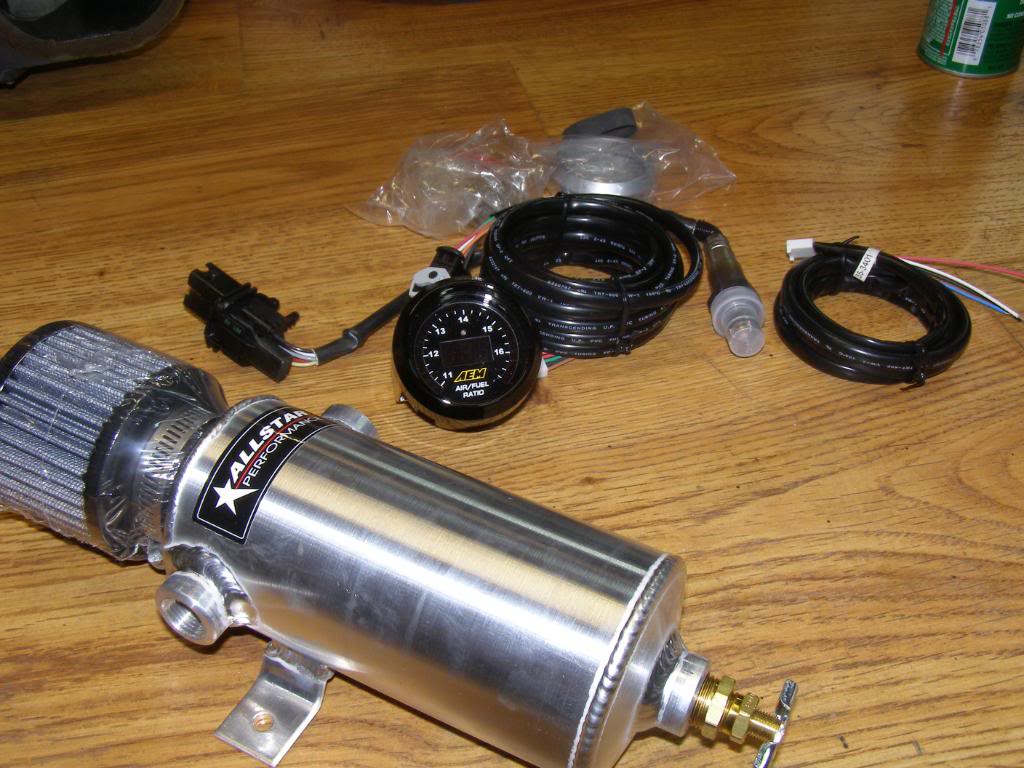
I got a little more work done, the UEGO is in, so is the catch tank for the breathers. The catch tank is a temporary solution, I will build a custom piece over the winter. It is getting ready to get cold here and I would like to drive the car a few times before it comes apart for paint and body over the winter.
I also took a few shots of the room I have left for a larger radiator. The plan is to have a custom piece built in order to maximize cooling. I would love to track the car some, however I think the current radiator, even with proper ducting, while good on the street will be inadequate on the track. You can see by the photos I have about 4 inches of space that I can use, the current radiator was a compromise to get the car on the road this year.

Everything is finally home!...for now.
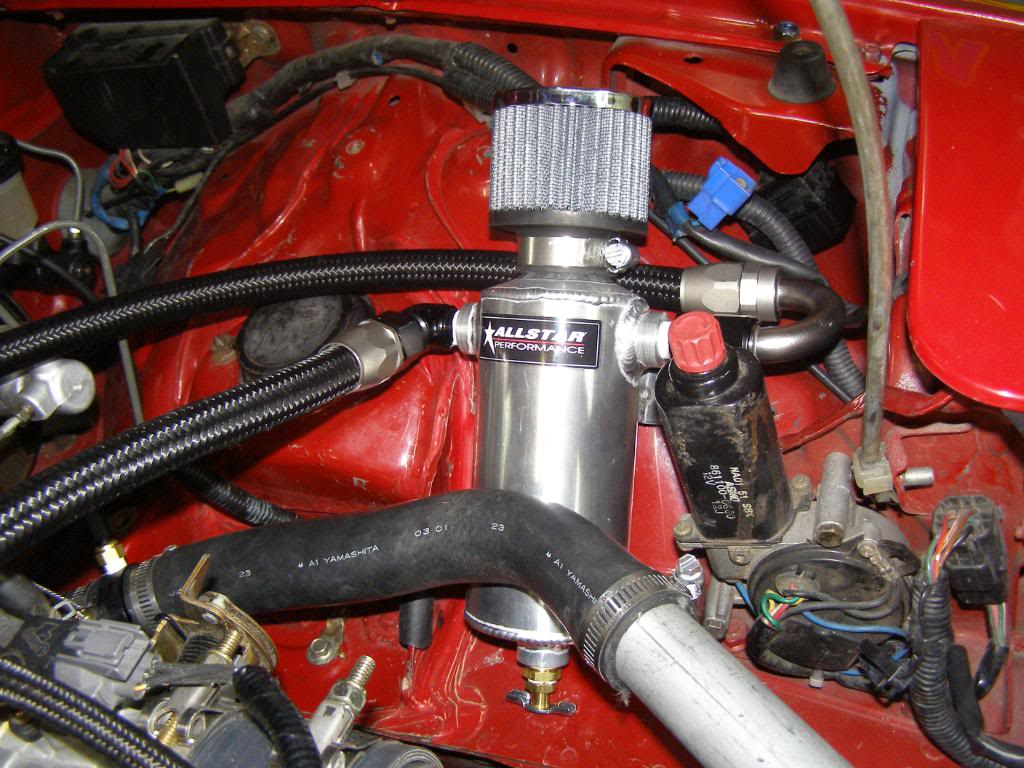
Temporary catch can.
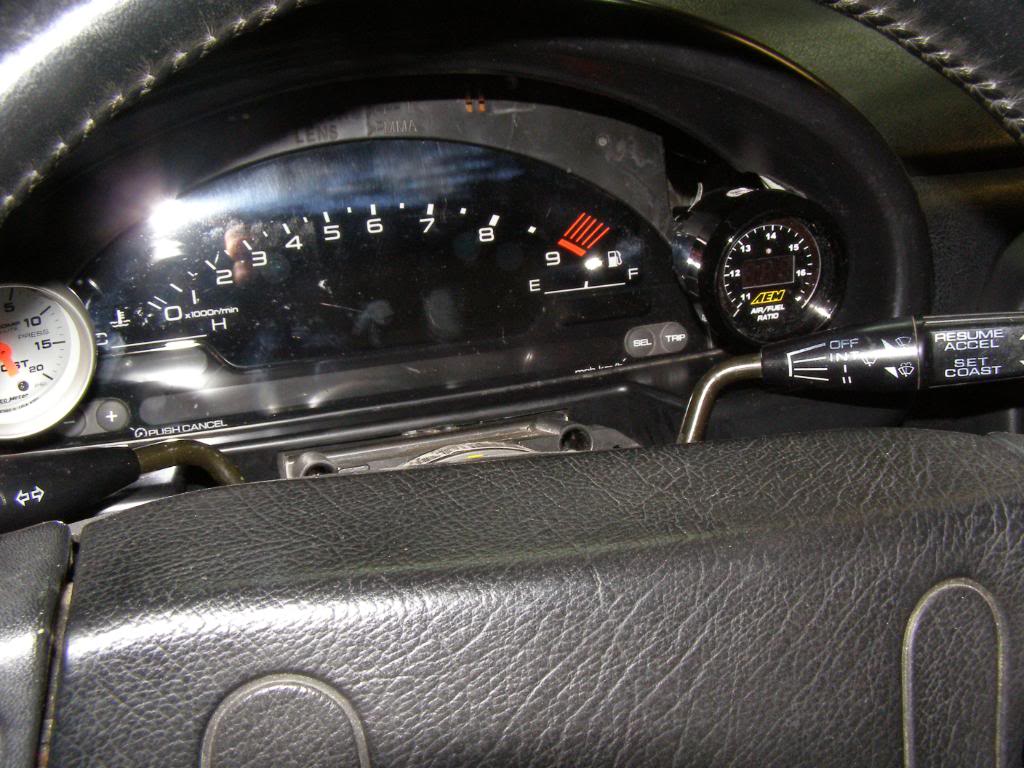
I decided the best place for the UEGO would be in the main cluster where I can keep an eye on it in a glance. At some point I will probably go to an analog gauge, as I find needle positions easier to recognize within normal operating parameters
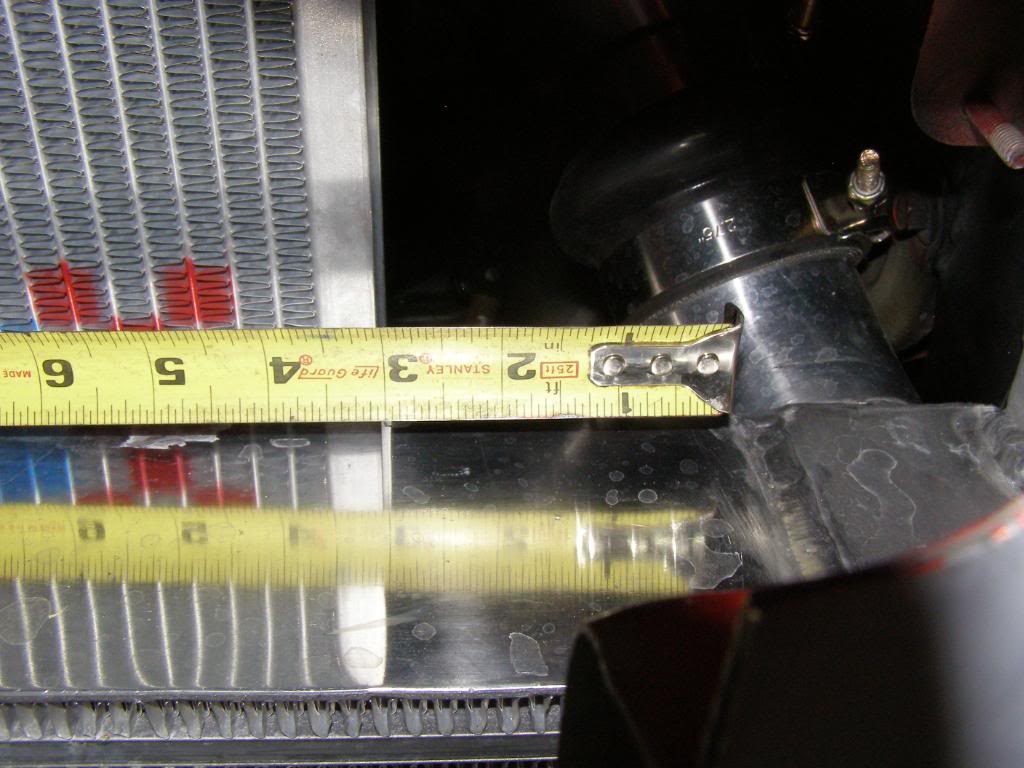
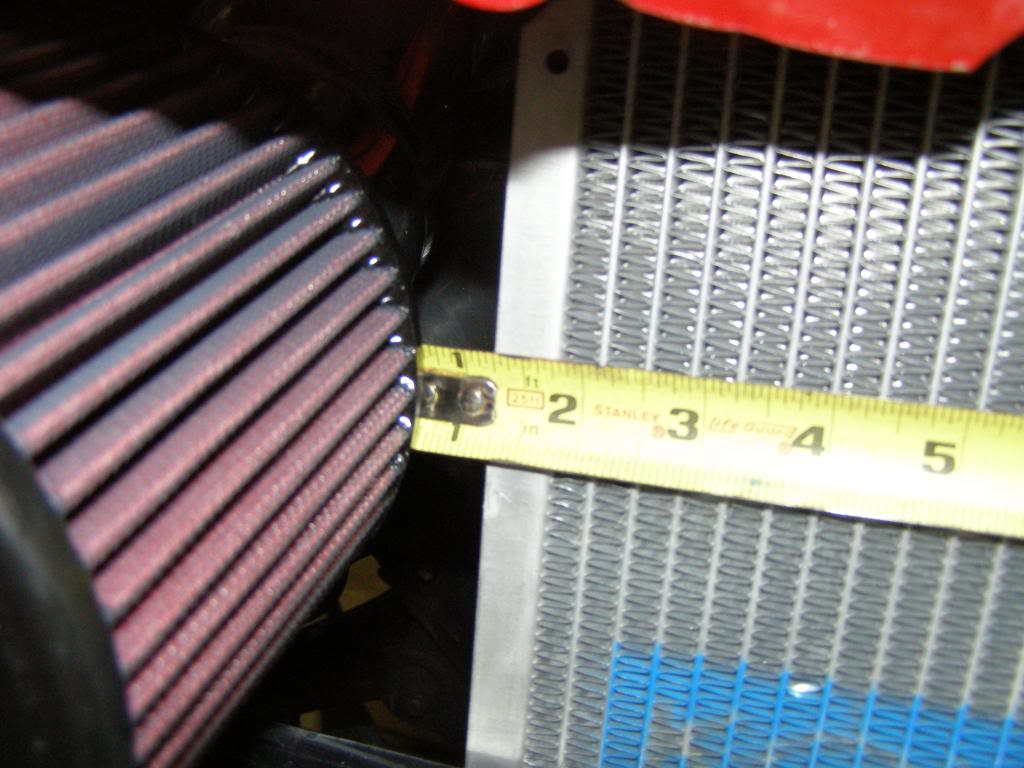
definitely need to maximize cooling space.
I got a little more work done, the UEGO is in, so is the catch tank for the breathers. The catch tank is a temporary solution, I will build a custom piece over the winter. It is getting ready to get cold here and I would like to drive the car a few times before it comes apart for paint and body over the winter.
I also took a few shots of the room I have left for a larger radiator. The plan is to have a custom piece built in order to maximize cooling. I would love to track the car some, however I think the current radiator, even with proper ducting, while good on the street will be inadequate on the track. You can see by the photos I have about 4 inches of space that I can use, the current radiator was a compromise to get the car on the road this year.
Everything is finally home!...for now.
Temporary catch can.
I decided the best place for the UEGO would be in the main cluster where I can keep an eye on it in a glance. At some point I will probably go to an analog gauge, as I find needle positions easier to recognize within normal operating parameters
definitely need to maximize cooling space.
Reply
0
0

Finally got to a computer where I can see your photos, your build is sick, sick, sick. Good job all around, that filter placement is perfect, especially if you shroud it all in with the rad and IC, you won't even need to worry (it would seem) about shrouding the filter separately because it would simply feed from the high-pressure zone in front of the heat exchangers. Brilliant.
Reply
0
0
Finally got to a computer where I can see your photos, your build is sick, sick, sick. Good job all around, that filter placement is perfect, especially if you shroud it all in with the rad and IC, you won't even need to worry (it would seem) about shrouding the filter separately because it would simply feed from the high-pressure zone in front of the heat exchangers. Brilliant.
Respectfully,
Hingstonwm
Last edited by hingstonwm; Oct 12, 2010 at 01:35 PM.
Reply
0
0
Quick update, went to the dyno today, will have to figure out where it all went wrong. I was hoping to get 400-450 on 15 pounds of boost. Well that didn't happen, I ended up with 485hp at 12 pounds and 285 #torque. Hell yeah!!!
I am extremely happy, make that giddy in a faggy kind way!!! The car makes you gigglel like a little girl. Ask leatherface, he knows what I am talking about!
 :
:
I had the dyno runs emailed to me but they have a .drf file extension and I can't open them. Does anyone have any ideas?
By the way the car is just nasty. I will post up some video footage after I get it loaded on to my laptop.
I am extremely happy, make that giddy in a faggy kind way!!! The car makes you gigglel like a little girl. Ask leatherface, he knows what I am talking about!
:I had the dyno runs emailed to me but they have a .drf file extension and I can't open them. Does anyone have any ideas?
By the way the car is just nasty. I will post up some video footage after I get it loaded on to my laptop.
Reply
0
0


