Gross.


 07-18-2017, 05:15 PM
#967
SadFab CEO

iTrader: (3)
Join Date: Sep 2012
Location: your mom's house phoenix, AZ
Posts: 4,560
Total Cats: 1,142
Golf ball sized hematoma. Because full hammer swing at a pickle fork to remove LBJ. And missed.
https://flic.kr/p/WS9qFF
https://flic.kr/p/WS9rCa

Reply
 0
0

0


 They still look like them, just now with 100% more Schraeder valve.
07-19-2017, 08:26 PM
They still look like them, just now with 100% more Schraeder valve.
07-19-2017, 08:26 PM
#974
Senior Member

Join Date: Jul 2014
Location: Milwaukee, WI
Posts: 1,137
Total Cats: 556
I have the same wheels (no spacers) but xidas which have a 2.25" coil, no rubbing, but not sure I'd want to go closer based on how tight everything already is under stock fenders.
that equates out to about the same distance as a 2.5" coil with your 5mm spacer, so at least in the beginning I'd use the spacer until you can prove you dont need it otherwise..
that equates out to about the same distance as a 2.5" coil with your 5mm spacer, so at least in the beginning I'd use the spacer until you can prove you dont need it otherwise..
Reply
0
0
07-29-2017, 02:15 PM
#976
My luck continues. Plagued with parts being defective, powdercoater not following directions, things missing or wrong in kits, and living the dream (nightmare) of Miata Rear Hubs.
I don't have pictures of the hub situation, but here's the rundown:
1) Acquire ARP studs from Boileralum
2) Purchase Dorman hubs
3) Ram the thick keilbasa studs into the small keyholes of the Dorman hubs. Repeat 8x, then realize that you messed up.
4) Spend 3-4 hours attempting to remove the bearing races from some good condition stock rear hubs.
5) Give up, order more Dorman hubs and Evo studs from Amazon.
5.5) Amazon's shipping logic is wrong, stuff arrives a day later than advertised.
6) Evo studs in Dorman hubs
6.5) Brain fart on the proper method to insert hubs into uprights.
7) Ram it in anyways, pinch back seal.
7.5) Decide you don't care. Drink a beer.
Powdercoater:
Dropped off rear uprights and f/r LCAs to be coated. Make sure he knows that Delrin and Sphericals are going in. Get text the day i'm supposed to pick up: "These are getting poly right? I didn't mask the bores."
SUPER. You should probably fix that.
V8R Billet X-Lite Upper Control Arms:
My luck with this vendor continues. To be 100% fair, Shandelle has been an absolute peach to deal with through email and is happy to answer any questions quickly. Great customer service. I just wish i didn't have to use it.
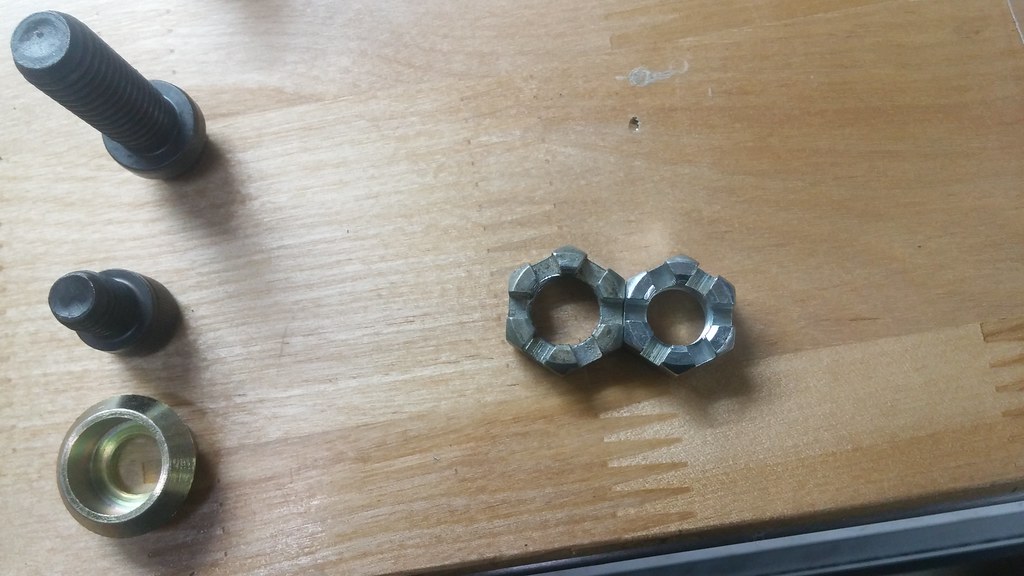
Pic will follow below, but long and short is that i'm having some problems with the pins that go through the sphericals to act as upper balljoints. Shandelle tells me that they're supposed to be threaded 7/16-20. I received two castle nuts. They are different sizes. One is so big i don't even have a tap to go through it to figure out what it is. The other i didn't think was 7/16-20 at first because it doesn't thread well on either "balljoint." However, it threads perfect down a 7/16-20 tap, so i guess that's what it is. Sourced another 7/16-20 castle nut locally. Neither nut can be threaded down the "balljoint" more than 3 rotations by hand. The 7/16-20 die i have is similar situation. I'm going to have to ram those nuts down the "balljoint" today with an impact, but i'm pretty scared about it.
Also: 4-5 out of 8 front control arm misalignment spacers arrived damaged. Due to the size of the Miata "long bolt," the portions that go into the heims are extremely thin and were deformed in shipping simply by being in a bag with other hardware. This made for exciting, infuriating (and bloody) install.
M-Tuned rear caliper brackets:
This was an NLA part that i spent a good amount of time bugging vendors to find. Nobody had it in stock on their website, so i spammed them all anyways via email. Goodwin Racing came through and found a pair in a dusty box on a shelf and loaded it into their system just so i could buy it. Good guys. Then proceeded to charge me almost $18 in shipping because they were stuffed in a box the size of Texas. Ok now i'm annoyed, but i have my unobtanium parts. These are to put 94-02 non-sport calipers (pad selection worth a damn) on 01-05 Sport rotors (more bigger).
PROBLEM: As i found out last night as i attempted to slam this car together, these are defective. Driver side (Amusingly labeled Passenger) is tapped for M12x1.25 when it should be M10x1.25. M12 bolts do not fit through uprights and i'm really not jazzed about drilling out uprights to fit this garbage.
ADDITIONAL PROBLEM: Parts are NLA, M-Tuned is no more. Goodwin previously had "their own" variant of these, which turned out to be the same thing in just a different color. Maruha still makes them but they cost over half of what a Superlite rear kit would cost, and they're drop ship only, probably through MiataRoadster, which i'm also not jazzed about. Flyin Miata has their own thing that does the same, but not listed on their site separately, part of a kit. I know FM sells every little piece they make separately if you ask, so i sent an email.
"Hi,
Noticed you had blah blah part in this kit. Three questions:
1) Will you sell this separately?
2) Is it in stock?
3) How much is it?
Thanks"
Reply:
"Yes we will sell it separately"
The end. Not helpful.
I guess the game plan at the moment is to just get some cheap 1.8 rear rotors from Amazon (en route) and figure it out on the back end (Probably Superlites w/ e-brake). I really wanted to run this setup because well... that's what all the cool kids do, and i have a Miata so i don't have to think for myself and everything should be easy. If i wanted "hard," i would have kept the MX6.
CONCERNING AXLES:
The Carquest axle i had in the passenger side survived less than 5000 miles before developing some pretty serious rotational play at the cup joint, hub end. Warranteed it out (nightmare, Advance stores and Advance Online don't talk well together, and i don't think anyone appreciated me repeatedly stating that i can't very well EMAIL THE OLD HUB BACK TO THE WEBSITE NOW CAN I?!?!?). New axle also has play. But less. So i slammed it in anyways and i'll just warranty it again this fall.
Anyways, none of you care about wall of text. Here's some pictures with quick captions.
Trying to figure out V8R Billet arms. No instructions. NOTE: different sized castle nuts

20170722_190847 by concealer404, on Flickr
Detail of different castle nuts.
20170722_185125 by concealer404, on Flickr
Front and rear slapped together.
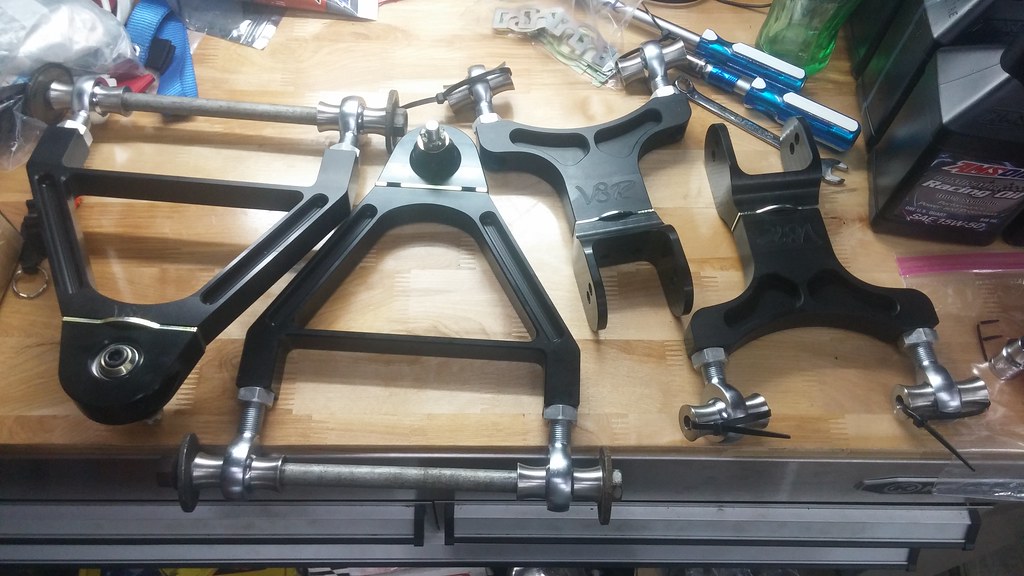
20170727_195553 by concealer404, on Flickr
Lack of directions making for an annoying situation with the one required poly bushing in each lower arm. But first! More slightly-just-enough-to-cause-problems damage in parts. (Fixed with a bastard file and way too much time/effort)
20170722_172923 by concealer404, on Flickr
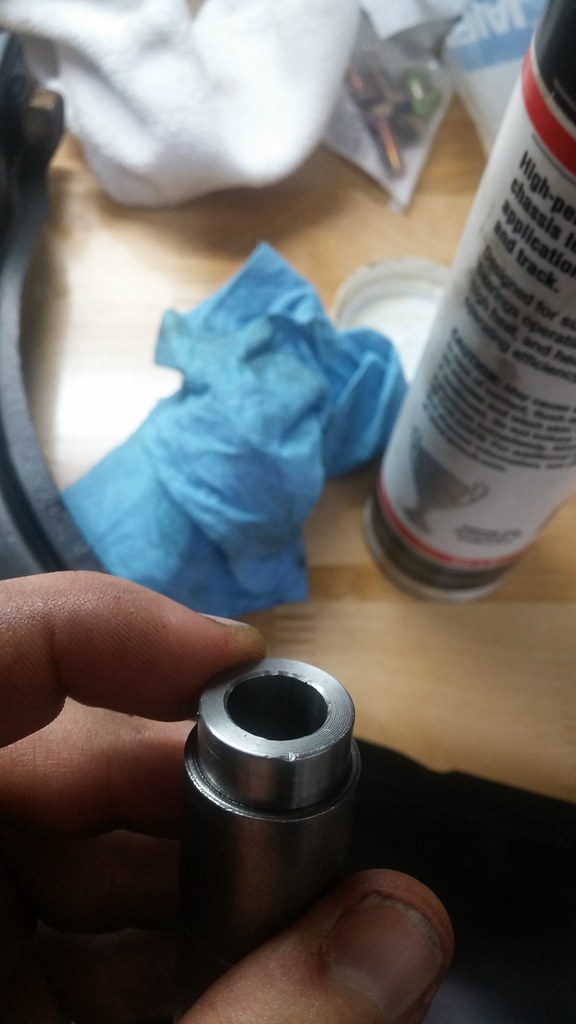
Turns out the "sleeves" in the poly bushings are actually bearings, which means they really NEED to be installed prior to the bushings being put in arms. Cue 3 hours of swearing to fix the hard way. Directions would be nice.
20170722_171135 by concealer404, on Flickr
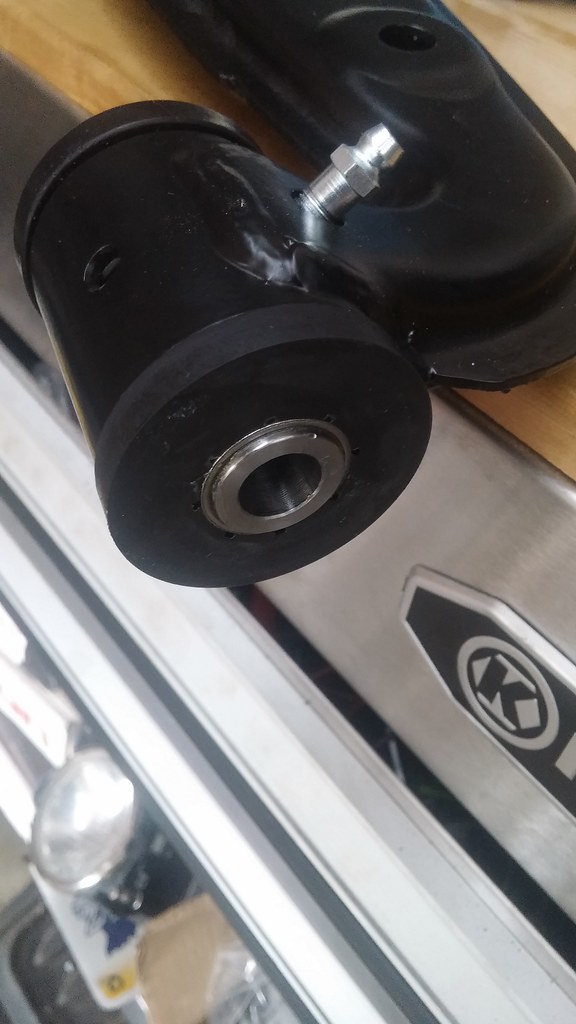
Handled.
20170722_174354 by concealer404, on Flickr
Learning how to safety wire. Glad i spent the extra money on Milbar reversible pliers.
20170728_151812 by concealer404, on Flickr
Handled.
20170728_160016 by concealer404, on Flickr
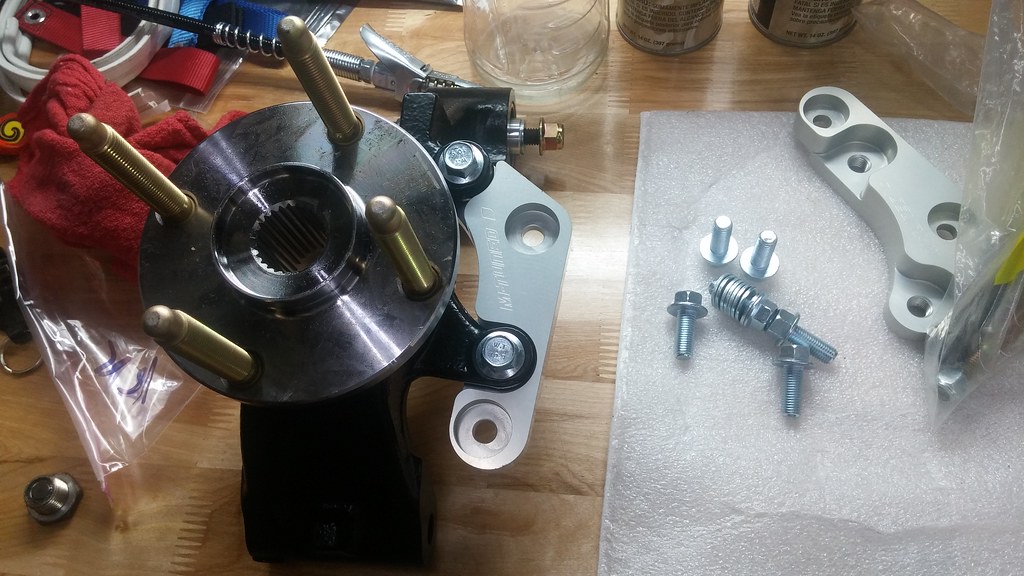
Laying out the goods all OCD-like so i can mindlessly put it back together.

20170728_163346 by concealer404, on Flickr
Driver rear installed. Stopped here and rage quit because of the M-Tuned bracket situation.
20170728_190220 by concealer404, on Flickr
M-Tuned BS.
20170728_214602 by concealer404, on Flickr
I don't have pictures of the hub situation, but here's the rundown:
1) Acquire ARP studs from Boileralum
2) Purchase Dorman hubs
3) Ram the thick keilbasa studs into the small keyholes of the Dorman hubs. Repeat 8x, then realize that you messed up.
4) Spend 3-4 hours attempting to remove the bearing races from some good condition stock rear hubs.
5) Give up, order more Dorman hubs and Evo studs from Amazon.
5.5) Amazon's shipping logic is wrong, stuff arrives a day later than advertised.
6) Evo studs in Dorman hubs
6.5) Brain fart on the proper method to insert hubs into uprights.
7) Ram it in anyways, pinch back seal.
7.5) Decide you don't care. Drink a beer.
Powdercoater:
Dropped off rear uprights and f/r LCAs to be coated. Make sure he knows that Delrin and Sphericals are going in. Get text the day i'm supposed to pick up: "These are getting poly right? I didn't mask the bores."
SUPER. You should probably fix that.
V8R Billet X-Lite Upper Control Arms:
My luck with this vendor continues. To be 100% fair, Shandelle has been an absolute peach to deal with through email and is happy to answer any questions quickly. Great customer service. I just wish i didn't have to use it.
Pic will follow below, but long and short is that i'm having some problems with the pins that go through the sphericals to act as upper balljoints. Shandelle tells me that they're supposed to be threaded 7/16-20. I received two castle nuts. They are different sizes. One is so big i don't even have a tap to go through it to figure out what it is. The other i didn't think was 7/16-20 at first because it doesn't thread well on either "balljoint." However, it threads perfect down a 7/16-20 tap, so i guess that's what it is. Sourced another 7/16-20 castle nut locally. Neither nut can be threaded down the "balljoint" more than 3 rotations by hand. The 7/16-20 die i have is similar situation. I'm going to have to ram those nuts down the "balljoint" today with an impact, but i'm pretty scared about it.
Also: 4-5 out of 8 front control arm misalignment spacers arrived damaged. Due to the size of the Miata "long bolt," the portions that go into the heims are extremely thin and were deformed in shipping simply by being in a bag with other hardware. This made for exciting, infuriating (and bloody) install.
M-Tuned rear caliper brackets:
This was an NLA part that i spent a good amount of time bugging vendors to find. Nobody had it in stock on their website, so i spammed them all anyways via email. Goodwin Racing came through and found a pair in a dusty box on a shelf and loaded it into their system just so i could buy it. Good guys. Then proceeded to charge me almost $18 in shipping because they were stuffed in a box the size of Texas. Ok now i'm annoyed, but i have my unobtanium parts. These are to put 94-02 non-sport calipers (pad selection worth a damn) on 01-05 Sport rotors (more bigger).
PROBLEM: As i found out last night as i attempted to slam this car together, these are defective. Driver side (Amusingly labeled Passenger) is tapped for M12x1.25 when it should be M10x1.25. M12 bolts do not fit through uprights and i'm really not jazzed about drilling out uprights to fit this garbage.
ADDITIONAL PROBLEM: Parts are NLA, M-Tuned is no more. Goodwin previously had "their own" variant of these, which turned out to be the same thing in just a different color. Maruha still makes them but they cost over half of what a Superlite rear kit would cost, and they're drop ship only, probably through MiataRoadster, which i'm also not jazzed about. Flyin Miata has their own thing that does the same, but not listed on their site separately, part of a kit. I know FM sells every little piece they make separately if you ask, so i sent an email.
"Hi,
Noticed you had blah blah part in this kit. Three questions:
1) Will you sell this separately?
2) Is it in stock?
3) How much is it?
Thanks"
Reply:
"Yes we will sell it separately"
The end. Not helpful.
I guess the game plan at the moment is to just get some cheap 1.8 rear rotors from Amazon (en route) and figure it out on the back end (Probably Superlites w/ e-brake). I really wanted to run this setup because well... that's what all the cool kids do, and i have a Miata so i don't have to think for myself and everything should be easy. If i wanted "hard," i would have kept the MX6.
CONCERNING AXLES:
The Carquest axle i had in the passenger side survived less than 5000 miles before developing some pretty serious rotational play at the cup joint, hub end. Warranteed it out (nightmare, Advance stores and Advance Online don't talk well together, and i don't think anyone appreciated me repeatedly stating that i can't very well EMAIL THE OLD HUB BACK TO THE WEBSITE NOW CAN I?!?!?). New axle also has play. But less. So i slammed it in anyways and i'll just warranty it again this fall.
Anyways, none of you care about wall of text. Here's some pictures with quick captions.
Trying to figure out V8R Billet arms. No instructions. NOTE: different sized castle nuts
20170722_190847 by concealer404, on Flickr
Detail of different castle nuts.
20170722_185125 by concealer404, on Flickr
Front and rear slapped together.
20170727_195553 by concealer404, on Flickr
Lack of directions making for an annoying situation with the one required poly bushing in each lower arm. But first! More slightly-just-enough-to-cause-problems damage in parts. (Fixed with a bastard file and way too much time/effort)
20170722_172923 by concealer404, on Flickr
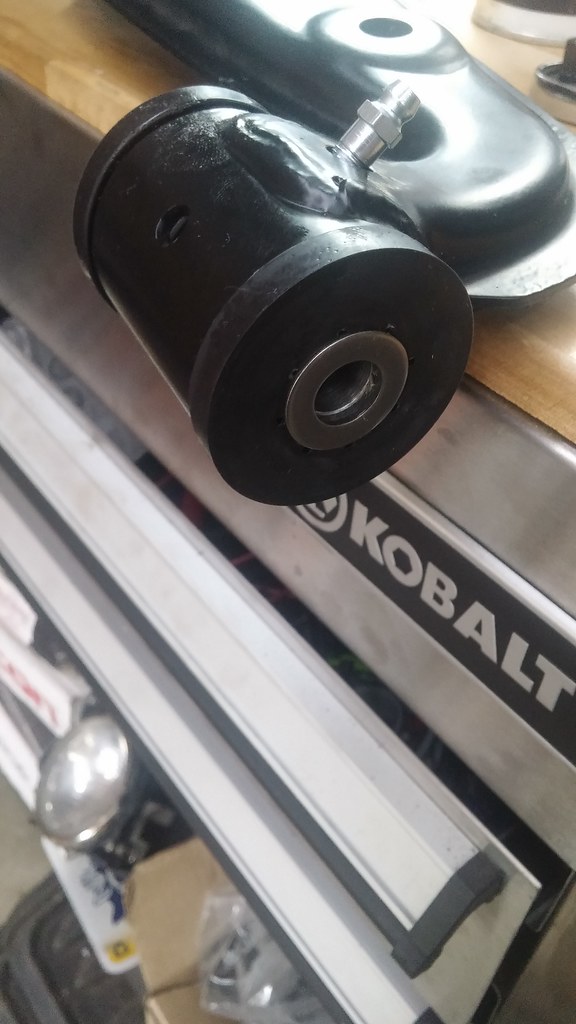
Turns out the "sleeves" in the poly bushings are actually bearings, which means they really NEED to be installed prior to the bushings being put in arms. Cue 3 hours of swearing to fix the hard way. Directions would be nice.
20170722_171135 by concealer404, on Flickr
Handled.
20170722_174354 by concealer404, on Flickr
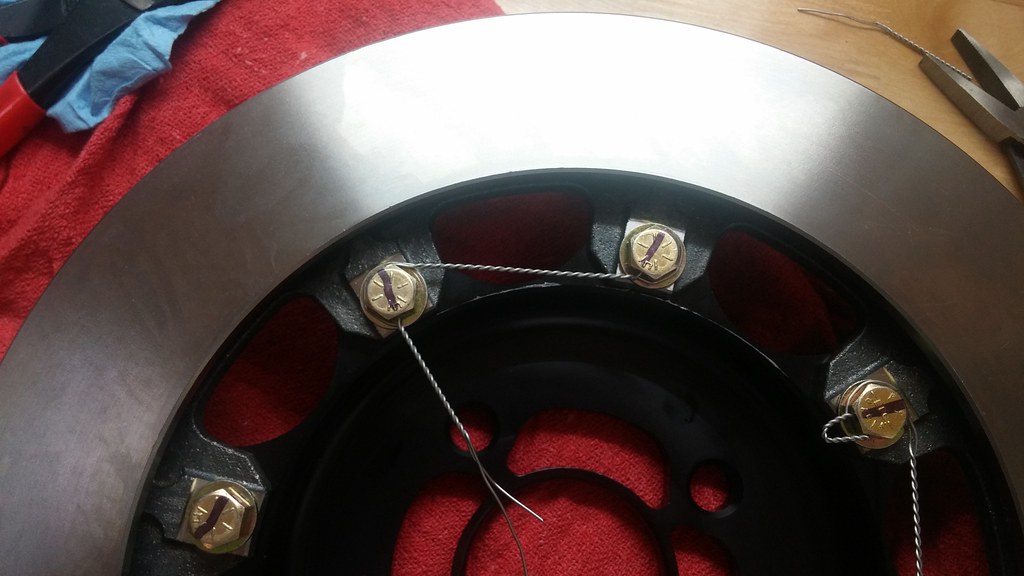
Learning how to safety wire. Glad i spent the extra money on Milbar reversible pliers.
20170728_151812 by concealer404, on Flickr
Handled.
20170728_160016 by concealer404, on Flickr
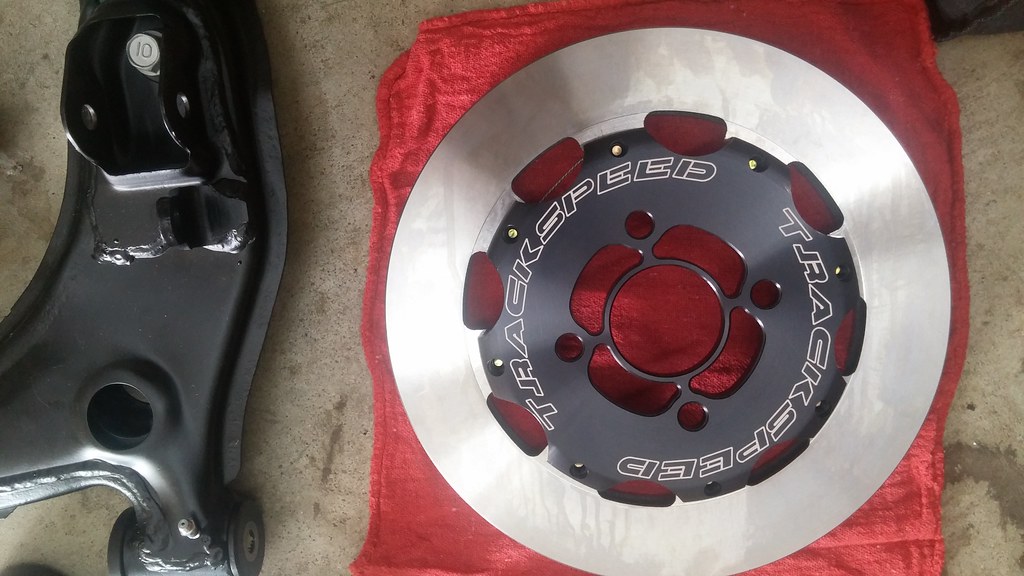
Laying out the goods all OCD-like so i can mindlessly put it back together.
20170728_163346 by concealer404, on Flickr
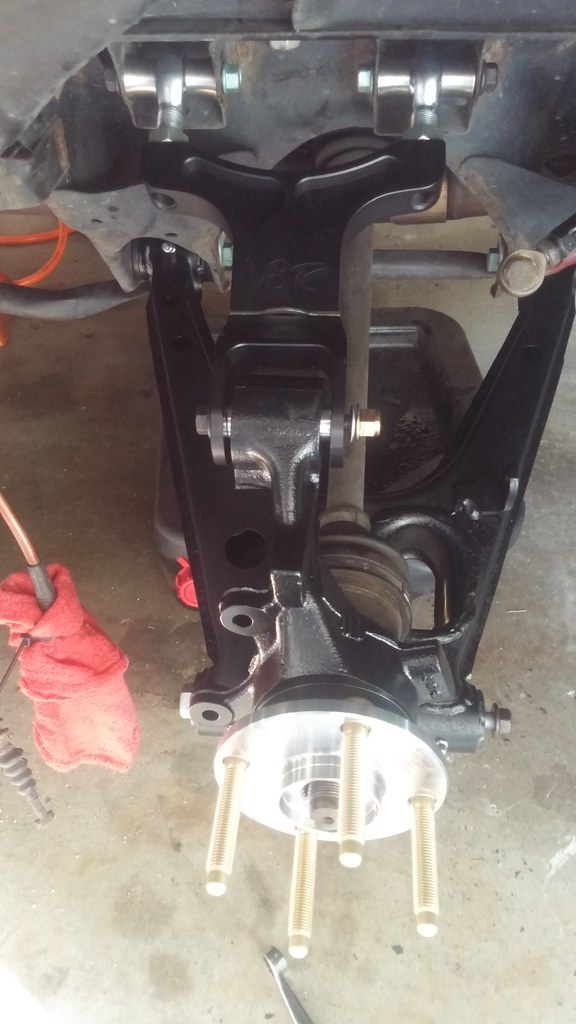
Driver rear installed. Stopped here and rage quit because of the M-Tuned bracket situation.
20170728_190220 by concealer404, on Flickr
M-Tuned BS.
20170728_214602 by concealer404, on Flickr
Reply
1
1
07-29-2017, 02:15 PM
#977
Bonus round and a question.
This amused me. Ridiculously wide 205/50 VR1s on left (measured same across unmounted, as 225/45 RS4s MOUNTED on 15x9s), 245/40 VR1s on 10s on right.
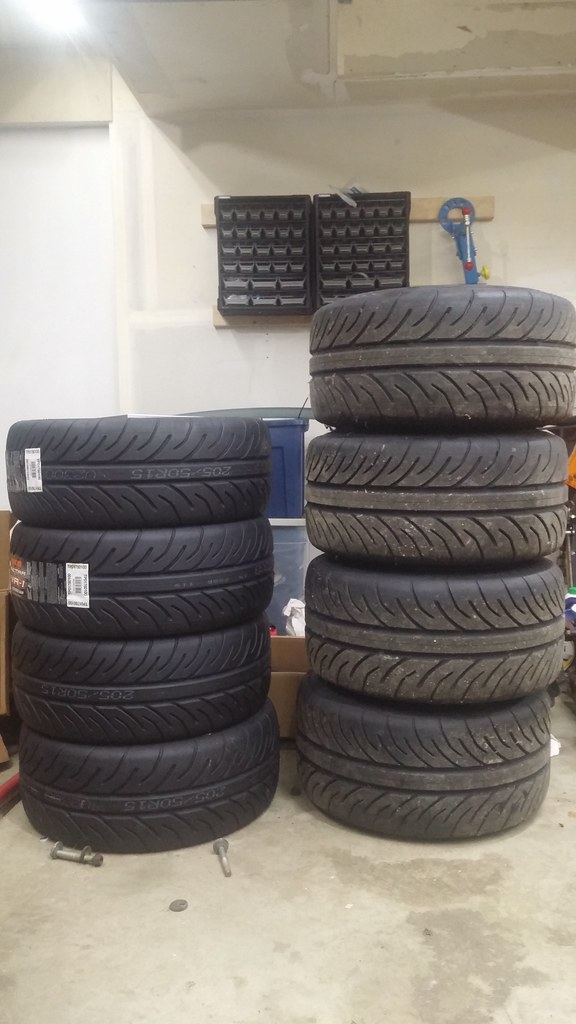
20170727_211501 by concealer404, on Flickr
New clutch/flywheel from XelderX. Can i take this to any old machine shop to be resurfaced? Weight combined: 10lbs
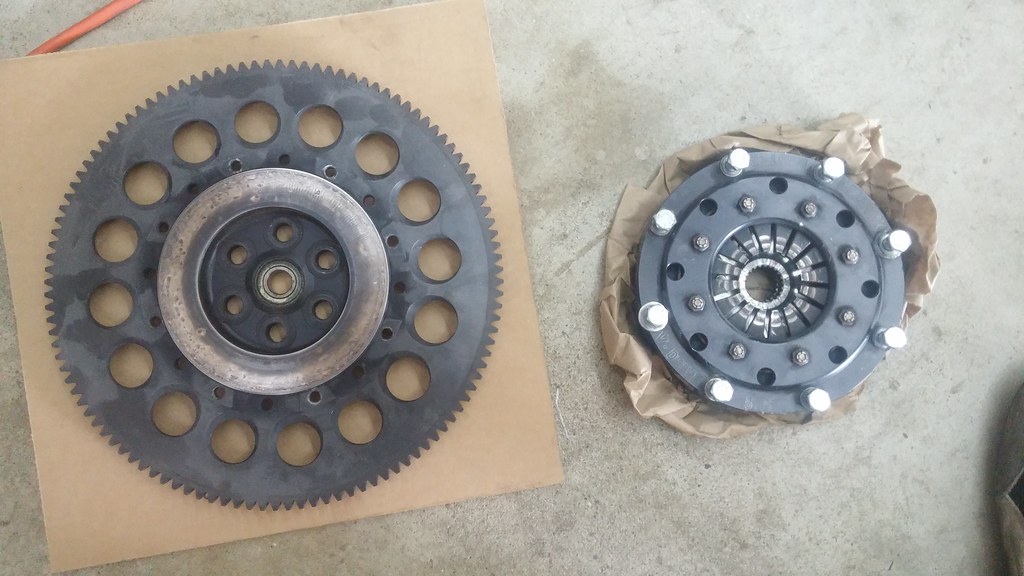
20170728_135701 by concealer404, on Flickr
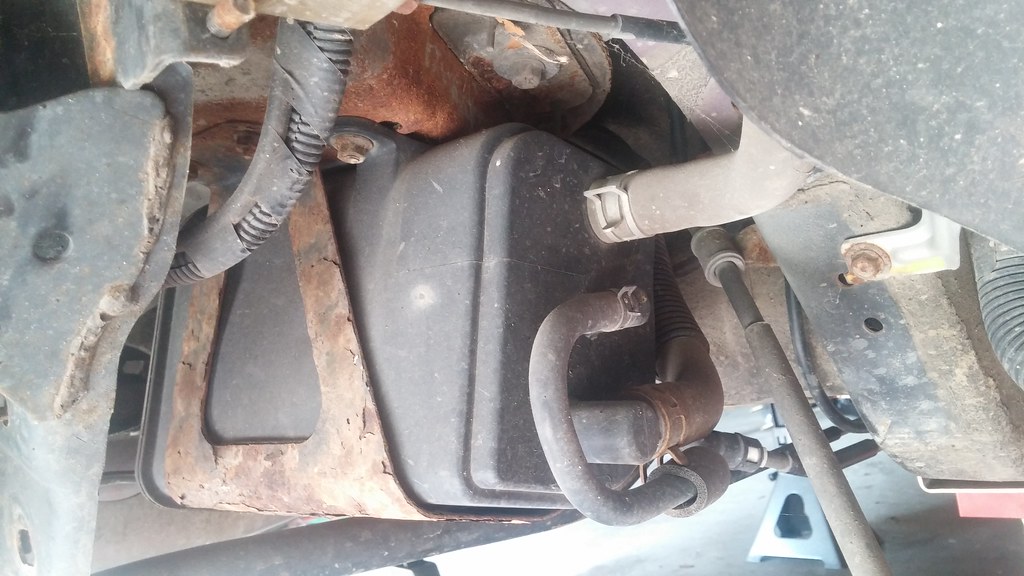
Do i need any of this garbage? Car is a 2000 Miata, and i don't have any emissions control on my ECU. Will be moving to a standalone soon-ish.
20170728_170211 by concealer404, on Flickr
This amused me. Ridiculously wide 205/50 VR1s on left (measured same across unmounted, as 225/45 RS4s MOUNTED on 15x9s), 245/40 VR1s on 10s on right.
20170727_211501 by concealer404, on Flickr
New clutch/flywheel from XelderX. Can i take this to any old machine shop to be resurfaced? Weight combined: 10lbs
20170728_135701 by concealer404, on Flickr
Do i need any of this garbage? Car is a 2000 Miata, and i don't have any emissions control on my ECU. Will be moving to a standalone soon-ish.
20170728_170211 by concealer404, on Flickr
Reply
0
0
07-30-2017, 10:22 AM
#979
Retired Mech Design Engr
iTrader: (3)
Join Date: Jan 2013
Location: Seneca, SC
Posts: 5,009
Total Cats: 857
Do i need any of this garbage? Car is a 2000 Miata, and i don't have any emissions control on my ECU. Will be moving to a standalone soon-ish.
20170728_170211 by concealer404, on Flickr
If you want the vent, then you can bypass the canisters and valves and retain the original vent location.
EDIT: see diagram and how I bypassed canister and kept the filter and vent.
https://www.miataturbo.net/build-thr...3/#post1364807
Reply
0
0
07-30-2017, 10:34 AM
#980
Just another day in paradise. Car still isn't on the ground. Sitting here waiting on some strong french press to brew so i can work up the ambition/energy to go slam on this car for another entire day. Snapped two front sway bar bracket bolts yesterday before i decided that the AWR brackets can wait until off season. Now to bother all my friends with welders to see if they want to come visit and weld on my car.
Thank you.  It looks gross and weighs something. It must be eradicated.
No. That is the actual carbon canister.
If you want the vent, then you can bypass the canisters and valves and retain the original vent location.
EDIT: see diagram and how I bypassed canister and kept the filter and vent.
https://www.miataturbo.net/build-thr...3/#post1364807
If you want the vent, then you can bypass the canisters and valves and retain the original vent location.
EDIT: see diagram and how I bypassed canister and kept the filter and vent.
https://www.miataturbo.net/build-thr...3/#post1364807
It looks gross and weighs something. It must be eradicated.
Reply
0
0


