
HornetBall's Build #2: Meet Red


Thread Starter
Elite Member
iTrader: (4)
Joined: Mar 2008
Posts: 6,301
Total Cats: 697
From: Granbury, TX
I had a fiberglass kit that had been sitting on the shelf for a while. When I opened it, the hardener had evaporated. I also had a several-years-old, mostly used up tube of red RTV on hand. Then I remembered the fiberglass/RTV trick (another aviation thing -- you can make cowl seals this way) and decided to skip the trip to the store and use up my old junk.
I think the RTV actually works better than epoxy in this application. The RTV is sticky and helps the fiberglass mold to shapes better. RTV doesn't run and cures faster. I also control when it starts curing by when I pull off the plastic wrap. If I change my mind at some point down the road, I can pull the fiberglass/RTV off the spoiler and it will all clean up.
Another tool for the toolbox.
Last edited by hornetball; May 12, 2014 at 09:12 AM.
Reply
 1
1

1


Thread Starter
Elite Member
iTrader: (4)
Joined: Mar 2008
Posts: 6,301
Total Cats: 697
From: Granbury, TX
I don't "expect" any issues (famous last words!). In the aviation world, I've seen this used for cowl seals and inter-cylinder baffling. Both applications are similar to what we are doing here. Airplanes are going faster and generating higher pressures than what we'll see with our cars -- although there are fewer rubber marbles at 10,000 feet. I'll report any issues if they crop up.
Reply
0
0

Junior Member
Joined: Jul 2009
Posts: 95
Total Cats: 6
From: San Fran
FYI, ABS Maximum Temperature: 176�F 80�C
re: Acrylonitrile Butadiene Styrene Properties | Technical Information (ABS)
Reply
1
1
Reply
0
0
Thread Starter
Elite Member
iTrader: (4)
Joined: Mar 2008
Posts: 6,301
Total Cats: 697
From: Granbury, TX
FYI, ABS Maximum Temperature: 176�F 80�C
re: Acrylonitrile Butadiene Styrene Properties | Technical Information (ABS)
re: Acrylonitrile Butadiene Styrene Properties | Technical Information (ABS)
More info: Thermoplastics - Physical Properties.
So, I would say ABS is marginal for that cover. I'll keep an eye on it. Jeffbucc, if you're reading this, the material on your air box (even with the reflective stuff) should be changed, STAT!
I'm guessing the OEM radiator material is PVDF?
Reply
0
0
I don't know that I would worry about it. Worst case scenario, it deforms slightly. You're not going to go anywhere near a flashpoint in an airbox or ducting setup so run it and see how it holds.
Reply
0
0
Thread Starter
Elite Member
iTrader: (4)
Joined: Mar 2008
Posts: 6,301
Total Cats: 697
From: Granbury, TX
Found the source of my confusion. I was looking at the MELTING temperature, not the working temperature.
Melt Temps
Digging in a bit more, it seems thermoplastics have a glass temperature where their stiffness plateaus until reaching the real melting temperature (called the rubber plateau because the thermoplastic feels rubbery in this temperature range).

For ABS, the glass temperature (Tg) is ~220�F. The melting temperature (Tm) is much higher, up in the 400's �F.
Thought this was cool. I never studied plastics back in the day.
Now, back to your regularly scheduled programming.
Melt Temps
Digging in a bit more, it seems thermoplastics have a glass temperature where their stiffness plateaus until reaching the real melting temperature (called the rubber plateau because the thermoplastic feels rubbery in this temperature range).
For ABS, the glass temperature (Tg) is ~220�F. The melting temperature (Tm) is much higher, up in the 400's �F.
Thought this was cool. I never studied plastics back in the day.
Now, back to your regularly scheduled programming.
Last edited by hornetball; May 12, 2014 at 12:47 PM.
Reply
0
0
Thread Starter
Elite Member
iTrader: (4)
Joined: Mar 2008
Posts: 6,301
Total Cats: 697
From: Granbury, TX
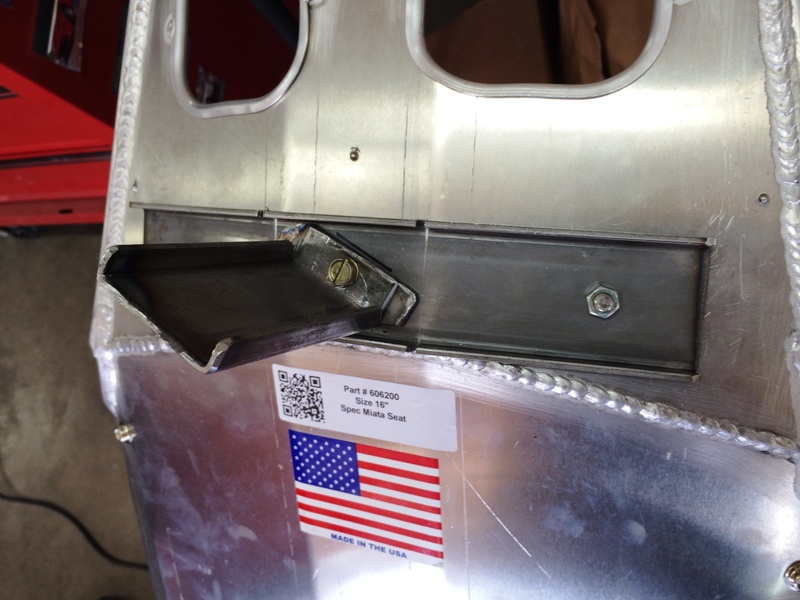
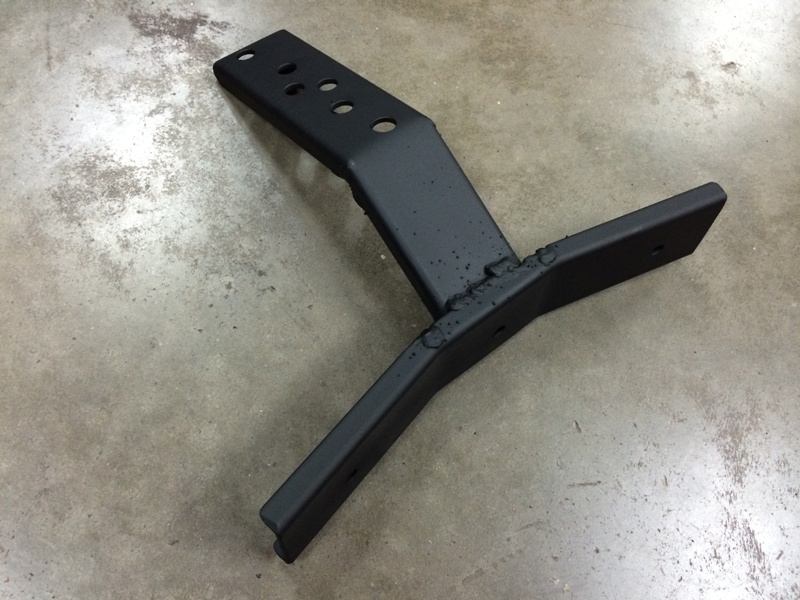
Built the seat back braces.
Started with the part that bolts to the seat. 3x11 (33 square inches) bent to fit the seatback. Note the location, you want them below the harness holes (the harness holes introduce a weak point). As with the seat brackets, these mounting bolts will get welded to the brace.

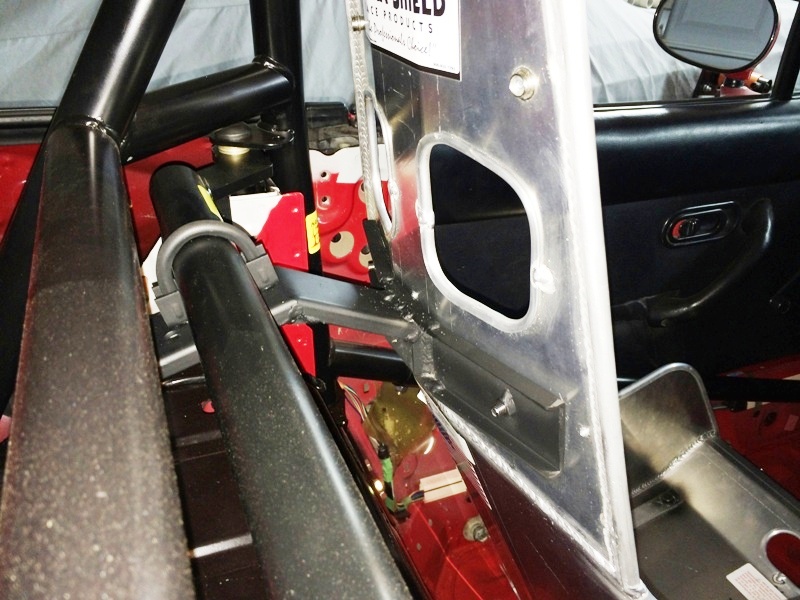
Next was to mockup the passenger's side. This was the easy side because the seat has a fixed position. Ended up connecting to a diagonal.
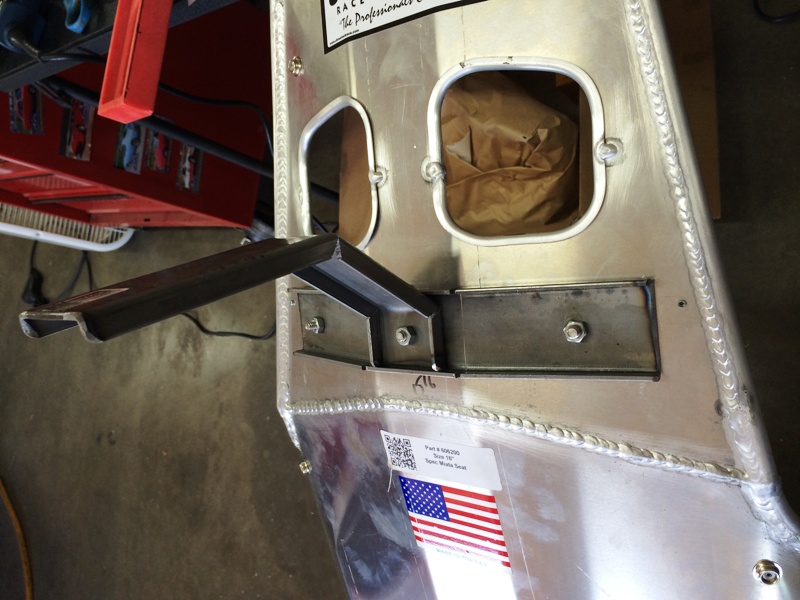
Mockup of the driver's side. This one needs a long mounting arm that is parallel to the seat brackets to accomadate the adjustable positions. The parallel arm connects to the harness bar that I added.
Comparison shot before welding.
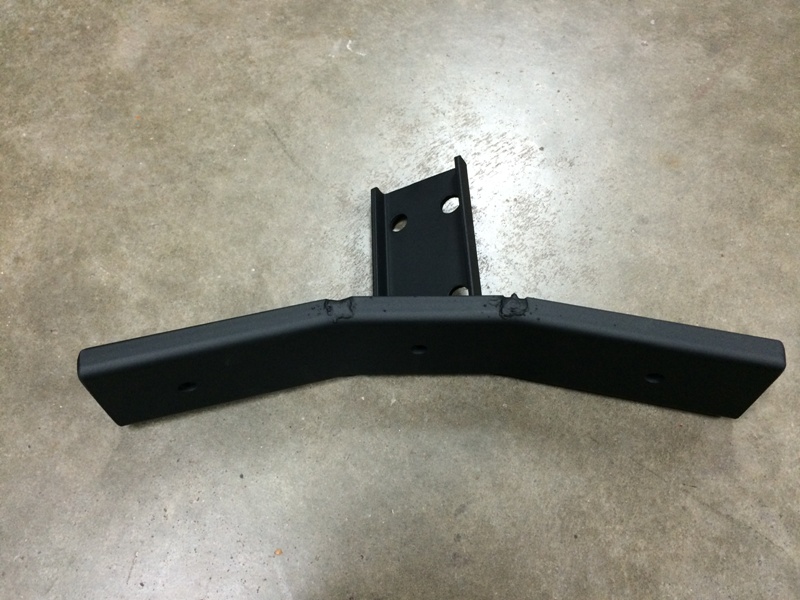
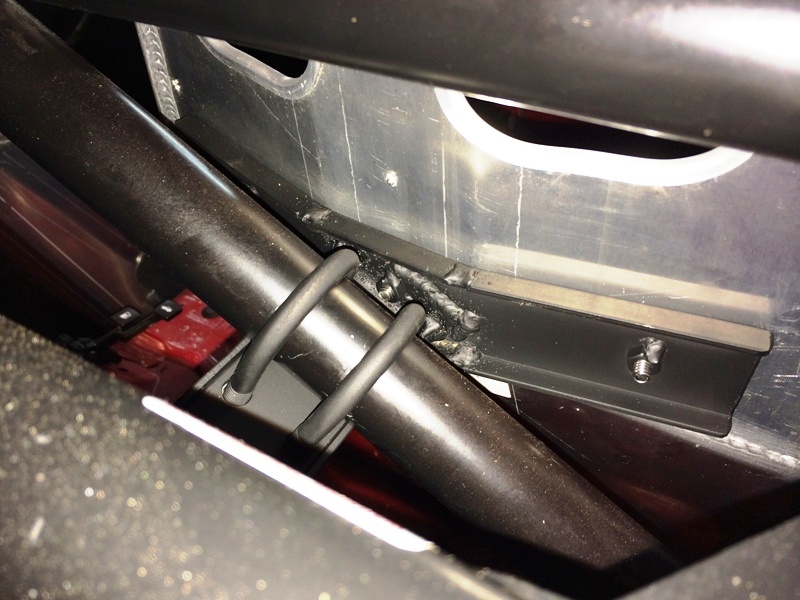
Finished passenger's brace with u-bolt holes drilled and ready to go.
Finished driver's brace with multiple holes to accomodate seat adjustment drilled. You can tell where the welder ran out of wire and I had to change spools. Oh well, cover it up with black paint.
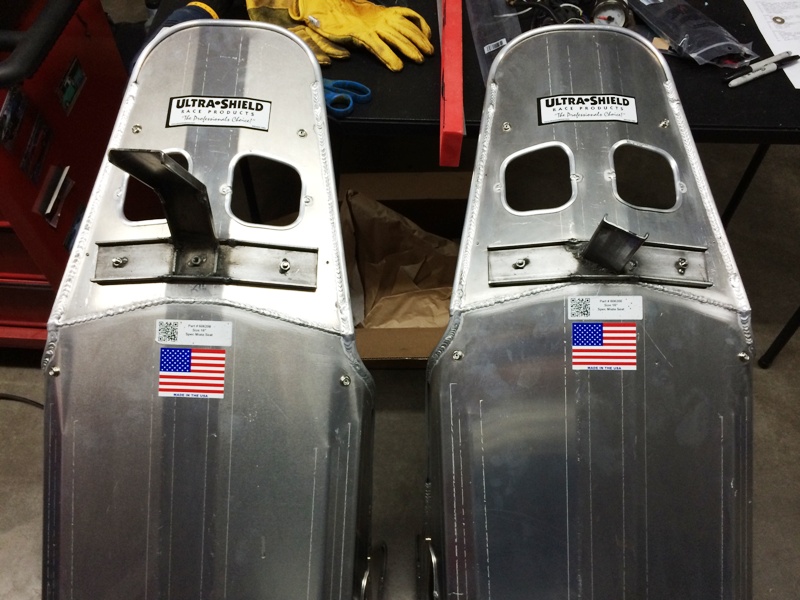
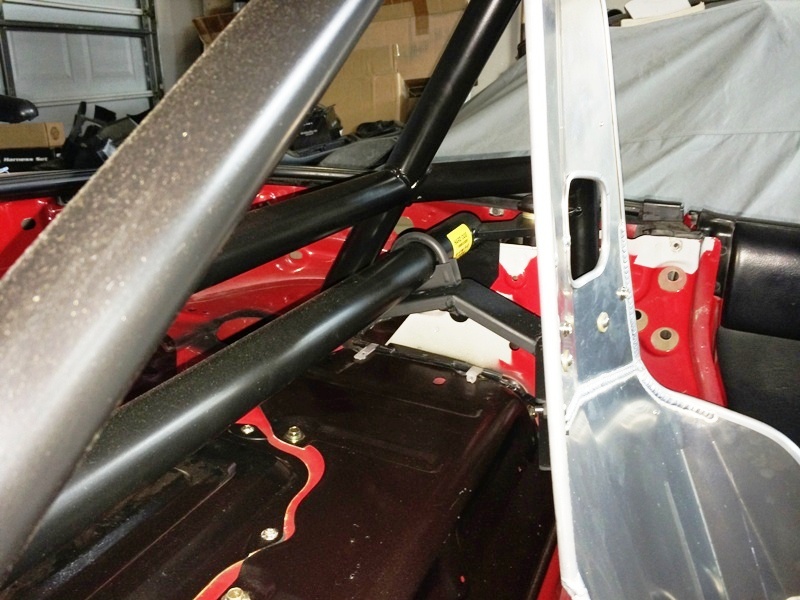
Installed driver's brace. The added harness bar worked out well for getting things centered and for getting the seat back brace into the desired position on the seat without resorting to crazy angles. This is the rearmost seating position.
Installed passenger's brace.
Used socket screws located under the padding for comfort. 3 per seat.
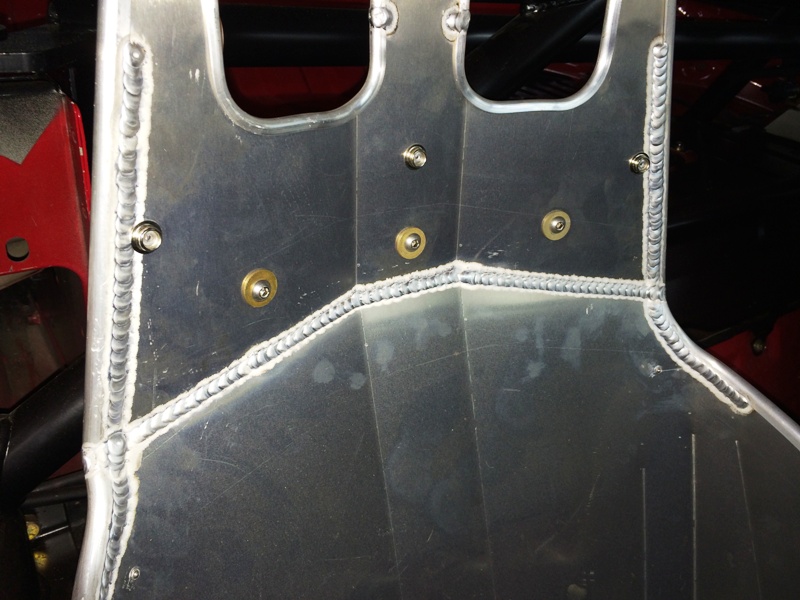
Seats are solid. They feel like structure now.
Started with the part that bolts to the seat. 3x11 (33 square inches) bent to fit the seatback. Note the location, you want them below the harness holes (the harness holes introduce a weak point). As with the seat brackets, these mounting bolts will get welded to the brace.
Next was to mockup the passenger's side. This was the easy side because the seat has a fixed position. Ended up connecting to a diagonal.
Mockup of the driver's side. This one needs a long mounting arm that is parallel to the seat brackets to accomadate the adjustable positions. The parallel arm connects to the harness bar that I added.
Comparison shot before welding.
Finished passenger's brace with u-bolt holes drilled and ready to go.
Finished driver's brace with multiple holes to accomodate seat adjustment drilled. You can tell where the welder ran out of wire and I had to change spools. Oh well, cover it up with black paint.
Installed driver's brace. The added harness bar worked out well for getting things centered and for getting the seat back brace into the desired position on the seat without resorting to crazy angles. This is the rearmost seating position.
Installed passenger's brace.
Used socket screws located under the padding for comfort. 3 per seat.
Seats are solid. They feel like structure now.
Reply
2
2


Elite Member
Joined: Oct 2013
Posts: 2,764
Total Cats: 951
From: Cedar City, UT
Reply
0
0
Thread Starter
Elite Member
iTrader: (4)
Joined: Mar 2008
Posts: 6,301
Total Cats: 697
From: Granbury, TX
Yes. And it also kept the angle more level. Honestly, that cold-rolled C-channel isn't prone to flexing, it's like an I-beam. Much better than flat stock. And you'll note that I gussetted the bend.
As for why I added the harness bar:
1. See earlier pictures that showed the harness/seatback brace centering issue using the roll cage seatback bar.
2. I'm using a HANS device. Normally, shoulder harnesses are OK if they are +/-20 degrees from level with your shoulders. However, with a HANS you want to bias that towards 0 to -20 degrees. Harness bar being lower took care of both the centering issue and lowering the harness.
3. Lower position also helps deconflict the seatback brace from the harnesses (avoids chaffing).
4. On the passenger side, the harness bar gives room to get the buckles away from the seat.
Anyway, car has plenty of side bracing now. LOL.
Last edited by hornetball; May 13, 2014 at 01:49 PM.
Reply
0
0
Thread Starter
Elite Member
iTrader: (4)
Joined: Mar 2008
Posts: 6,301
Total Cats: 697
From: Granbury, TX
Time will tell. That 2000 degree rating just means that the wrap itself won't degrade when exposed to 2000 degree heat sources. It doesn't mean that it will drop 2000 degrees on one side to less than 200 degrees on the other.
Just keep an eye on it please. We all love your car!
Just keep an eye on it please. We all love your car!
Reply
0
0
Elite Member
Joined: Oct 2013
Posts: 2,764
Total Cats: 951
From: Cedar City, UT
Time will tell. That 2000 degree rating just means that the wrap itself won't degrade when exposed to 2000 degree heat sources. It doesn't mean that it will drop 2000 degrees on one side to less than 200 degrees on the other.
Just keep an eye on it please. We all love your car!
Just keep an eye on it please. We all love your car!
I just wish you weren't all the way down in Texas so I could get a ride in this beast on the track once its done.
Reply
0
0
Elite Member
Joined: Oct 2013
Posts: 2,764
Total Cats: 951
From: Cedar City, UT
It is about 18 hours from Cedar City. Sometimes the bakery is autonomous, sometimes it needs my constant presence to bitch slap employees. Depends on the season...

Reply
0
0

Joined: Sep 2010
Posts: 8,157
Total Cats: 1,094
From: Lake Forest, CA
Did you ever sign up for a track spot at Miatas at MRLS? You better be there, I MUST see this car in person.
Reply
0
0


