
HornetBall's Build #2: Meet Red


Elite Member
Joined: Oct 2013
Posts: 2,764
Total Cats: 951
From: Cedar City, UT
Can do. I'm guessing mount the yarn right under the TSI or to the sides? Finally some good use for my old gopro.
Reply
 0
0

0

Thread Starter
Elite Member
iTrader: (4)
Joined: Mar 2008
Posts: 6,301
Total Cats: 697
From: Granbury, TX
If you look at Keith Tanner's Targa car, you'll see the best of both worlds. NACA scoop for daytime running and a TSI for night time. This car will be a daylight-only track car, so I'm just doing a simple NACA scoop.
Reply
0
0

Thread Starter
Elite Member
iTrader: (4)
Joined: Mar 2008
Posts: 6,301
Total Cats: 697
From: Granbury, TX
Nothing at all wrong with a DIY NACA scoop. I traded money for time. I must say, the FM headlight lid is a nice piece. Planning to leave as-is, good looking carbon fiber with a shiny finish.
Reply
0
0


Products | Slick Auto
-Zach
Reply
0
0
Is the FM cover the same part as Slick Auto? Looks quite similar and both appear to be proper pre-preg parts unlike the d.original stuffs.
Products | Slick Auto
-Zach
Products | Slick Auto
-Zach
Targa Miata
-Zach
Reply
0
0
Thread Starter
Elite Member
iTrader: (4)
Joined: Mar 2008
Posts: 6,301
Total Cats: 697
From: Granbury, TX
A bit more progress:
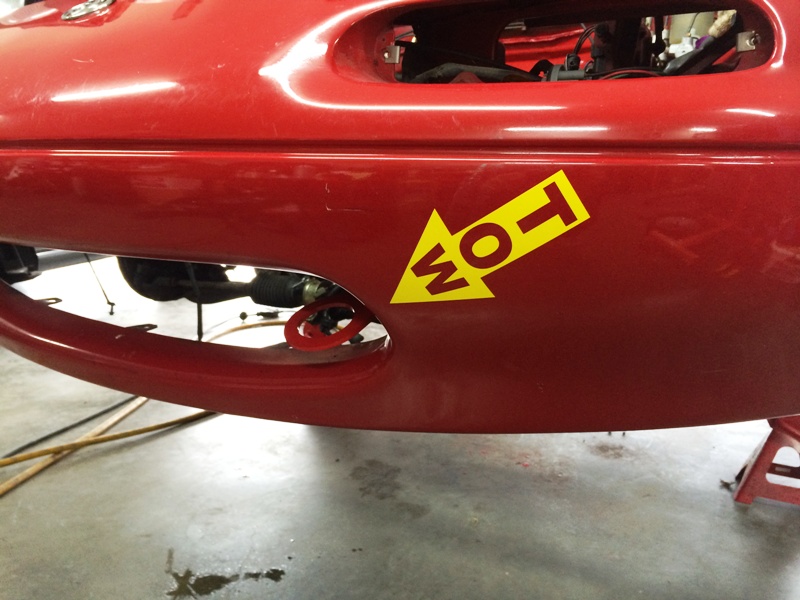
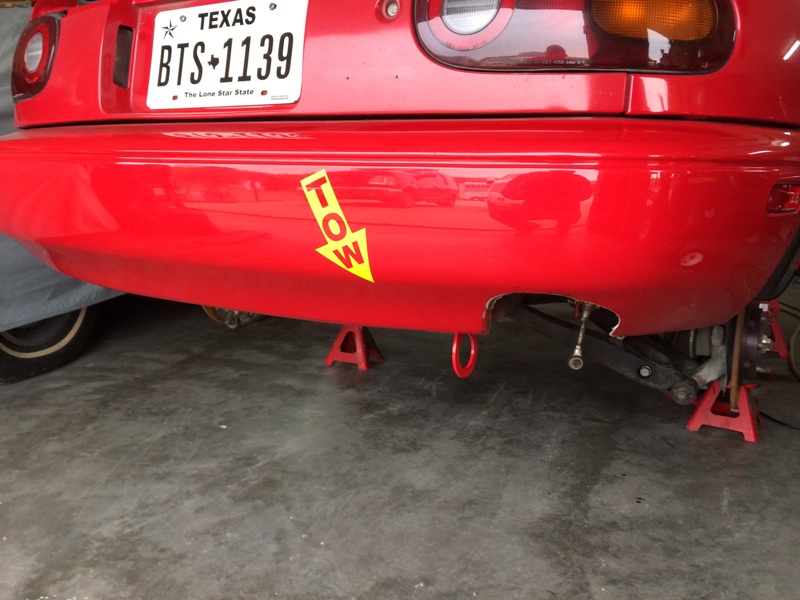
Tow hooks. Looking racy:
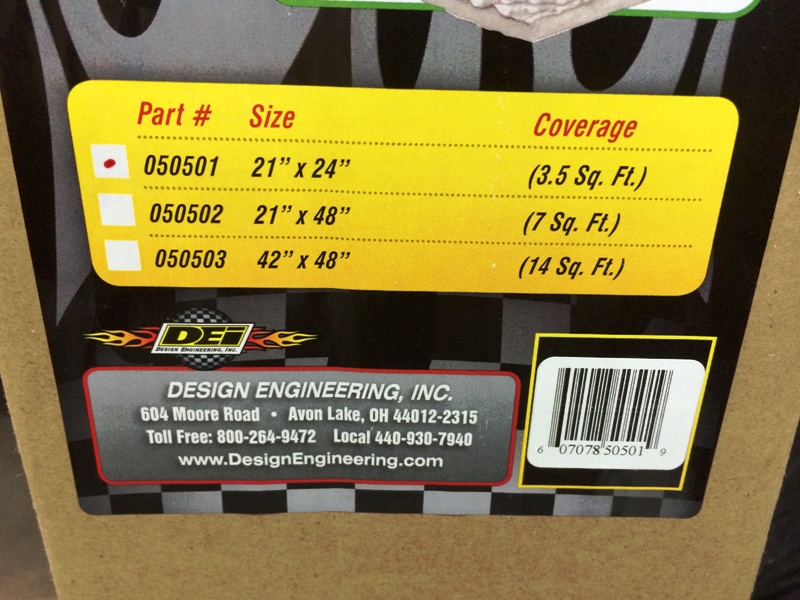
Bought some DEI heat shielding for the transmission tunnel. After scrubbing all the oil, grease and dirt out of the tunnel, installation was cake. I think I'll be doing this to my Silver car too. Small size was plenty (Amazon):

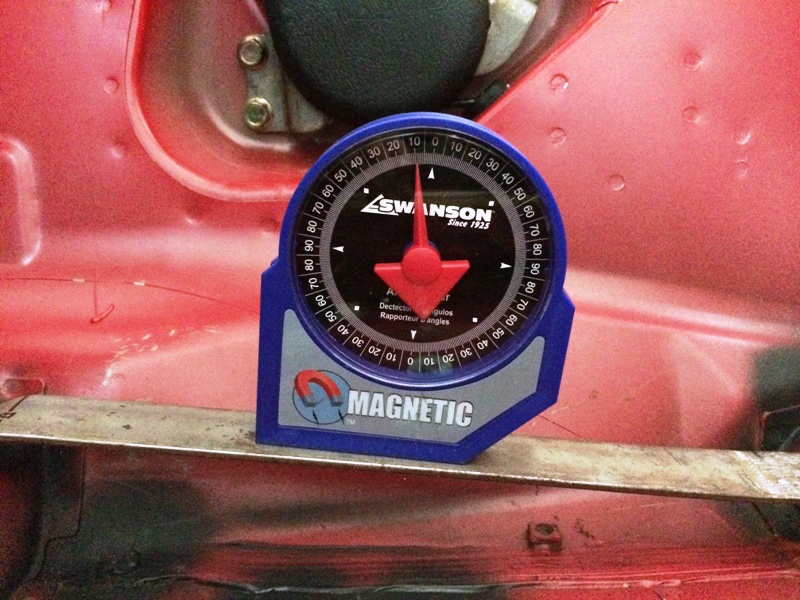
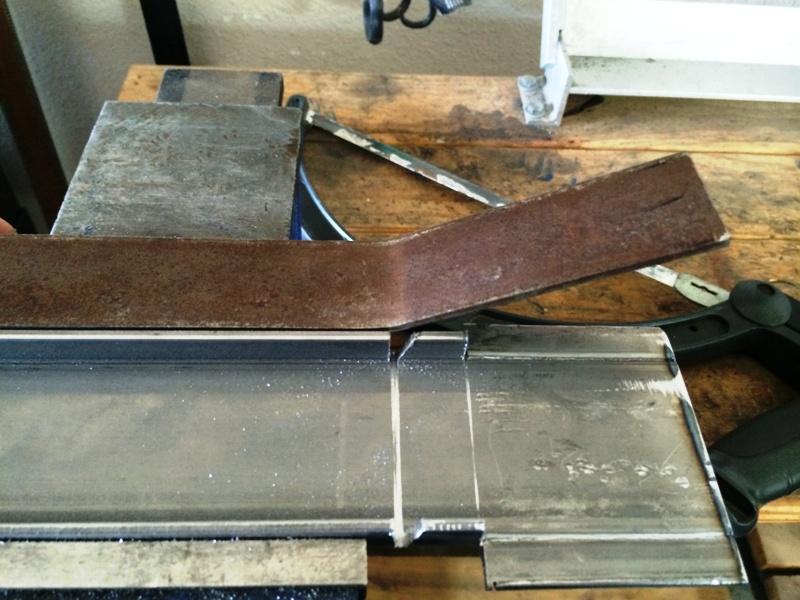
Started fabricating the seat brackets. These are loosely based on the TDR design (TDR Seat Rails 90-05). I'm constructing these from 1/8" rolled C-channel steel (Home Depot Racing). Should be really strong and I'll be able to drill a series of holes with welded nuts on the driver's side for seat adjustability. Step 1 was to use some flat stock to get angles and dimensions:

Ended up with a 10 degree rail angle. This puts the seatback angle of the UltraShield Spec Miata Seat at 15 degrees which, I hope, will work well with my HANS:
With pattern in hand, started working the C-channel. Cut to length (17.5" total) and then worked the ends. The front end gets a straight hacksaw cut 2.25" from the end, and a notch (where the welded bend will be) 3" from the end. Used a BFH to flatten the end where it will rest against the OEM pad:
The back end gets a straight hacksaw cut 2" from the end. Again, flattened with the BFH:
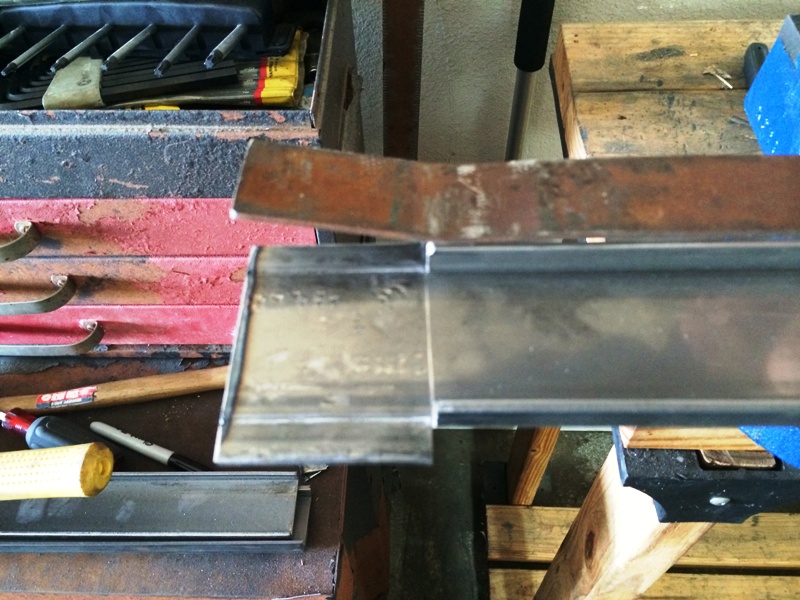
Rounded the edges with a grinder and this is what it looks like:
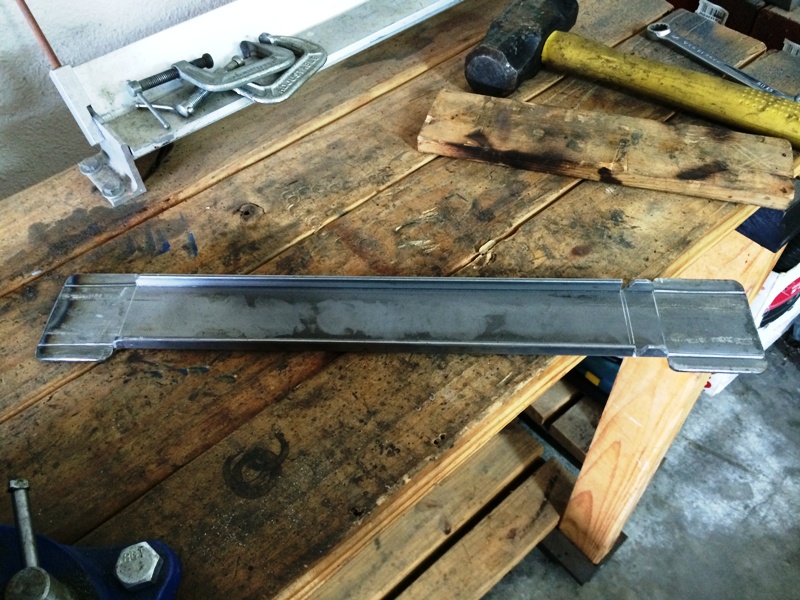
Bent the ends so it matches the pattern:
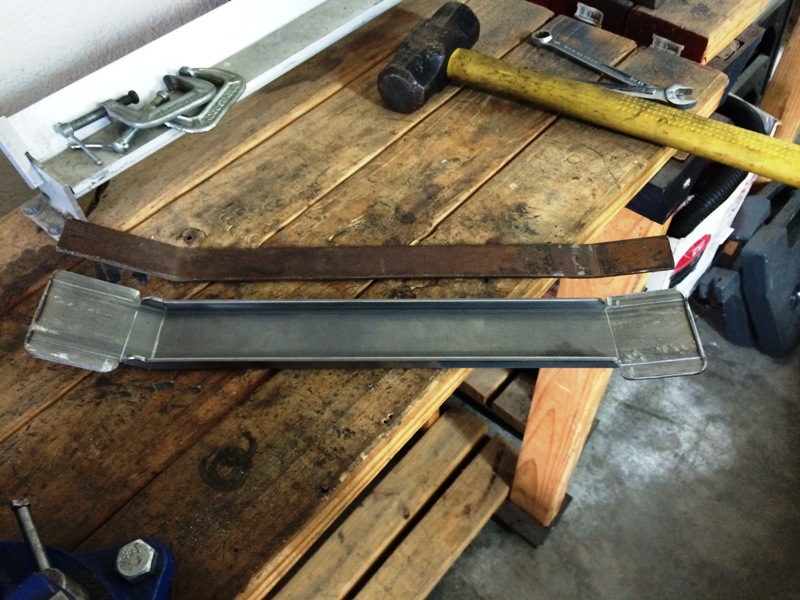
Test fit:
Still some drilling and welding to come on these. This C-channel is super-easy to weld.
The UltraShields sat really nicely on these brackets. Hopefully, they are low enough (I'm a 5'10" type of guy). If not, I'll need to remove the OEM rear pad as described for the TDR "low" option.
Tow hooks. Looking racy:
Bought some DEI heat shielding for the transmission tunnel. After scrubbing all the oil, grease and dirt out of the tunnel, installation was cake. I think I'll be doing this to my Silver car too. Small size was plenty (Amazon):
Started fabricating the seat brackets. These are loosely based on the TDR design (TDR Seat Rails 90-05). I'm constructing these from 1/8" rolled C-channel steel (Home Depot Racing). Should be really strong and I'll be able to drill a series of holes with welded nuts on the driver's side for seat adjustability. Step 1 was to use some flat stock to get angles and dimensions:
Ended up with a 10 degree rail angle. This puts the seatback angle of the UltraShield Spec Miata Seat at 15 degrees which, I hope, will work well with my HANS:
With pattern in hand, started working the C-channel. Cut to length (17.5" total) and then worked the ends. The front end gets a straight hacksaw cut 2.25" from the end, and a notch (where the welded bend will be) 3" from the end. Used a BFH to flatten the end where it will rest against the OEM pad:
The back end gets a straight hacksaw cut 2" from the end. Again, flattened with the BFH:
Rounded the edges with a grinder and this is what it looks like:
Bent the ends so it matches the pattern:
Test fit:
Still some drilling and welding to come on these. This C-channel is super-easy to weld.
The UltraShields sat really nicely on these brackets. Hopefully, they are low enough (I'm a 5'10" type of guy). If not, I'll need to remove the OEM rear pad as described for the TDR "low" option.
Reply
2
2

Well , I also happen to be 5' 10", so I definitely want to see how you fit with these! I have a long torso, so I might eventually remove the rear humps. What is involved in that?
Keep up the great work! I ordered my re-route stuff based on your advice and I just might get a new seat setup out of this thread as well!
Keep up the great work! I ordered my re-route stuff based on your advice and I just might get a new seat setup out of this thread as well!
Reply
0
0
I wish I went kirkey after this nightmare if a weekend i mounted a forza sport and I barley clear the broomstick with them mounted to the floor on side mounts.
Is the cage any taller than the hardcore ht roll bar? I'd imagine not but just wondering?
Is the cage any taller than the hardcore ht roll bar? I'd imagine not but just wondering?
Reply
0
0
Thread Starter
Elite Member
iTrader: (4)
Joined: Mar 2008
Posts: 6,301
Total Cats: 697
From: Granbury, TX
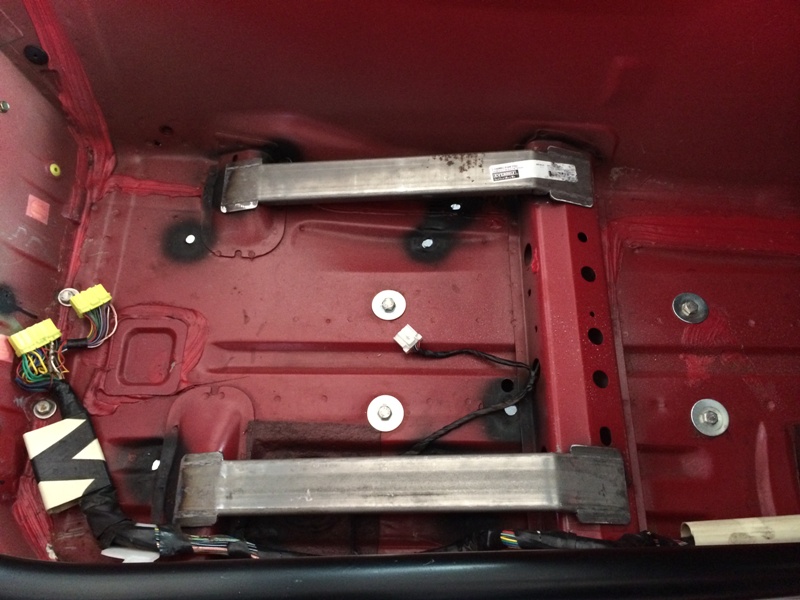
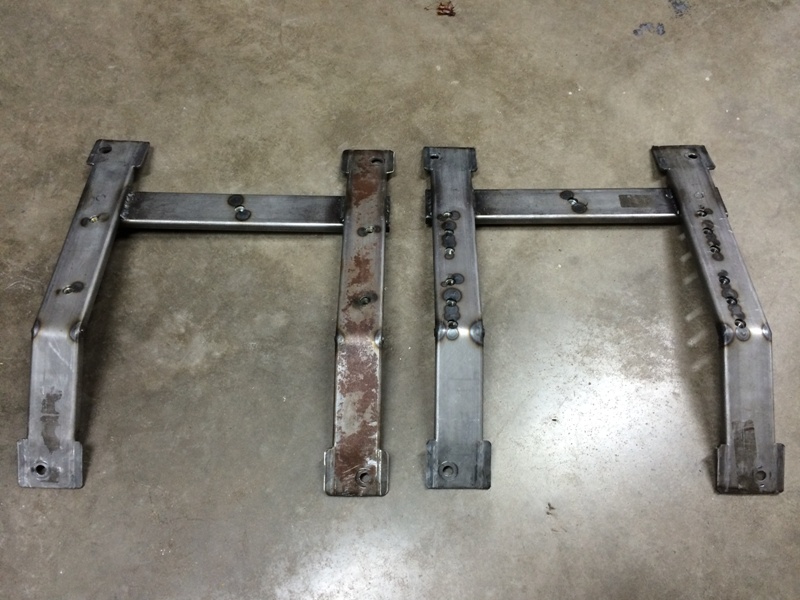
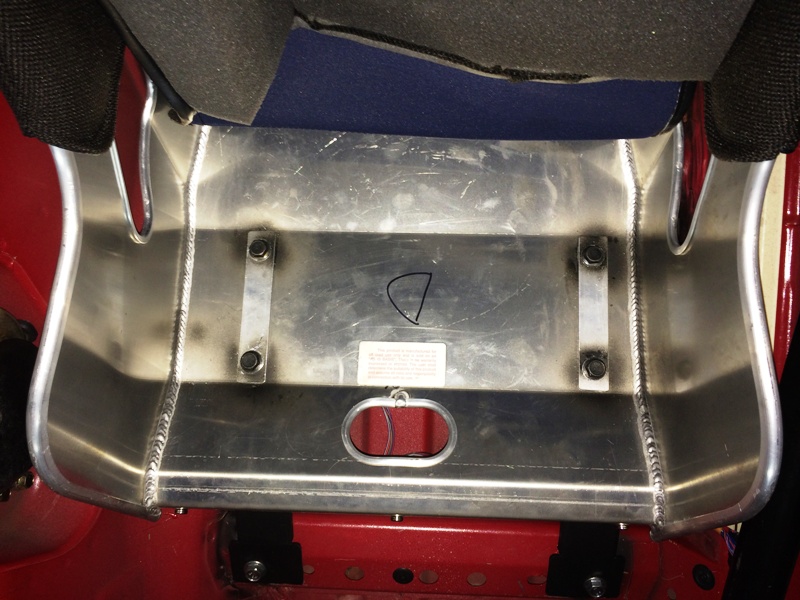
Got the seat bases built. I sit-tested my earlier design and felt like it positioned the seat too vertically for comfort. So I redid the dimensions slightly. The design I settled on tilts the base of the seat ~17-18 degrees.
Both sides are basically custom built with surprisingly different finished dimensions. The spacing between the seat supports on the driver's side is noticeably more narrow than on the passenger's side. Kind of surprising, Mazda must have had a reason.
To get accurate mounting holes:
1. Drill through the car's floor at the rear bolt holes using a 1/4" bit.
2. Drill the front of the supports and bolt them in.
3. Use a square to get the supports parallel and square to the car.
4. Get under the car with some spray paint and lightly spritz through the 1/4" holes drilled in step 1 to mark the location of the rear holes.
5. Drill the rear holes. This worked great on the driver's side. By the time I got to the passenger's side, I had started drinking beer. Accuracy suffered.
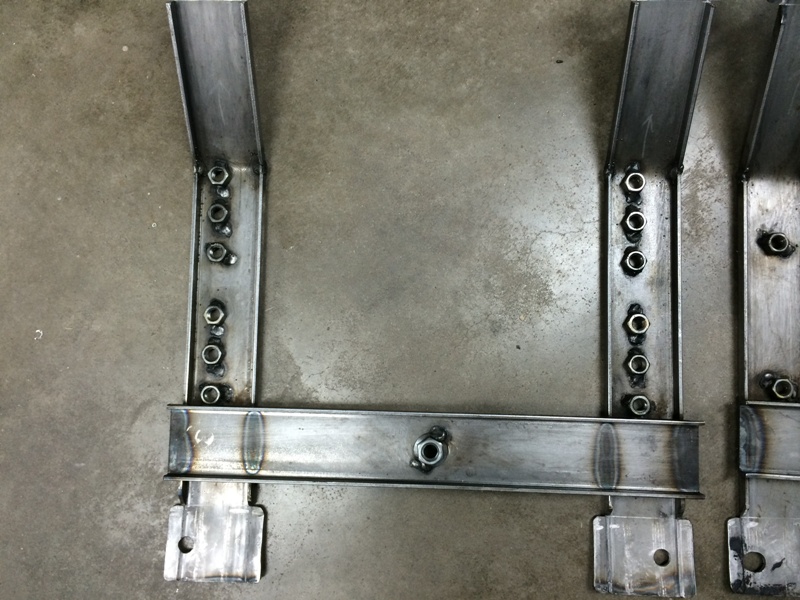
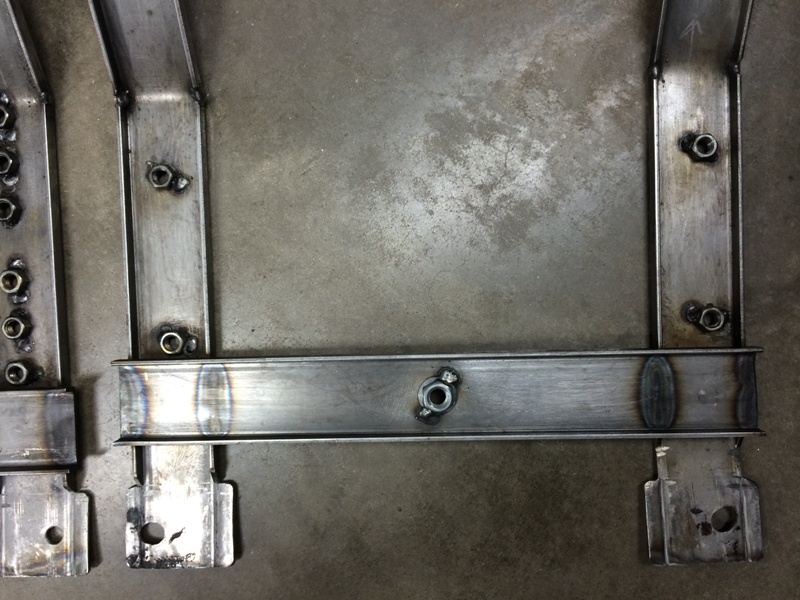
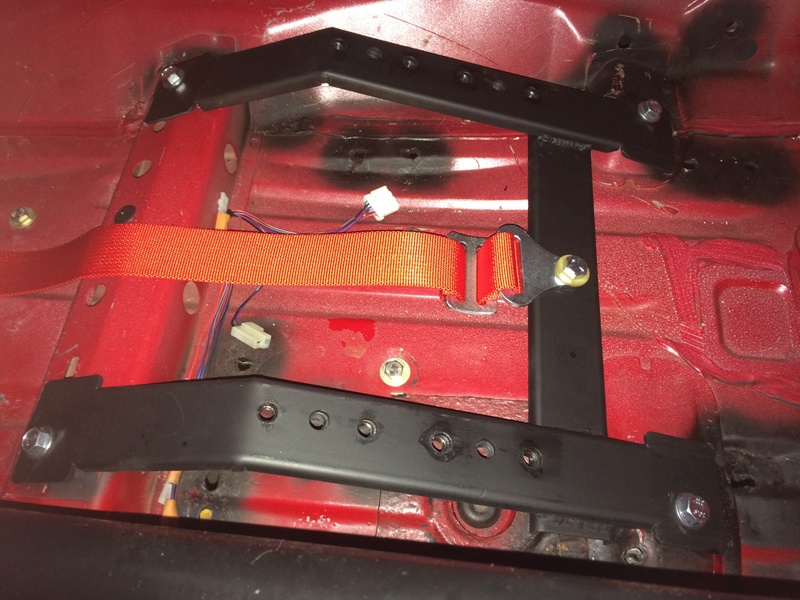
I also welded all nuts to the seat bases. The idea here is that everything can be removed and installed with a ratchet or impact gun from the top -- no futzing under the car or messing with backing wrenches. Ideal for trackside work. You can see that the passenger's seat base has a single, fixed position. The driver's seat base has additional nuts welded to support 3 seat positions about an inch apart for adjustability. The cross-brace has 4 welds. The whole thing is built like a brick ****house because the cross-brace provides the mounting point for the harness sub-belt.
Some pix:
The Ultrashield sure is a great fit in the Miata. This is the 16" Spec Miata seat. Lots of room. No sheet metal bashing. And it's darn comfortable too:
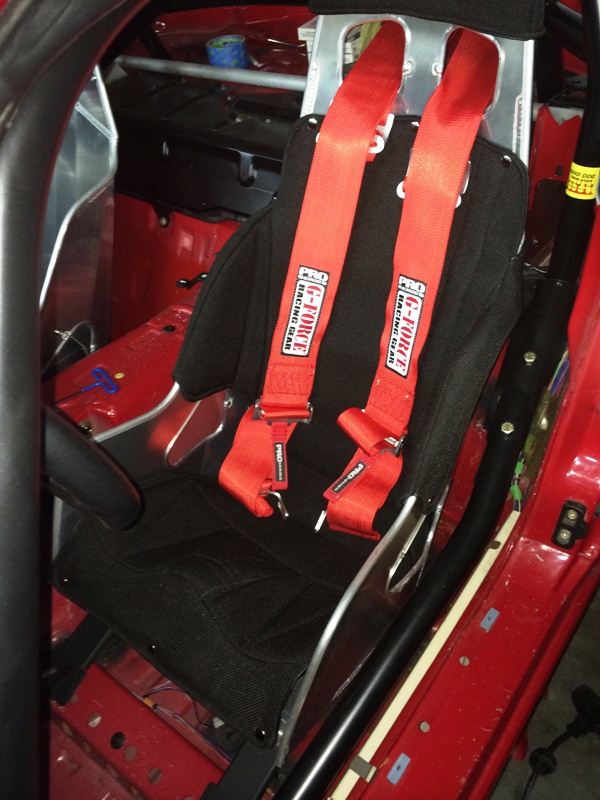
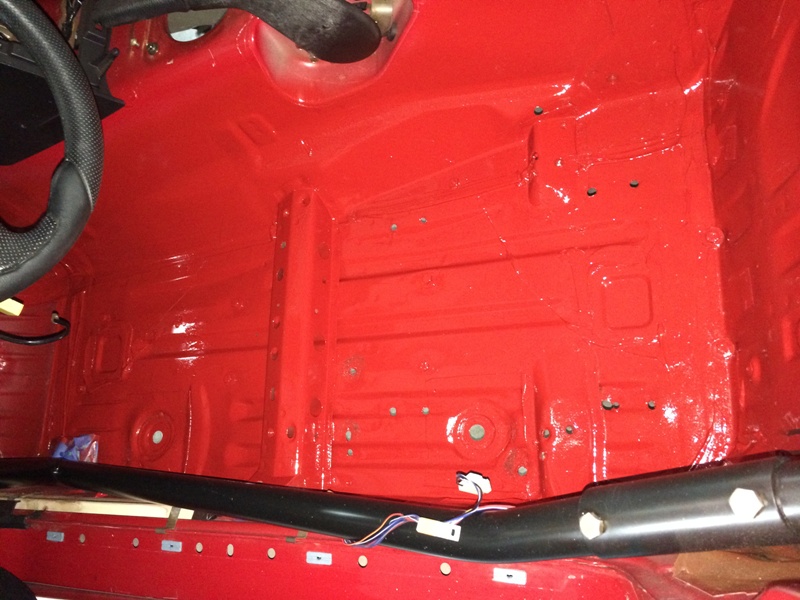
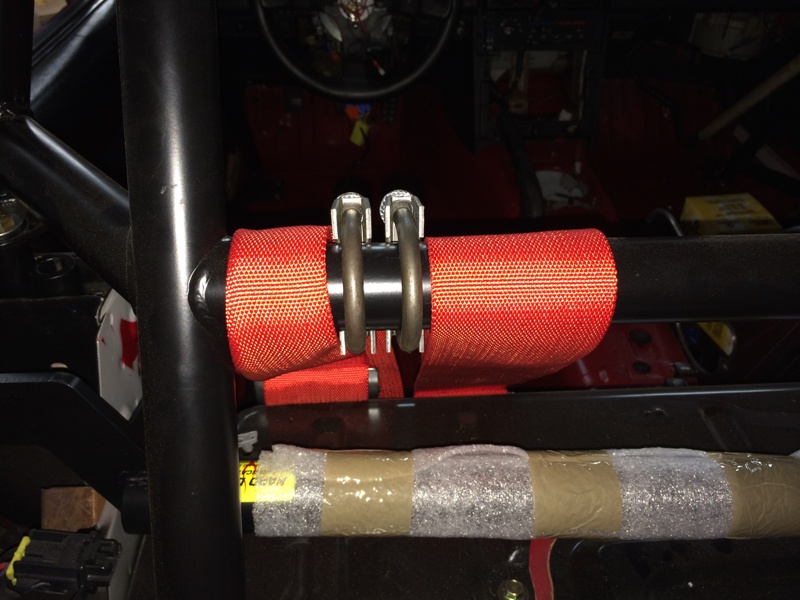
One area I'm concerned about is that when the seat is lined up with the steering wheel, the shoulder harness holes are off-center with respect to the cage's seat-back bar. This is what it looks like:
So, what do you guys think? Is this acceptable? Or should I add a separate harness bar? Only the driver's side has this issue, passenger's side is fine. Need to get this sorted before I build the seatback braces. I'm leaning towards adding a separate harness bar.
Also got the NRG Quick Release installed. It went on a full-size Momo hub (not a short hub) that the PO had installed. I was worried that this would position the wheel to close the driver, but a test sit felt OK. Guess I'll drive it and see. Can always add a short hub later.

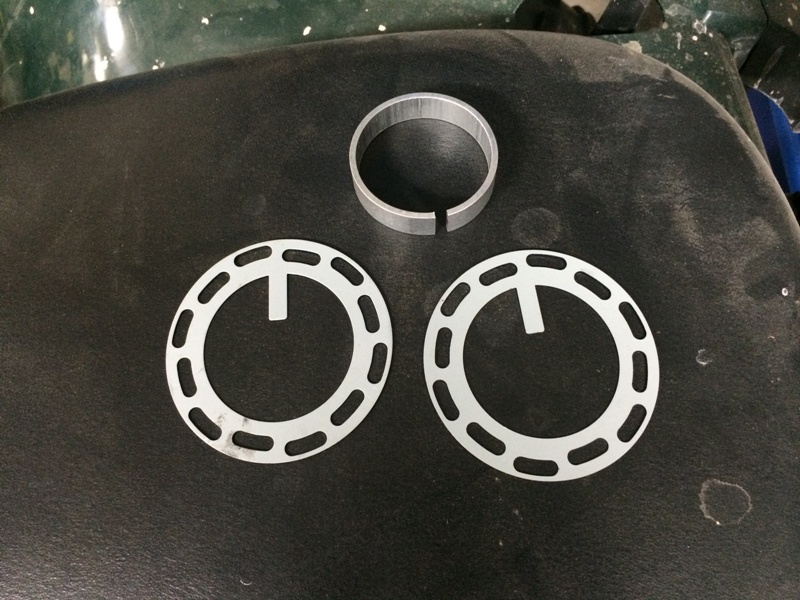
These parts came with the Quick Release. I have no idea what they're for and NRG didn't incude any instructions with the Quick Release (rice!). Anybody have an idea?
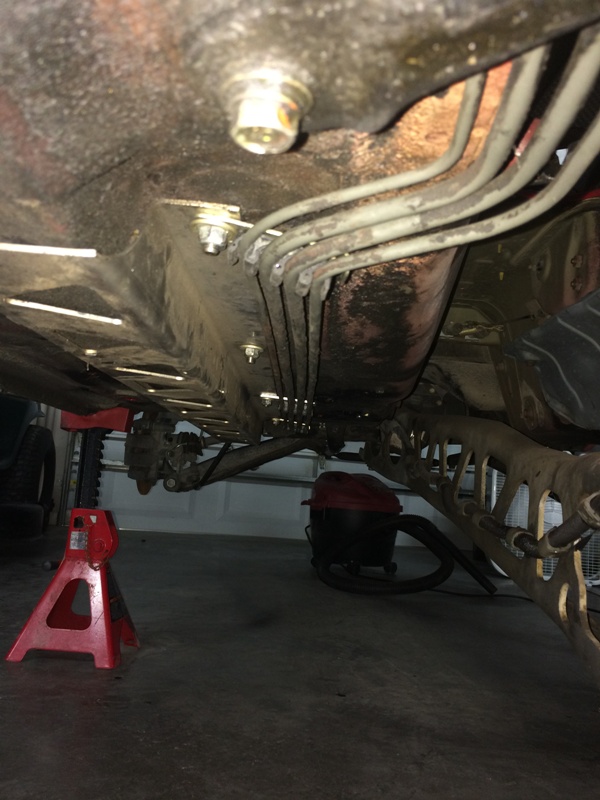
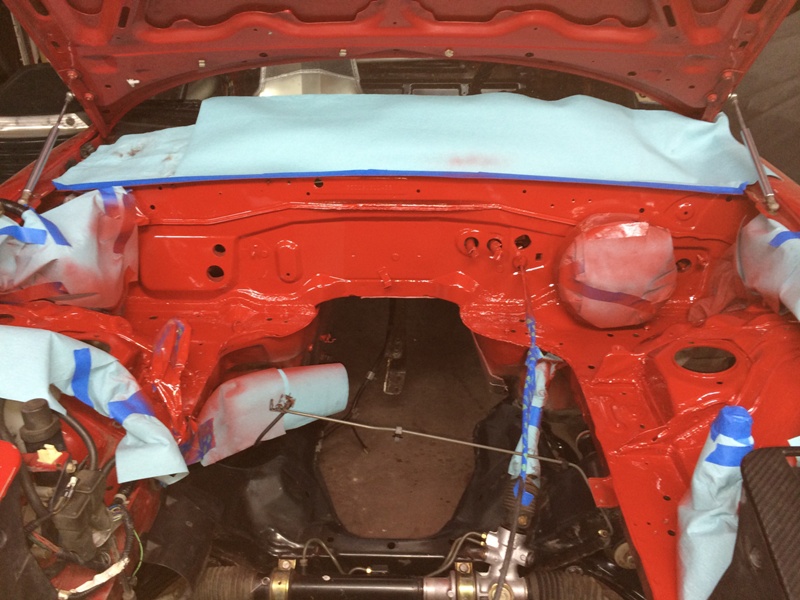
Also got my brake and fuel lines relocated into a protected position. As much as I like FM's frame rails, I really hate the way they put the brake and fuel lines into harm's way:
In other news, I gave up on the Jongbloed 15x9's. Ordered Advanti Storm's instead. Hard to argue with 12.2 pound 15x9's for $141 that are in stock. They're on their way.
Standby for progress this coming week. Took some vacation time to get this beast on the road!
Both sides are basically custom built with surprisingly different finished dimensions. The spacing between the seat supports on the driver's side is noticeably more narrow than on the passenger's side. Kind of surprising, Mazda must have had a reason.
To get accurate mounting holes:
1. Drill through the car's floor at the rear bolt holes using a 1/4" bit.
2. Drill the front of the supports and bolt them in.
3. Use a square to get the supports parallel and square to the car.
4. Get under the car with some spray paint and lightly spritz through the 1/4" holes drilled in step 1 to mark the location of the rear holes.
5. Drill the rear holes. This worked great on the driver's side. By the time I got to the passenger's side, I had started drinking beer. Accuracy suffered.
I also welded all nuts to the seat bases. The idea here is that everything can be removed and installed with a ratchet or impact gun from the top -- no futzing under the car or messing with backing wrenches. Ideal for trackside work. You can see that the passenger's seat base has a single, fixed position. The driver's seat base has additional nuts welded to support 3 seat positions about an inch apart for adjustability. The cross-brace has 4 welds. The whole thing is built like a brick ****house because the cross-brace provides the mounting point for the harness sub-belt.
Some pix:
The Ultrashield sure is a great fit in the Miata. This is the 16" Spec Miata seat. Lots of room. No sheet metal bashing. And it's darn comfortable too:
One area I'm concerned about is that when the seat is lined up with the steering wheel, the shoulder harness holes are off-center with respect to the cage's seat-back bar. This is what it looks like:
So, what do you guys think? Is this acceptable? Or should I add a separate harness bar? Only the driver's side has this issue, passenger's side is fine. Need to get this sorted before I build the seatback braces. I'm leaning towards adding a separate harness bar.
Also got the NRG Quick Release installed. It went on a full-size Momo hub (not a short hub) that the PO had installed. I was worried that this would position the wheel to close the driver, but a test sit felt OK. Guess I'll drive it and see. Can always add a short hub later.
These parts came with the Quick Release. I have no idea what they're for and NRG didn't incude any instructions with the Quick Release (rice!). Anybody have an idea?
Also got my brake and fuel lines relocated into a protected position. As much as I like FM's frame rails, I really hate the way they put the brake and fuel lines into harm's way:
In other news, I gave up on the Jongbloed 15x9's. Ordered Advanti Storm's instead. Hard to argue with 12.2 pound 15x9's for $141 that are in stock. They're on their way.
Standby for progress this coming week. Took some vacation time to get this beast on the road!
Last edited by hornetball; Apr 26, 2014 at 08:50 AM.
Reply
0
0
They look like horn button grounds rings - the tab likely fits a spade connector. My steering hub came with a similar ring and the instructions indicated it was for horn functionality.
-Zach
-Zach
Reply
0
0

Thread Starter
Elite Member
iTrader: (4)
Joined: Mar 2008
Posts: 6,301
Total Cats: 697
From: Granbury, TX
Busy couple of days.
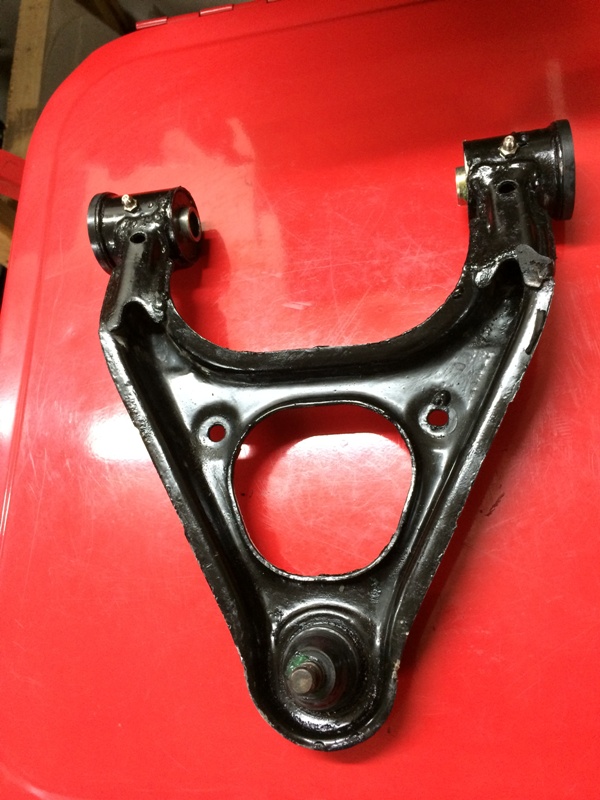
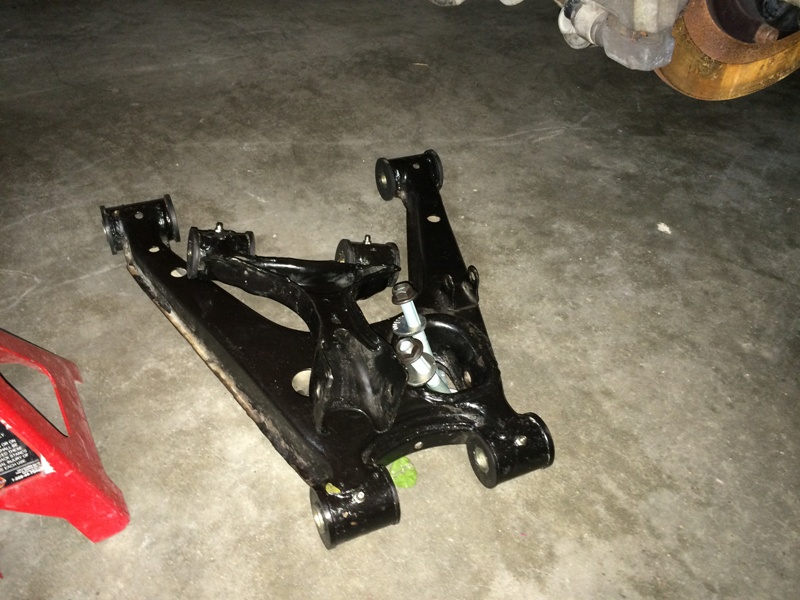
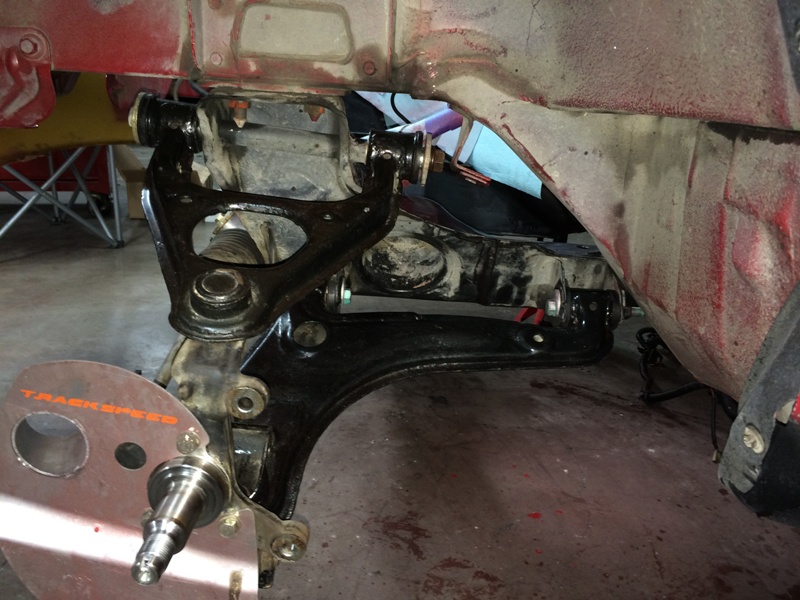
Suspension work. Freshened up the control arms with poly bushings, grease fittings, new ball joint/tie rod end dust boots and the latest adjusting bolts. The original dust boots were all intact so no wear problems. They were about to go, especially the tie rod end dust boots that are most exposed to brake heat.
Speaking of brake heat, adding some of Savington's prawns that I picked up used from a friend:
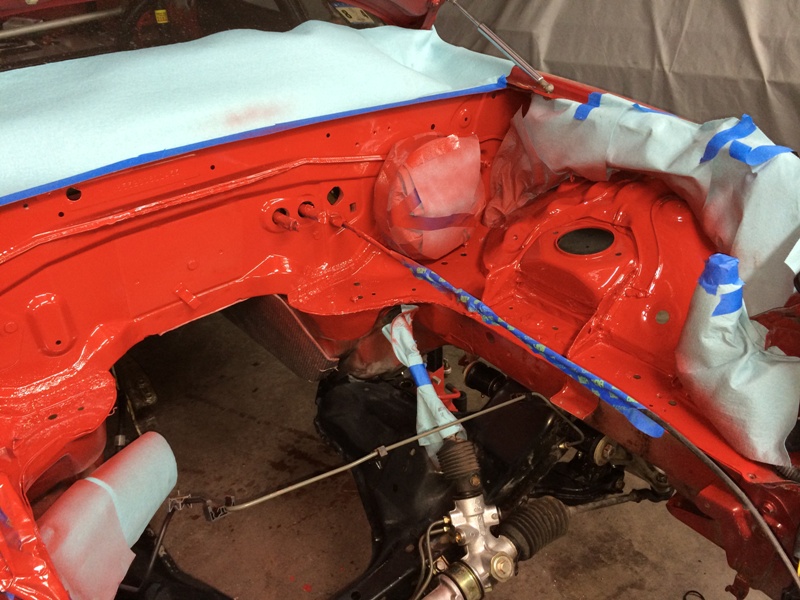
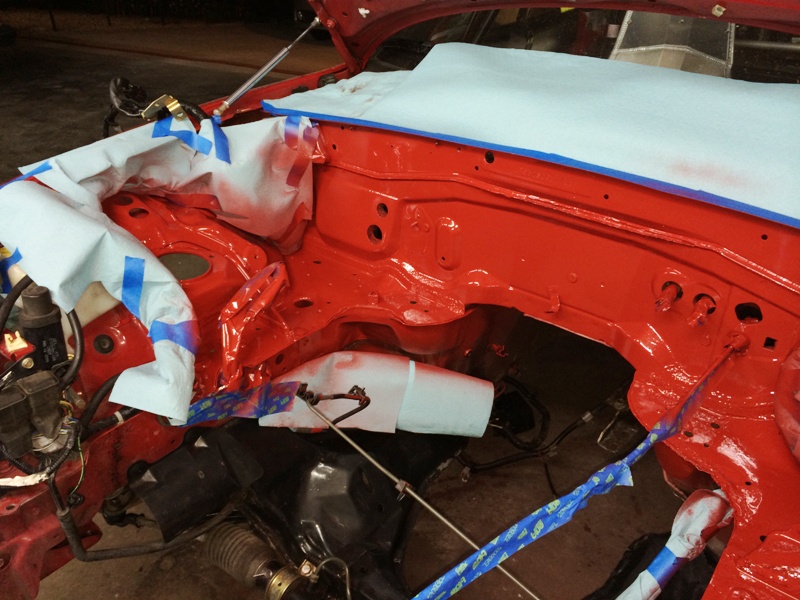
OCD kicked in. Fixed some more PO body damage and then went to town with the Rustoleum. Couldn't help myself. Damn you JeffBucc, D A M N Y O U !!! LOL.
Got a package from Brian Goodwin:
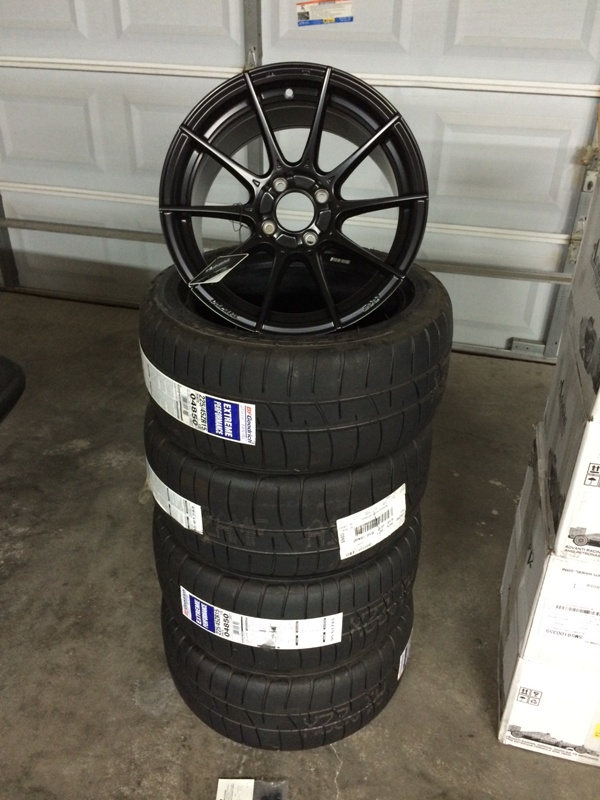
15x9, and light. Yum:
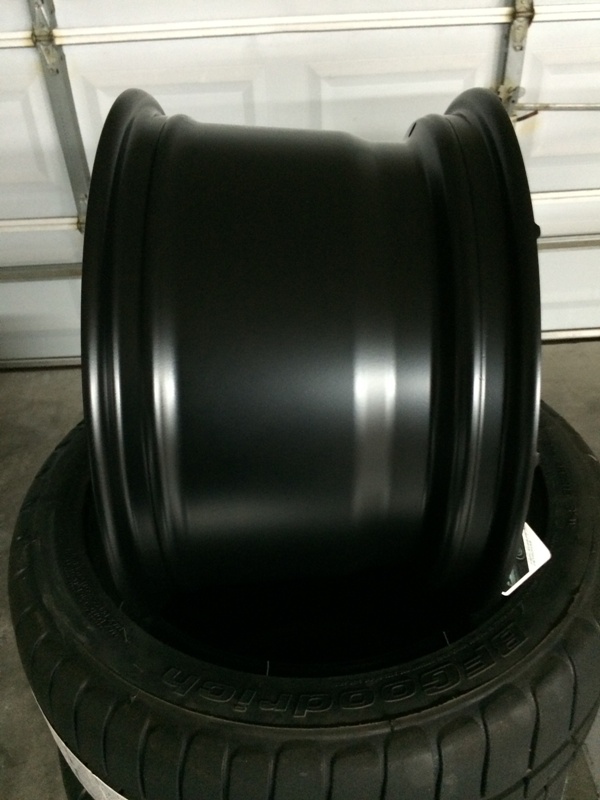
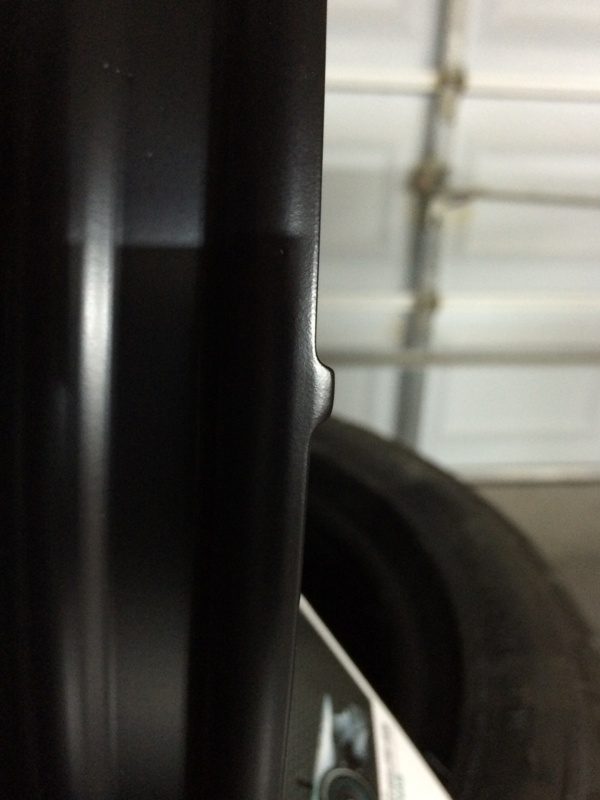
There's been some talk of the Advanti Storm spoke design perhaps causing tire mounting issues (although none have been reported). This is how far the spokes really protrude, not much at all:
Easiest part of the project so far, evaporator delete:

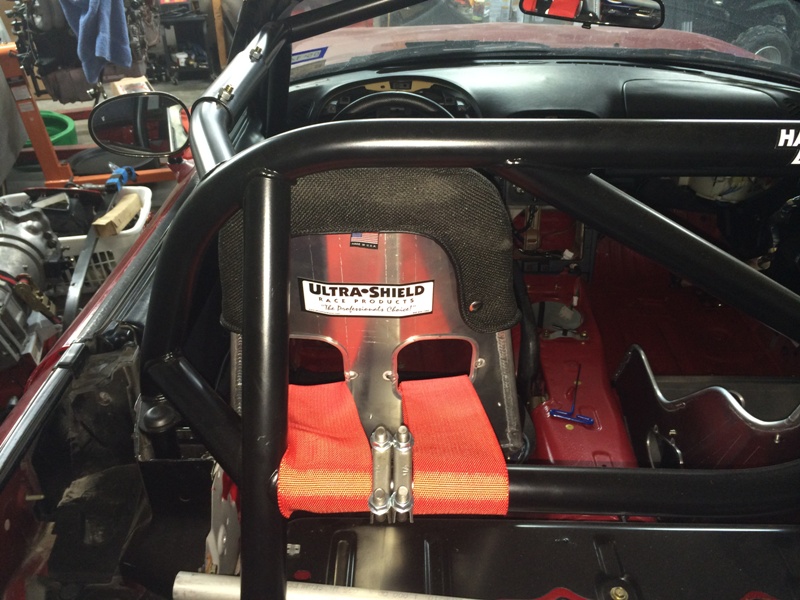
Back to the harness, a friend of mine who's a longtime racer suggested that I could fold the shoulder harness webbing to get it centered on the seat better. He mentioned that it is common for race harnesses to get folded to fit 3" webbing into 2" fittings. I mocked up the fold. Looks like this. I dunno?
Going to drop the motor back in tomorrow. Standby.
Suspension work. Freshened up the control arms with poly bushings, grease fittings, new ball joint/tie rod end dust boots and the latest adjusting bolts. The original dust boots were all intact so no wear problems. They were about to go, especially the tie rod end dust boots that are most exposed to brake heat.
Speaking of brake heat, adding some of Savington's prawns that I picked up used from a friend:
OCD kicked in. Fixed some more PO body damage and then went to town with the Rustoleum. Couldn't help myself. Damn you JeffBucc, D A M N Y O U !!! LOL.
Got a package from Brian Goodwin:
15x9, and light. Yum:
There's been some talk of the Advanti Storm spoke design perhaps causing tire mounting issues (although none have been reported). This is how far the spokes really protrude, not much at all:
Easiest part of the project so far, evaporator delete:
Back to the harness, a friend of mine who's a longtime racer suggested that I could fold the shoulder harness webbing to get it centered on the seat better. He mentioned that it is common for race harnesses to get folded to fit 3" webbing into 2" fittings. I mocked up the fold. Looks like this. I dunno?
Going to drop the motor back in tomorrow. Standby.
Reply
1
1
Elite Member
Joined: Oct 2013
Posts: 2,764
Total Cats: 951
From: Cedar City, UT


Reply
1
1


Awesome job on the build! I love the seat mounts that you made, I may have to redo mine for my ultrashield and make some new ones similar to yours. Where did you get the evap delete tube? Im in need of one and not sure the best place to find one short of a dealership.
Reply
0
0
Thread Starter
Elite Member
iTrader: (4)
Joined: Mar 2008
Posts: 6,301
Total Cats: 697
From: Granbury, TX
Yep, Rosenthal. They have two items, one is just the tube, the other is a "kit" that has the tube along with 3 rubber plugs to seal the holes left over from removing the evaporator.
On the rails, the key dimension for getting the angle I liked was from the front bolt holes to the bend . . . I used 6.5". You can also make this lower by removing the rear mounting pads and bolting through the floor at the rear. If you do this, you need to shorten the dimension from the front bolt holes to the bend to preserve the same tilt angle.
Ran errands today gathering all the doodads for putting the engine back in. Getting to work now.
Reply
0
0


