
93' Miata stolen and flipped build thread


Elite Member
Joined: Oct 2013
Posts: 2,764
Total Cats: 951
From: Cedar City, UT
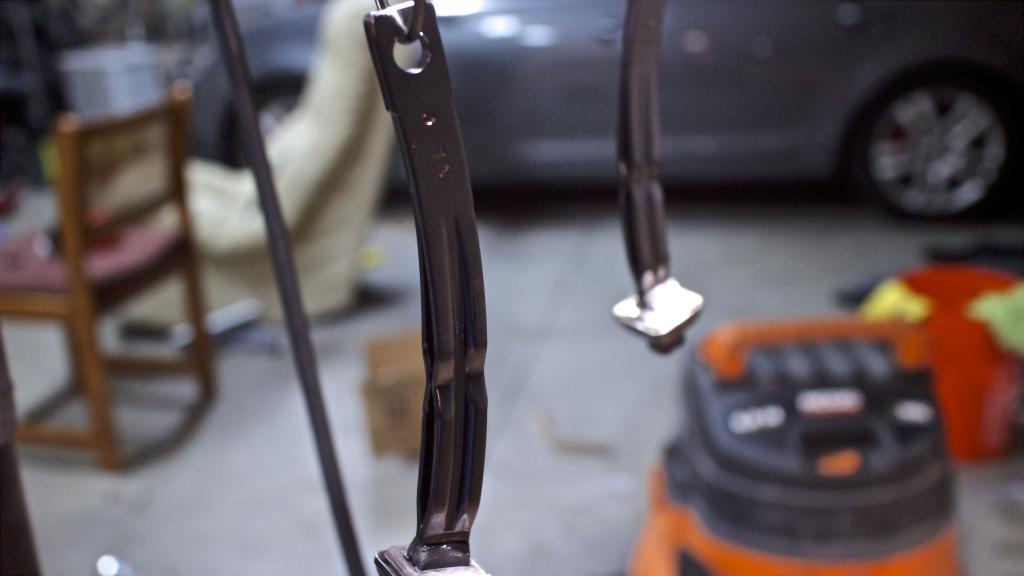
Repainted the door latch sliders...no idea what the correct name for them is. I did a pretty crappy job the first go around so this was take 2.
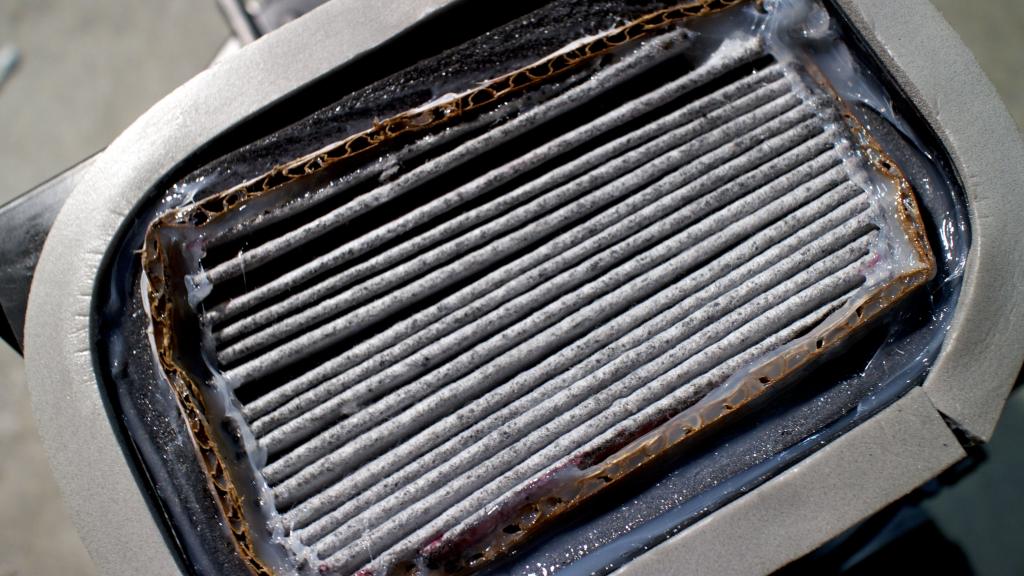
Also experimented with putting a carbon filter in the blower intake. We'll see if it restricts airflow too much. This is a very rough draft. If I don't end up liking it I'll find something the fits a little better.
I had a spare carbon filter laying around for my VW Jetta so I hacked it up and put cardboard around the edge followed by foam weatherstripping and some sealant just for good measure.
It is ugly as sin but no one will see it so...who cares! Living in the desert you have no idea how much sand and dust will get in your car just by having the windows down let alone not having a filter between the bare air and your cabin.
It looks way worse in the picture too BTW...

Last edited by Jeffbucc; Feb 20, 2014 at 11:23 PM.
Reply
 3
3

3


Reply
0
0
Elite Member
Joined: Oct 2013
Posts: 2,764
Total Cats: 951
From: Cedar City, UT
It was such a hack job
It was rushed, admittedly, I'm not happy with it but it is one of those function over form type jobs!...At least that is how rationalization is helping me get through my "F" report card I gave myself on it.
It was rushed, admittedly, I'm not happy with it but it is one of those function over form type jobs!...At least that is how rationalization is helping me get through my "F" report card I gave myself on it.
Reply
0
0
Elite Member
Joined: Oct 2013
Posts: 2,764
Total Cats: 951
From: Cedar City, UT
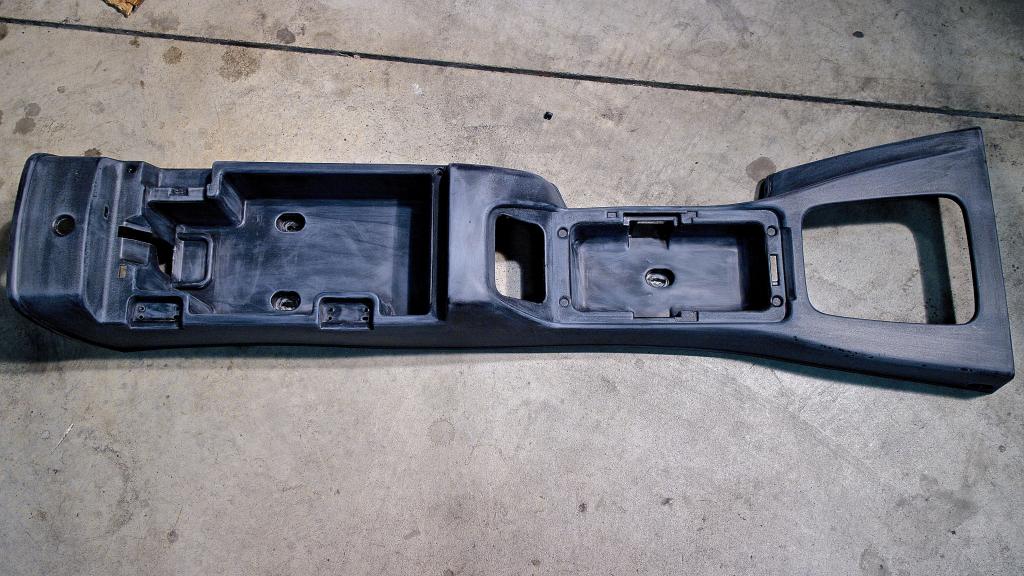
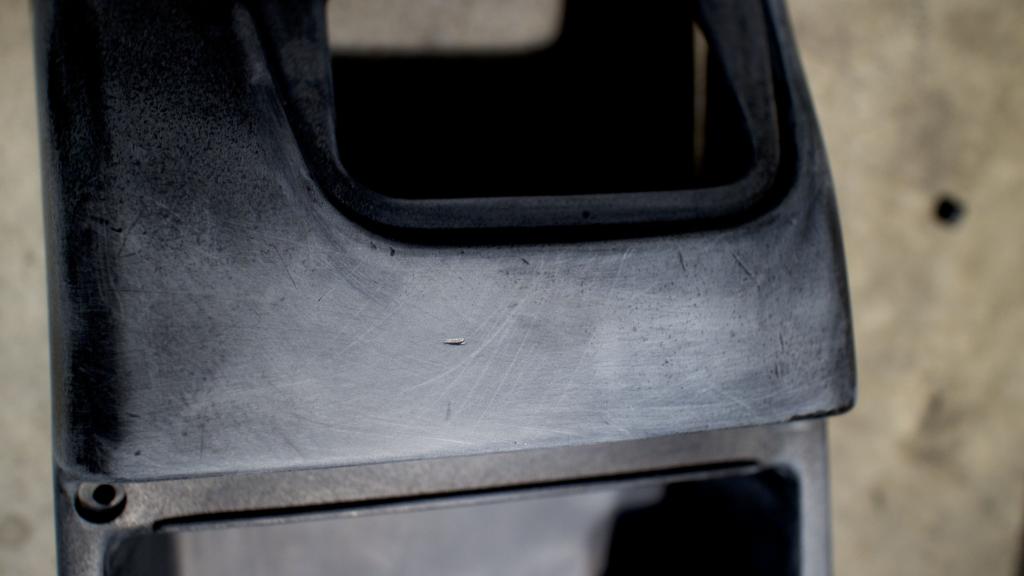
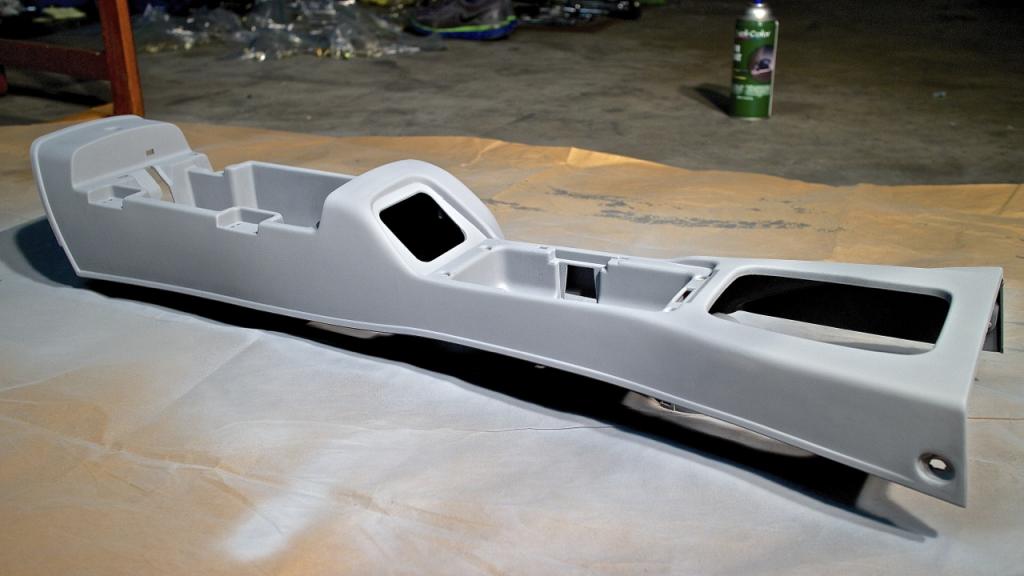
OK let me preface this by saying I have never used bondo before. So this looks rough, but sandable.
Most of the reason that I am doing this is because the plastic wouldn't respond to any of my conditioners, it stayed a really chalky white. I started off by wet sanding with 400 grit sandpaper, to remove the top layer of oxidized plastic. You really don't want to use anything less than 400 grit. Anything coarser will introduce fine scratches that will show through the plastic paint when you are finished. More headache than it is worth to speed up your project.
After sanding I cleaned it again thoroughly so I could get a good idea of what I needed to correct before painting. The thing I've notice about painting plastic is that any blemishes/scratches/dents etc etc really really show through in your final project. Anyone can spot them really easily, and it makes the 90% perfect plastic look like **** due to the 10%.
Saying that, I've never really had an issue with deeper scratches that I couldn't at least sand out/massage out. So I bought a tub of Bondo, and researched it a little before diving in.
Pretty sure I go the mix ratio of hardener-Bondo just about right, but damn does this stuff really set-up fast. I mixed way too much up the first time around, so it taught me to use a tiny bit at a time.
Going to let it cure for an hour before I start sanding the bondo down flat again.
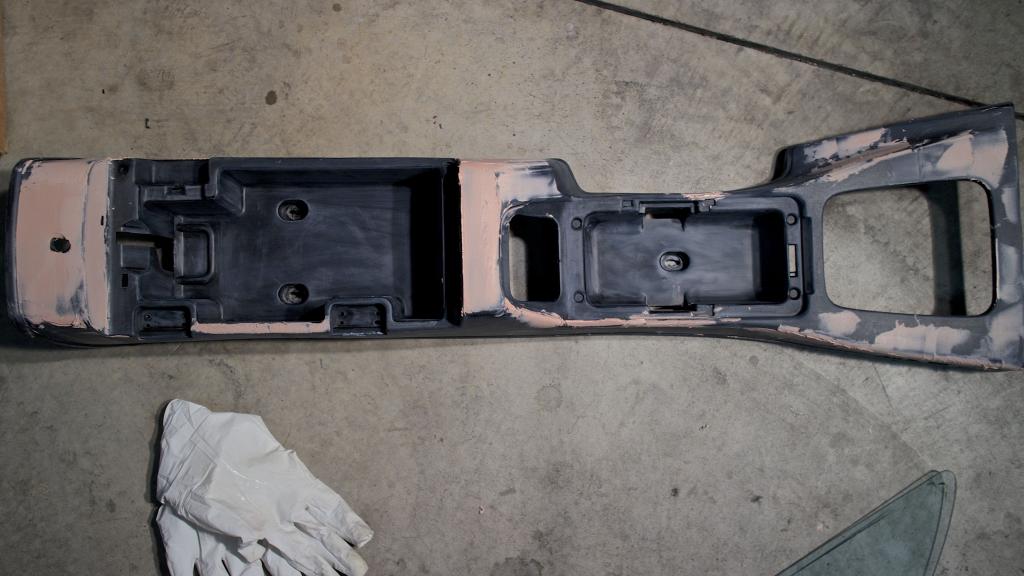
Sanded
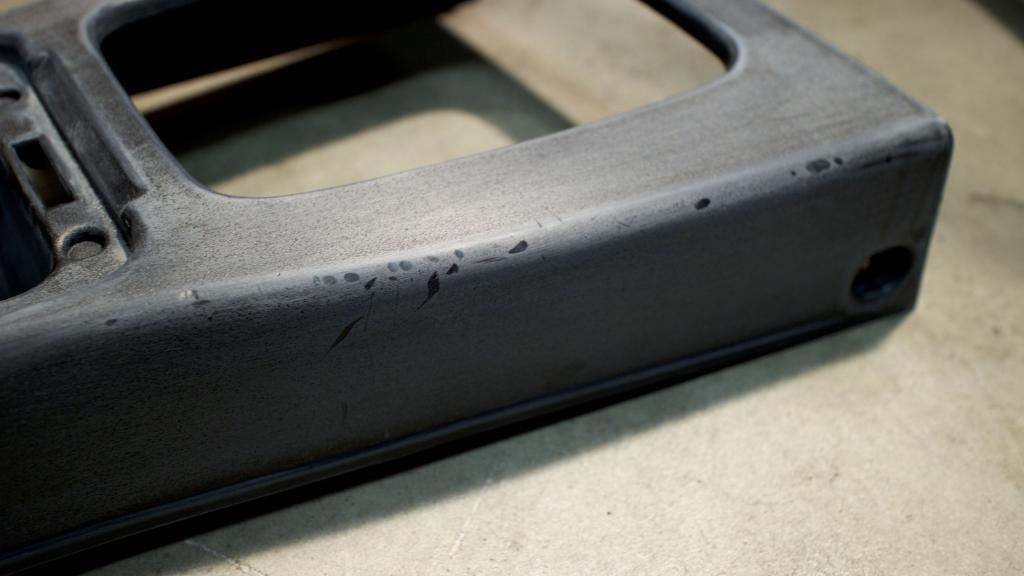
a couple of the imperfection I was talking about. There are more but they are more minor and mostly just small scratches and pinholes.
Bondo setting up. I know it looks messy but I was trying to round out the edges well so that I had a lot of material to play with when I started to sand.
I'm going to trim some of the good sections from the Colorado car's carpet that was mostly trashed, and line the arm rest pocket/cup holder spot so that things don't rattle around.
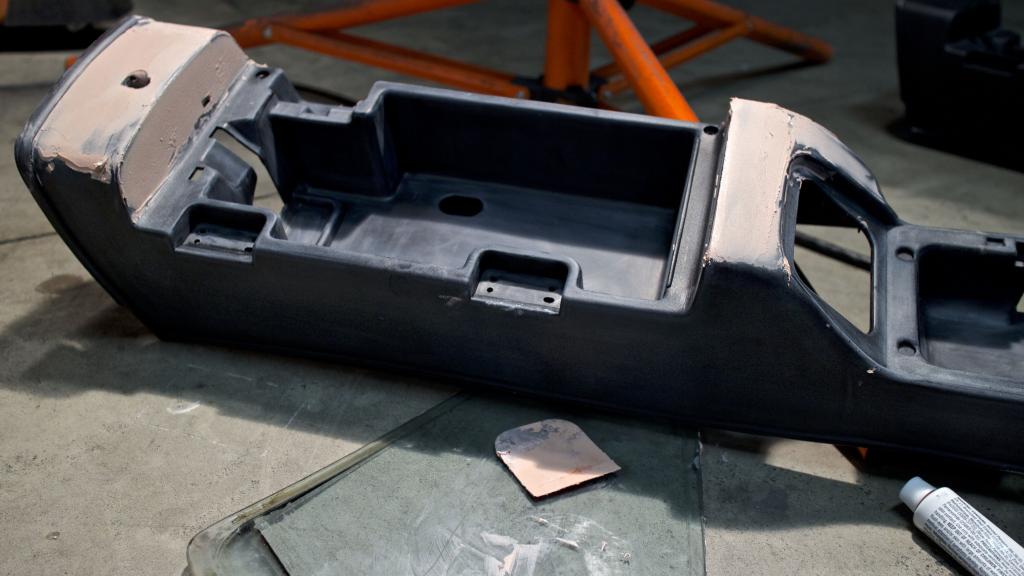
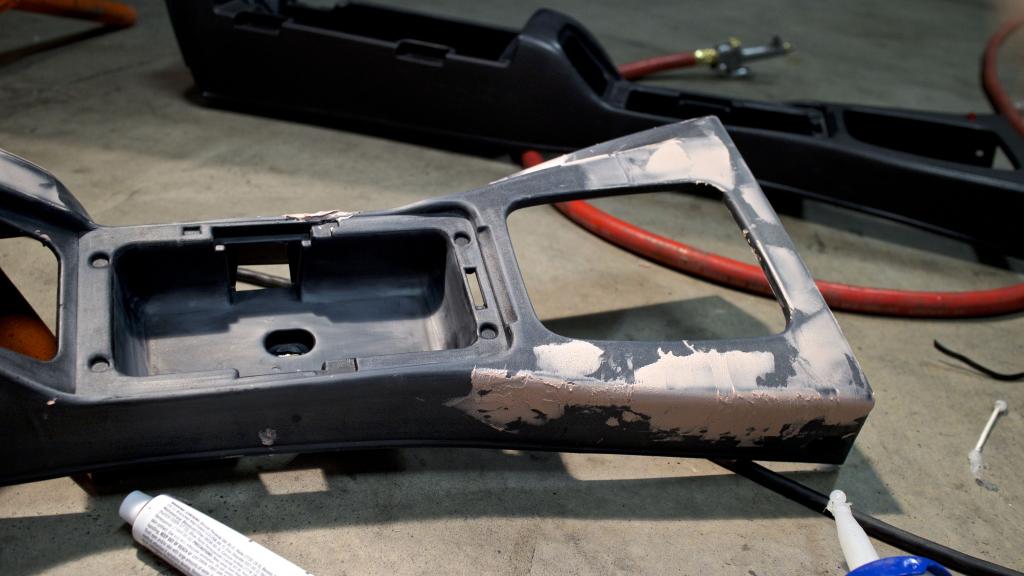
Wear your respirator folks!
Most of the reason that I am doing this is because the plastic wouldn't respond to any of my conditioners, it stayed a really chalky white. I started off by wet sanding with 400 grit sandpaper, to remove the top layer of oxidized plastic. You really don't want to use anything less than 400 grit. Anything coarser will introduce fine scratches that will show through the plastic paint when you are finished. More headache than it is worth to speed up your project.
After sanding I cleaned it again thoroughly so I could get a good idea of what I needed to correct before painting. The thing I've notice about painting plastic is that any blemishes/scratches/dents etc etc really really show through in your final project. Anyone can spot them really easily, and it makes the 90% perfect plastic look like **** due to the 10%.
Saying that, I've never really had an issue with deeper scratches that I couldn't at least sand out/massage out. So I bought a tub of Bondo, and researched it a little before diving in.
Pretty sure I go the mix ratio of hardener-Bondo just about right, but damn does this stuff really set-up fast. I mixed way too much up the first time around, so it taught me to use a tiny bit at a time.
Going to let it cure for an hour before I start sanding the bondo down flat again.
Sanded

a couple of the imperfection I was talking about. There are more but they are more minor and mostly just small scratches and pinholes.


Bondo setting up. I know it looks messy but I was trying to round out the edges well so that I had a lot of material to play with when I started to sand.
I'm going to trim some of the good sections from the Colorado car's carpet that was mostly trashed, and line the arm rest pocket/cup holder spot so that things don't rattle around.


Wear your respirator folks!
Reply
0
0
Elite Member
Joined: Oct 2013
Posts: 2,764
Total Cats: 951
From: Cedar City, UT
I really do want to buy a hide to have a lot of it left over after the door projects. Just in case I get crazy enough to do the dash.

Reply
0
0

Elite Member
Joined: Mar 2006
Posts: 1,574
Total Cats: 106
From: Schwarzenberg, Germany
That's how we roll here... using the side windows as a mixing board for the bondo...! 
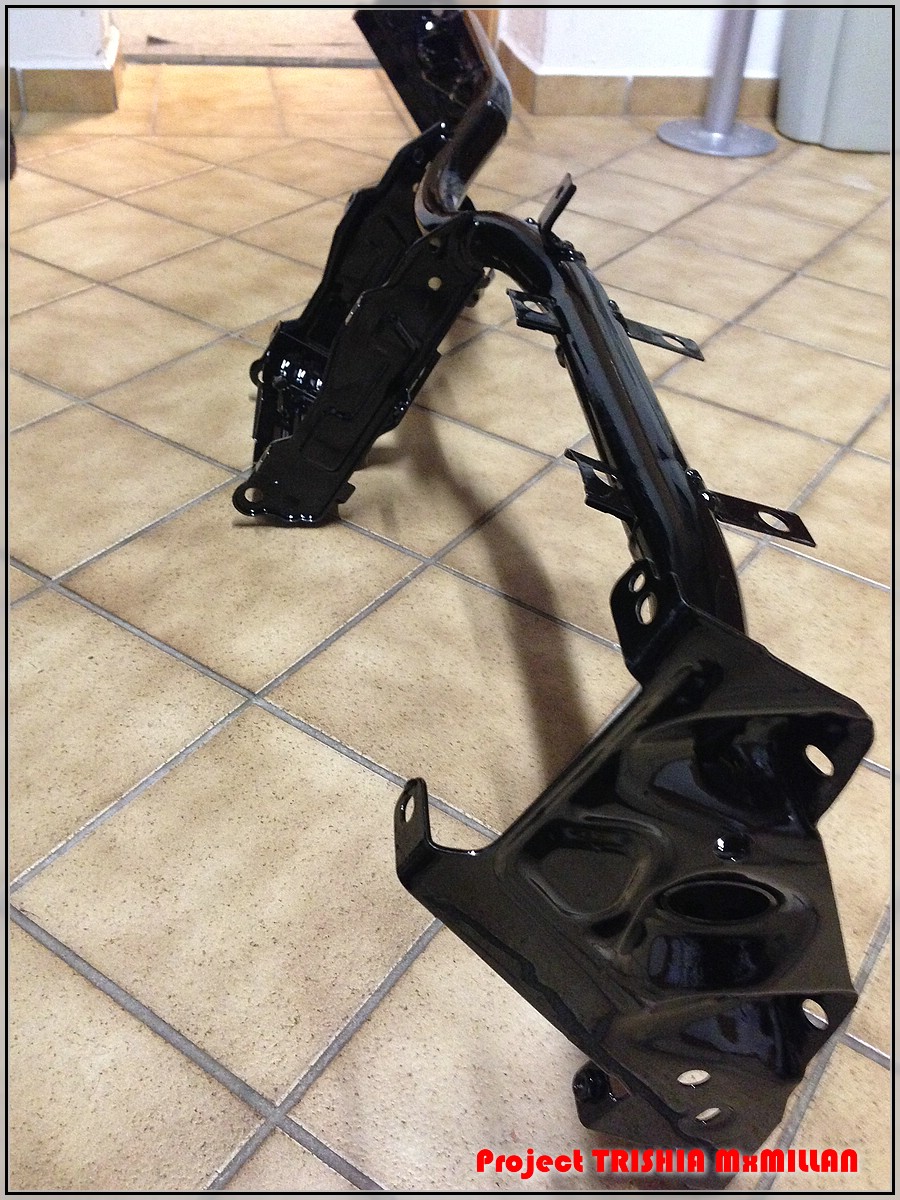
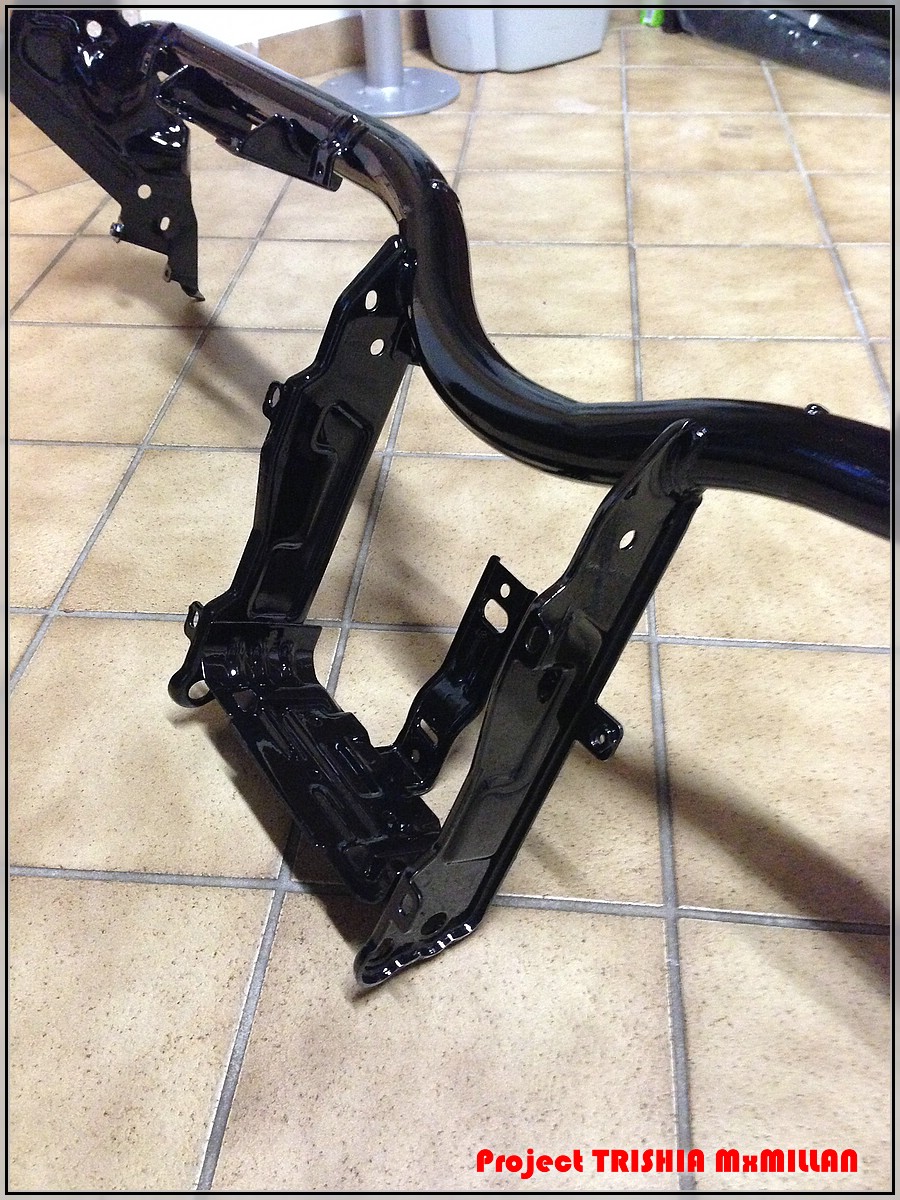
BTW - just a last threadjack - to let you know how the dash bar turned out:
Greets
BTW - just a last threadjack - to let you know how the dash bar turned out:
Greets
Reply
1
1
Oh, you're crazy enough

But seriously, I've been watching this thread in amazement for weeks and I'm picking up more and more tips as I go along. Don't be afraid to tell us what cleaners/chemicals/paints and such you are using, some of us are taking notes.
Awesome work man, AWE-some. As in, inspires awe.
But seriously, I've been watching this thread in amazement for weeks and I'm picking up more and more tips as I go along. Don't be afraid to tell us what cleaners/chemicals/paints and such you are using, some of us are taking notes.
Awesome work man, AWE-some. As in, inspires awe.
Reply
1
1
Elite Member
Joined: Oct 2013
Posts: 2,764
Total Cats: 951
From: Cedar City, UT
It turned out perfect Zaphod! Damn fine work. I would've done it myself but I reached my limit on sanding and wire wheeling rust around the time I powder coated it.
Don't forget to sand the paint off your ground points.
Reply
0
0
Elite Member
Joined: Mar 2006
Posts: 1,574
Total Cats: 106
From: Schwarzenberg, Germany
Yepp, I did already ask Adam aka Revlimiter about that via PM (thanks Adam btw.)
Reply
0
0

Joined: Sep 2010
Posts: 8,149
Total Cats: 1,087
From: Lake Forest, CA
Do it. Then your interior door levers will feel more at home like their brothers in the Aston Martins.
Reply
0
0
Elite Member
Joined: Oct 2013
Posts: 2,764
Total Cats: 951
From: Cedar City, UT
Oh, you're crazy enough
But seriously, I've been watching this thread in amazement for weeks and I'm picking up more and more tips as I go along. Don't be afraid to tell us what cleaners/chemicals/paints and such you are using, some of us are taking notes.
Awesome work man, AWE-some. As in, inspires awe.
But seriously, I've been watching this thread in amazement for weeks and I'm picking up more and more tips as I go along. Don't be afraid to tell us what cleaners/chemicals/paints and such you are using, some of us are taking notes.
Awesome work man, AWE-some. As in, inspires awe.
By the way, you and I just became friends with that picture. Evil Dead 1&2 and Army of Darkness are my all time favorite movies.
Don't touch that please, your primitive intellect wouldn't understand alloys and compositions and things with... molecular structures.
So it is 2:45am, so that is roughly 3 hours of sanding to get it jussssttt about perfect. I'm scared to spray the primer since painting plastic sometimes just doesn't want to cooperate.
If you do this. Buy a rubber block to attach your sandpaper to. If you do this all by hand you are going to force the sandpaper into the depressions you just filled with the bondo.
With a block, as long as you hold it flush with the plastic, you'll get a nice smooth finish.
An old trick in the detailing world to test how smooth the surface is, is to put a plastic sandwich bag over your hand and run it over the surface. You will be able to feel the imperfections a lot easier then with just your bare hand.
You want to make sure that all the bondo patches have a feathered edge as well. Any hard edge you see is going to show up in the primer/paint. So just make sure you keep going over the area you are sanding until it seems seamless.
Enough talk, pictures!
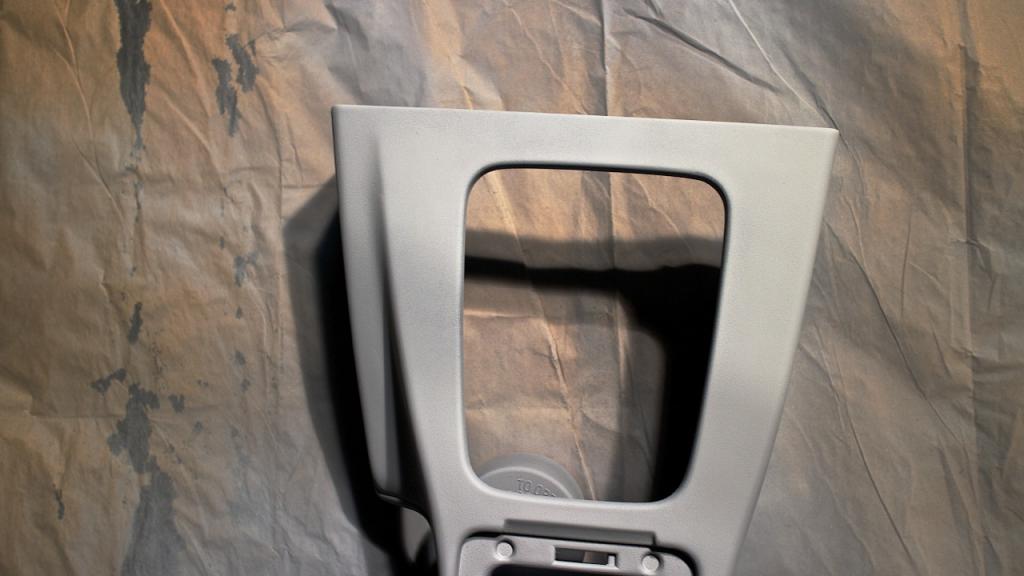
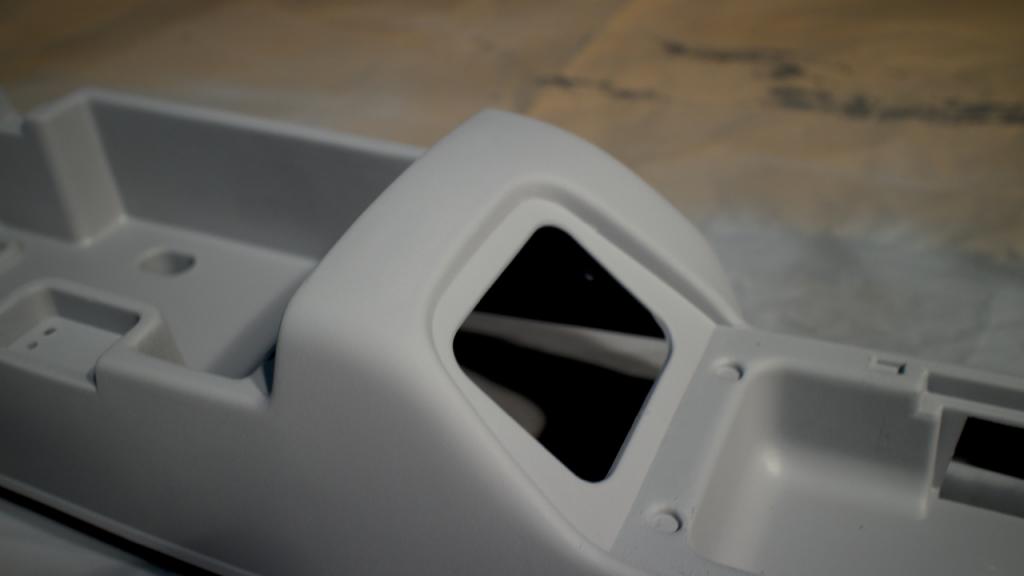
Hard edge around the keyhole. Roll your sandpaper into a straw and roll it around the hole to get it out easier without over sanding the surrounding area.

all smooth


Good example of a feathered edge

Wish me luck with the paint...I really hope I don't screw up. It will really make me rage quit if I do.

Reply
1
1

Don't rage quit, just spend money instead :-P
Centerpanel Long Glove Box
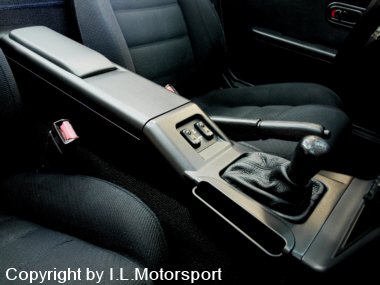
There's a cupholder version too....
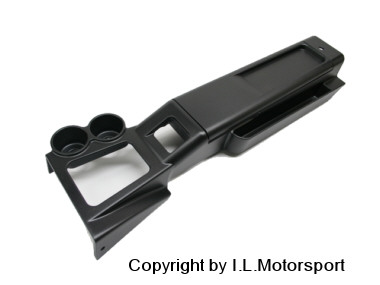
Centerpanel Long Glove Box
There's a cupholder version too....
Reply
0
0
Elite Member
Joined: Oct 2013
Posts: 2,764
Total Cats: 951
From: Cedar City, UT
I think I'm happy with how it turned out Richy! Thanks for the links though.
Taking the long route, as always, pays off in the end.
Damn it looks smooth. There are a couple spots I'm going to lightly wet sand with 1k grit sandpaper to ensure the final coat has a consistent finish, but it'd be pretty hard to do much better than this for my first time working with bondo.

Taking the long route, as always, pays off in the end.
Damn it looks smooth. There are a couple spots I'm going to lightly wet sand with 1k grit sandpaper to ensure the final coat has a consistent finish, but it'd be pretty hard to do much better than this for my first time working with bondo.


Reply
3
3
Elite Member
Joined: Oct 2013
Posts: 2,764
Total Cats: 951
From: Cedar City, UT
And I'm going to call this one beginners luck!

Reply
0
0

Newb
Joined: Jun 2006
Posts: 8
Total Cats: 0
Reply
0
0


