
11's on the Motor, 9's on the Nitrous


Reply
 2
2

2

Thread Starter
Elite Member
iTrader: (2)
Joined: Aug 2009
Posts: 3,145
Total Cats: 175
From: Dover, FL
I worked all weekend on the car, and got a healthy amount done. Yesterday was pretty much a flop. It started when I dropped a whole gun's worth of paint on the floor, me, and my Dad's MG.
Then, I installed the fuel tank and spent 2 hours trying to start a nut on the top tank gasket where the fill lines come out. The X brace on the roll cage is right on top, and the threads must have been galled. It was very hard to get the nut on the stud, and get a wrench on the damn thing. I finally was able to start the nut, but just before it was about to cinch down the gasket, the stud broke. I had to pull the tank, drill out the stud, and weld in a new stud.
After a few beers with some fellow forum members, I came back to the office and worked till almost 2 am refining some of the paint I sprayed earlier that day, as well as a few other chores.
Today was a much better day. Finished painting the trunk, installed the fuel tank, installed the rear subframe and control arms, and shot some gloss onto the engine bay.
It is kind of starting to look like a car again.
Reply
0
0


Rear subframe is in? Oh, yeah! Pics are needed! Man, you are hardcore on the hours you spend on that thing.
Reply
0
0

 link please
Thread Starter
Elite Member
iTrader: (2)
Joined: Aug 2009
Posts: 3,145
Total Cats: 175
From: Dover, FL
All I know is I have to start staying out of Daisy Dukes Bar.

I have been working on an area in the trunk with some 1500 grit sandpaper and some polish, and OH MY it looks good. Unfortunately my camera has sputtered out. I will borrow one and get some pics up as soon as possible.
Christmas may put a damper on my ability to thrash on the car, but we will see.

I have been working on an area in the trunk with some 1500 grit sandpaper and some polish, and OH MY it looks good. Unfortunately my camera has sputtered out. I will borrow one and get some pics up as soon as possible.
Christmas may put a damper on my ability to thrash on the car, but we will see.
Reply
0
0

All I know is I have to start staying out of Daisy Dukes Bar.
I have been working on an area in the trunk with some 1500 grit sandpaper and some polish, and OH MY it looks good. Unfortunately my camera has sputtered out. I will borrow one and get some pics up as soon as possible.
Christmas may put a damper on my ability to thrash on the car, but we will see.
I have been working on an area in the trunk with some 1500 grit sandpaper and some polish, and OH MY it looks good. Unfortunately my camera has sputtered out. I will borrow one and get some pics up as soon as possible.
Christmas may put a damper on my ability to thrash on the car, but we will see.
Reply
0
0
Thread Starter
Elite Member
iTrader: (2)
Joined: Aug 2009
Posts: 3,145
Total Cats: 175
From: Dover, FL
I was dying to share my enthusiasm, but I just did not have my camera that day. There will be pics, lots of pics.

Last edited by miata2fast; Jan 4, 2014 at 08:42 AM.
Reply
0
0
Thread Starter
Elite Member
iTrader: (2)
Joined: Aug 2009
Posts: 3,145
Total Cats: 175
From: Dover, FL
I purchased a few parts.
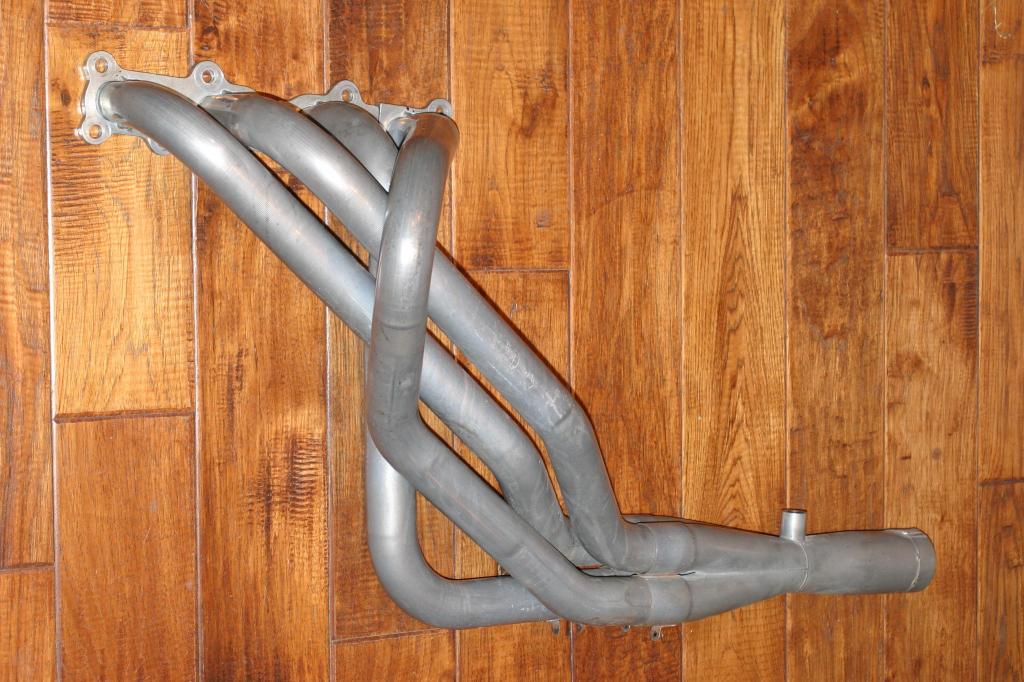
Bob Boig header with SPD collector
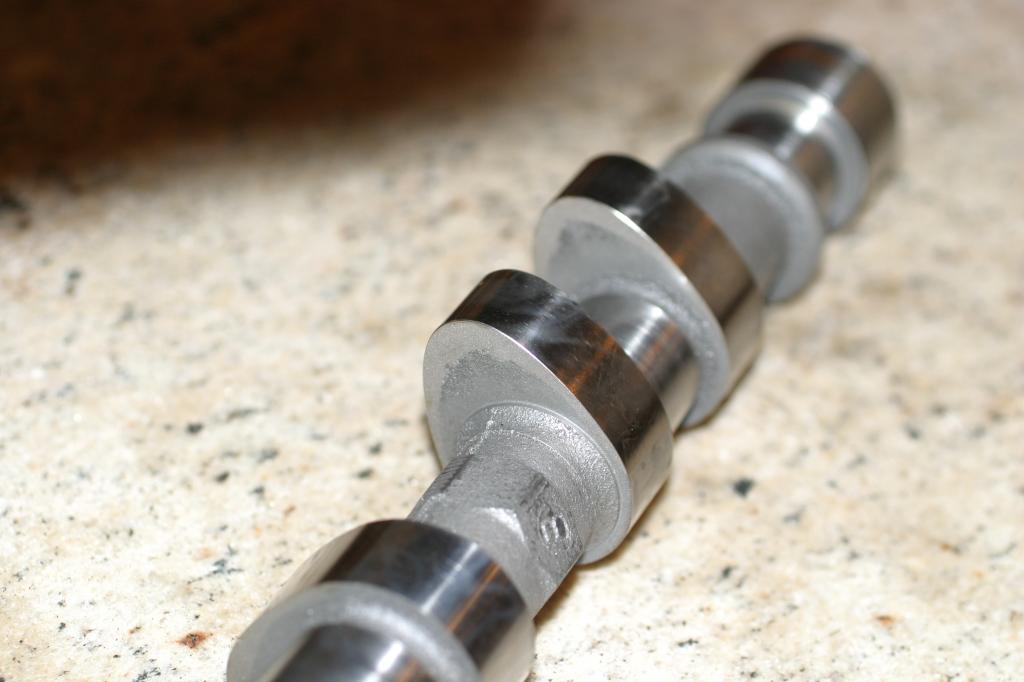
This camshaft is so fat, it almost looks like a roller cam.
I am devoting another weekend to the car. Hopefully it will be productive and I will have more to post.

Bob Boig header with SPD collector

This camshaft is so fat, it almost looks like a roller cam.

I am devoting another weekend to the car. Hopefully it will be productive and I will have more to post.
Reply
1
1
Thread Starter
Elite Member
iTrader: (2)
Joined: Aug 2009
Posts: 3,145
Total Cats: 175
From: Dover, FL
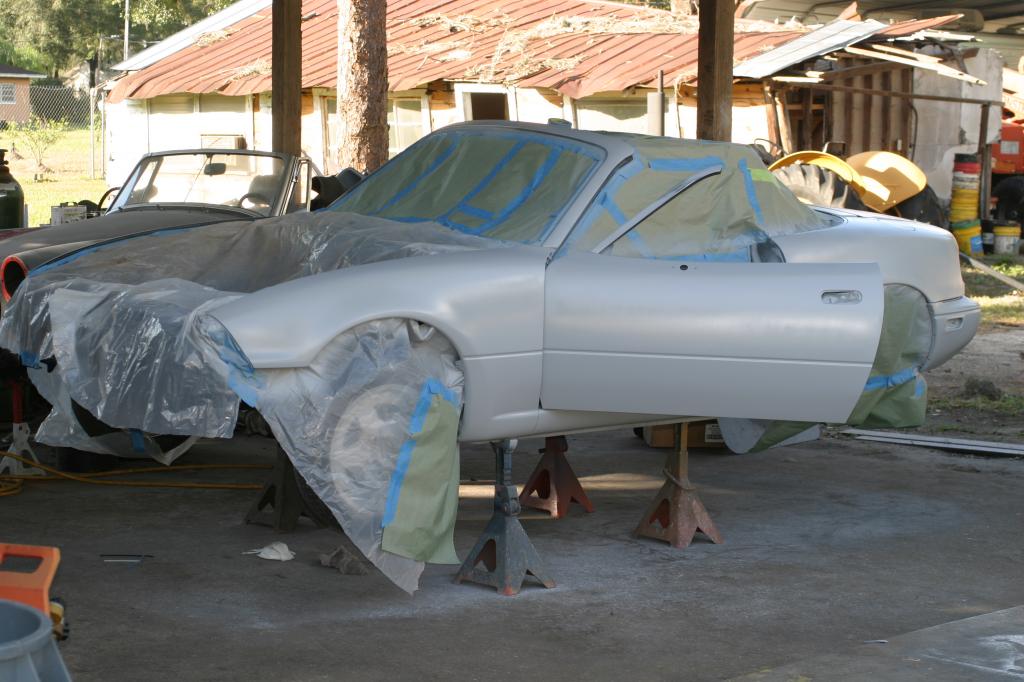
Think it is time for a little update. I spent some time blocking the sheet metal, and realized that I did not put down near enough primer. Because the interior is for the most part finished, I had to tape it up.
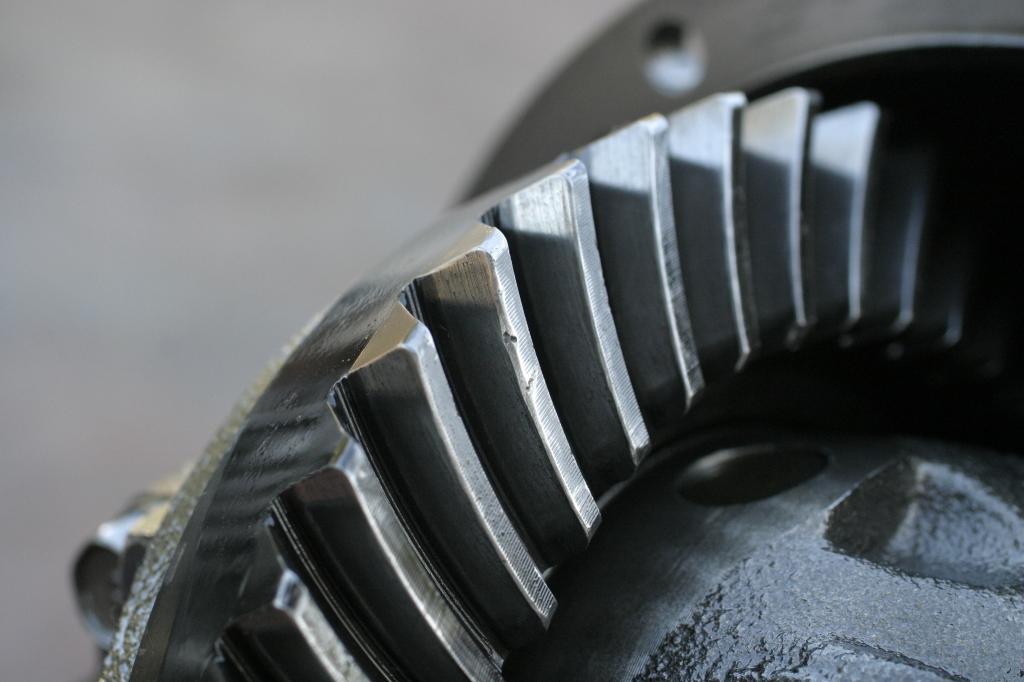
I need to get this thing rolling, so I decided to tackle the diff. I took it apart to clean everything and do a full inspection. I was not thrilled at what I saw. I had some metal floating around from prior broken axle incidents.
You can see where I have been smoothing out the chip with a die grinder and paper scroll. I also chamfered the edges on all the teeth on the ring gear to prolong the life as long as possible.
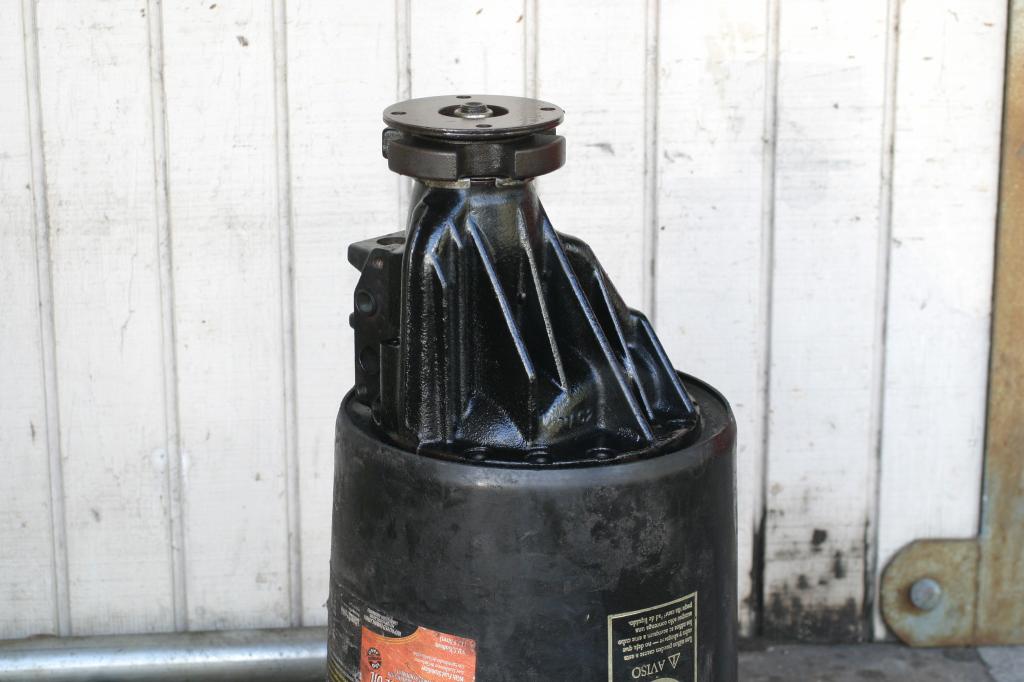
cleaned and painted the diff carrier.
Installed delrin bushings.
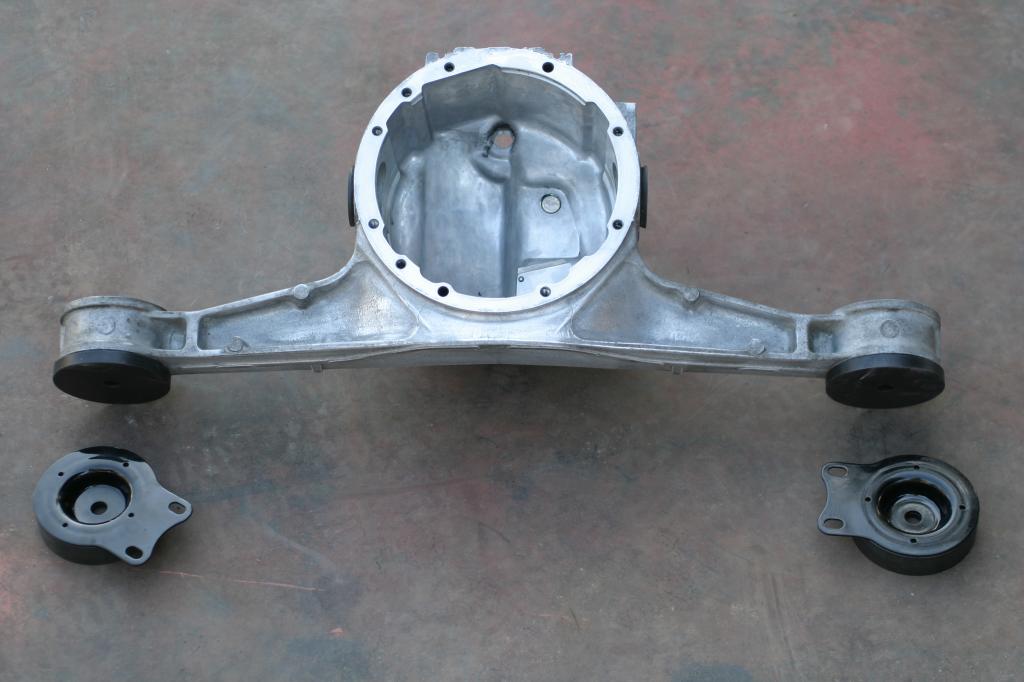
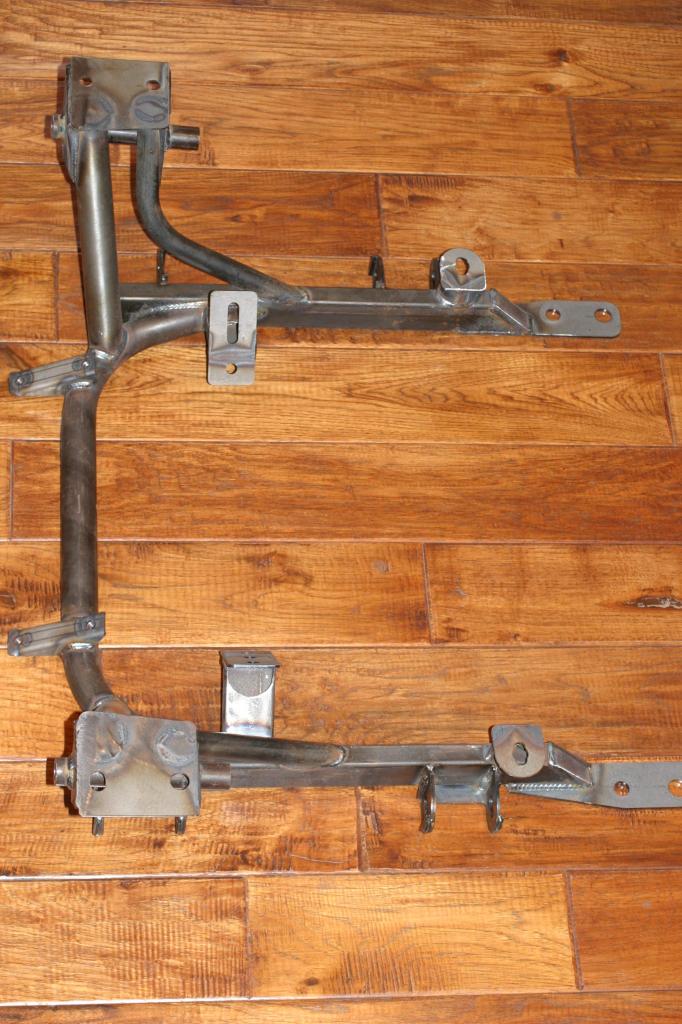
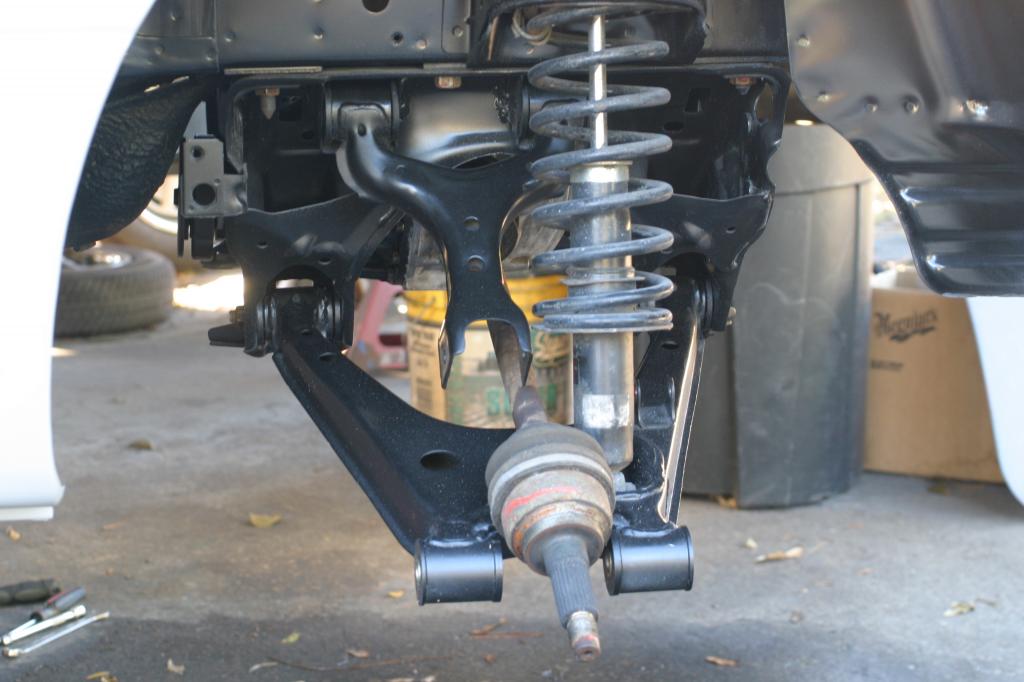
Installed the diff, control arms with new Energy Suspension bushings, and axles.
More to come.

I need to get this thing rolling, so I decided to tackle the diff. I took it apart to clean everything and do a full inspection. I was not thrilled at what I saw. I had some metal floating around from prior broken axle incidents.
You can see where I have been smoothing out the chip with a die grinder and paper scroll. I also chamfered the edges on all the teeth on the ring gear to prolong the life as long as possible.

cleaned and painted the diff carrier.

Installed delrin bushings.

Installed the diff, control arms with new Energy Suspension bushings, and axles.

More to come.
Reply
0
0
Thread Starter
Elite Member
iTrader: (2)
Joined: Aug 2009
Posts: 3,145
Total Cats: 175
From: Dover, FL
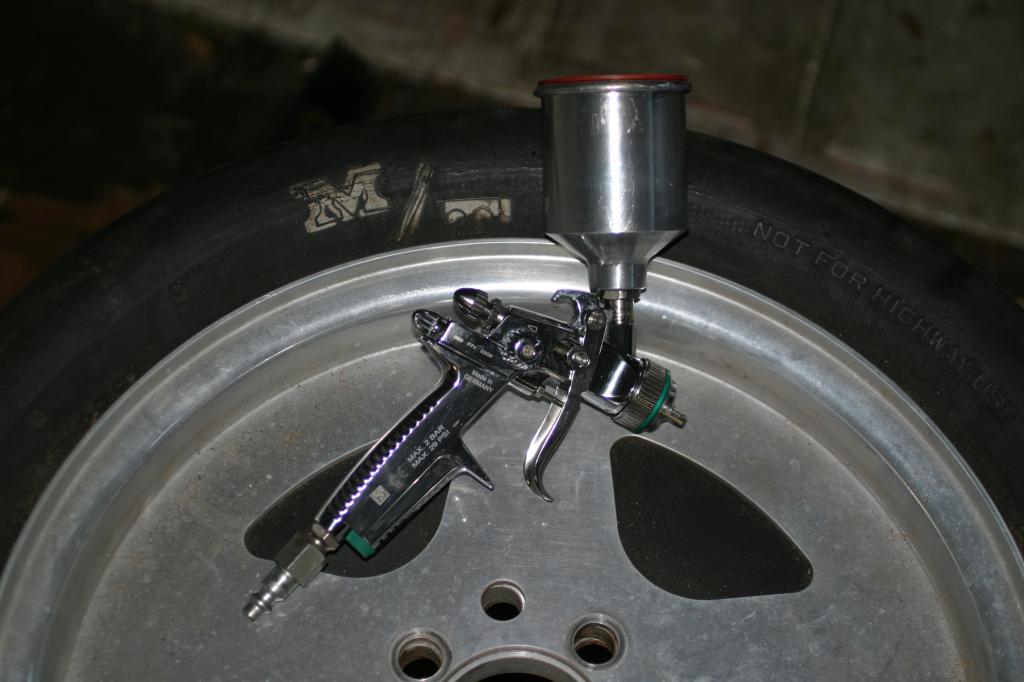
I splurged and purchased this fine German piece of craftsmanship. It is a mini gun, and it uses very little paint. It was kind of expensive, but it paints beautifully. I have been painting everything with a high quality, hardener activated, single stage urethane paint. It should make the finish on everything last much longer. No more rattle cans.
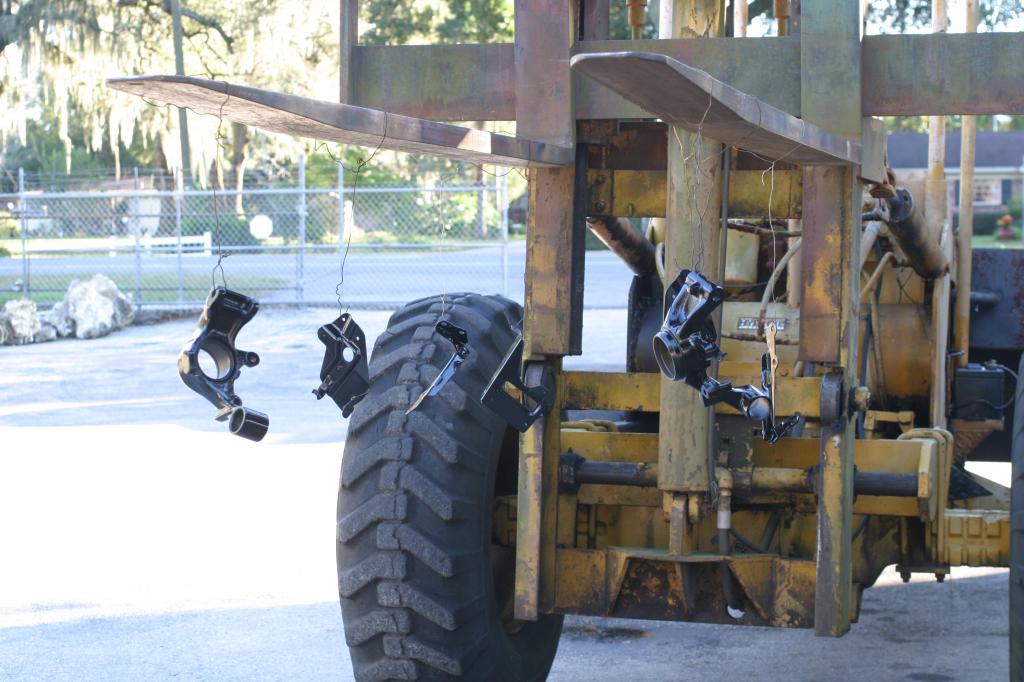
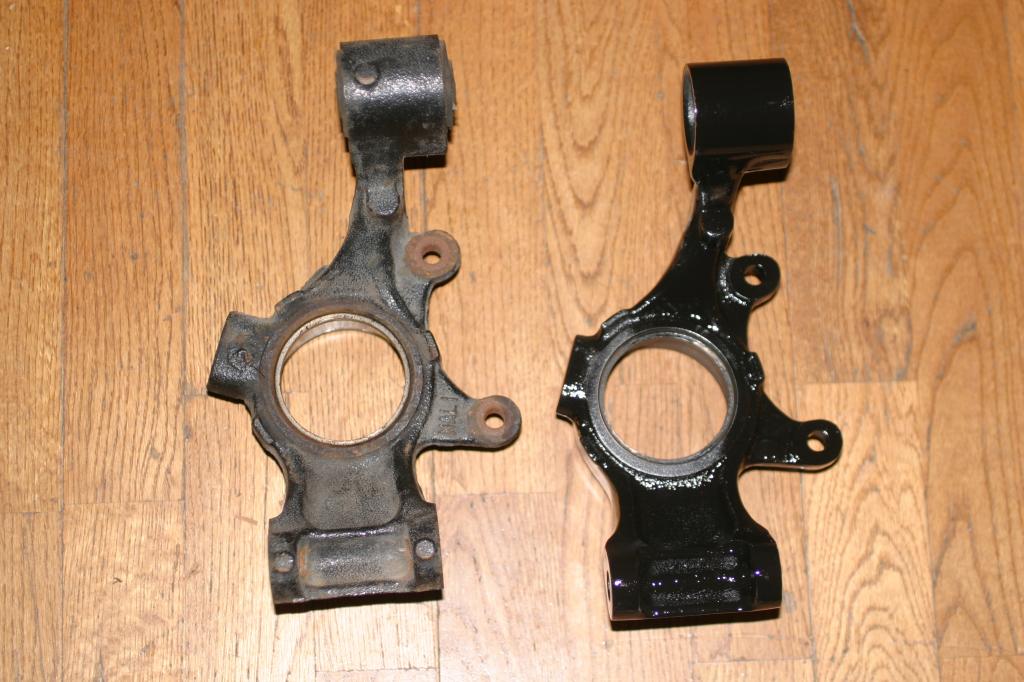
I am still whittling away at whatever I can find to reduce weight. I spent a few hours on the rear spindles removing some weight. I didn't go crazy. I just smoothed out all the humps and heavy casting marks, and removed about half of the heavy block that is on one side of the spindle.
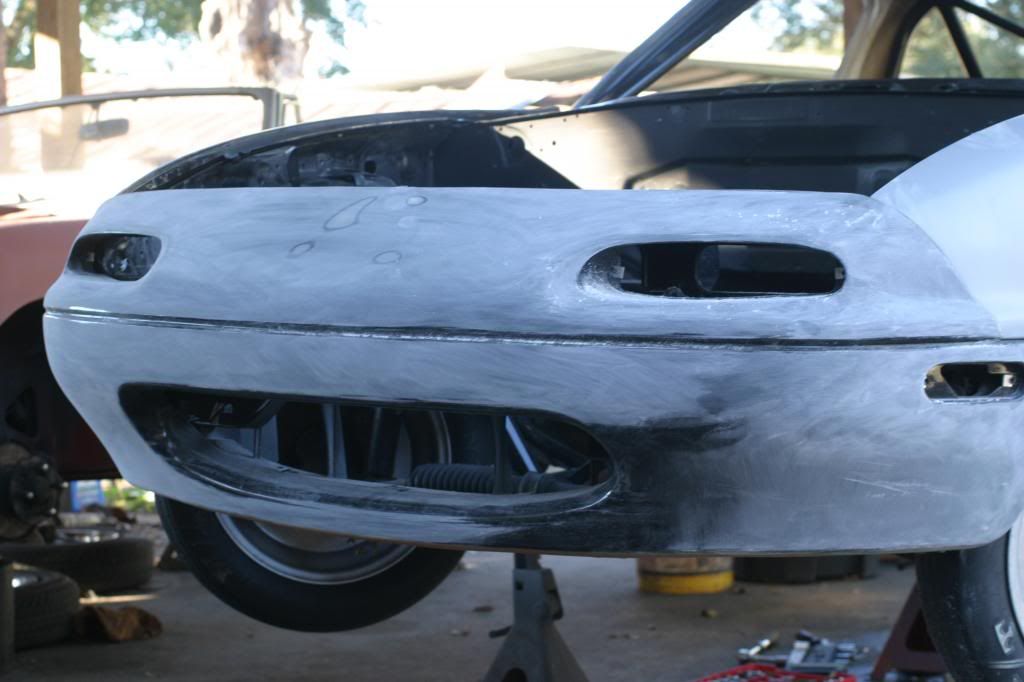
One of the last pieces of body panels that need work is the nose. I got to work on it today.

Last edited by miata2fast; Jan 12, 2014 at 10:45 PM.
Reply
0
0
 Not quite to my liking.
Thread Starter
Elite Member
iTrader: (2)
Joined: Aug 2009
Posts: 3,145
Total Cats: 175
From: Dover, FL
I only painted one rear quarter panel to get a feel for the paint before painting the engine bay. It was really only one coat, and I took it down.
When I started blocking, I kept hitting bare metal. I should have put a lot more primer on the first time. It was a rookie mistake.
When I started blocking, I kept hitting bare metal. I should have put a lot more primer on the first time. It was a rookie mistake.
Reply
0
0


