Cspence's Build Thread
#101
Supporting Vendor

iTrader: (3)
Join Date: Jul 2006
Location: San Diego
Posts: 3,303
Total Cats: 1,216
Thanks for the credit for the lights idea! (that's my red NA) It's great to see this being done more and more often, I never liked the pop ups and think the miata looks awesome with headlights there.
#102
Elite Member
Thread Starter
iTrader: (11)
Join Date: Jun 2007
Location: Meriden, CT
Posts: 2,065
Total Cats: 1
I'll b damned...I was wondering if that was someone from on here....What did you use for your covers??
#104
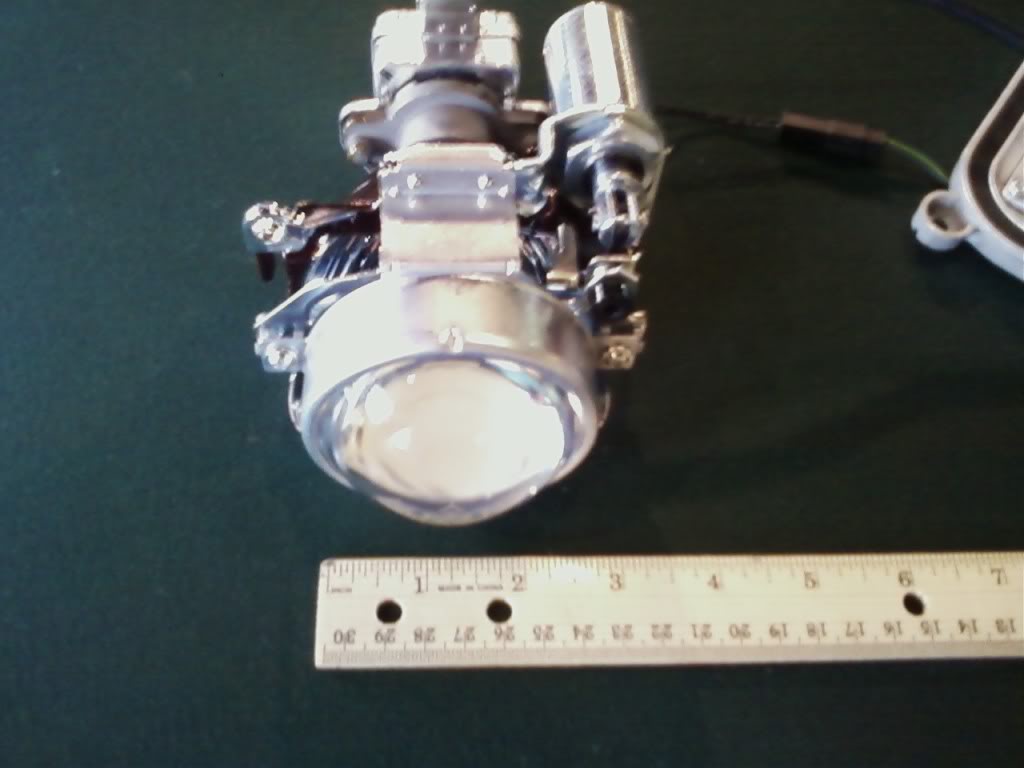
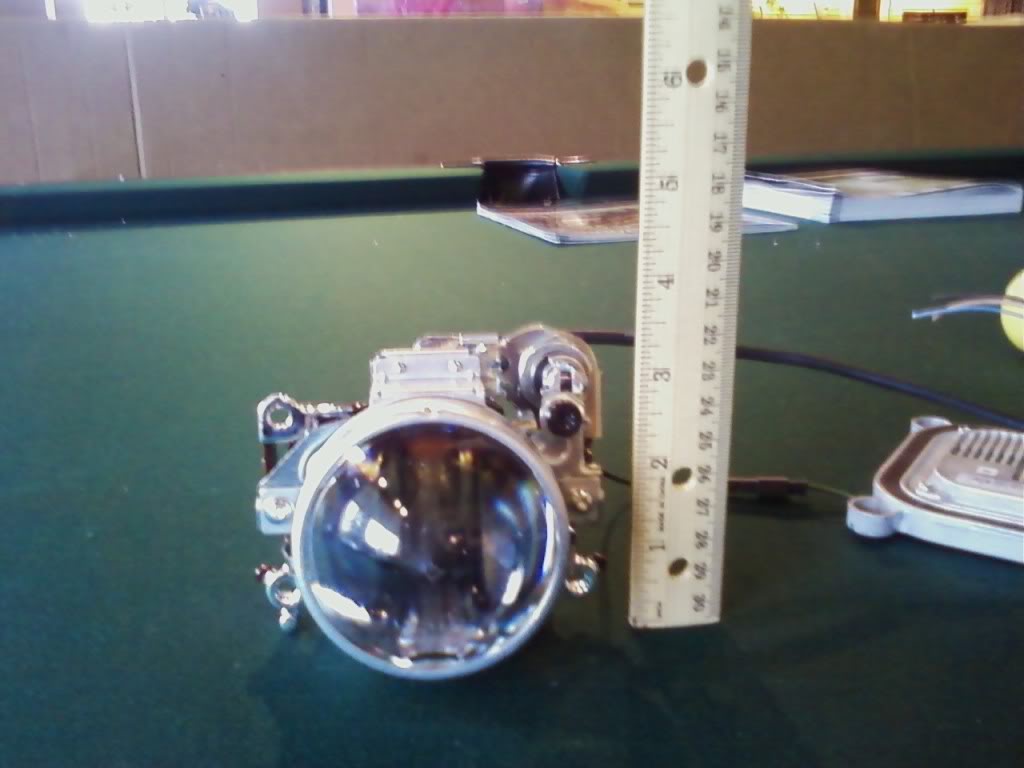
Got the ebay projectors today. Bixenon. Used projectors (although I can't tell) new bulbs & ballasts. It's all Ostram stuff so it's quality. That solenoid doesn't look like it add much size to me. Haven't torn the bumper off yet to see what kind of space I'm dealing with. I'm more concerned about heat than size. The outside ring around the lens is 2 3/4" so these are pretty compact. The solenoid adds about 1/2" in height and 1/4" in width. Worst case I only use the low beam.
Now to figure out the wiring to make it all work and find the time to do it!


Now to figure out the wiring to make it all work and find the time to do it!


#106
Elite Member
Thread Starter
iTrader: (11)
Join Date: Jun 2007
Location: Meriden, CT
Posts: 2,065
Total Cats: 1
O yea...those projectors sure look purdy!
Last edited by Cspence; 06-01-2009 at 10:21 PM.
#107
I'll have to seal them up. Thanks for that and the wiring instructions. Quick question on the wiring. On the Miata, does the low beam turn off when the high beams are activated? If so the shutter will switch but the bulb will turn off. Am I wrong about that? I hope I am but I've had other cars that worked that way. Low beams shut off when highs are on.
The outside of the metal retaining ring around the lens is 2 3/4" and the inside is 2 1/2". About as small as bixenon's get which is a good thing! I'll have to try to replicate the bracket you created from your picture. Of course I don't have a $250,000 CAD driven piece of equipment to do it. I'll be using the trusty hacksaw. If it were more visible I'd make it extra ghetto by using an old license plate!
Really good to know I've gotta seal them up before I went ahead and installed them. I'm usually a measure once cut 6 times, curse, throw it away and buy another kind of guy. Appreciate not having to learn that the hard way. Thanks!
#109
Supporting Vendor

iTrader: (3)
Join Date: Jul 2006
Location: San Diego
Posts: 3,303
Total Cats: 1,216
-Ryan
#110
Elite Member
Thread Starter
iTrader: (11)
Join Date: Jun 2007
Location: Meriden, CT
Posts: 2,065
Total Cats: 1
As you found, the outside screw hole is not on the same plane as the inside one, so if you use both holes, the cover has to flex into an S shape to fit to both holes. I found if you cut the covers just the right length and then place the outside edge in first then screw in the inside screw, it is held in perfectly, and the cover bends to the curvature of the hole. That outside corner can't come out unless you remove the inside side screw. I felt that was cleaner than warping the cover to fit both screw holes.
-Ryan
-Ryan
Scanned it in, pm me your email and I'll forward it on.
Last edited by Cspence; 06-02-2009 at 05:17 PM.
#111
Elite Member
Thread Starter
iTrader: (11)
Join Date: Jun 2007
Location: Meriden, CT
Posts: 2,065
Total Cats: 1
Been working on the bumper scoop for a few days, got the brackets made / welded on, test fitted, and painted. Its not a perfect fit, but its damn close! I may look at trying to find something to put around the edges to clean up the look a little, any ideas....Anyways, I'll let the pics do all the talking...
1-4.jpg?t=1244150346
2-4.jpg?t=1244150534
3-3.jpg?t=1244150560
4-3.jpg?t=1244150602
5-3.jpg?t=1244150630
6-3.jpg?t=1244150650
7-3.jpg?t=1244150685
8-3.jpg?t=1244150711
9-3.jpg?t=1244150738
10-2.jpg?t=1244150508
Pic for ease of comparison...
5-1.jpg?t=1243547434
1-4.jpg?t=1244150346
2-4.jpg?t=1244150534
3-3.jpg?t=1244150560
4-3.jpg?t=1244150602
5-3.jpg?t=1244150630
6-3.jpg?t=1244150650
7-3.jpg?t=1244150685
8-3.jpg?t=1244150711
9-3.jpg?t=1244150738
10-2.jpg?t=1244150508
Pic for ease of comparison...
5-1.jpg?t=1243547434
Last edited by Cspence; 06-04-2009 at 06:18 PM.
#112
Elite Member
Thread Starter
iTrader: (11)
Join Date: Jun 2007
Location: Meriden, CT
Posts: 2,065
Total Cats: 1
Well, for some reason I got a fire under my *** right now to finish up some of the projects I started....I'm going with it. Got the headlight scoop formed up and fitted. Just need to make a few brackets to hold it and it'll be ready to weld. Just wanted to share some progress pics. Let me know what ya'll think!
1-5.jpg?t=1244237979
2-5.jpg?t=1244238145
3-4.jpg?t=1244238182
4-4.jpg?t=1244238208
5-4.jpg?t=1244238236
6-4.jpg?t=1244238262
1-5.jpg?t=1244237979
2-5.jpg?t=1244238145
3-4.jpg?t=1244238182
4-4.jpg?t=1244238208
5-4.jpg?t=1244238236
6-4.jpg?t=1244238262
Last edited by Cspence; 06-05-2009 at 06:12 PM.
#114
Elite Member
Thread Starter
iTrader: (11)
Join Date: Jun 2007
Location: Meriden, CT
Posts: 2,065
Total Cats: 1
I have'nt thought of a way to make it not look obnoxious...I was thinking that the cone filter in the scoop would look cool, but figured it also might look a little over the top,although the car is kinda over the top with the black stripe, giant hole in the bumper, etc... Should I put it there and make like a perforated cover that I can paint white and put over it?? Input and ideas welcome, kinda at a loss with this one!
**EDIT**
Pics for reference...
DSC04120.jpg?t=1244245395
DSC04124.jpg?t=1244245428
**EDIT**
Pics for reference...
DSC04120.jpg?t=1244245395
DSC04124.jpg?t=1244245428
Last edited by Cspence; 06-05-2009 at 07:48 PM.
#117
Senior Member
iTrader: (6)
Join Date: Aug 2008
Location: West Palm Beach, FL
Posts: 1,020
Total Cats: 1
looks to radical for a DD, good for a track car (like splittime).
what if u just had two diff set ups. first try one and compare to ur #s with the other.
btw, i think im gonna do the giant black stripe...
#118
Elite Member
Thread Starter
iTrader: (11)
Join Date: Jun 2007
Location: Meriden, CT
Posts: 2,065
Total Cats: 1
On another note, once you go black, you don't go back. I was'nt sure about the stripe when I first got the car, but I like it now. I think it sets the car apart! Go for it..
#119
Elite Member
iTrader: (11)
Join Date: Jun 2007
Location: Overland Park, Kansas
Posts: 5,360
Total Cats: 43
screw the cone filter. Find a GIANT drop in K&N filter and build yourself an airbox. Seal it off 100% except for the inlet to the trubo and the inlet on the headlight opening... "Ram air" GM style.. Before they were taken over by Socialists.... 

#120
Elite Member

iTrader: (3)
Join Date: Apr 2008
Location: Outside Portland Maine
Posts: 2,023
Total Cats: 19
I'm thinking panel filter in the scoop with either a mesh cover where the headlight cover goes, or just one with a scoop. Just enough to cover the filter. I suppose it doesn't matter what kind of filter goes under the cover, but I'd put a white cover over the scoop.


