
Inglar´s 2001 Sport


Reply
 0
0

0


Thread Starter
Junior Member
Joined: Mar 2010
Posts: 189
Total Cats: 0
From: Norway
Reply
0
0
Thread Starter
Junior Member
Joined: Mar 2010
Posts: 189
Total Cats: 0
From: Norway
Reply
0
0

Thread Starter
Junior Member
Joined: Mar 2010
Posts: 189
Total Cats: 0
From: Norway
Reply
0
0

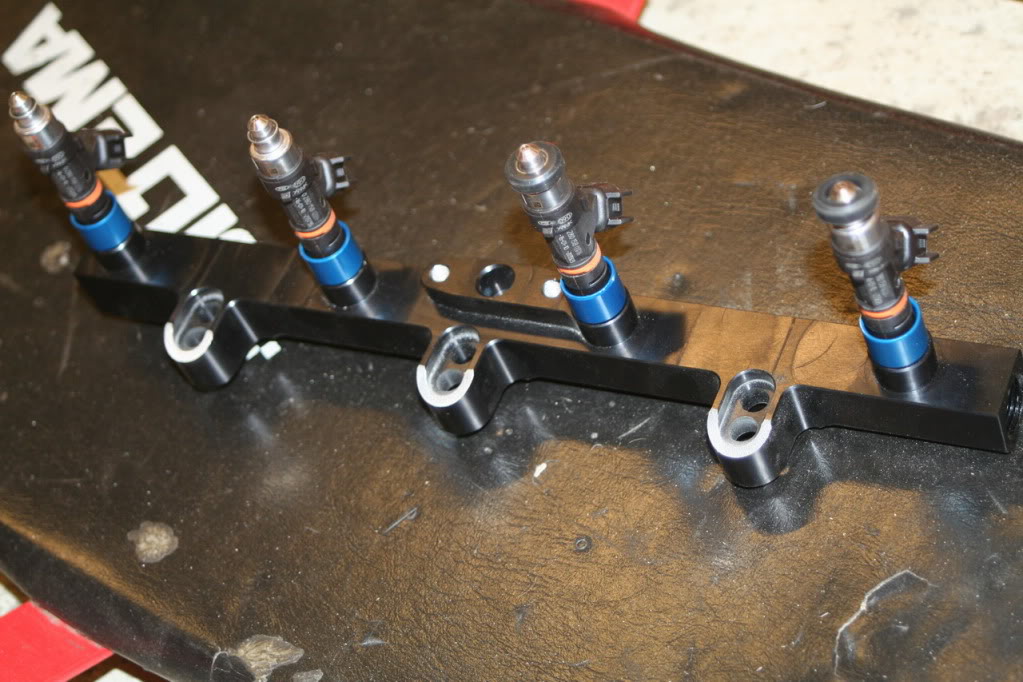
Injector solution:
Take the blue top hat and lube the hell out of the inside of it. I used oil.
Put the hat on the injector and press. The lube will let the hat "pop" onto the injector all the way.
Bolt the rail down as usual with no extra spacers and it should work. Pressure test by key on and pump will prime and look for leaks.
Reply
0
0
Thread Starter
Junior Member
Joined: Mar 2010
Posts: 189
Total Cats: 0
From: Norway
Injector solution:
Take the blue top hat and lube the hell out of the inside of it. I used oil.
Put the hat on the injector and press. The lube will let the hat "pop" onto the injector all the way.
Bolt the rail down as usual with no extra spacers and it should work. Pressure test by key on and pump will prime and look for leaks.
Take the blue top hat and lube the hell out of the inside of it. I used oil.
Put the hat on the injector and press. The lube will let the hat "pop" onto the injector all the way.
Bolt the rail down as usual with no extra spacers and it should work. Pressure test by key on and pump will prime and look for leaks.
Reply
0
0

Injector solution:
Take the blue top hat and lube the hell out of the inside of it. I used oil.
Put the hat on the injector and press. The lube will let the hat "pop" onto the injector all the way.
Bolt the rail down as usual with no extra spacers and it should work. Pressure test by key on and pump will prime and look for leaks.
Take the blue top hat and lube the hell out of the inside of it. I used oil.
Put the hat on the injector and press. The lube will let the hat "pop" onto the injector all the way.
Bolt the rail down as usual with no extra spacers and it should work. Pressure test by key on and pump will prime and look for leaks.
__________________


Reply
0
0
Thread Starter
Junior Member
Joined: Mar 2010
Posts: 189
Total Cats: 0
From: Norway
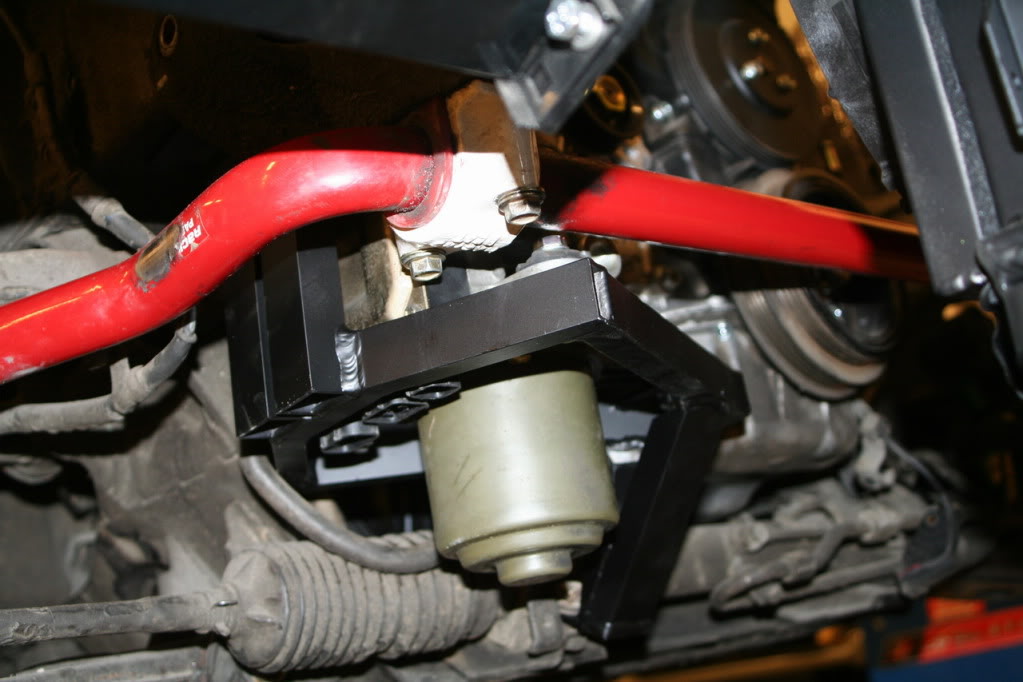
Managed to leave the camera at the workshop yesterday. Found the reason for the trouble with the fuel rail. The injectors was pressed all the way in, but the "mounting eyes" needed some trimming. Used the inner holes so I had to trim the ends a bit so it didn´t hit the top cover. And will change to 10mm longer bolts. Didnt get enough turns on the bolts to feel safe.
Will post some pictures when I remember the camera
Will post some pictures when I remember the camera
Reply
0
0


__________________
Reply
0
0


Joined: Jun 2005
Posts: 19,338
Total Cats: 574
From: Fake Virginia
Reply
0
0
Thread Starter
Junior Member
Joined: Mar 2010
Posts: 189
Total Cats: 0
From: Norway
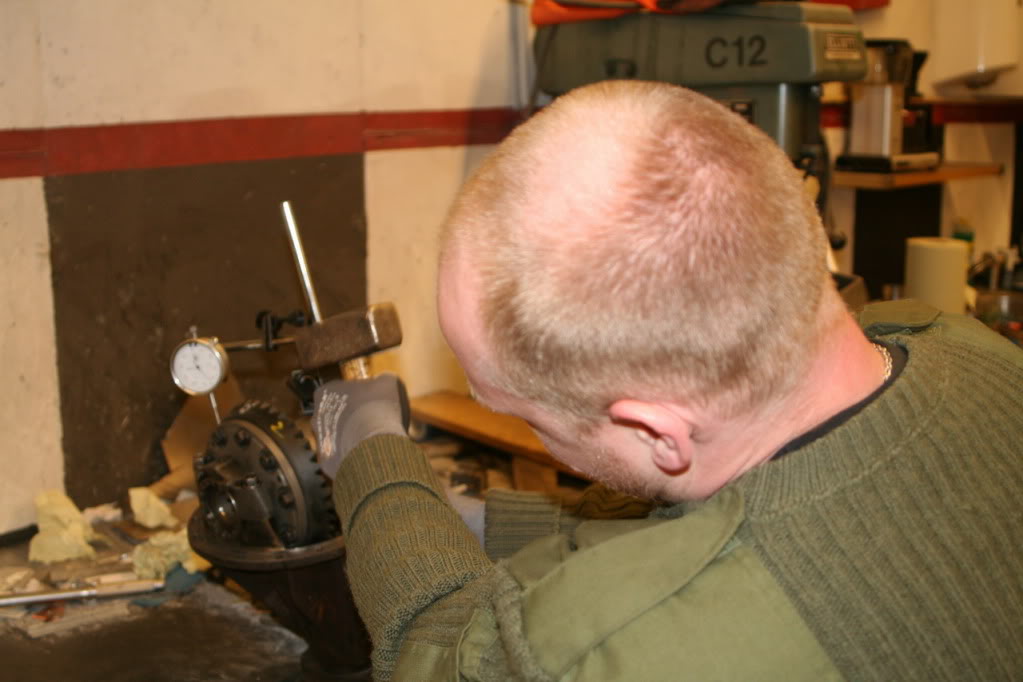
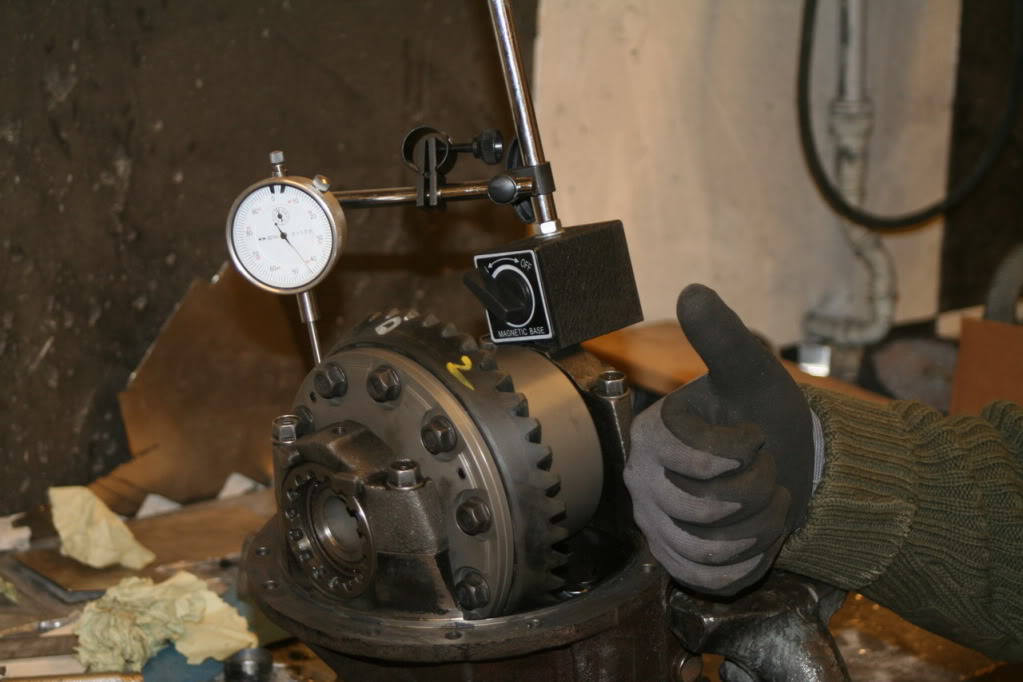
The diff is back in the car now. Used the new pinion spacer. Didn´t bather to chack with the old one. Happy with the help I got from hf-mx5t. have never tried this before so it is great to get help from someone who has done this before. A lot of adjustment before the diff was finished. If you are planning to do this, buy a micromeeter (or what it is called in english )
)
)
Reply
0
0


