
93' Miata stolen and flipped build thread


Elite Member
Joined: Oct 2013
Posts: 2,764
Total Cats: 951
From: Cedar City, UT
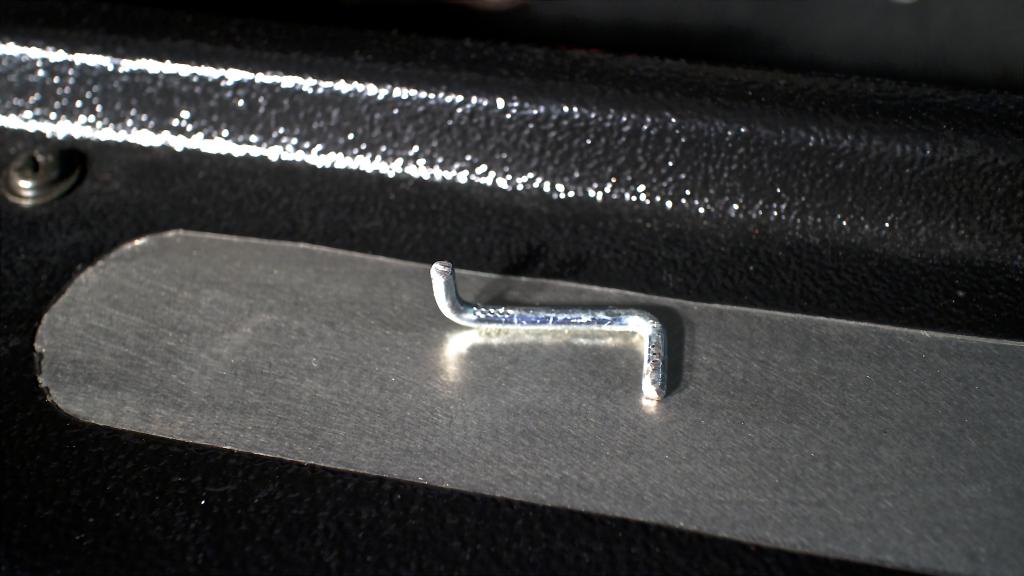
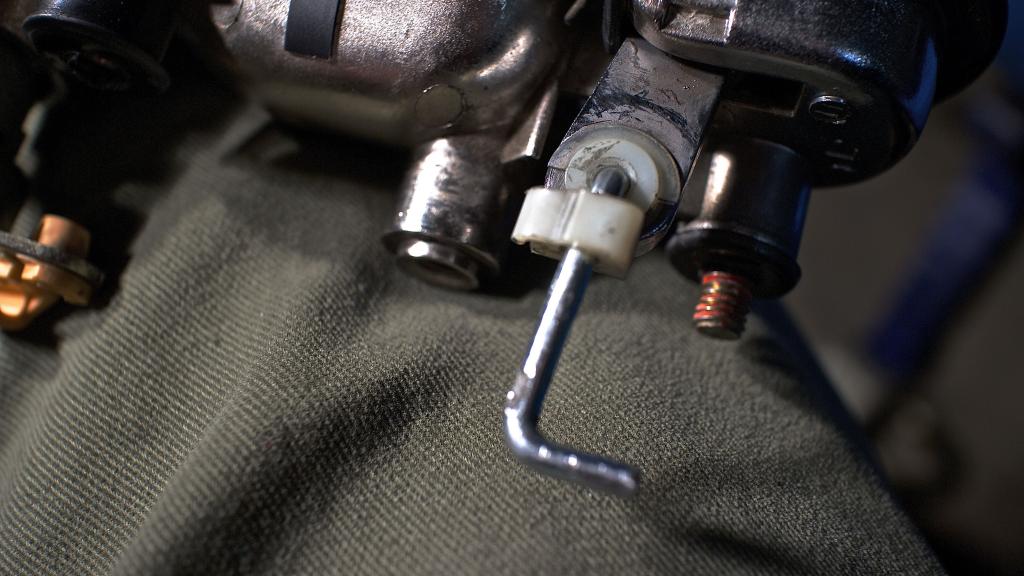
Whoops forgot I had to do this on the drivers side. I was missing the metal rod that connects the outside door lever to the door lock latch, and had no idea where it disappeared to.
So after giving it a bit of thought I grabbed a metal coat hanger and it happened to be a perfect fit in the hole(1/8"). Super easy to do, especially with how soft the steel is in coat hangers. Easy fix.
So after giving it a bit of thought I grabbed a metal coat hanger and it happened to be a perfect fit in the hole(1/8"). Super easy to do, especially with how soft the steel is in coat hangers. Easy fix.


Last edited by Jeffbucc; Feb 24, 2014 at 06:00 AM.
Reply
 3
3

3


I saw 91K thread views and thought "hmmmmm"
Yup, as I suspected: NA MX5 nut-and-bolt OCD rebuild | Build Threads
-Zach
Yup, as I suspected: NA MX5 nut-and-bolt OCD rebuild | Build Threads
-Zach
Reply
0
0
Elite Member
Joined: Oct 2013
Posts: 2,764
Total Cats: 951
From: Cedar City, UT
I saw 91K thread views and thought "hmmmmm"
Yup, as I suspected: NA MX5 nut-and-bolt OCD rebuild | Build Threads
-Zach
Yup, as I suspected: NA MX5 nut-and-bolt OCD rebuild | Build Threads
-Zach
I don't take responsibility for any influx of the newbie section!
Reply
0
0

Elite Member
Joined: Oct 2013
Posts: 2,764
Total Cats: 951
From: Cedar City, UT
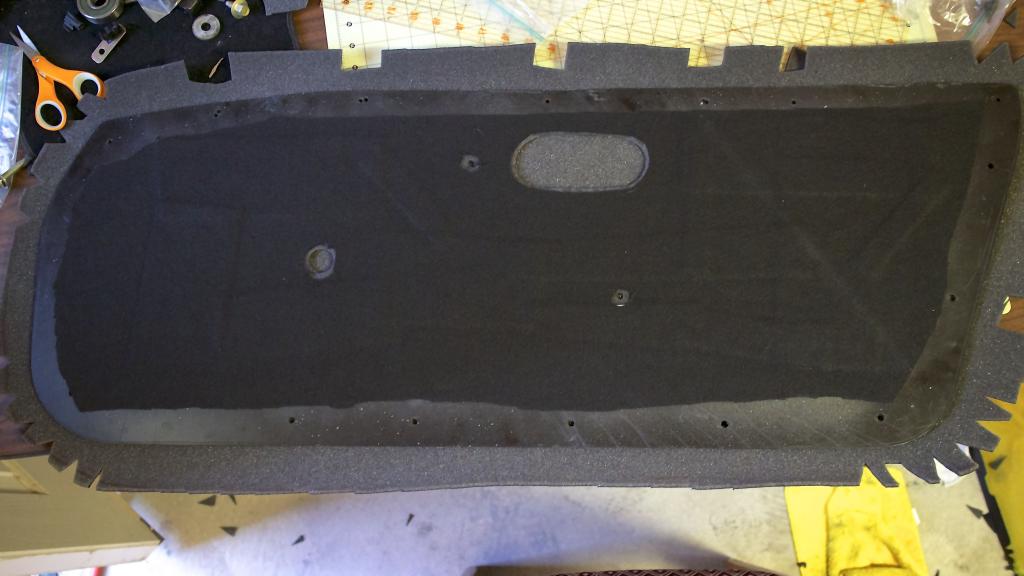
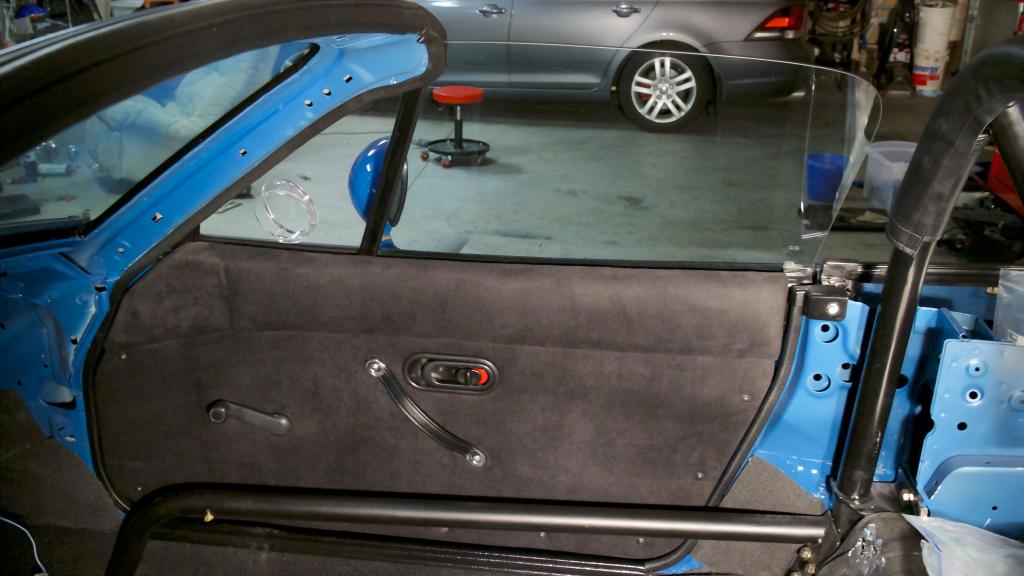
Finally done. That took forever! Turned out really great though. Glad I decided to cover the ABS plastic rather than leave it raw. Looks much more refined this way.
Finally read up on how to apply the vibration dampener properly. So I used a lot less this time around and placed it fairly strategically. I put an emphasis on fairly, who knows if it is effective placement or not.
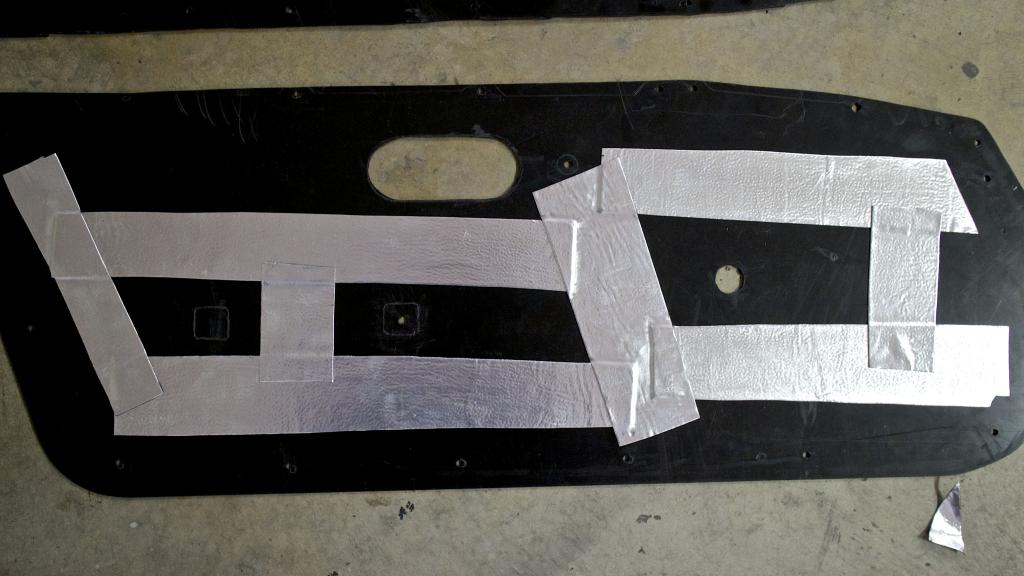

Put some felt on the back side of the ABS panels to help with noise a little. I just had some randomly lying around.
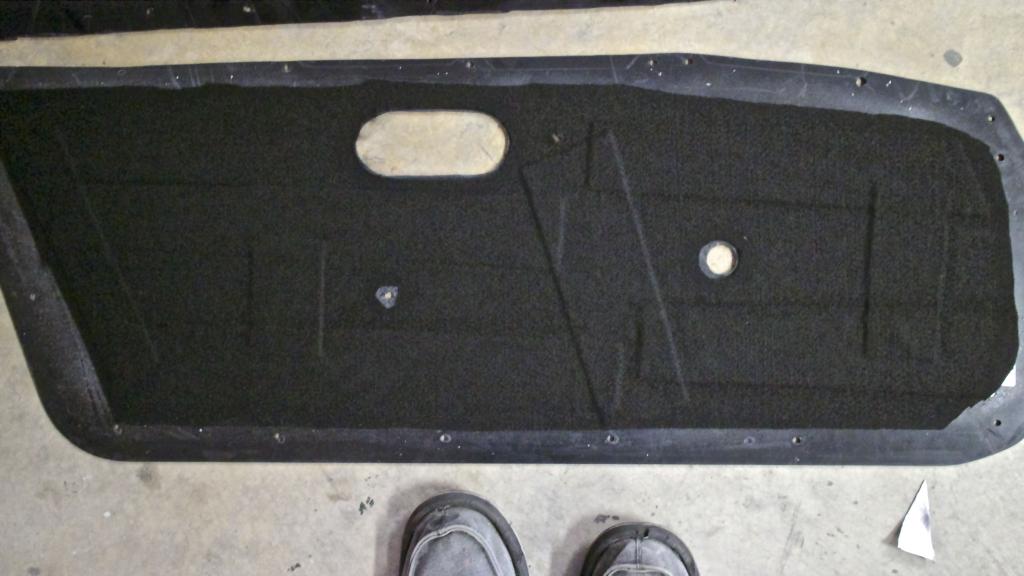
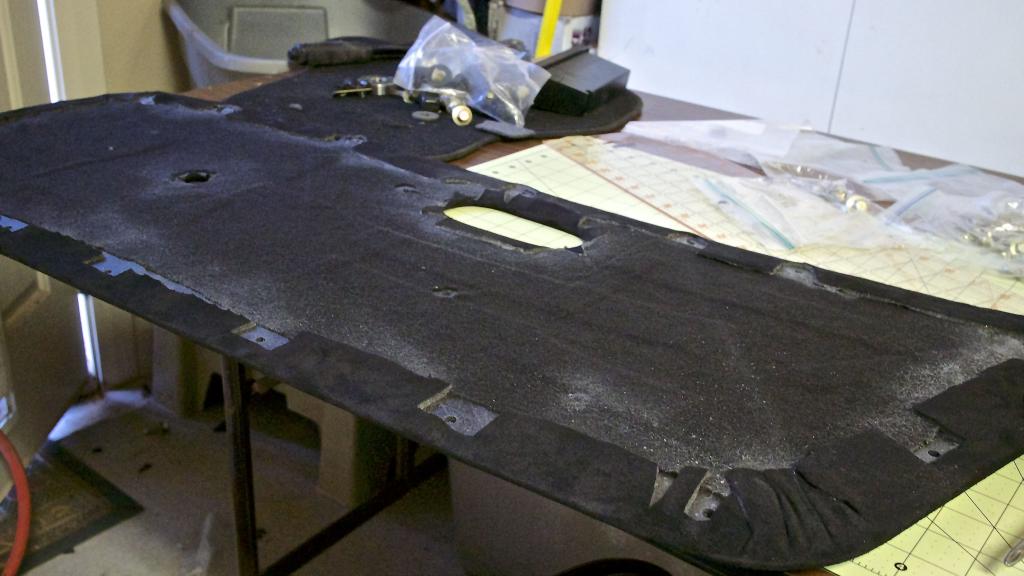
Cut the fabric to shape.
Apply adhesive to the edges and wrap it around nice and snug. I trimmed that bottom corner up so it would remain flush.
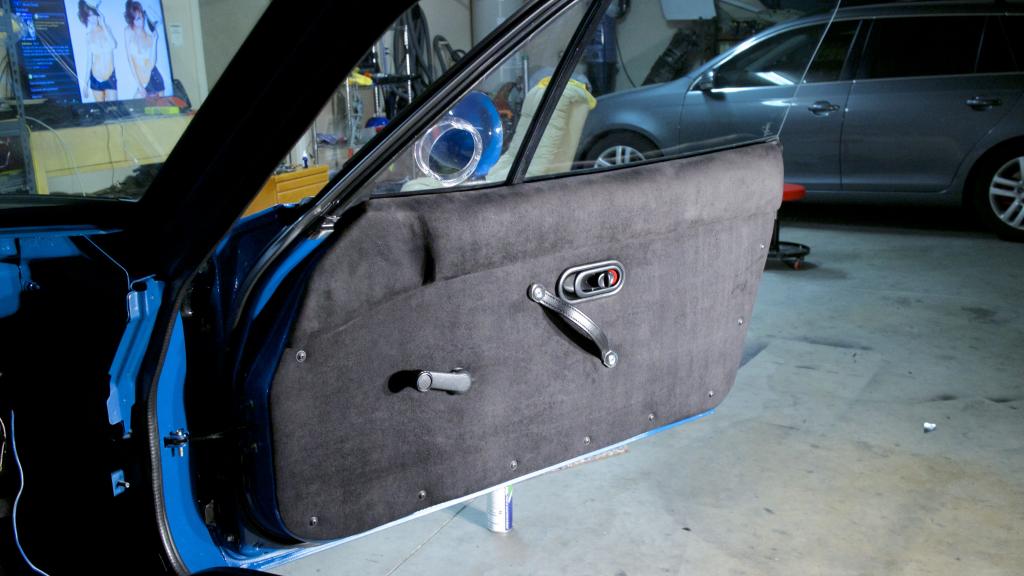
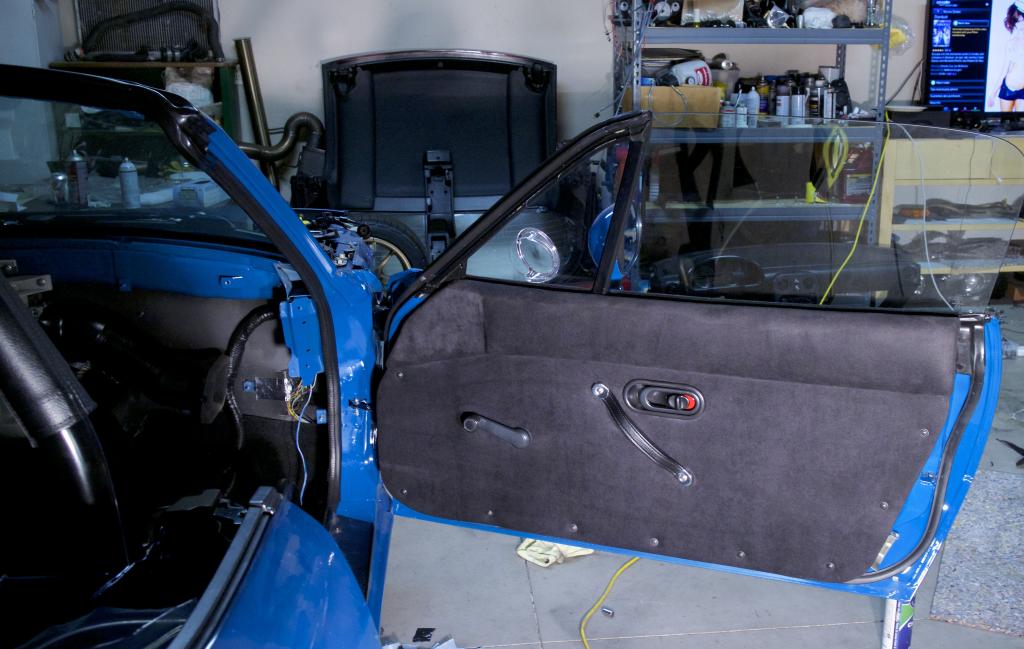
and installed! Really happy with it. The window levers were a bitch to get in since the padding was a little thicker than OEM I really had to press the door panel in hard to get it over the notch.
Thanks again Revlimiter for throwing in the door handles for me. They really look top notch.
Finally read up on how to apply the vibration dampener properly. So I used a lot less this time around and placed it fairly strategically. I put an emphasis on fairly, who knows if it is effective placement or not.


Put some felt on the back side of the ABS panels to help with noise a little. I just had some randomly lying around.

Cut the fabric to shape.

Apply adhesive to the edges and wrap it around nice and snug. I trimmed that bottom corner up so it would remain flush.

and installed! Really happy with it. The window levers were a bitch to get in since the padding was a little thicker than OEM I really had to press the door panel in hard to get it over the notch.
Thanks again Revlimiter for throwing in the door handles for me. They really look top notch.


Reply
5
5

Elite Member
Joined: Oct 2013
Posts: 2,764
Total Cats: 951
From: Cedar City, UT
 So I need to tear it apart again.
Reply
0
0
Elite Member
Joined: Oct 2013
Posts: 2,764
Total Cats: 951
From: Cedar City, UT
All this...for frikin' seat belts...
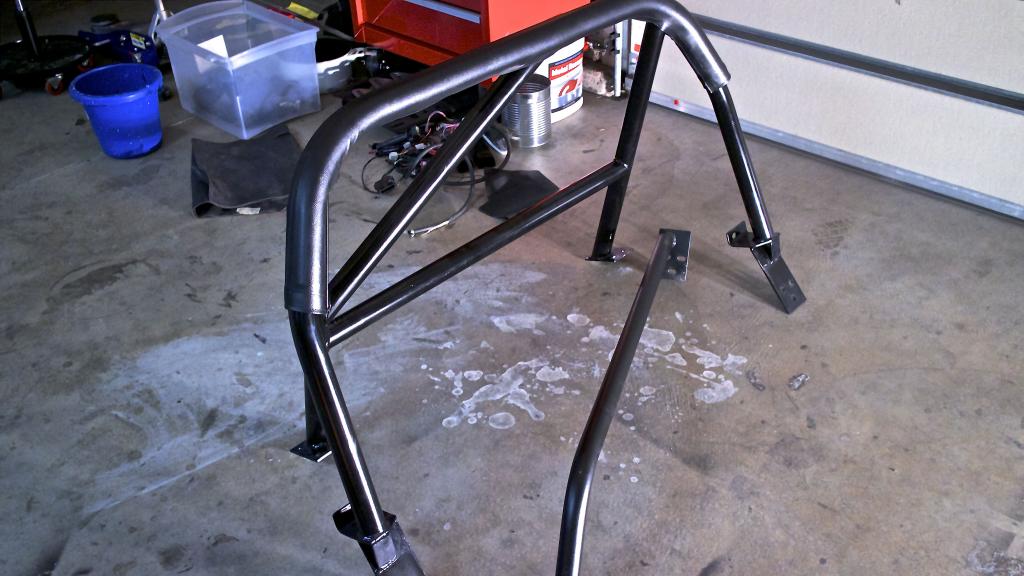
Roll bar/door bars out
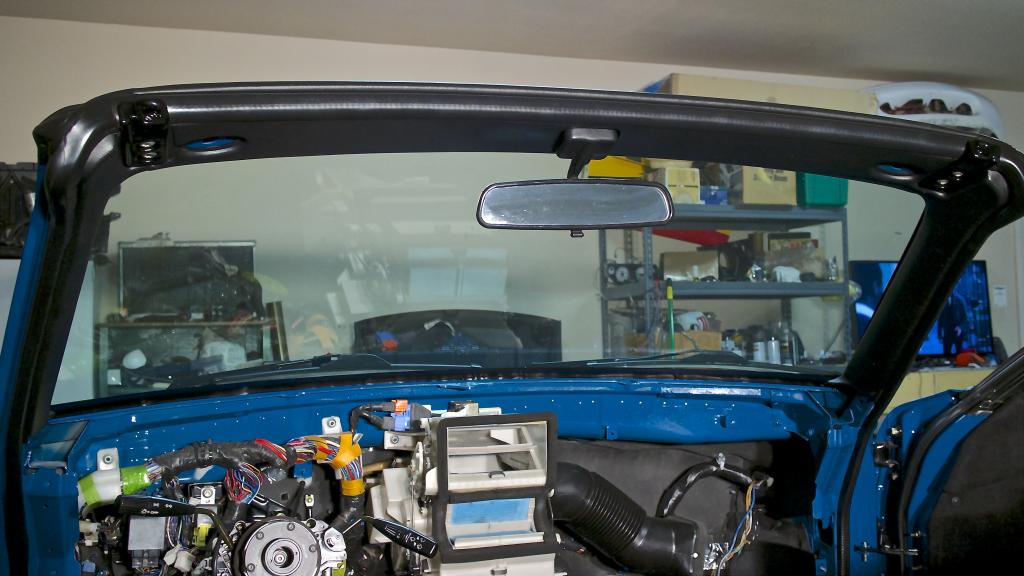
segued and installed the windshield trim and hard top strikers.
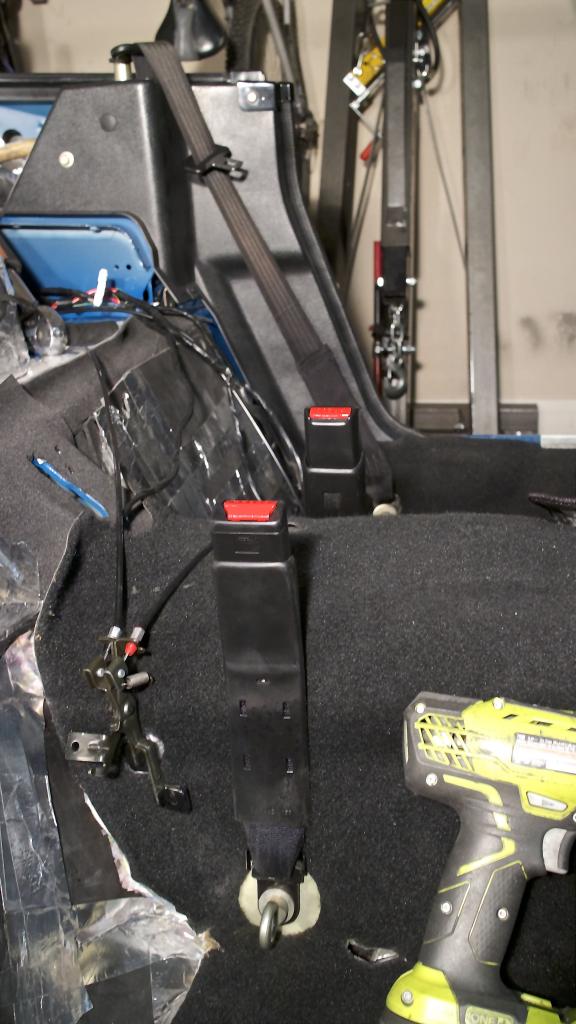
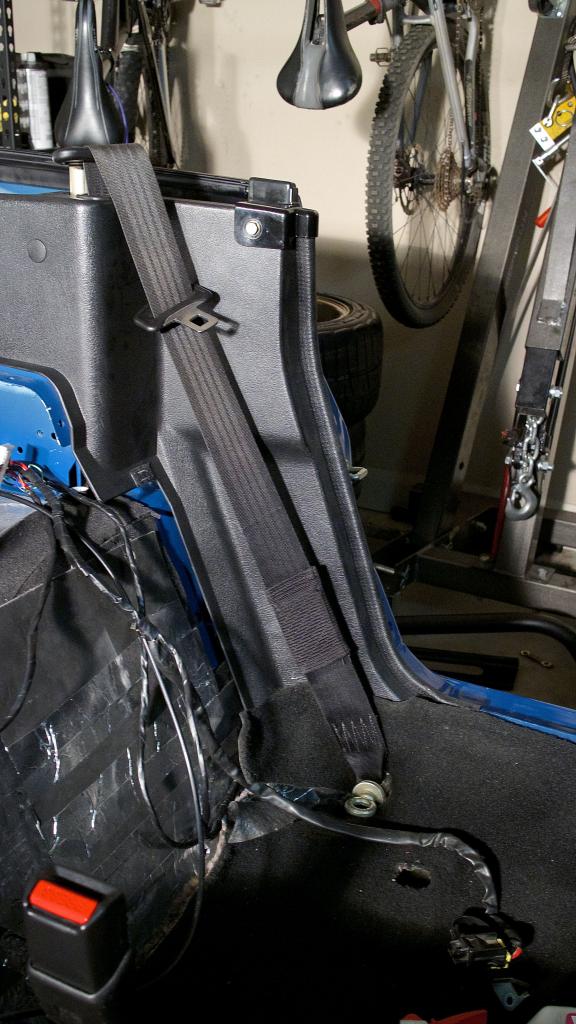
Seat belts in. Should the seat belt float freely or be locked hard in place? I torqued the bolts to 35 ft lbs.
How I attached the eye-bolts for the 6 point harness. 2 thick washers and a large washer against the body to spread the load if there is an accident. Not sure if it was correct, but from reading up on it a little it is what a lot do. Question being, should I put a matching large washer on the underbody with a nut?
Roll bar/door bars out

segued and installed the windshield trim and hard top strikers.

Seat belts in. Should the seat belt float freely or be locked hard in place? I torqued the bolts to 35 ft lbs.

How I attached the eye-bolts for the 6 point harness. 2 thick washers and a large washer against the body to spread the load if there is an accident. Not sure if it was correct, but from reading up on it a little it is what a lot do. Question being, should I put a matching large washer on the underbody with a nut?


Reply
2
2

You don't really need the big washer if you are using he OEM hardpoint. Big washers and large backing plates are used when securing the harness to sheet metal. OEM hardpoint is a better way to go -- designed and tested.
Harness manufacturers usually have free instructions on their websites. Worth a read. There's a link to Scroth instructions in my red car build thread.
Harness manufacturers usually have free instructions on their websites. Worth a read. There's a link to Scroth instructions in my red car build thread.
Reply
0
0

What type of fabric is that on the door panels. It looks like sued but I imagine it is fake sued really interested. I would like to do something similar with mine.
Reply
0
0

I might have missed it somewhere 200 or 300 pages ago (you are literally working faster than I have time to check in on the progress...), but are you planning on running race seats with these harnesses you want? or just stock seats?
If you are going with buckets you probably want to remove the plastic sleeve from the receiver side and route that and the seatbelt webbing through the bucket cutouts, so its not just draping over the top of the bolsters when you are using that belt around town.
If you plan to run stock seats, then just ignore me!
Reply
0
0

The seat belt should pivot. However the roll bar stops it from pivoting as much as it should, so they usually don't retract easily. Therefore, you can pivot it up against the roll bar and tighten it down and be good to go.
Otherwise, you'll have to replicate the stock shouldered bolt somehow to allow it to pivot.
Otherwise, you'll have to replicate the stock shouldered bolt somehow to allow it to pivot.
Reply
0
0
Awesome work on the center console. The bondo work is epic and the armrest came out fantastic.
Door tops - also fantastic.
Door panels: DAMN!!! Such a huge improvement from the bare ABS. Well done sir! And enjoy the door pulls.
Door tops - also fantastic.
Door panels: DAMN!!! Such a huge improvement from the bare ABS. Well done sir! And enjoy the door pulls.
Reply
1
1
Elite Member
Joined: Oct 2013
Posts: 2,764
Total Cats: 951
From: Cedar City, UT
are you planning on running race seats with these harnesses you want? or just stock seats?
If you are going with buckets you probably want to remove the plastic sleeve from the receiver side and route that and the seatbelt webbing through the bucket cutouts, so its not just draping over the top of the bolsters when you are using that belt around town.
If you are going with buckets you probably want to remove the plastic sleeve from the receiver side and route that and the seatbelt webbing through the bucket cutouts, so its not just draping over the top of the bolsters when you are using that belt around town.
I'm running Buddy Club Racing seats, ain't putting no stock seats back in this car!
 They are one of the few seats that fit with door bars installed. Although, saying that, with the new door cards in place, I could remake the door bars to give me another 1-3" of side bolster space.
The seat belt should pivot. However the roll bar stops it from pivoting as much as it should, so they usually don't retract easily. Therefore, you can pivot it up against the roll bar and tighten it down and be good to go.
Otherwise, you'll have to replicate the stock shouldered bolt somehow to allow it to pivot.
Otherwise, you'll have to replicate the stock shouldered bolt somehow to allow it to pivot.
Reply
1
1
Elite Member
Joined: Oct 2013
Posts: 2,764
Total Cats: 951
From: Cedar City, UT
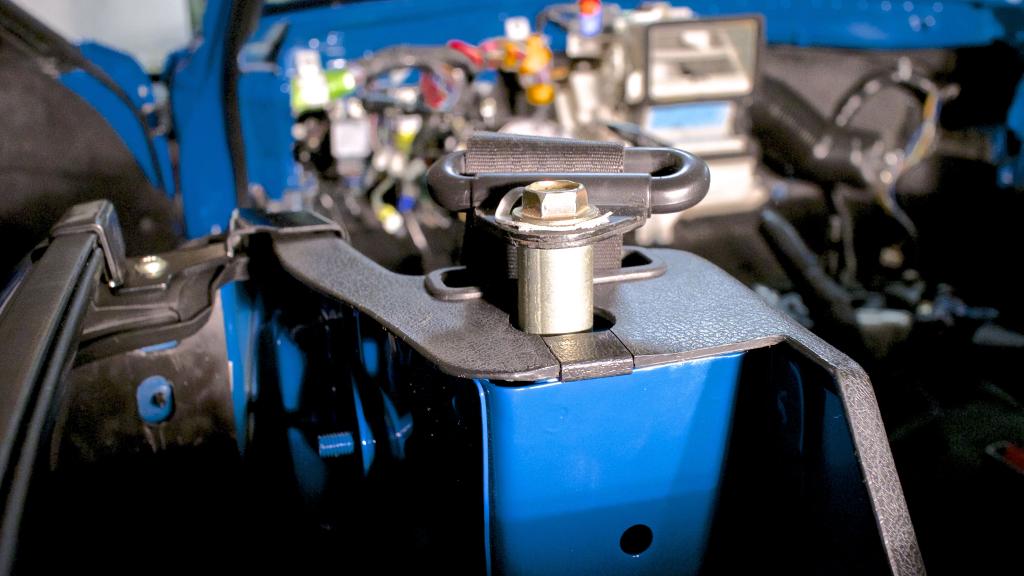
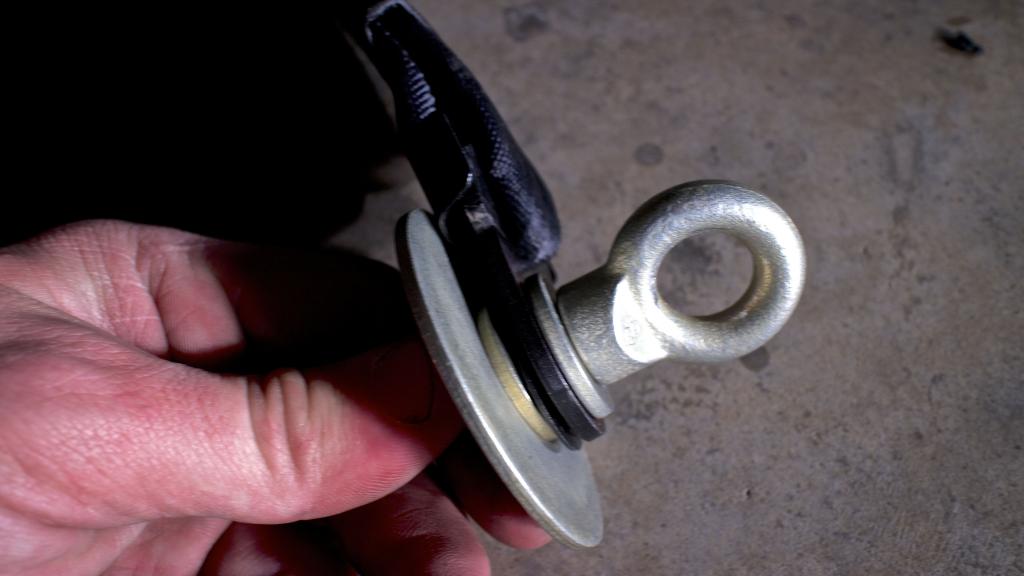
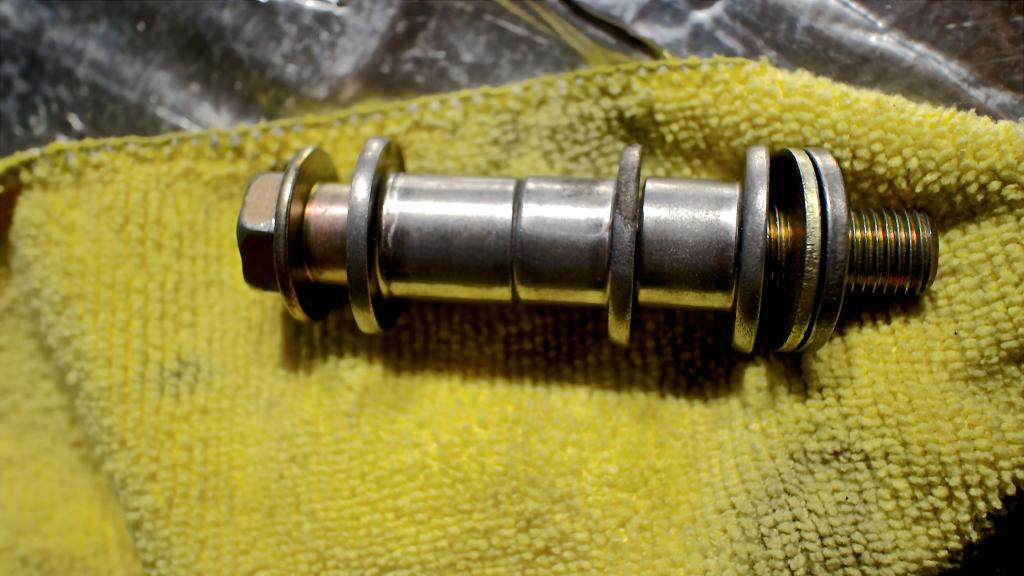
In case anyone is wondering what the seatbelt tower spacer arrangement is on 90-93 Miata, this is the correct layout.
Thick washer
Thin washer
3 stepped spacers and then the seat belt
Whene tightening make sure you pull the seat belt up flush against the bolt head so that it doesn't get torqued down onto the spacer.
Thick washer
Thin washer
3 stepped spacers and then the seat belt
Whene tightening make sure you pull the seat belt up flush against the bolt head so that it doesn't get torqued down onto the spacer.

Reply
1
1
I was referring to the lower bolster cutout, not the shoulder ones. My first time installing buckets I forgot to route the strap through the cutout then bolt it to the body BEFORE I installed the seat, and after fighting with the trans tunnel with a big hammer, and finally getting everything to line up with my side mounts in a very tight space, I was not excited to have to remove it all to access the seat belt bolt to route it through the seat cutout at my hip.
Reply
0
0

Elite Member
Joined: Oct 2013
Posts: 2,764
Total Cats: 951
From: Cedar City, UT
Gotcha, thanks, should be easy to do when I put the seats in.
OK that was a long night. Got the roll bar back in and the door bars. First I sprayed some rubberized undercoating on the contact point with the body since I didn't the first time around. Mostly to protect where the paint got scraped off and the drill holes. MUCH easier the second time around. Only took me an hour to put it all together.
After that I got the seat belts sorted out and went to install the trim panels and....doh! they wouldn't fit for the life of me. So after researching what Bethania Garage suggests, I came up with my own solution. I didn't want to cut the panels in half like they suggested. It looked super tacky in all the photos that I saw.
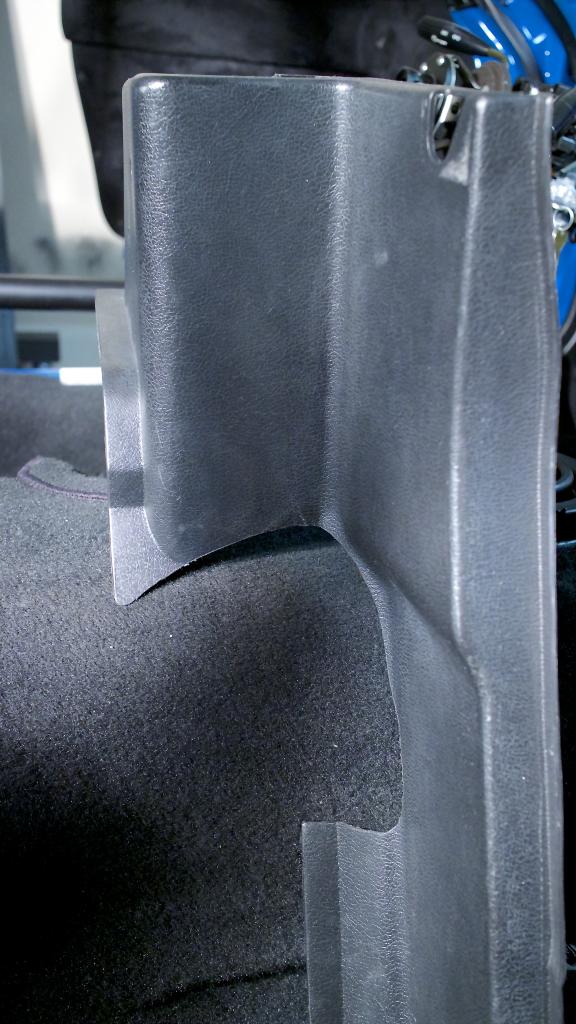
So I took the long route and installed then removed it about 20 times until I traced a pattern that would allow me to slide it in-between the roll bar and the chassis. I cut off the fastener plastic off the back of it along with the 1" tabs that slide into the body. Then I carefully used a dremmel to carve the contact point off the plastic. After that it slid right in just perfectly! In my opinion it is a pain in the *** to do, but worth it for the final result.
Passenger panel took a lot of attention to get it right.
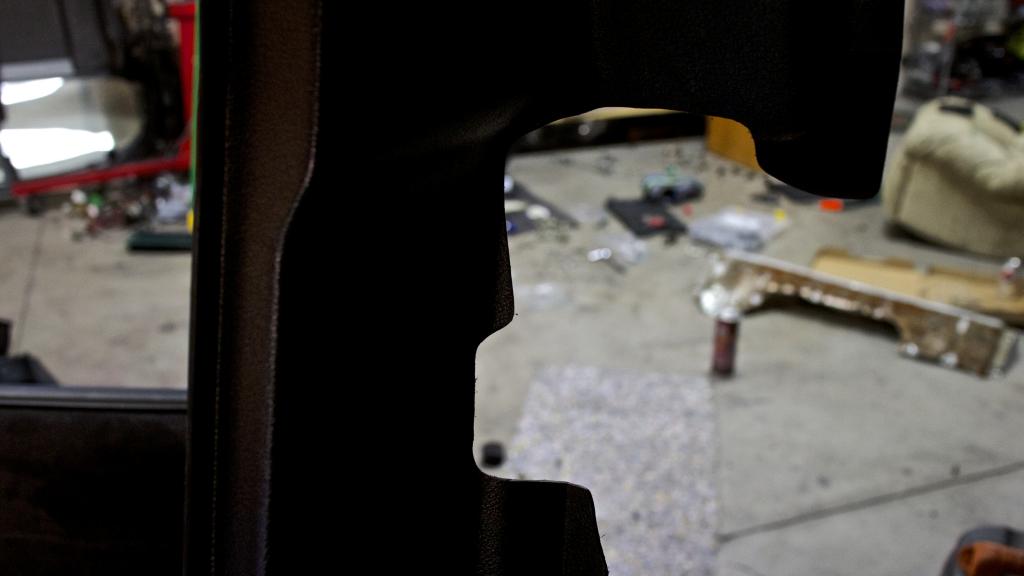
Drivers side was much more compliant.
Then I installed the ground wires and put the rear finish panel on along with the carpet.
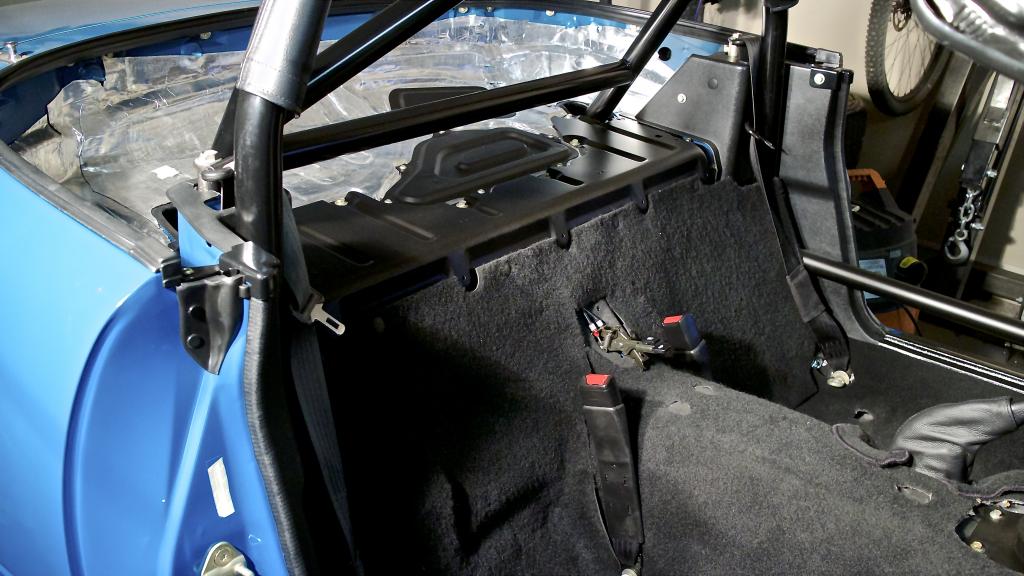
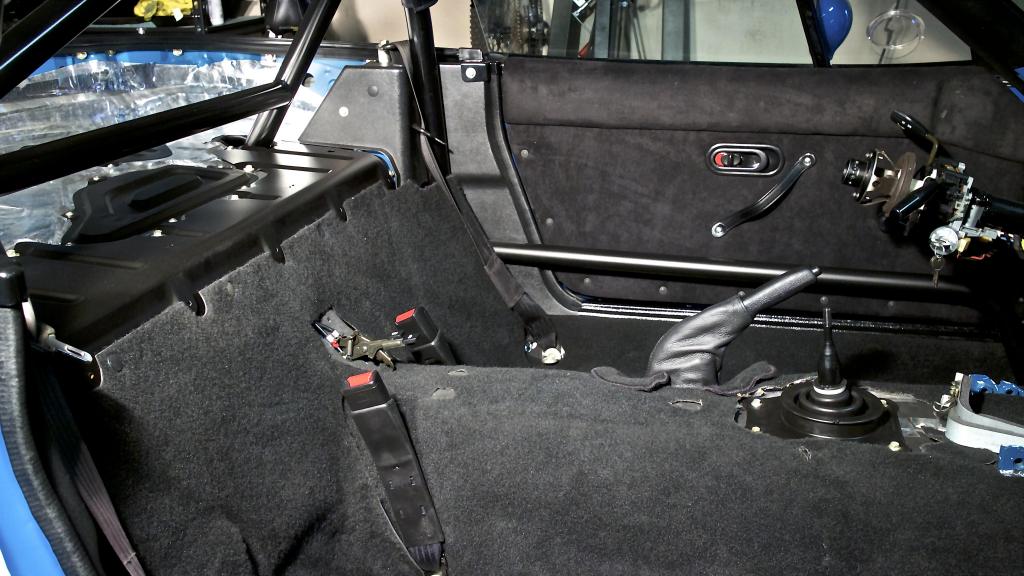
And the rear carpet just laid on until I can find a solution that I am happy with.
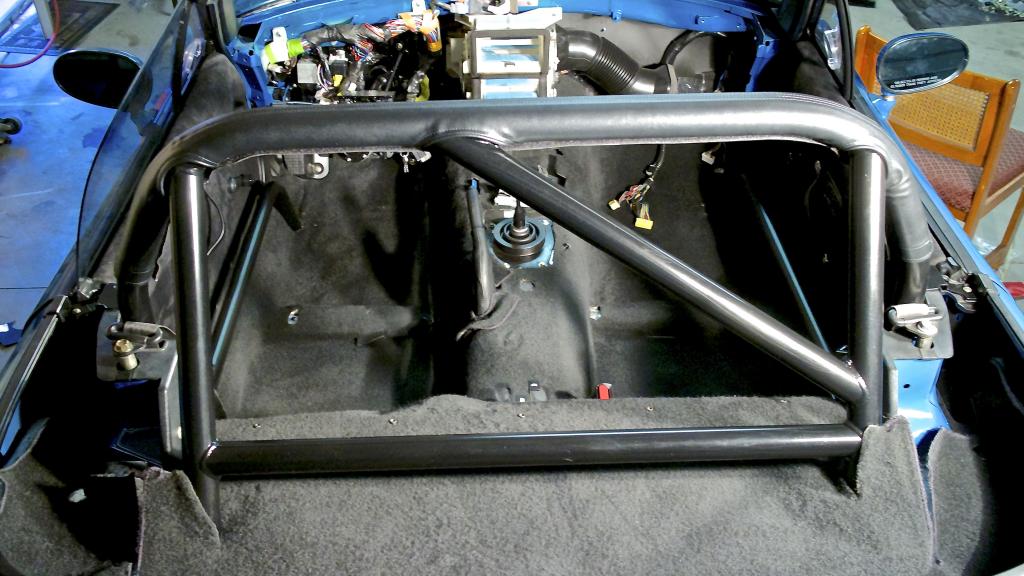
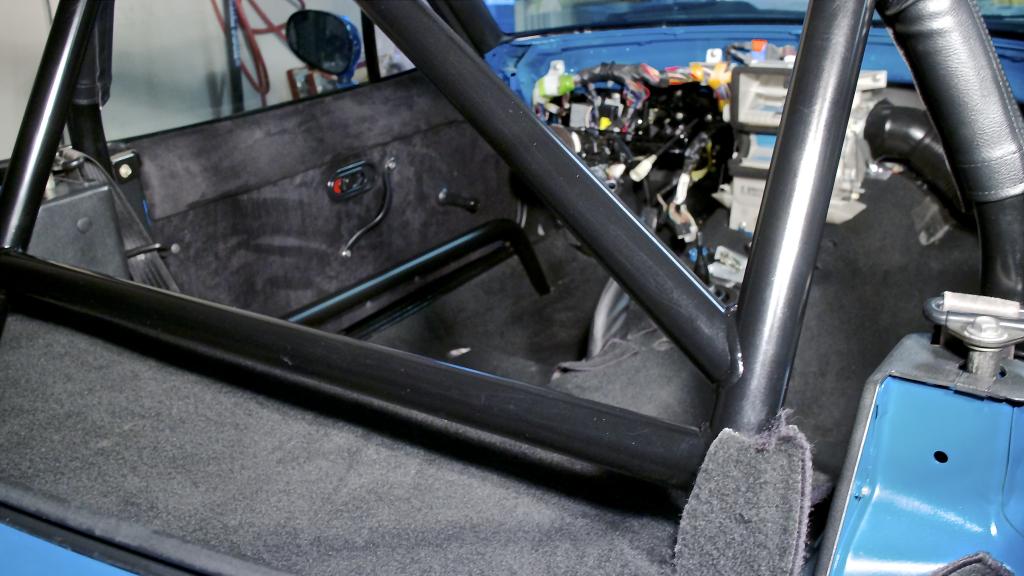
Glad that is over with.
OK that was a long night. Got the roll bar back in and the door bars. First I sprayed some rubberized undercoating on the contact point with the body since I didn't the first time around. Mostly to protect where the paint got scraped off and the drill holes. MUCH easier the second time around. Only took me an hour to put it all together.
After that I got the seat belts sorted out and went to install the trim panels and....doh! they wouldn't fit for the life of me. So after researching what Bethania Garage suggests, I came up with my own solution. I didn't want to cut the panels in half like they suggested. It looked super tacky in all the photos that I saw.
So I took the long route and installed then removed it about 20 times until I traced a pattern that would allow me to slide it in-between the roll bar and the chassis. I cut off the fastener plastic off the back of it along with the 1" tabs that slide into the body. Then I carefully used a dremmel to carve the contact point off the plastic. After that it slid right in just perfectly! In my opinion it is a pain in the *** to do, but worth it for the final result.
Passenger panel took a lot of attention to get it right.

Drivers side was much more compliant.

Then I installed the ground wires and put the rear finish panel on along with the carpet.


And the rear carpet just laid on until I can find a solution that I am happy with.


Glad that is over with.
Reply
1
1
Elite Member
Joined: Oct 2013
Posts: 2,764
Total Cats: 951
From: Cedar City, UT
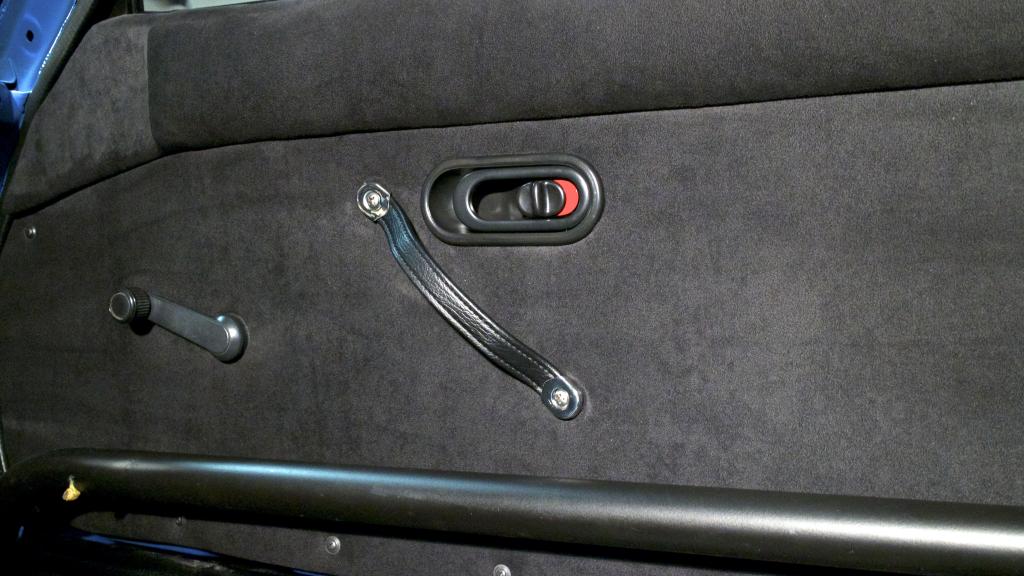
The handles are from Revlimiter(Adam), very cheap for how good they look. I'm so happy I went with the OEM door handle/locks inside, gives it a really clean look. The Porsche RS pull straps just didn't look as clean IMHO. Maybe if I could have found a good metal trim ring for the base of the strap, but that just costs more money!
Reply
0
0


