
93' Miata stolen and flipped build thread


You really want to avoid cutting into the chassis as much as possible. I've regretted every cut I've made, although it's all in the name of functionality.
Have you considered an RX-7 oil cooler? Doesn't require any airflow because it's so huge, and it's a little easier to mount since it's only ~6x6. Basically replaces the plastic bumper support.
Have you considered an RX-7 oil cooler? Doesn't require any airflow because it's so huge, and it's a little easier to mount since it's only ~6x6. Basically replaces the plastic bumper support.
Reply
 0
0

0

I'm absolutely thrilled with my oil cooler location. TX Summer tested and approved.
https://www.miataturbo.net/build-thr...4/#post1149743
https://www.miataturbo.net/build-thr...4/#post1149743
Reply
1
1

Elite Member
Joined: Oct 2013
Posts: 2,764
Total Cats: 951
From: Cedar City, UT
I'm absolutely thrilled with my oil cooler location. TX Summer tested and approved.
https://www.miataturbo.net/build-thr...4/#post1149743
https://www.miataturbo.net/build-thr...4/#post1149743
*edit* but seeing as Texas is very relative to Vegas/southern Utah temps, it may not be as incomparable as I originally thought *edit*
I'm contemplating mounting it in front of the radiator hoping that the big *** TSE radiator will still get enough flow to be in the green with coolant temps.
Reply
0
0
What's the diff? Your radiator AND your oil cooler combined cool the engine. Whether one is in front of the other doesn't matter much, you're still adding engine cooling capacity. If you put the oil cooler in front of the radiator, you either add to the stack and reduce radiator effectiveness, or you divert air and reduce radiator effectiveness. If you put the oil cooler behind the radiator, you add to the stack and reduce the oil cooler effectiveness slightly.
HOWEVER, proper design and stacking of heat transfer devices should consider the target temperature of the fluid you are cooling, since heat transfer is a product of the delta-T. What that means is your coolest fluid should go up front, and your warmest in the back. That order would be intercooler (target temp < 100F), radiator (target temp < 200F), oil cooler (target temp < 230F).
Or, I could just skip the science and tell you to do it this way because it works (in TX in August), it's easy to install, easy to maintain, keeps the oil cooler protected and doesn't require you to cut up your car.
Or . . . well, that's enough. BTW, the heat in your oil comes more from RPM than from power.
Reply
5
5
Elite Member
Joined: Oct 2013
Posts: 2,764
Total Cats: 951
From: Cedar City, UT
Or, I could just skip the science and tell you to do it this way because it works (in TX in August), it's easy to install, easy to maintain, keeps the oil cooler protected and doesn't require you to cut up your car.
Or . . . well, that's enough. BTW, the heat in your oil comes more from RPM than from power.
Or . . . well, that's enough. BTW, the heat in your oil comes more from RPM than from power.

Reply
1
1
This ... granted I have Brotrex boost, but even so, ALL of my oil heat comes from RPM and not power. Trubos may be different due to the trubo sharing oil with the engine for cooling purposes. But other than that, BP engine oil heat is almost entirely due to average RPM.
Reply
0
0
Reply
0
0
Reply
0
0
Elite Member
Joined: Oct 2013
Posts: 2,764
Total Cats: 951
From: Cedar City, UT
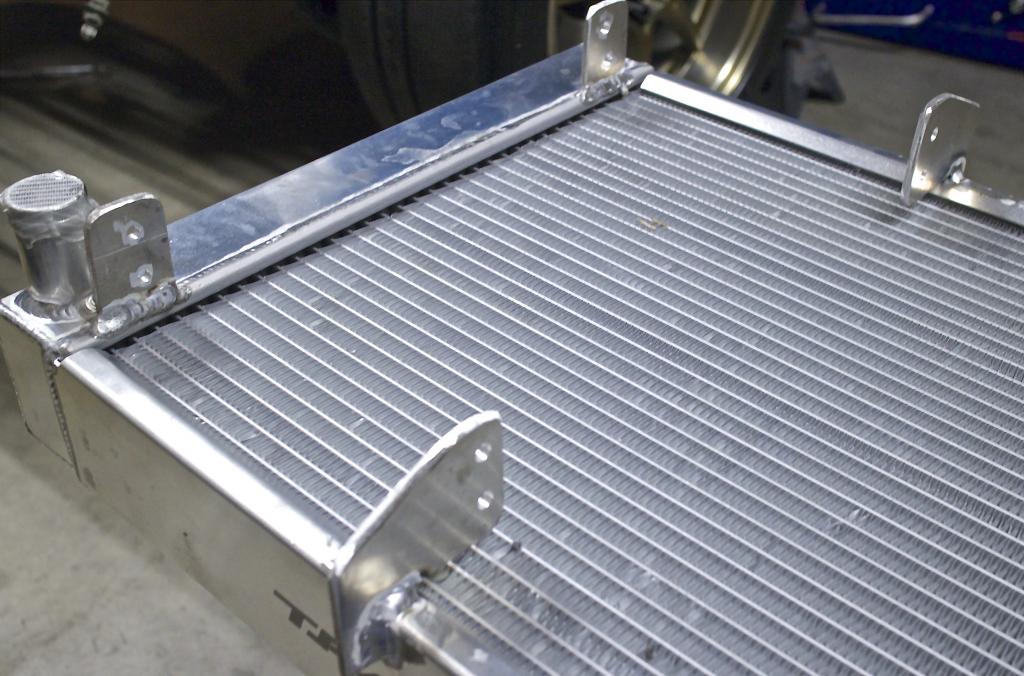
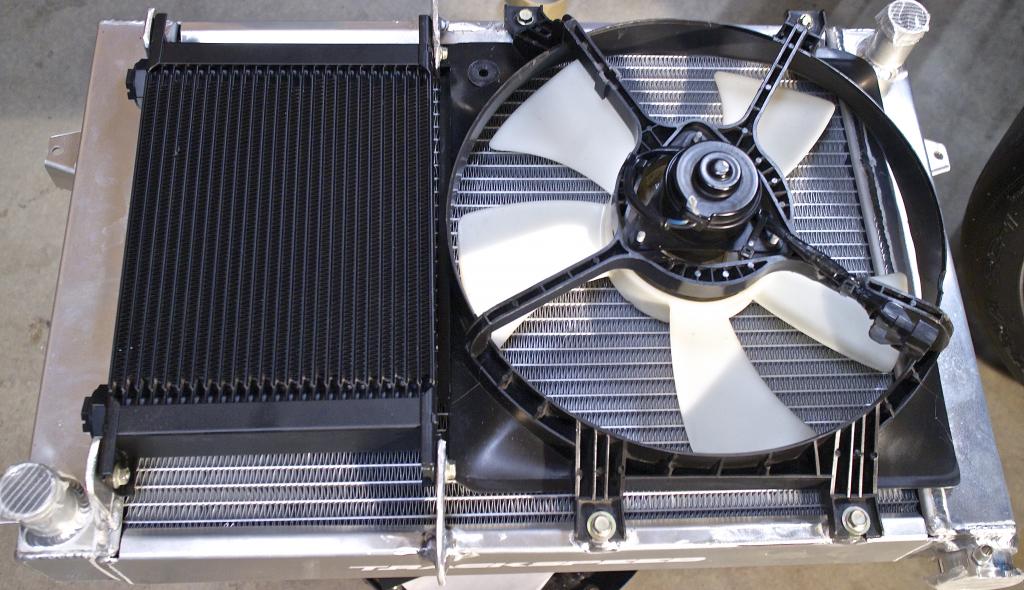
Followed Rick's advice and mounted it as he did and it works really nicely. Took it to a Welder who does aluminum railings/iron work, he cut off the original fan bungs and moved them to the drivers side. Welded some tabs onto the passenger side and $50 later and no frustration we are good to go.
Had to trim the fan a little and add a couple washers to the fan mounts to clear the blades, but other than that no problem.
Now I just need to figure out how to connect the AN connectors to the stainless lines. Just glad they are 90� connectors to clear the frame rails.
Had to trim the fan a little and add a couple washers to the fan mounts to clear the blades, but other than that no problem.
Now I just need to figure out how to connect the AN connectors to the stainless lines. Just glad they are 90� connectors to clear the frame rails.


Reply
1
1

Joined: Sep 2010
Posts: 8,146
Total Cats: 1,087
From: Lake Forest, CA
Reply
0
0

Joined: Apr 2014
Posts: 18,643
Total Cats: 1,870
From: Beaverton, USA
I'm absolutely thrilled with my oil cooler location. TX Summer tested and approved.
https://www.miataturbo.net/build-thr...4/#post1149743
https://www.miataturbo.net/build-thr...4/#post1149743
 lol.
lol.I think I will run mine off some brackets on the AC fan mounts. Whenever I get around to actually getting an oil cooler.
Reply
0
0

Elite Member
Joined: Oct 2013
Posts: 2,764
Total Cats: 951
From: Cedar City, UT
It really is most choice. Do it...it ain't like you're in a rush! 
You said first....Rick just won due to pictures and data. 
Ok I switched to imgur to try it out, and get Scott off my PB account.
-
-
-
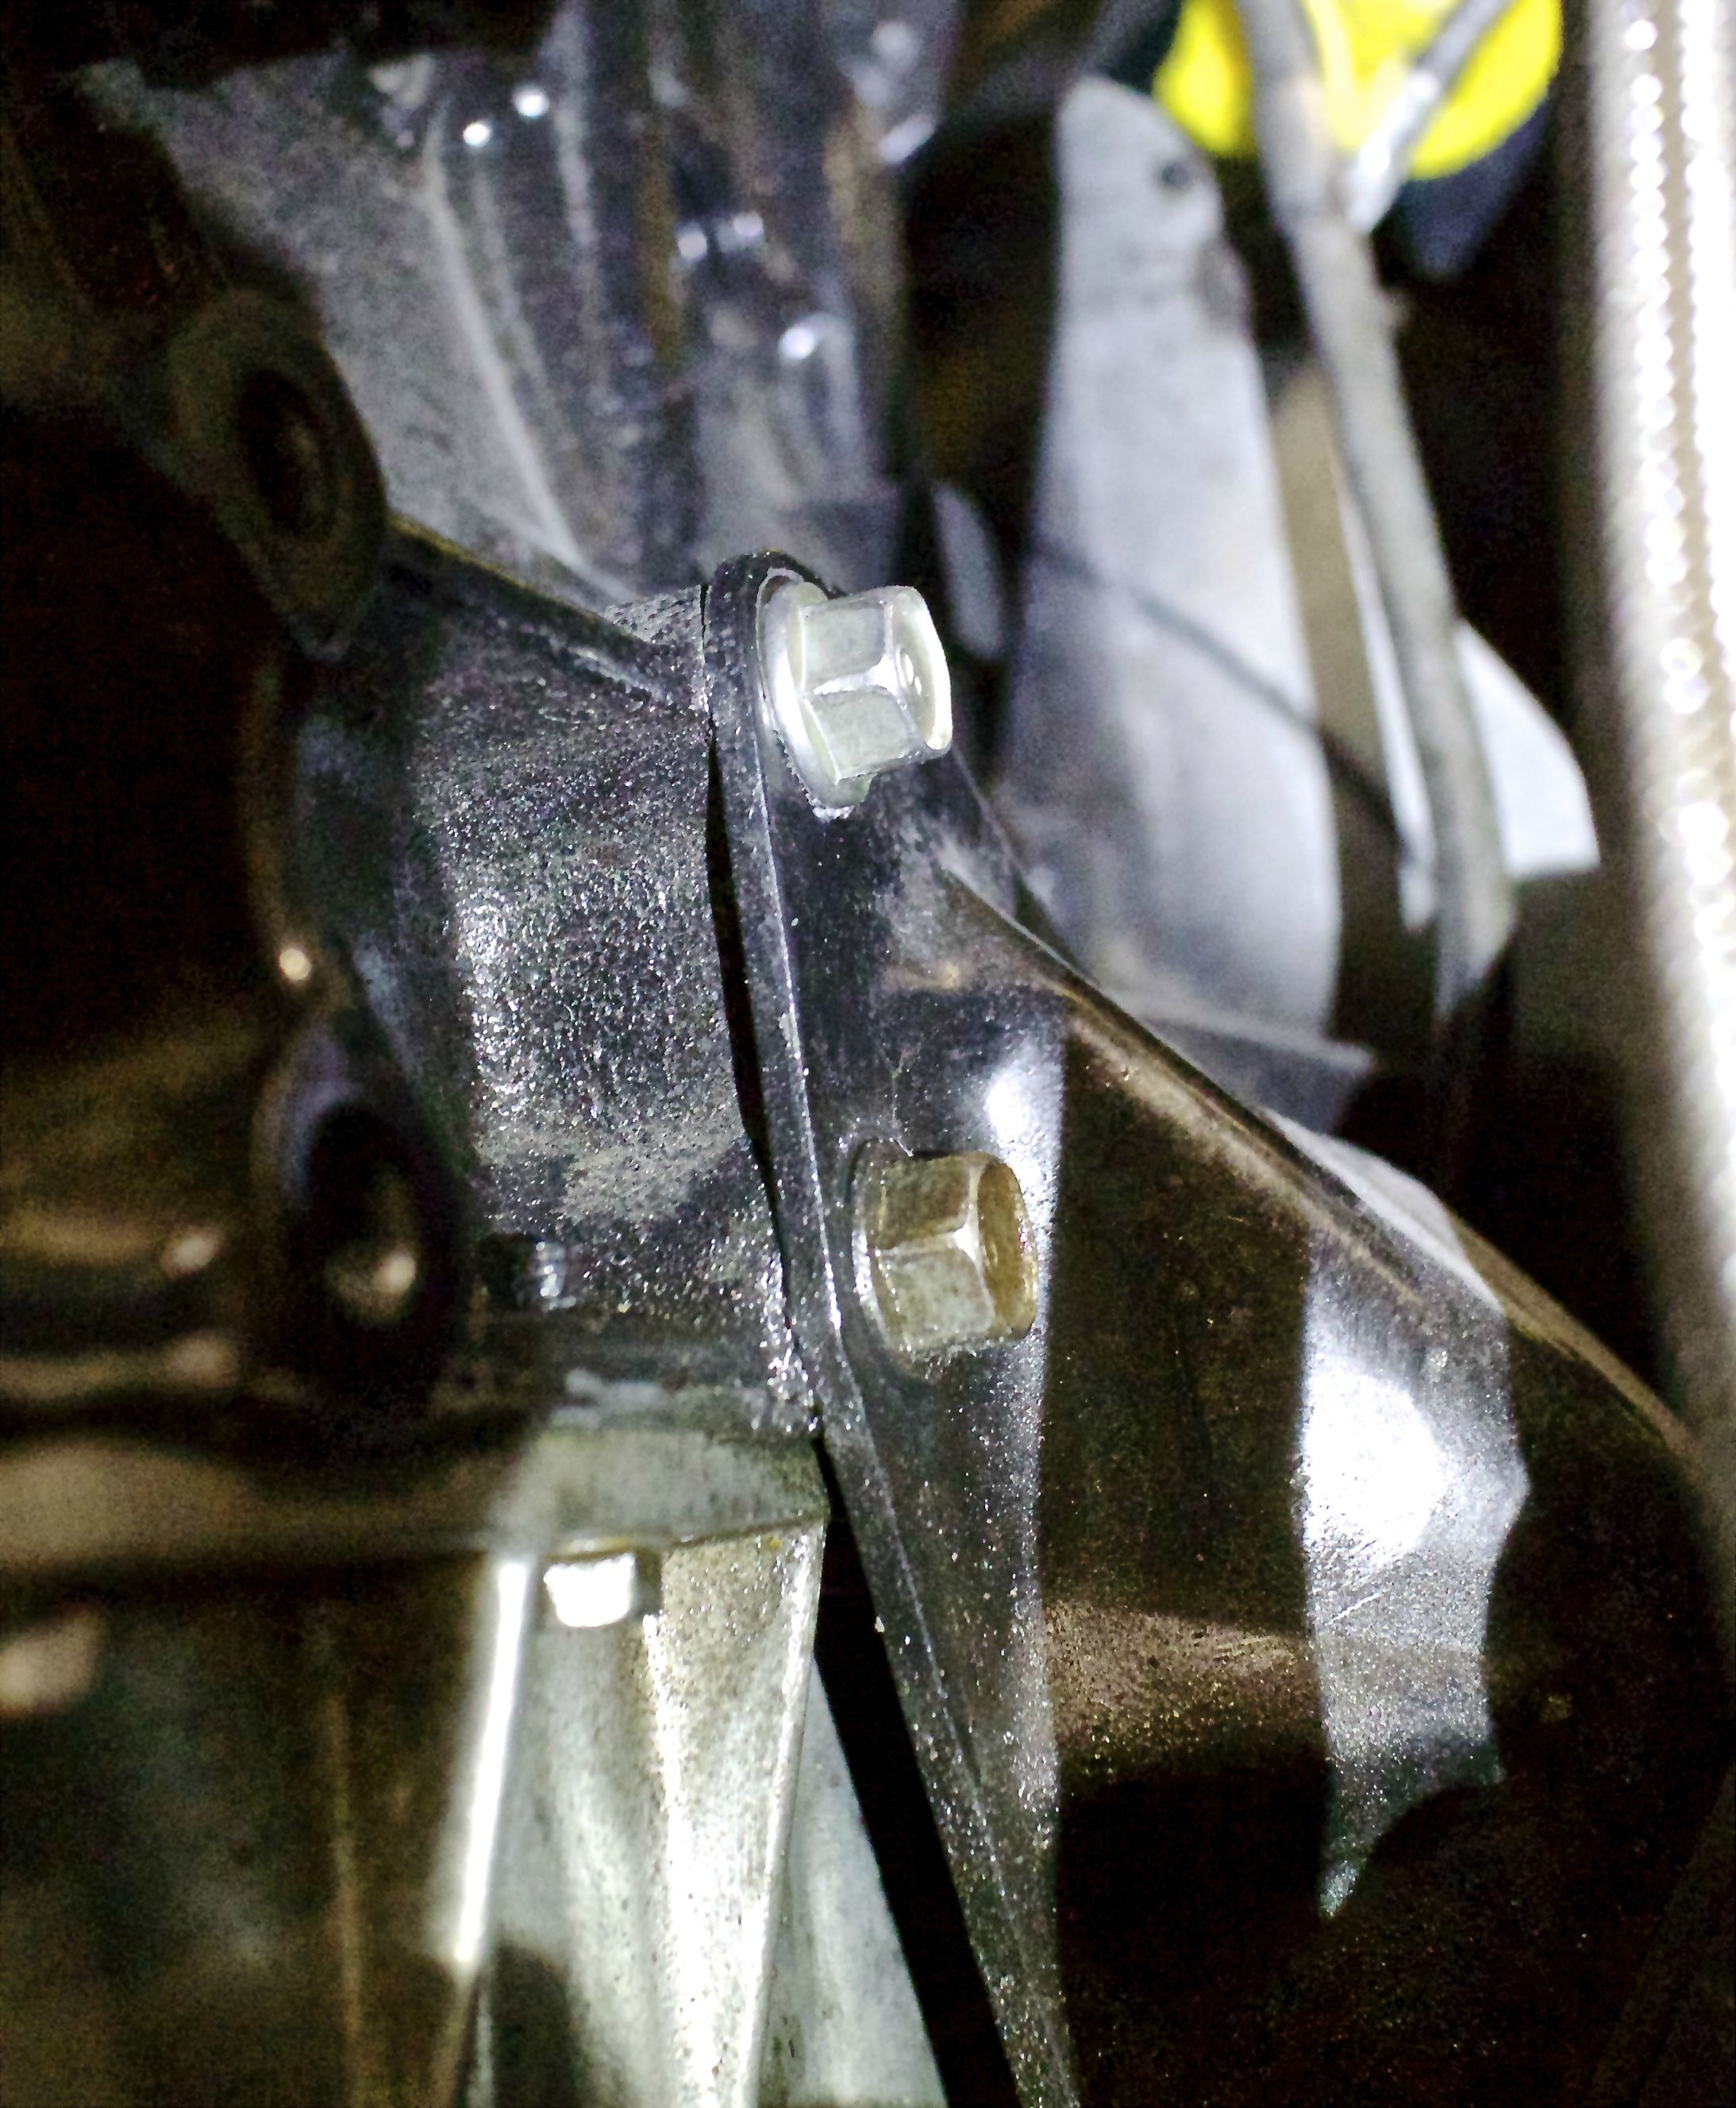
So while I'm waiting to get my AN lines made I decided to do a once over of all my bolts/connections/et al and holy **** am I glad I did. Considering I have to drive the Miata 5 hours to Willow springs and back, this could have been a slight issue on the track.
Notice the difference between these two bolts? One is shiny and not covered in road grime...yeah... On each motor mount I had a bolt missing and the others were hand tight. I clearly remember torquing them to spec, but I guess with the Mazdaspeed motor mounts, I either need to loctite them, or just check them more regularly.
What is y'alls solution? Loctite, overtorque, or regular preventative maintenance?
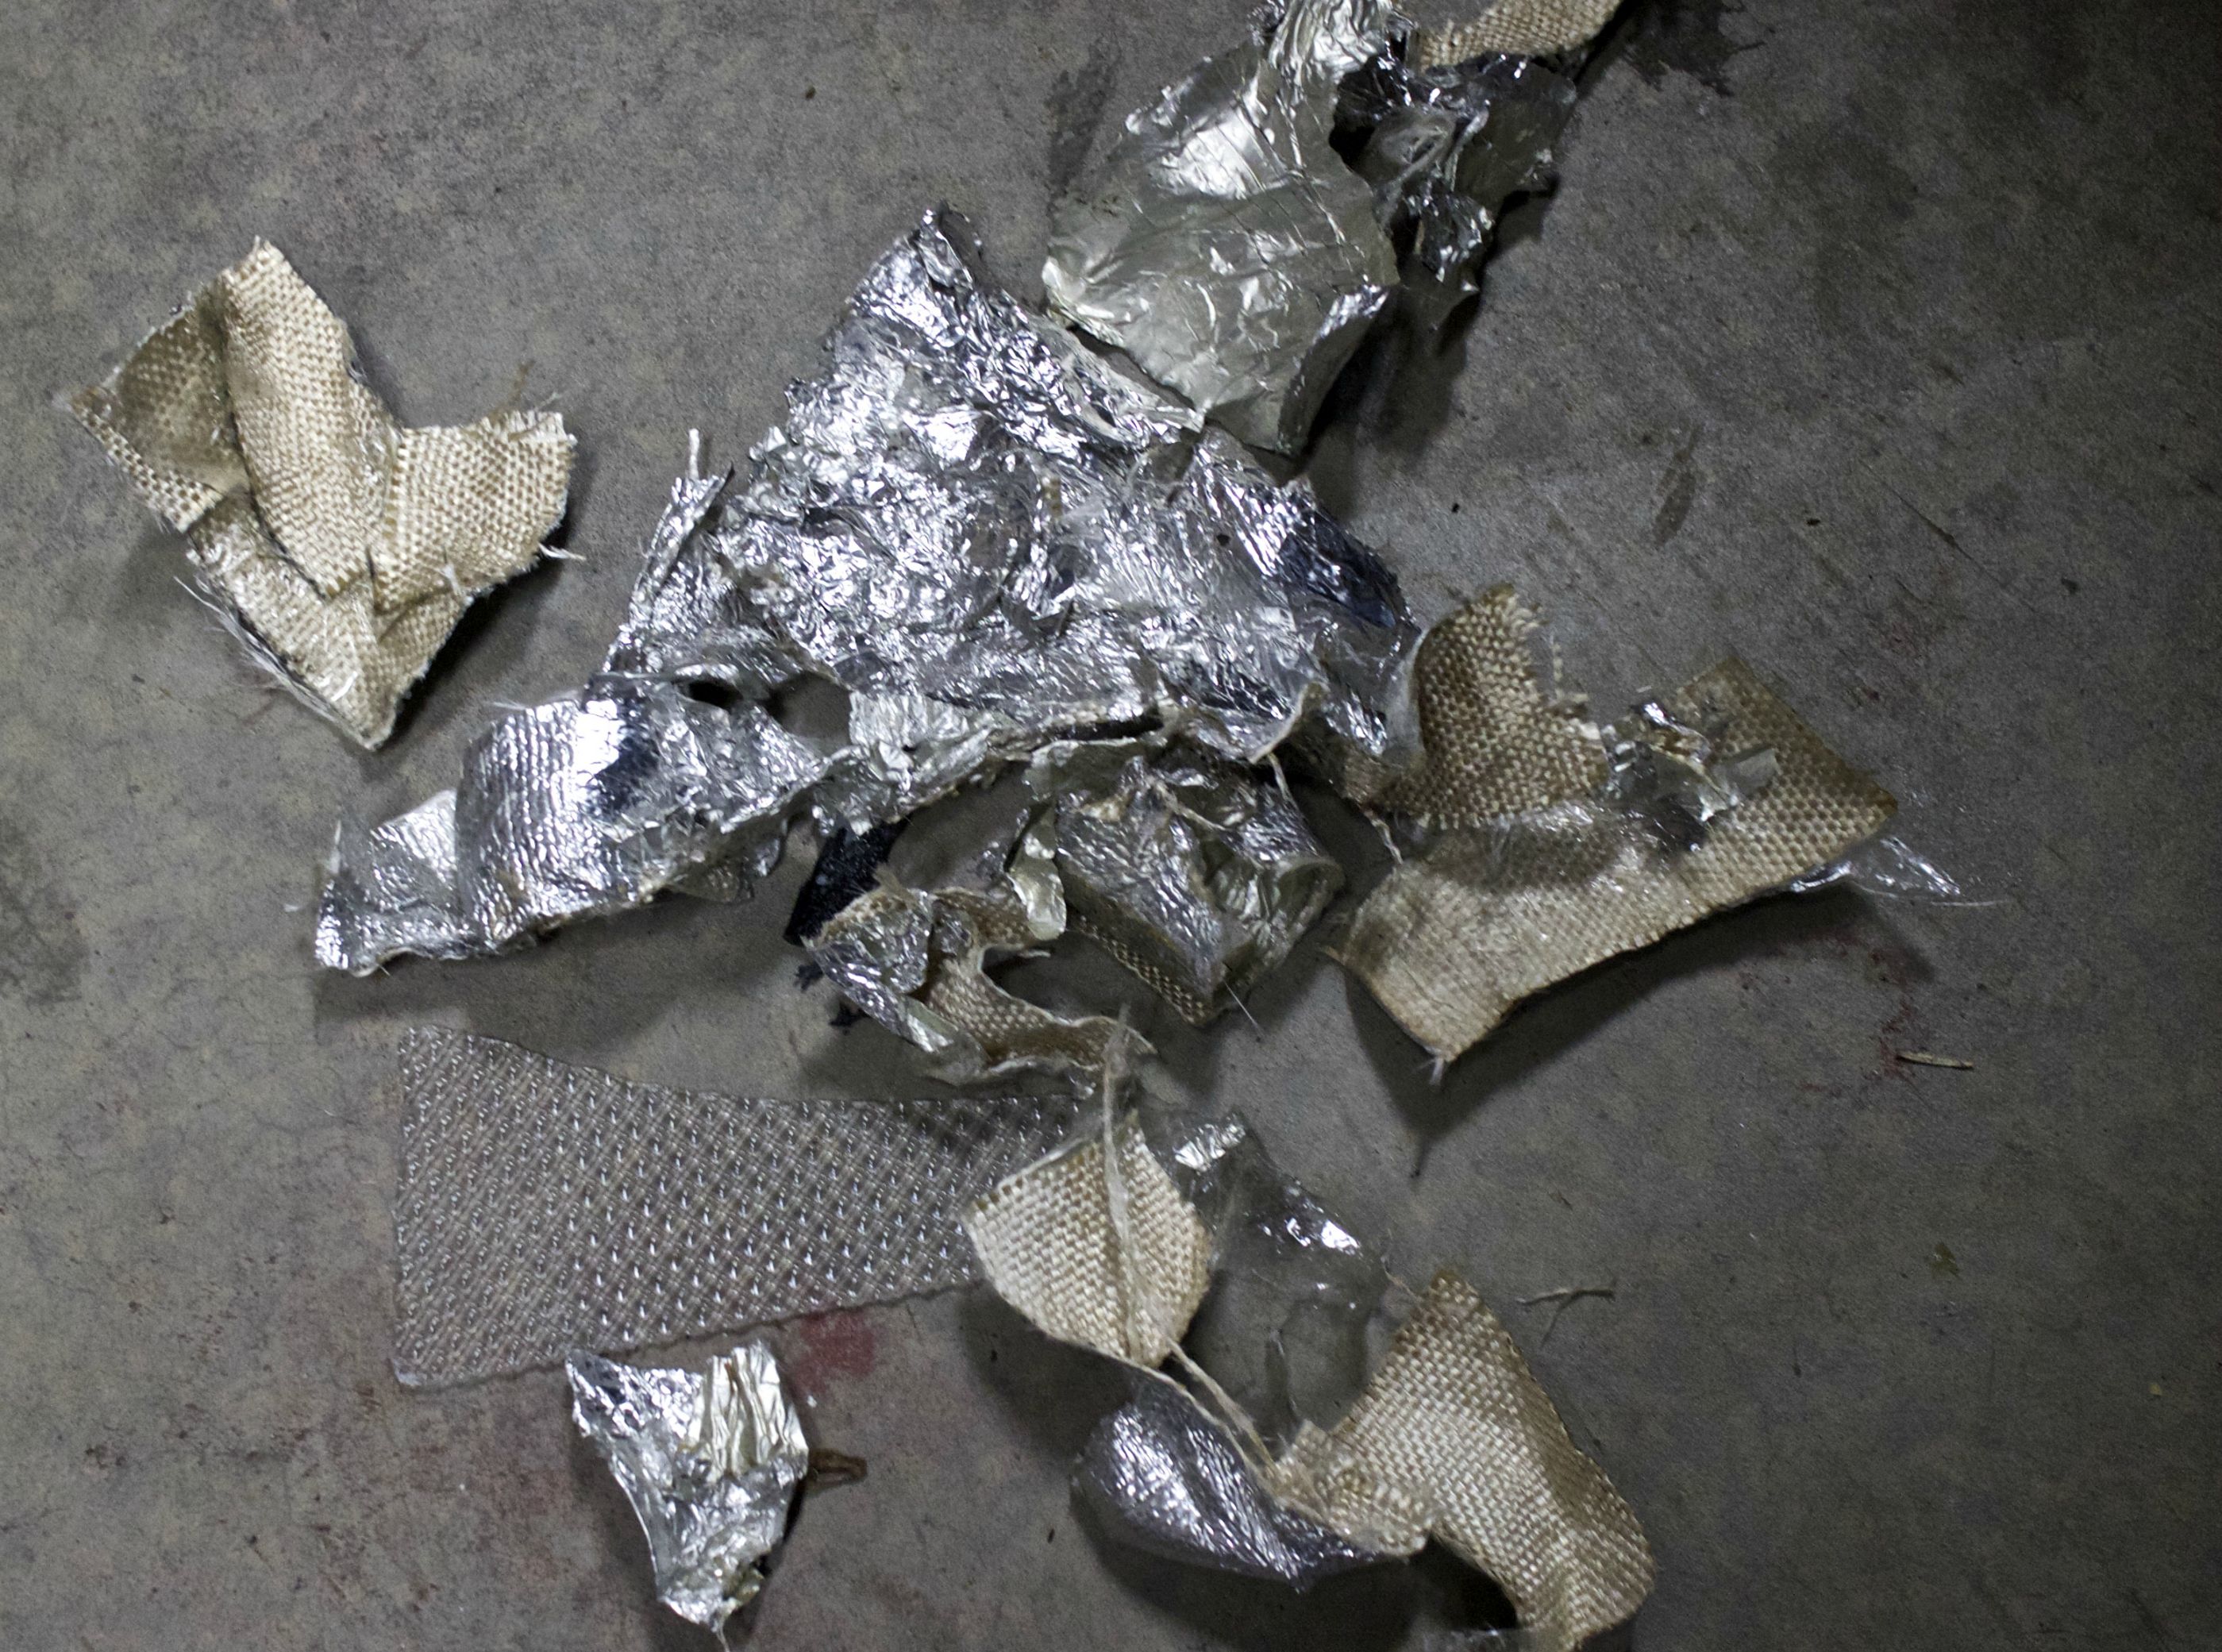
Also decided to redo my heater core hose downpipe heat prevention solution. I originally used a **** load of aluminum tape and transmission tunnel wrap. But the adhesive on both gave up the ghost and I was using a ton of metal zip ties to keep it on. Functionally it was working, but I didn't want to risk it falling off in some areas and getting a melted hose as a result.
I bought 3' of after doing a bit of research. I should have done this in the first place. Super easy, and slips on without any struggle(I just put rubber conditioner on so it was easier for me). Highly recommend it. Plus it looks a lot clean as hell.
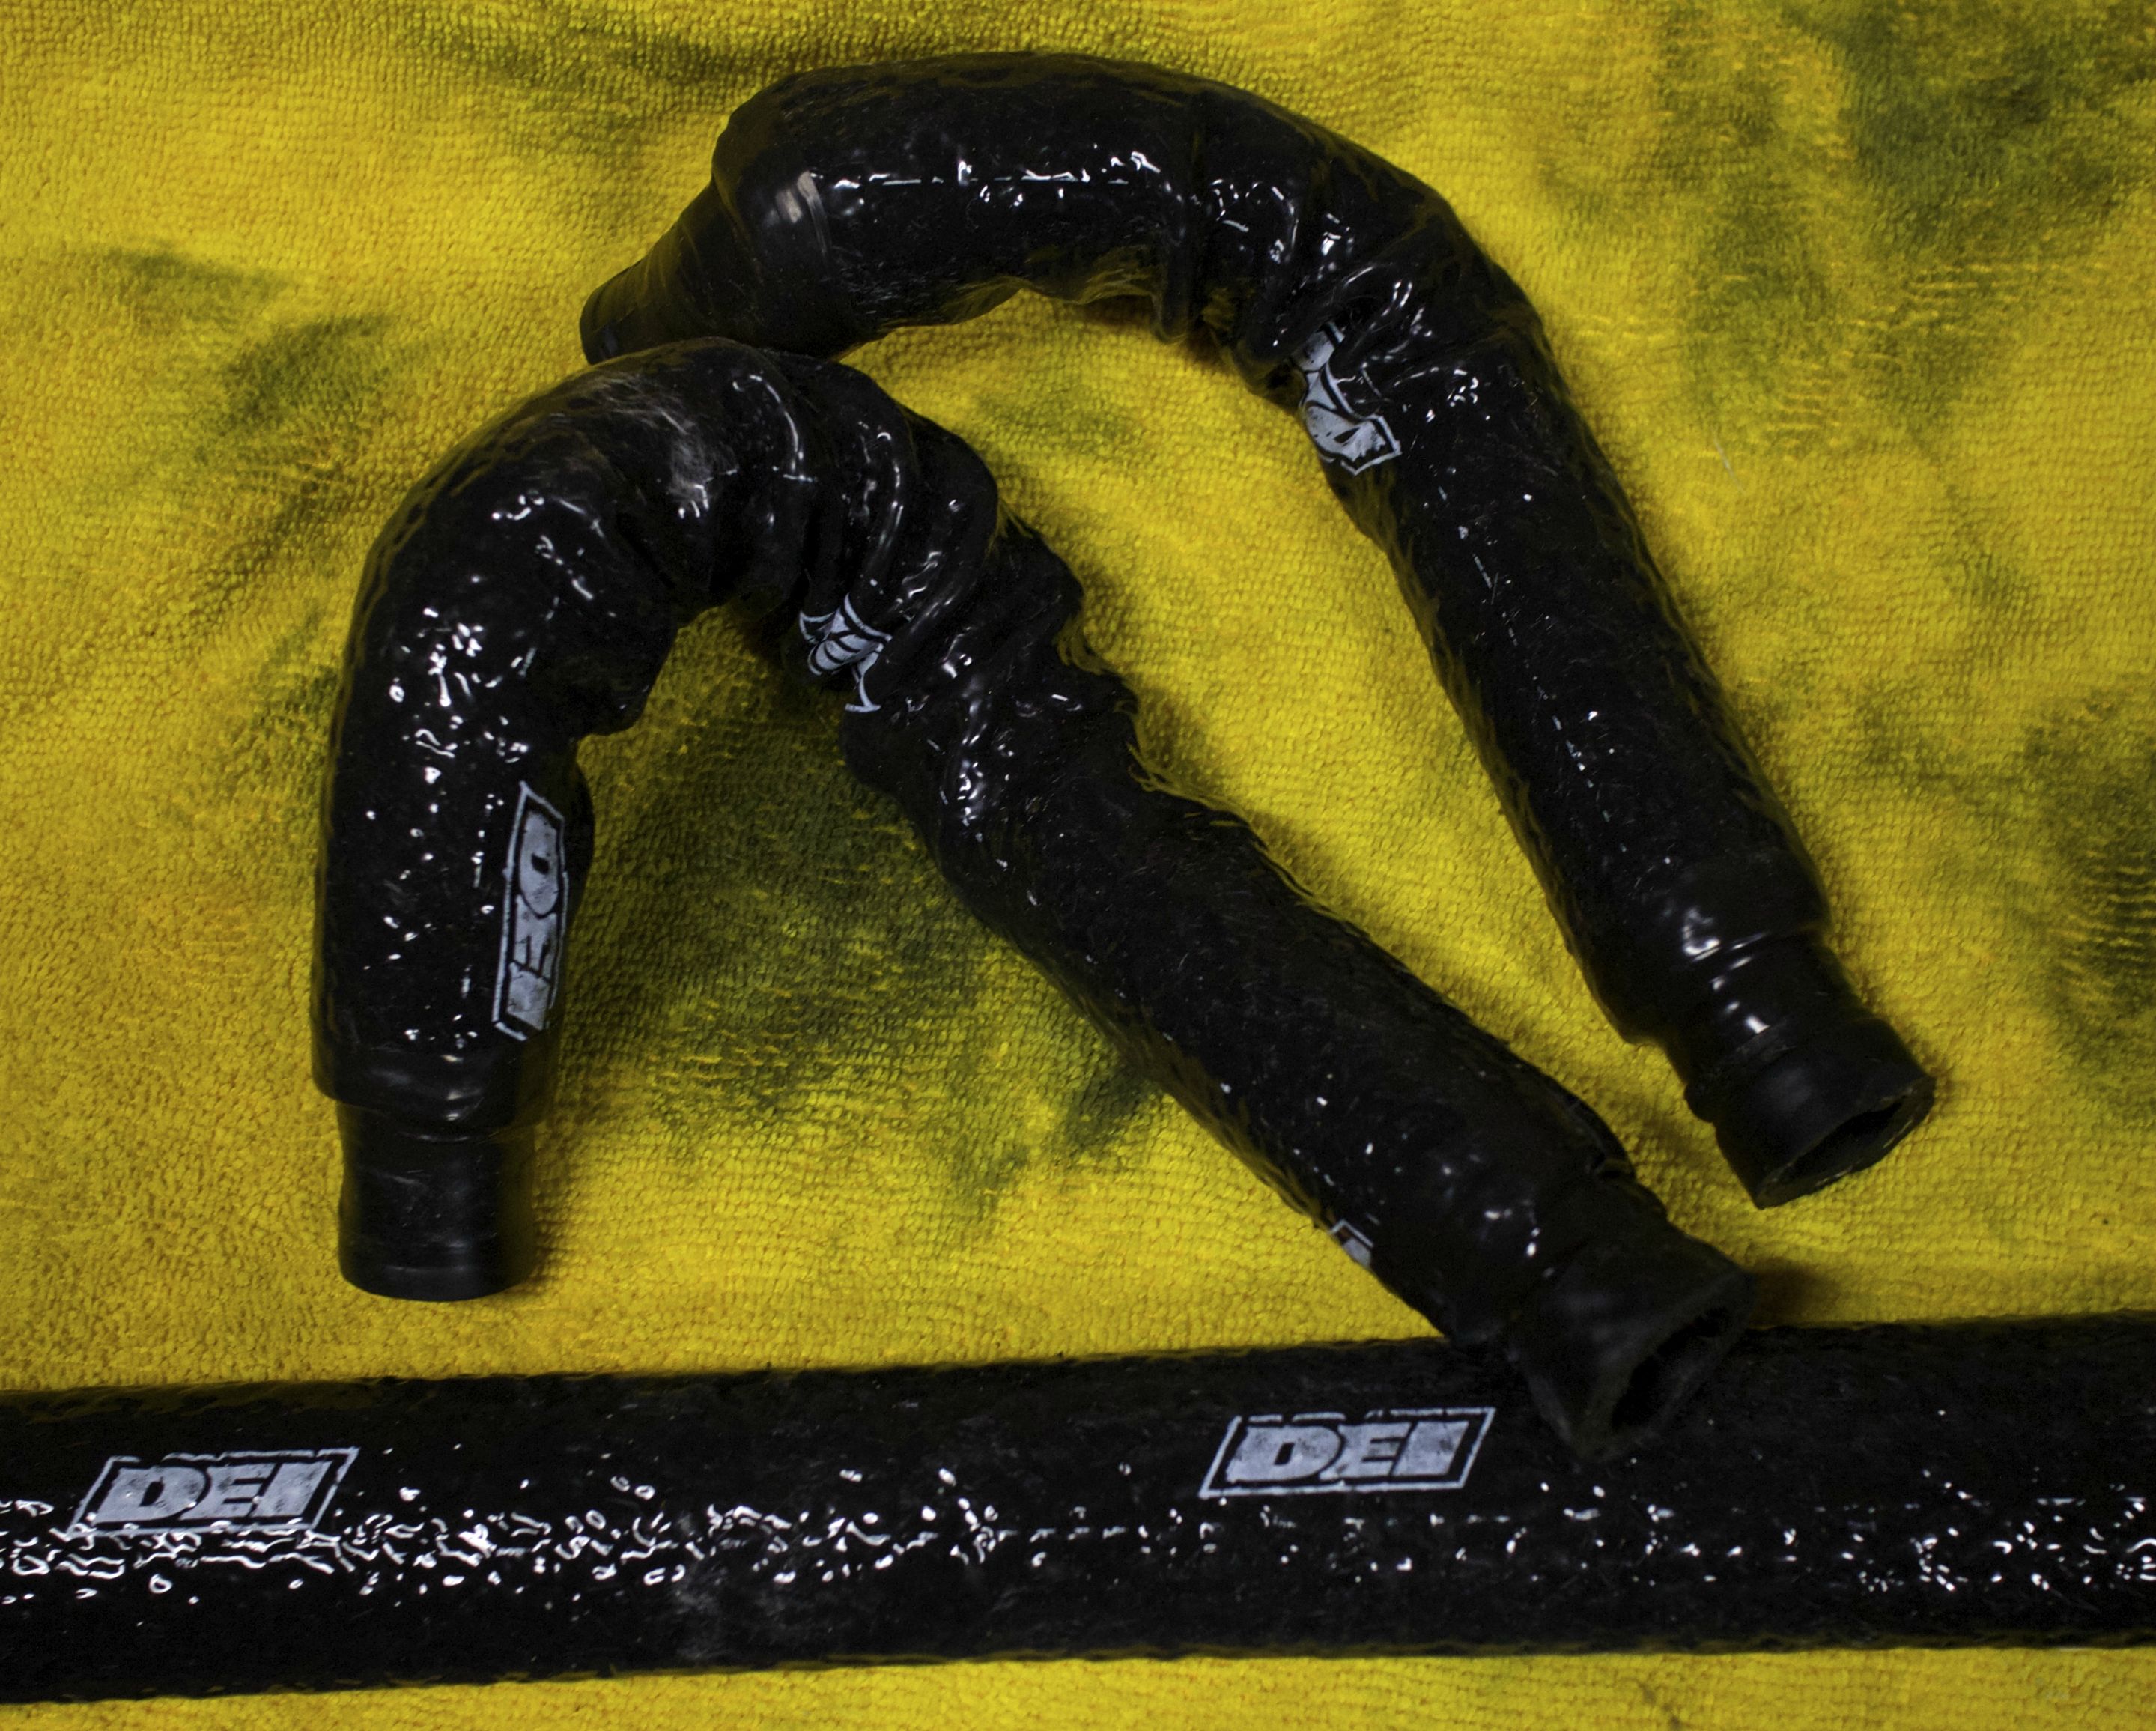
It also comes with this awesome(as in I'm buying several rolls of it) rubber tape. Only it has no adhesive, it just attaches to itself somehow...no clue, love it though.
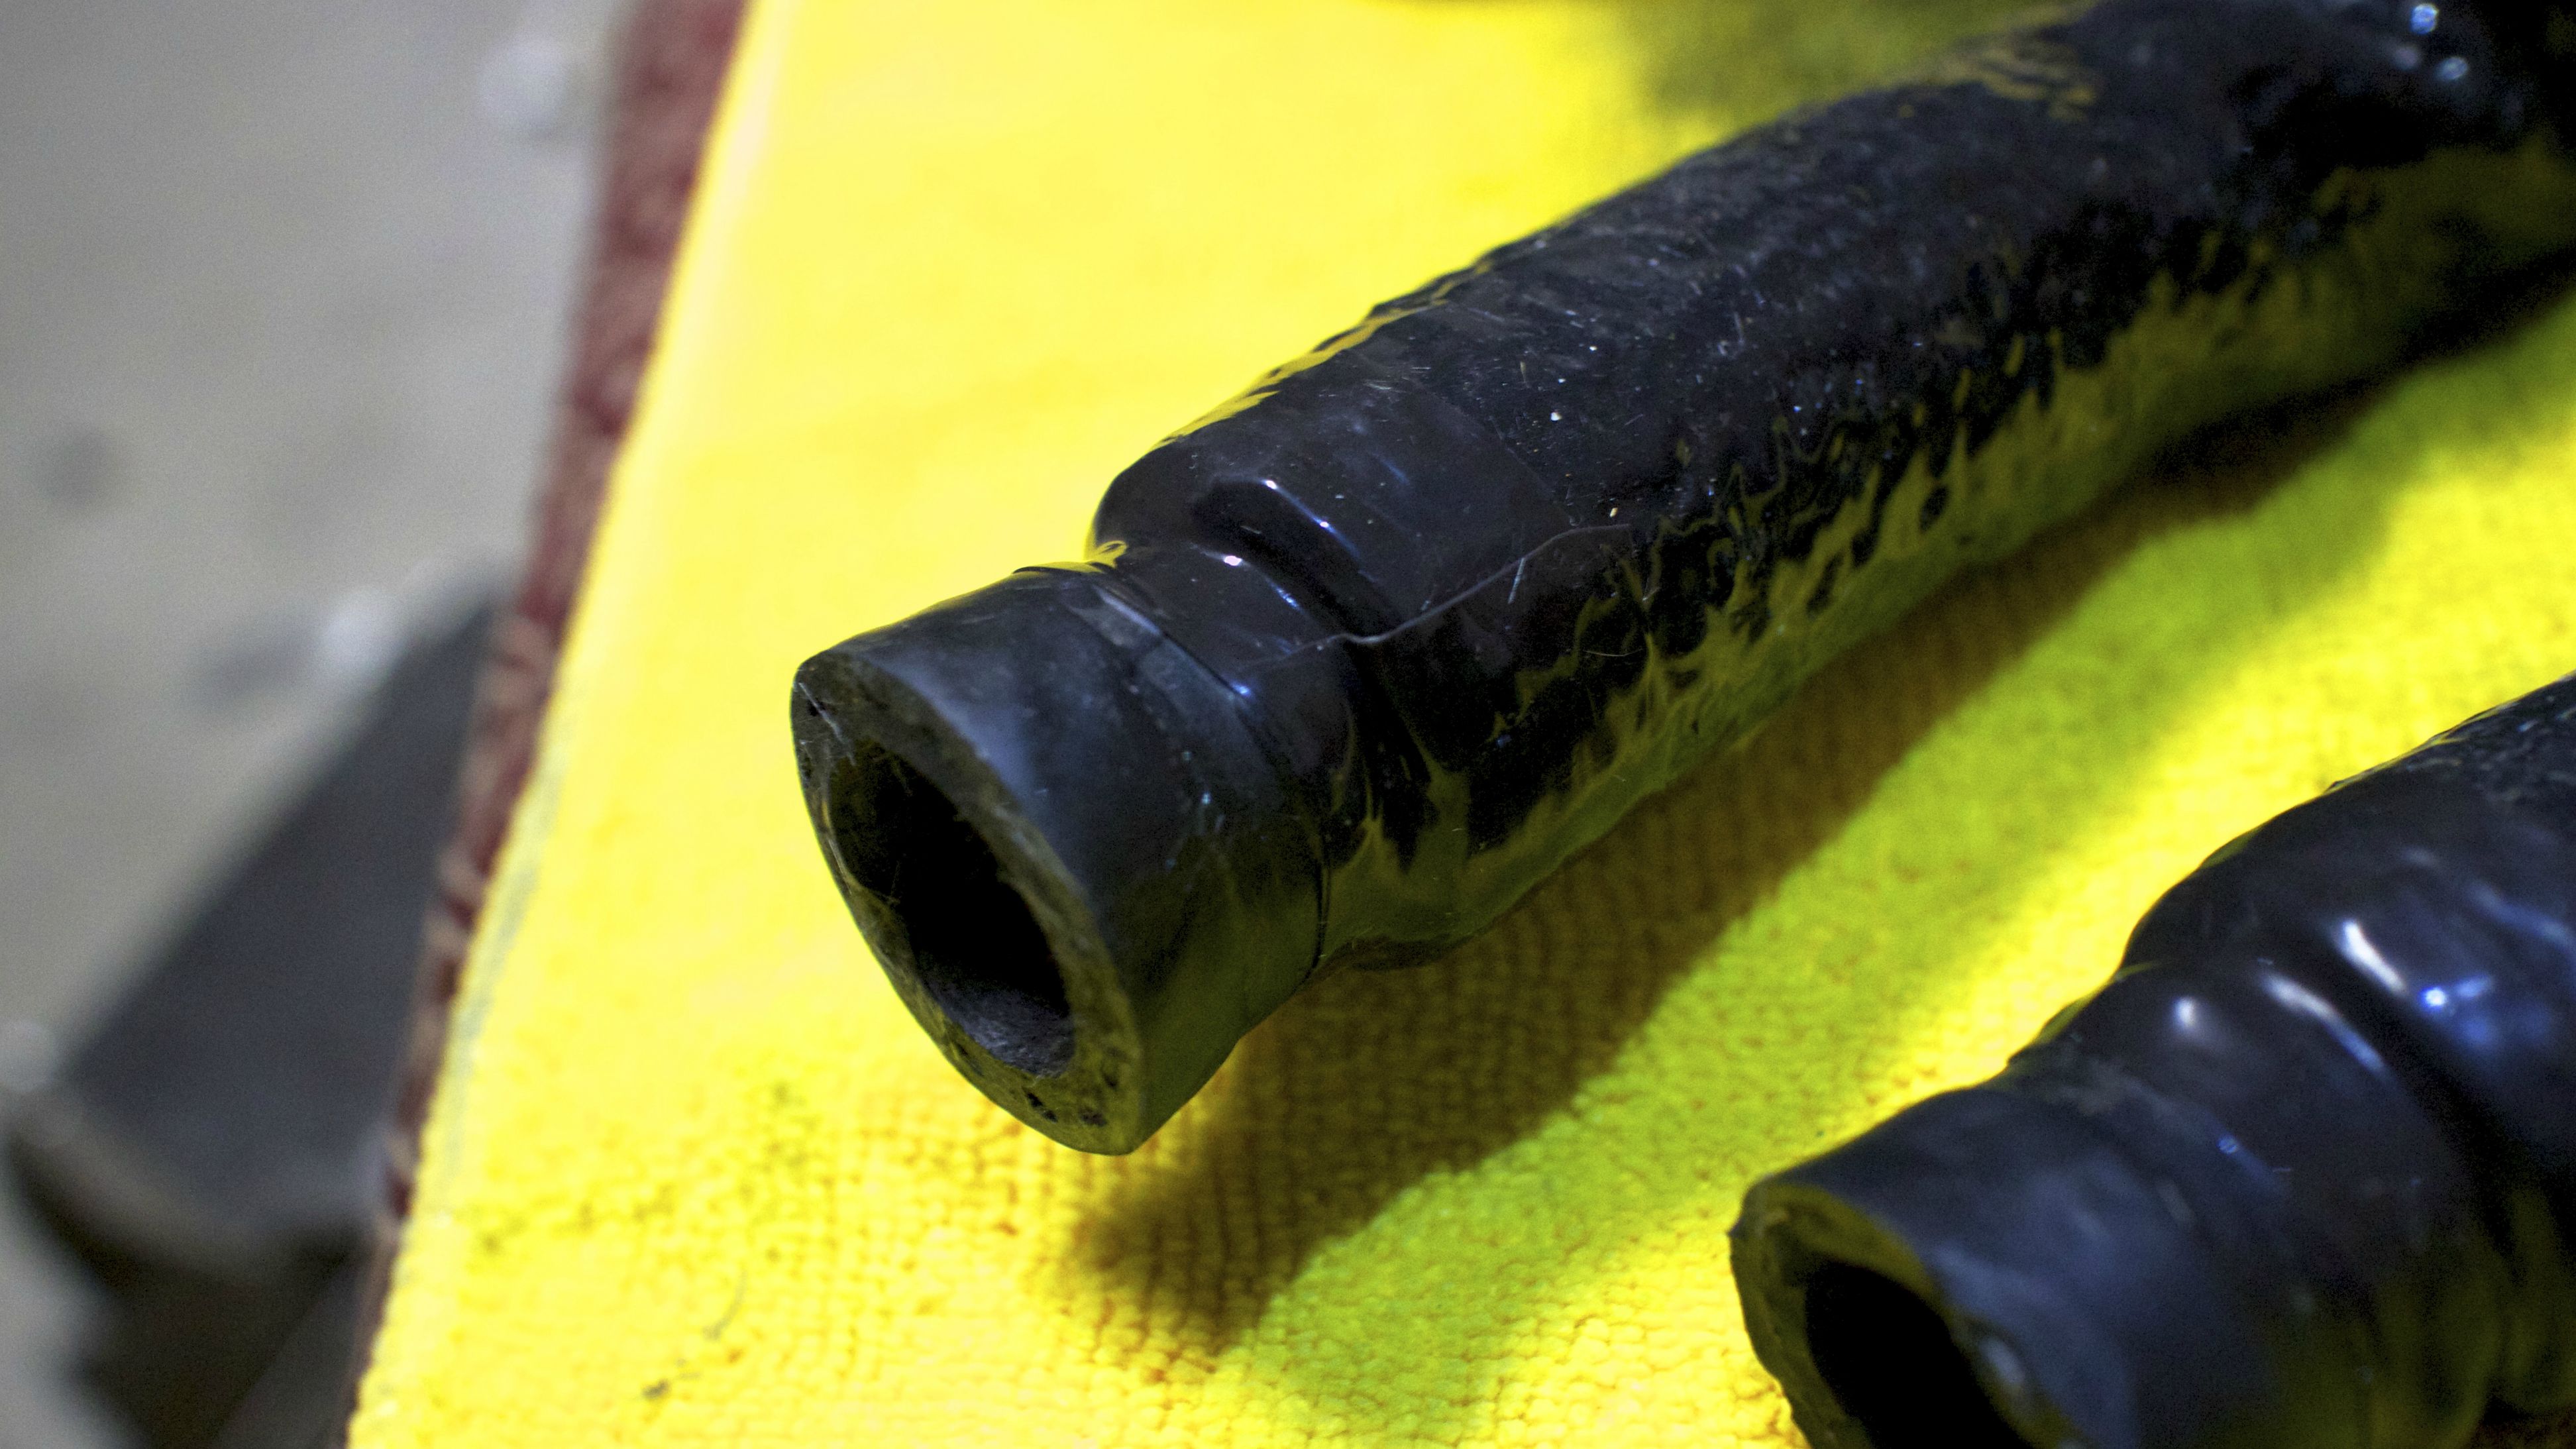
Much better than this!
Trying to make it to the autocross meet this weekend to see how the car does before my track date, so hopefully I can get it tidied up before Sunday.
Ok I switched to imgur to try it out, and get Scott off my PB account.
-
-
-
So while I'm waiting to get my AN lines made I decided to do a once over of all my bolts/connections/et al and holy **** am I glad I did. Considering I have to drive the Miata 5 hours to Willow springs and back, this could have been a slight issue on the track.
Notice the difference between these two bolts? One is shiny and not covered in road grime...yeah... On each motor mount I had a bolt missing and the others were hand tight. I clearly remember torquing them to spec, but I guess with the Mazdaspeed motor mounts, I either need to loctite them, or just check them more regularly.
What is y'alls solution? Loctite, overtorque, or regular preventative maintenance?
Also decided to redo my heater core hose downpipe heat prevention solution. I originally used a **** load of aluminum tape and transmission tunnel wrap. But the adhesive on both gave up the ghost and I was using a ton of metal zip ties to keep it on. Functionally it was working, but I didn't want to risk it falling off in some areas and getting a melted hose as a result.
I bought 3' of after doing a bit of research. I should have done this in the first place. Super easy, and slips on without any struggle(I just put rubber conditioner on so it was easier for me). Highly recommend it. Plus it looks a lot clean as hell.
It also comes with this awesome(as in I'm buying several rolls of it) rubber tape. Only it has no adhesive, it just attaches to itself somehow...no clue, love it though.
Much better than this!
Trying to make it to the autocross meet this weekend to see how the car does before my track date, so hopefully I can get it tidied up before Sunday.
Reply
0
0


