
99mx5 EFR build


Thread Starter
Elite Member
iTrader: (16)
Joined: Oct 2006
Posts: 1,656
Total Cats: 526
From: Las Cruces, NM
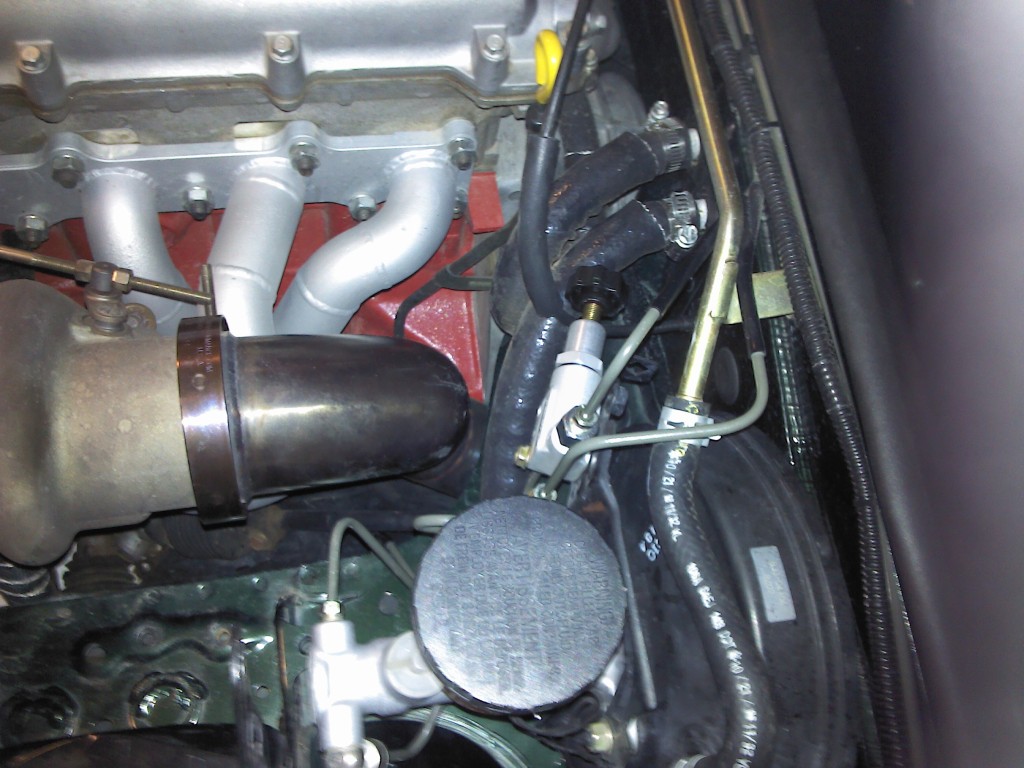
I popped a silicone elbow at the last trackday. It was close to the manifold, so I decided to redo the intercooler pipe. I was planning to shield the elbow from the heat, but it popped before I got it done. The new pipe will only have a small section of silicone to connect the pipe to the turbo and will not have any silicone next to a heat source.
The elbow split longways.
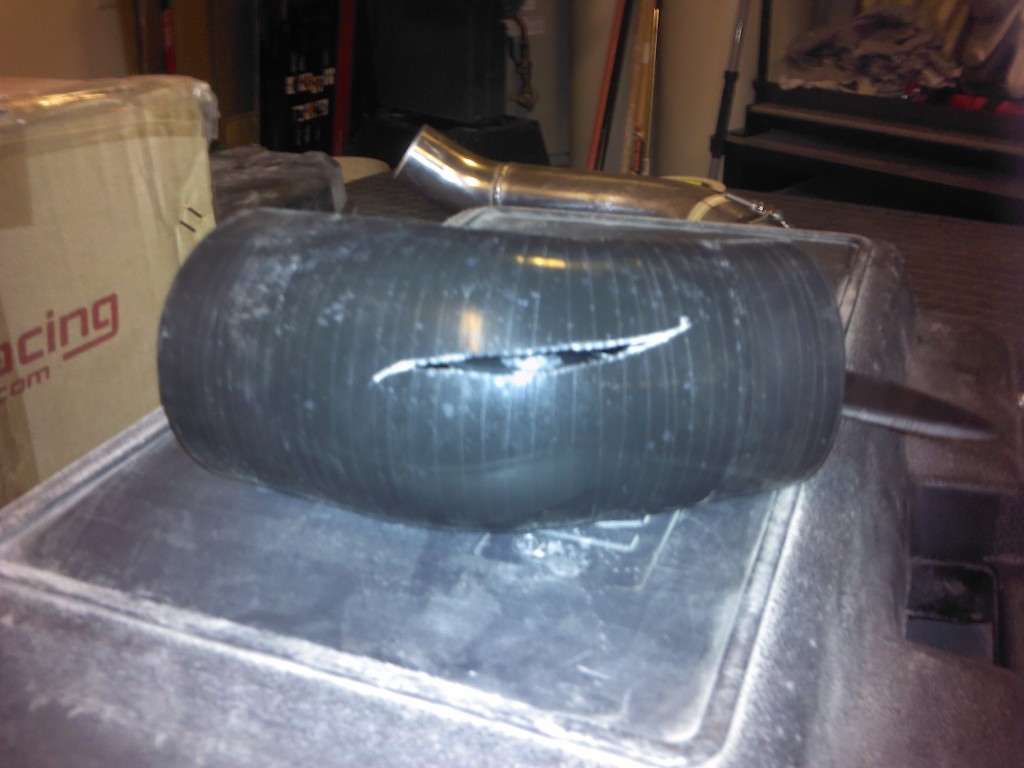
The pipe is 2" at the turbo and transitions to 2.75". I split a section of pipe and made a cone to connect the two sizes.

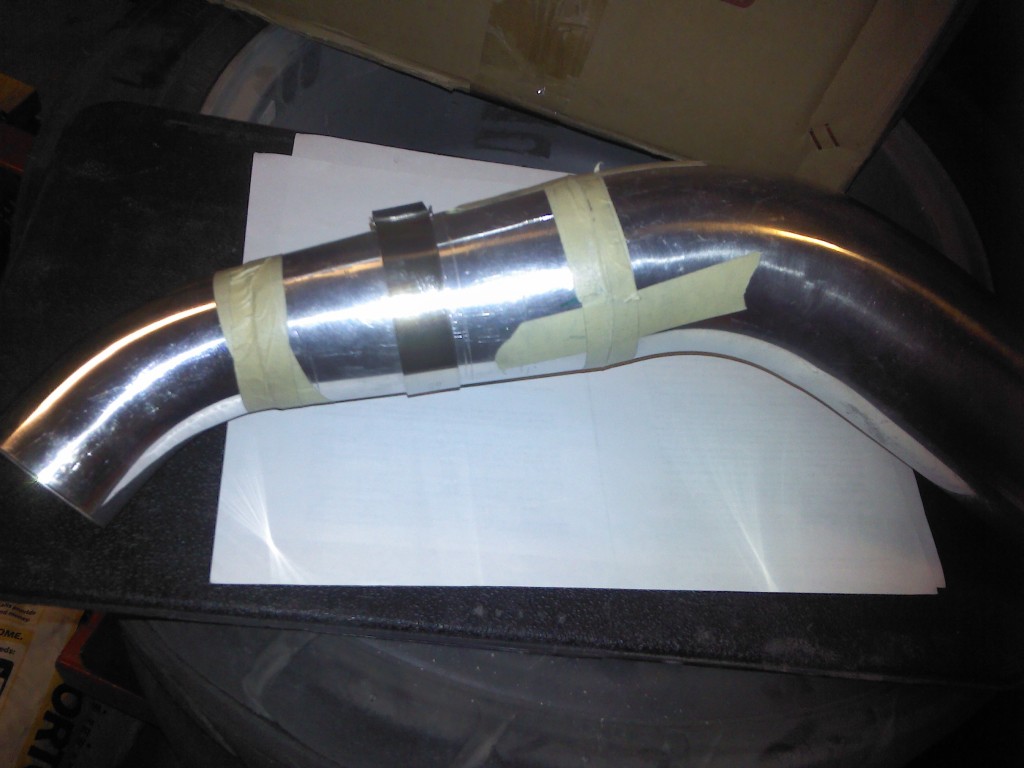
Here are the parts taped together for fitting. I'll get them welded this weekend.
I also received these so the BBK install will begin soon.

The elbow split longways.
The pipe is 2" at the turbo and transitions to 2.75". I split a section of pipe and made a cone to connect the two sizes.
Here are the parts taped together for fitting. I'll get them welded this weekend.
I also received these so the BBK install will begin soon.
Reply
 0
0

0

Senior Member
Joined: Dec 2004
Posts: 1,278
Total Cats: 37
From: Brisbane, Australia
I run those same pads for track days but they are noisy and dusty as hell for street driving. I swap to the Carbotech Bobcat pads after events.
Your car externally looks pretty much exactly like mine, I just wish I had the EFR bits under the hood!
Nice work!
Your car externally looks pretty much exactly like mine, I just wish I had the EFR bits under the hood!
Nice work!
Reply
0
0
Thread Starter
Elite Member
iTrader: (16)
Joined: Oct 2006
Posts: 1,656
Total Cats: 526
From: Las Cruces, NM
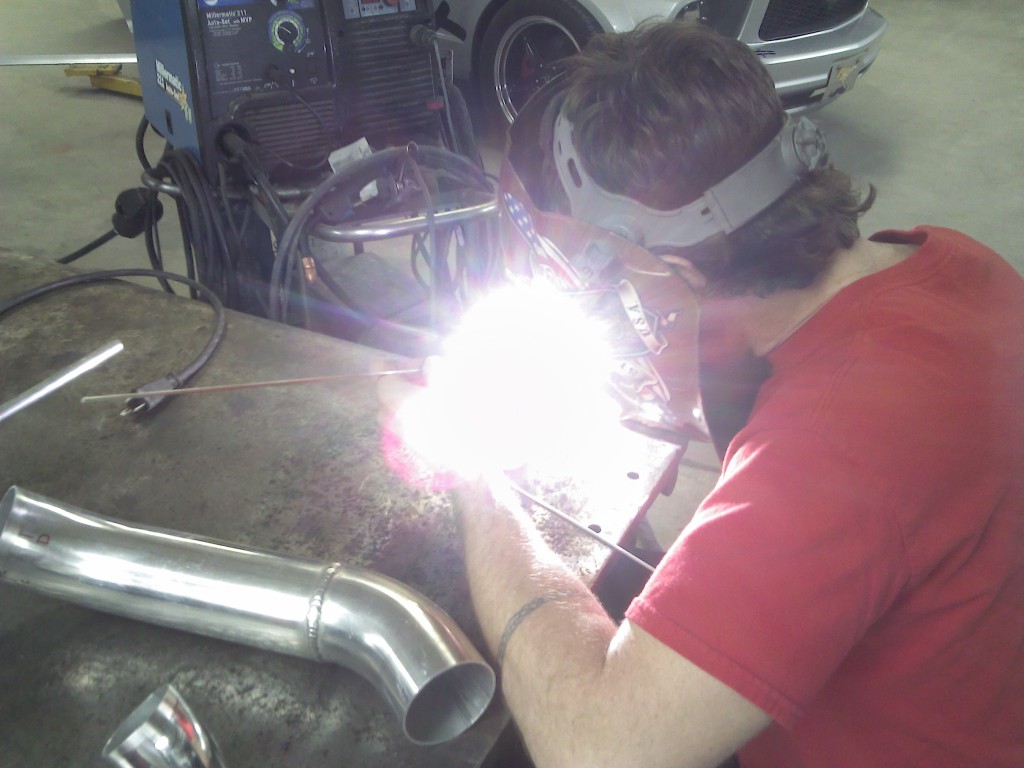
Here are pics of the new intercooler pipe build.
I took the parts to a friend to get them welded.
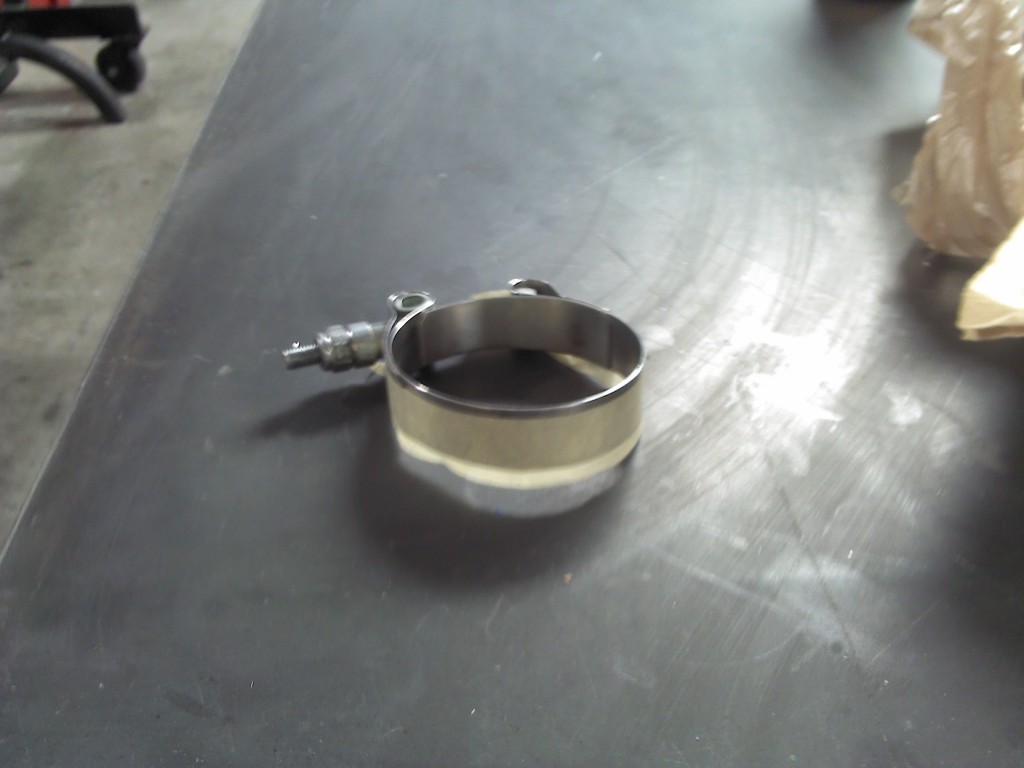
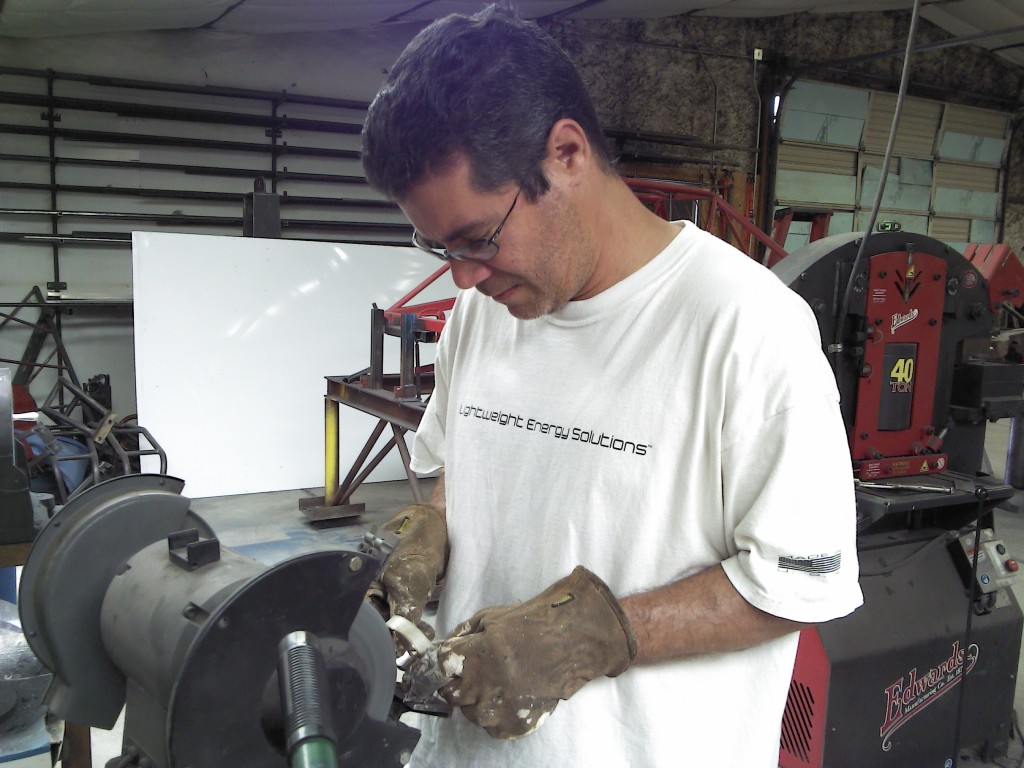
The EFR compressor outlet has a narrow channel for the clamp, so I had to grind down the clamp to make it narrower. I used masking tape to use as a guide for each side of the clamp.
My ugly mug grinding...
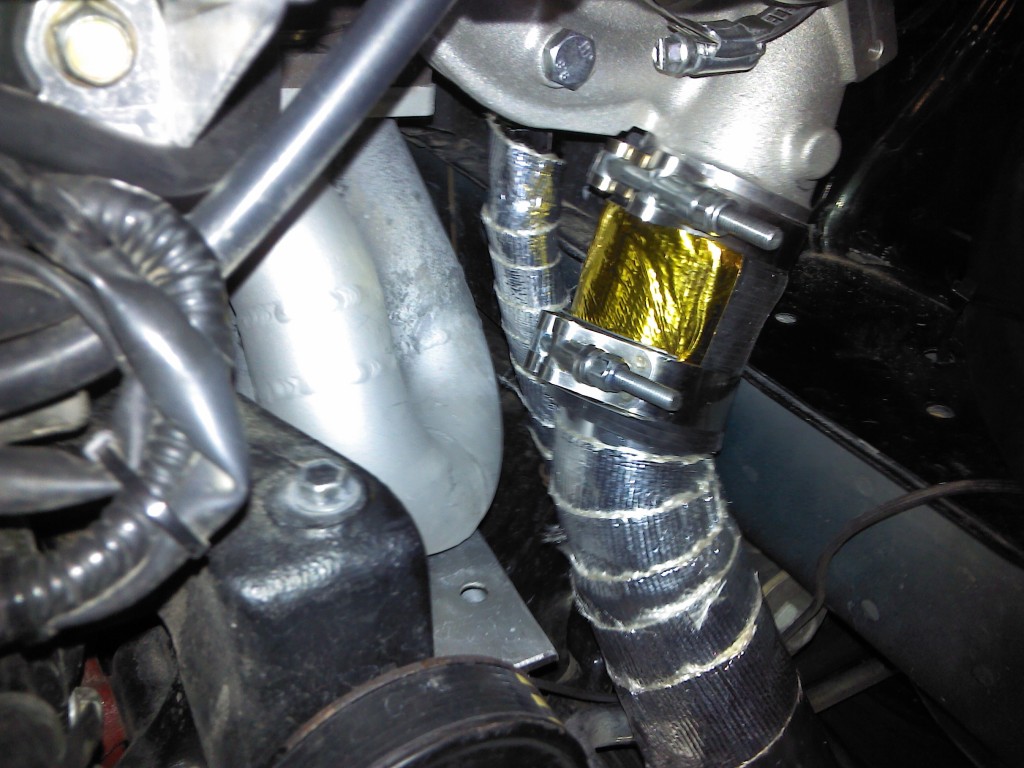
Finished intercooler pipe that transitions from 2" to 2.75".

I also wrapped the oil drain tube, the pipe and put some reflective tape on the coupler.
I took the parts to a friend to get them welded.
The EFR compressor outlet has a narrow channel for the clamp, so I had to grind down the clamp to make it narrower. I used masking tape to use as a guide for each side of the clamp.
My ugly mug grinding...
Finished intercooler pipe that transitions from 2" to 2.75".
I also wrapped the oil drain tube, the pipe and put some reflective tape on the coupler.
Reply
2
2


Thread Starter
Elite Member
iTrader: (16)
Joined: Oct 2006
Posts: 1,656
Total Cats: 526
From: Las Cruces, NM
Thanks! The shop belongs to my friend's dad. He races modifieds at the Las Cruces Speedway. They build their race cars there. This place has two lifts and an engine building room.
Here's another pic.
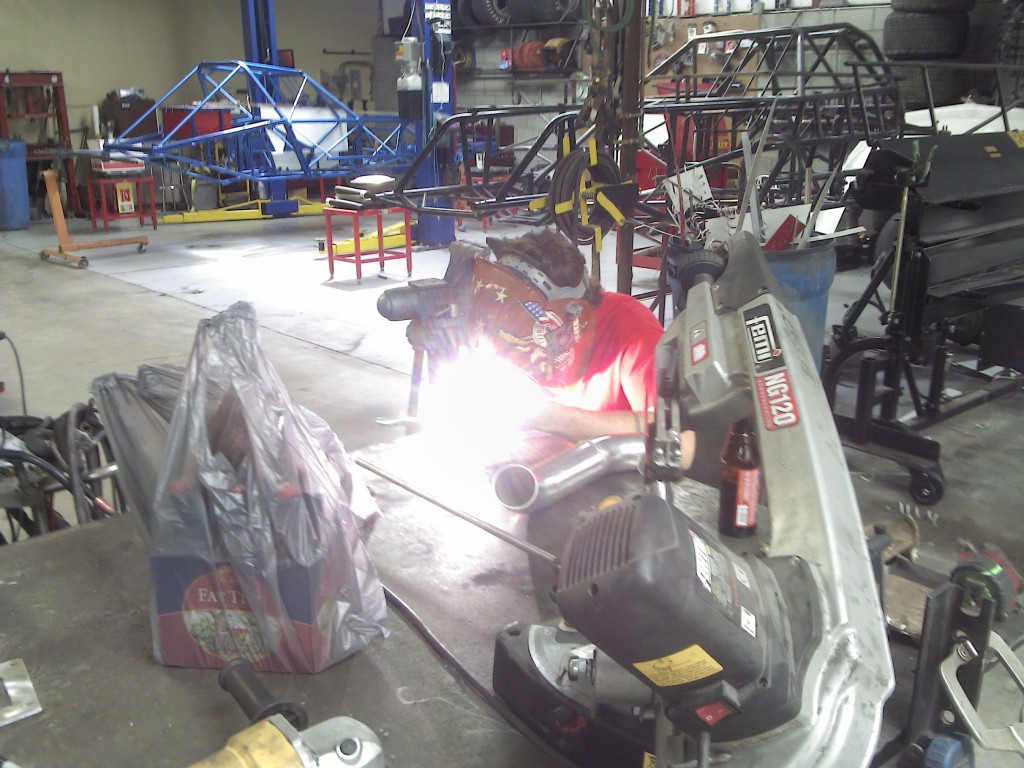
Here's another pic.
Last edited by 99mx5; Apr 11, 2013 at 04:42 AM.
Reply
0
0
Thread Starter
Elite Member
iTrader: (16)
Joined: Oct 2006
Posts: 1,656
Total Cats: 526
From: Las Cruces, NM
This evening I installed the Wilwood prop valve. I bent the bracket back to make clearance for the turbo heat shield. I used one of the factory bolts to fasten it to the bracket.


Tomorrow I'll install the calipers and disks.
Tomorrow I'll install the calipers and disks.
Reply
0
0
Thread Starter
Elite Member
iTrader: (16)
Joined: Oct 2006
Posts: 1,656
Total Cats: 526
From: Las Cruces, NM
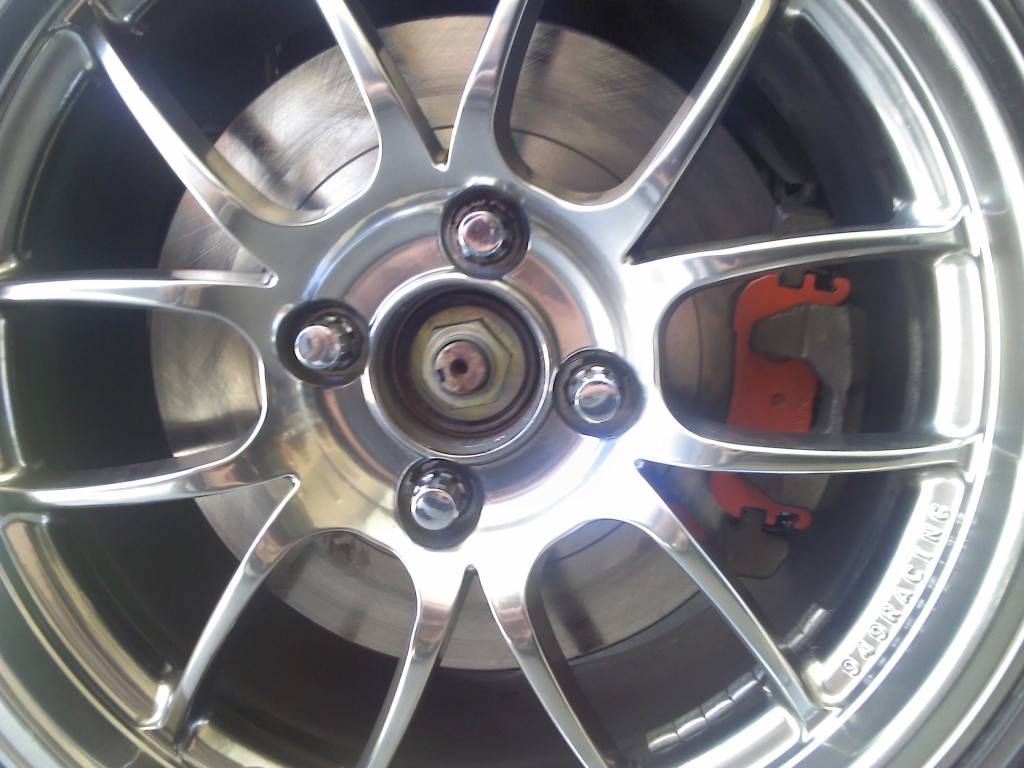
Last night I installed the front calipers and disks. I also got the quick clips for the Wilwoods. I will be using Carbotech XP10 all around. I'll install the rear disks and caliper brackets this evening.

I also found this Black IPA from Santa Fe Brewing. It made the install go much smoother.


I also found this Black IPA from Santa Fe Brewing. It made the install go much smoother.

Reply
0
0

Did you safety wire the hubs to the rotors?
Reply
0
0
Thread Starter
Elite Member
iTrader: (16)
Joined: Oct 2006
Posts: 1,656
Total Cats: 526
From: Las Cruces, NM
I got the quick clips when I bought the BBK from good-win-racing. 949racing also sells them. I used the included bolts with Locktite red to mount the friction rings to the top hats.
Last night I also installed the rear brakes with the M-Tuned brackets and sport disks. The pads are Carbotech XP10.
Here is the next project... Hopefully, these arrive before the next trackday.

Last night I also installed the rear brakes with the M-Tuned brackets and sport disks. The pads are Carbotech XP10.
Here is the next project... Hopefully, these arrive before the next trackday.
Reply
0
0
Those mounts are awesome. They went in super easy for me, just make sure that you have all matching threads on them, one of my nuts for the bolts that go through the mounts was course thread instead of fine.
Reply
0
0

I really, really want to get those mounts but all the vendors say they shake everything to pieces. I have a bad judder when letting out the clutch so I'm pretty sure my mounts are shot. Can they be street driven?
Reply
0
0
Maybe. Mine arent broken in yet, does vibrate a bit, not nearly as bad as delrin mounts.
Reply
0
0
All-round "Good Guy"

Joined: Dec 2009
Posts: 1,036
Total Cats: 266
From: Brisbane, AUSTRALIA
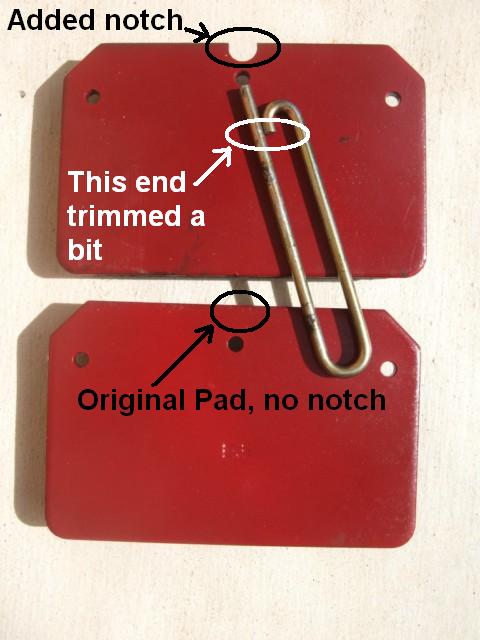
I found that with the Carbotech pads, the caliper pins did not sit flush, they were splayed. Did you find this?
I also needed to trim the curved end a fraction so that it would fit snugly over the inside caliper (see last photo below).
I decided to fix this problem by filing notches in the pads above the pin holes so that the pins can sit flush. The top pad below shows the notch above the caliper pin hole (the caliper pin is pointing to it) and the bottom pad shows the original pad.
Here's what they look like installed, nice and flush:
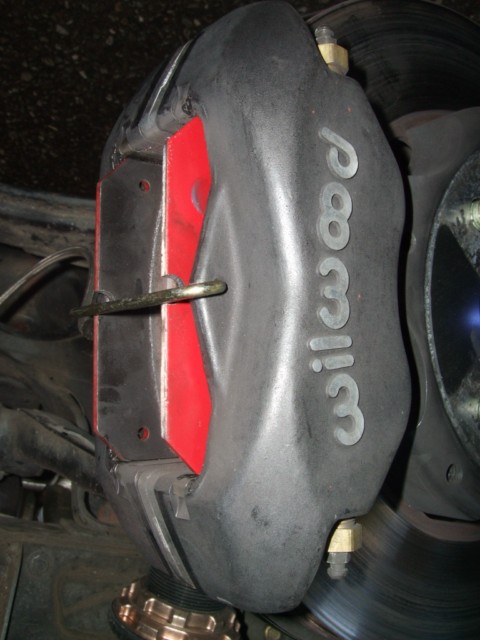
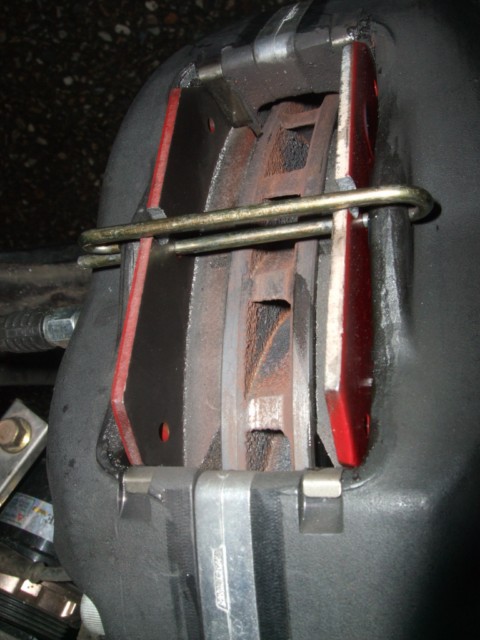
Note: The caliper pin is wedged firm, it does not rattle up&down.
I also needed to trim the curved end a fraction so that it would fit snugly over the inside caliper (see last photo below).
I decided to fix this problem by filing notches in the pads above the pin holes so that the pins can sit flush. The top pad below shows the notch above the caliper pin hole (the caliper pin is pointing to it) and the bottom pad shows the original pad.
Here's what they look like installed, nice and flush:
Note: The caliper pin is wedged firm, it does not rattle up&down.
Reply
1
1


Yeah, I've been running without a trimmed clip, but I'll trim it next time I change pads. I also sharpened the end a bit to help it go in easier. I've only used it on Wilwood at Hawk pads, no interference with the pads.
Reply
0
0
All-round "Good Guy"
Joined: Dec 2009
Posts: 1,036
Total Cats: 266
From: Brisbane, AUSTRALIA
Reply
2
2


