
2jz Miata build thread


Ok so it feels like it has been forever since I have been on here but I am still getting work done. I had a small detour and had to put a motor in my dd. For those of you that care its a 90 civic wagon witch now has a b18b and it runs like a champ.
I finished the radiator brackets and they are super legit just need to get some pics if I can ever make it home before dark. I also got my new godspeed 50mm bov in and got the flange in and welded it all up today. I will be spraying the charge pipes wrinkle black tomorrow. I also took off the compressor housing today so I can tap it for a 1/8 pipe to -4an fitting for my wastegate. I have a really nice braided line I made last time and would like to keep. I will see if I can snap some pics and get them up. The pics below are of the 50mm bov and mounting flange. I will get complete pics when it is all done. I am waiting for my GV lip to come in so I can start on my splitter, my wheels are being made and should be he in a week, I am fixing my fender flares because both front had some cracks ( they were free, nothing is ever free), As soon as the wheels come in I can cut the rear quarters for the flares. Then somewhere in there I am going to mount the methanol kit, figure out how to signal it with my FIC ( I have been told I can), and mount my air fuel gauge so I can start to tune a little. I feel like the list is getting smaller and smaller and I may be able to drive this thing in a month or two!!! Welds have lots of splatter because I was using flux core it wont even be noticeable when painted.
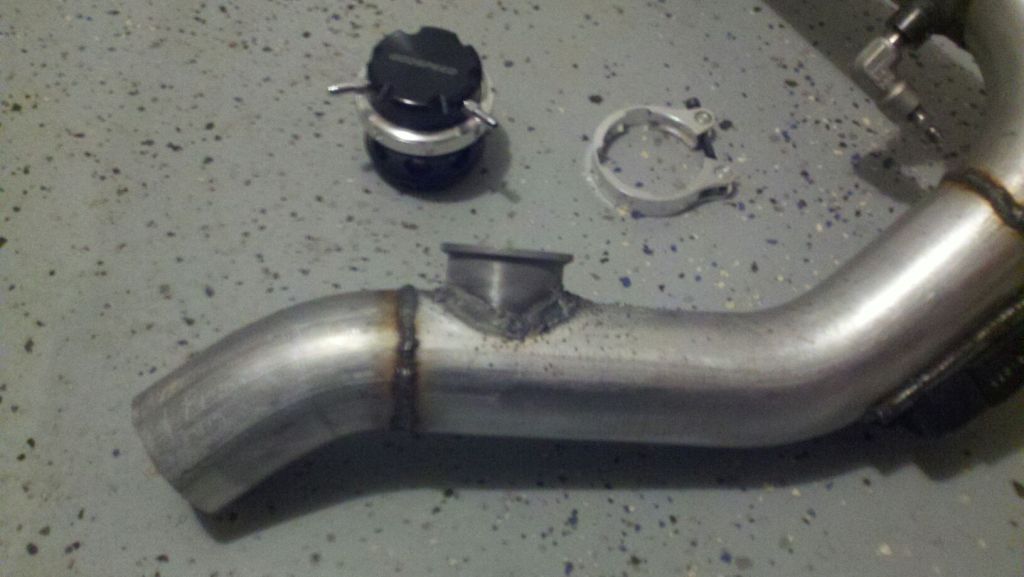
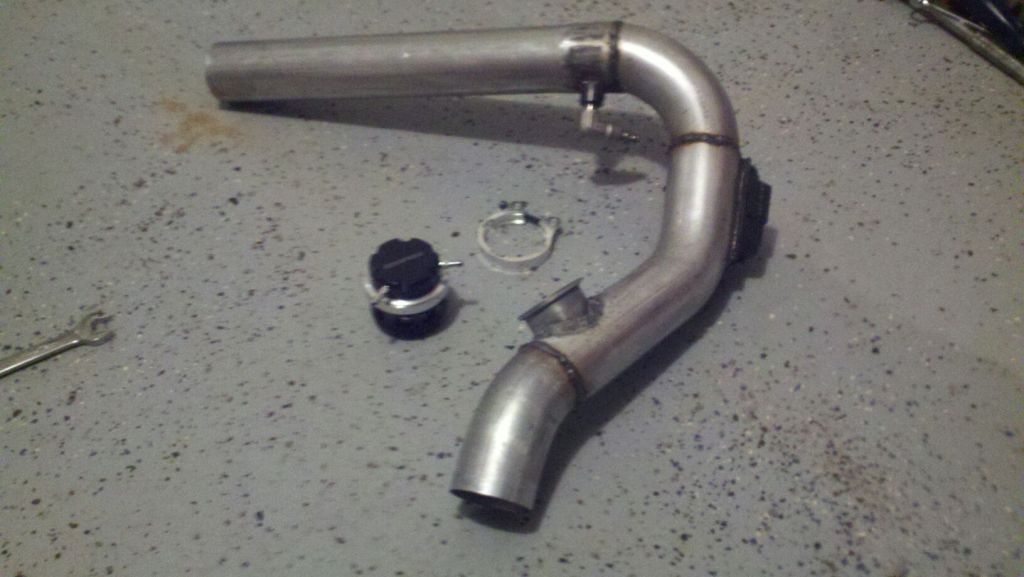
I finished the radiator brackets and they are super legit just need to get some pics if I can ever make it home before dark. I also got my new godspeed 50mm bov in and got the flange in and welded it all up today. I will be spraying the charge pipes wrinkle black tomorrow. I also took off the compressor housing today so I can tap it for a 1/8 pipe to -4an fitting for my wastegate. I have a really nice braided line I made last time and would like to keep. I will see if I can snap some pics and get them up. The pics below are of the 50mm bov and mounting flange. I will get complete pics when it is all done. I am waiting for my GV lip to come in so I can start on my splitter, my wheels are being made and should be he in a week, I am fixing my fender flares because both front had some cracks ( they were free, nothing is ever free), As soon as the wheels come in I can cut the rear quarters for the flares. Then somewhere in there I am going to mount the methanol kit, figure out how to signal it with my FIC ( I have been told I can), and mount my air fuel gauge so I can start to tune a little. I feel like the list is getting smaller and smaller and I may be able to drive this thing in a month or two!!!
Welds have lots of splatter because I was using flux core it wont even be noticeable when painted.
Reply
 0
0

0

Hit the splatter up with a wire wheel and it will come off (most of it at least), that is what I do because I have about the cheapest flux core welder there is. Sounds like this bad boy is coming close to being finished.
Reply
0
0
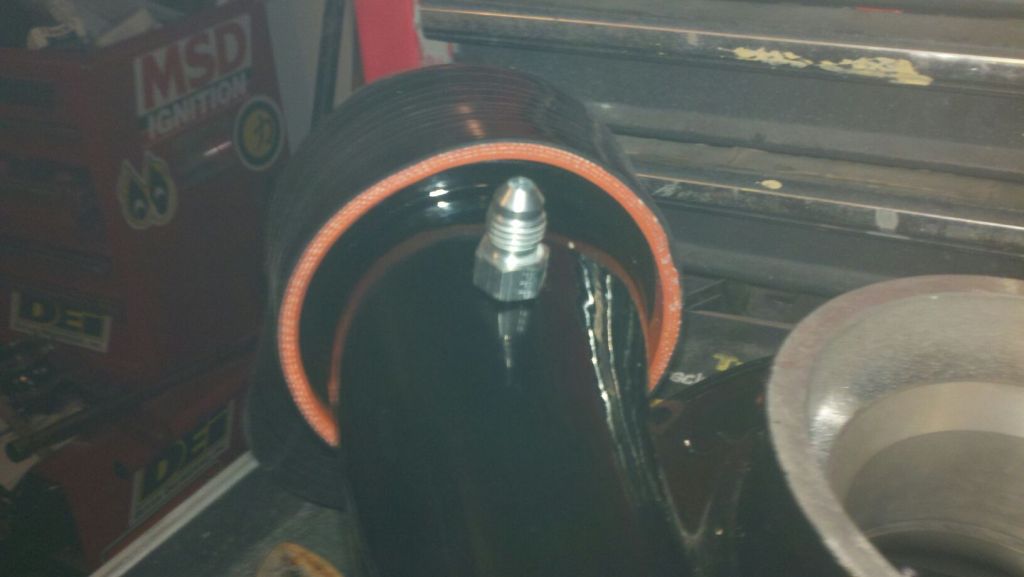
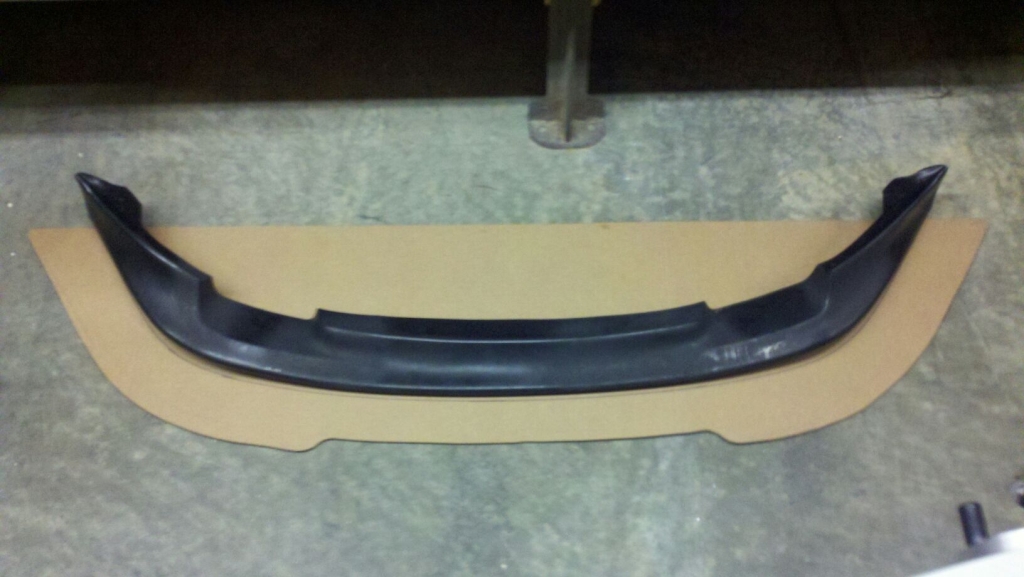
OK so the charge pipe is hanging in the garage drying as I type this I hope it wrinkles because it is a little cold to be painting. I did get my 4an fitting mounted into my compressor housing. Hopefully this weekend I can get the coolant lines all figured out and then maybe drive it. Still waiting for my new wheels to come in and working on the fenders I hate fiberglass!!! I got my new Ebay GV lip in and I am actually really amazed at how nice it is. It has the correct mounting surface and it is pretty thick so for $115 I am happy. I will be taking that to work next week to make my splitter. Still undecided on how big to go because I was not aware of how big the GV lip is to begin with. I am thinking about three inches past the GV lip will be good. Does anyone have any input on this?
Reply
0
0
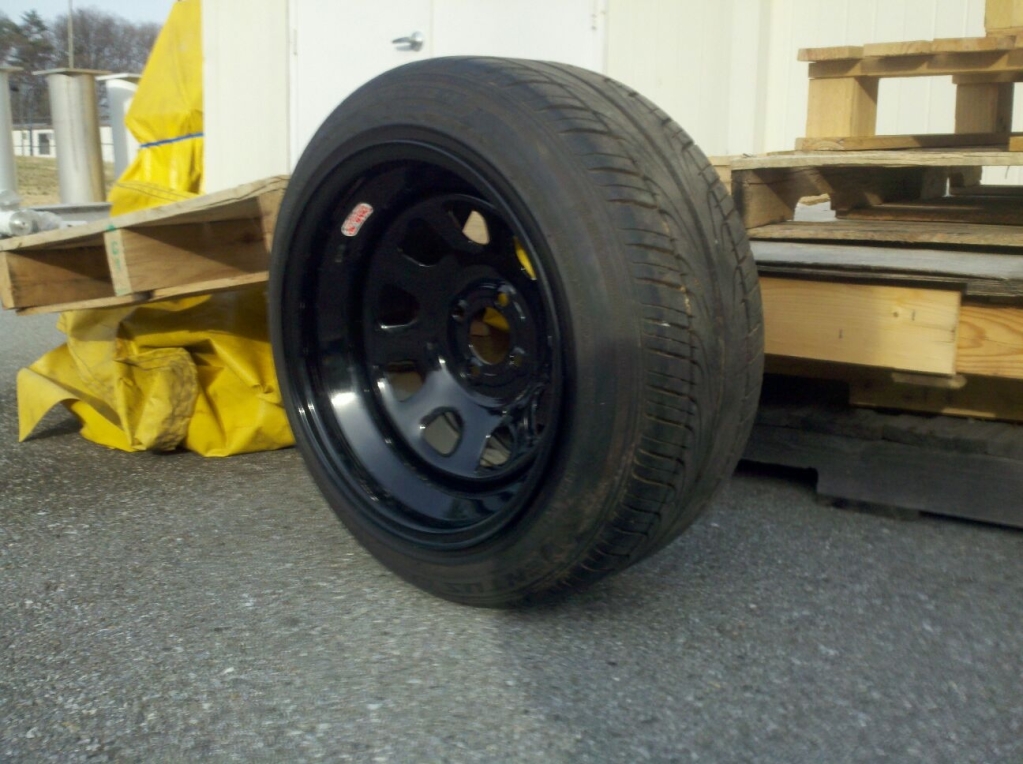
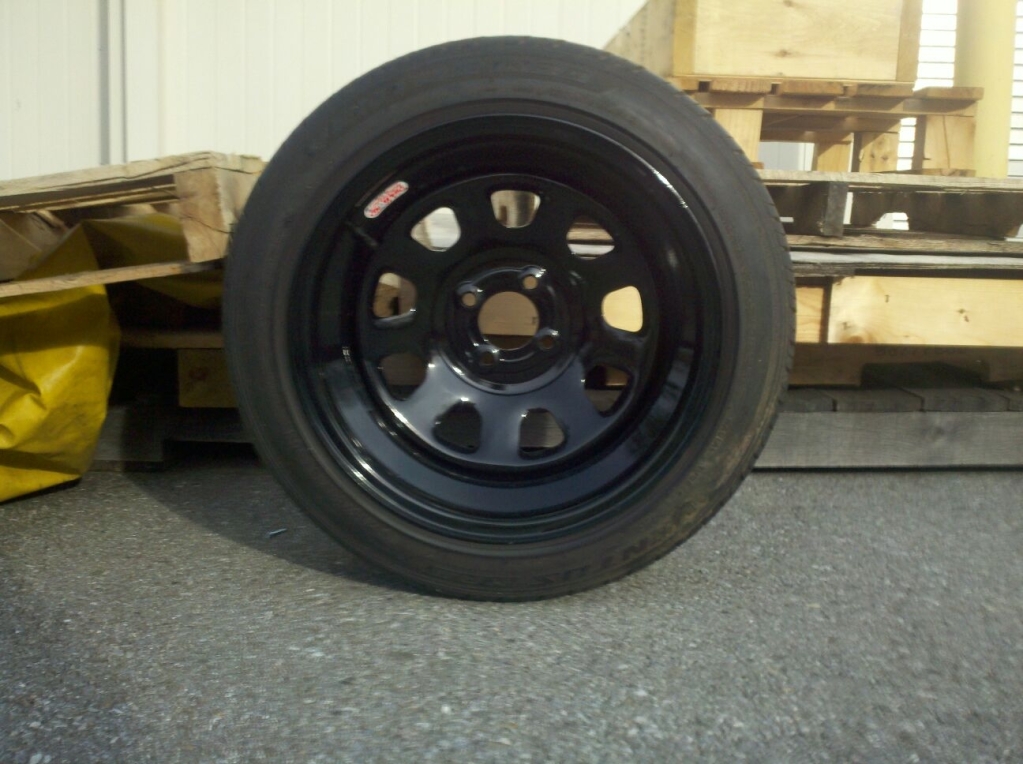
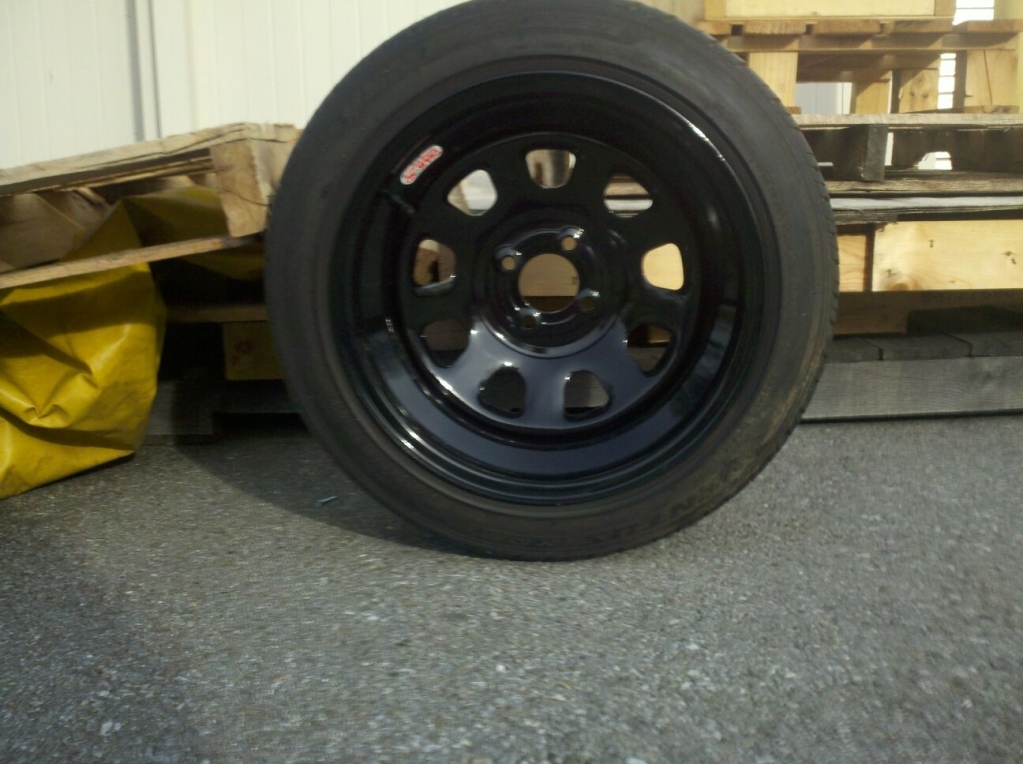
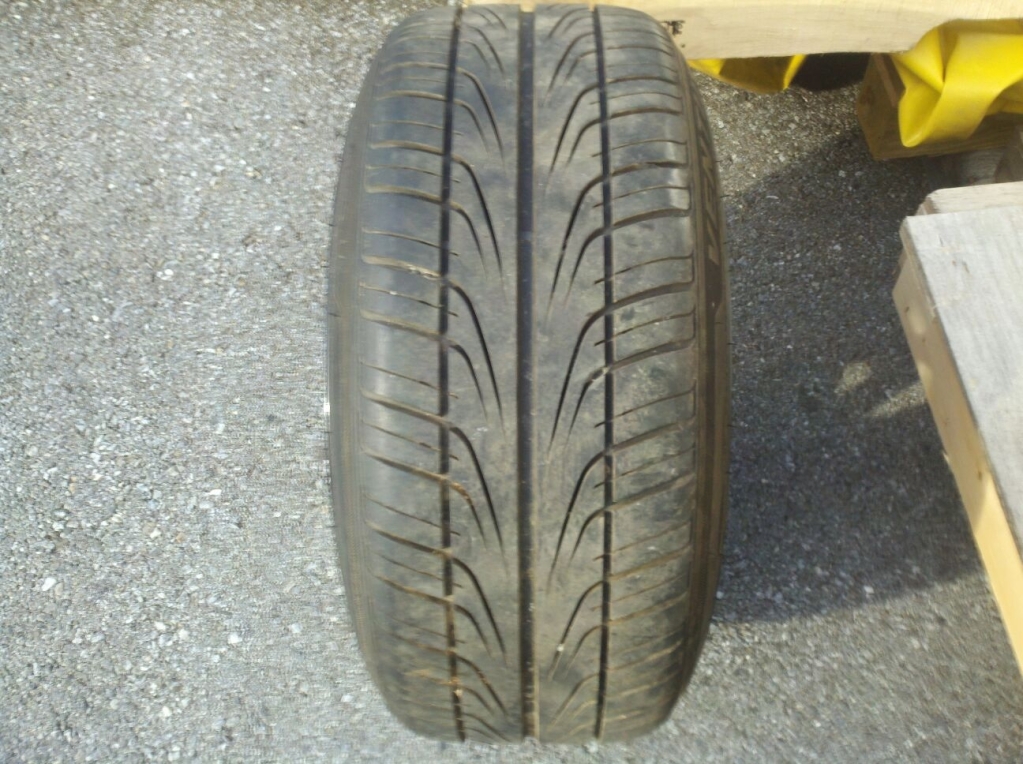
Just mounted the tires on my new wheels you guys may hate them but here they are. I am planing on getting a set of hoosier slicks for the back but just have not bought them yet. I have not got a whole lot done on the car because work has been insane and I wont be able to do anything for another two weeks or so but I will try and keep you all updated.
Reply
0
0
The tires are 215 I want to get 225 for the front these were the tires I had so I wanted to see how they look. I am waiting for my hoosier 24x8.5x16 to come in for the back and if they look good I think I will run them all the way around.lol
Reply
0
0
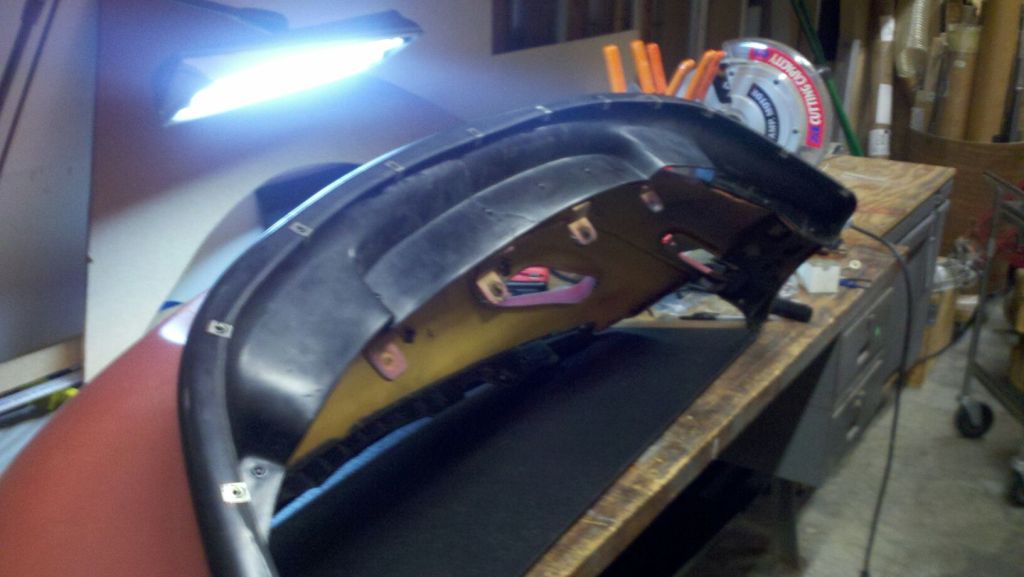
OK so pulled a FML moment. I mounted my wheels they look awesome. Put the rear flare in place with tape to make sure they fit well all it good there. Then mounted the front fender and flare and FML the wheel sticks out 1.5" past the flare. It doesnt look horrible but it doesn't look good either. So two choices buy two more custom wheels to fit my flares in the front or just man up and buy some Rharris flares. I am going to buy some rharris flares as soon as I get some money together. Either way it is a big screw up on my part but does give me an excuse to buy flares. On another note my charge piping will not wrinkle all the way so I am sanding it down and putting on gloss black.
Reply
0
0
That's shitty, flares shouldn't be too much trouble though. Still though I would opt for getting 2 new wheels and sell the ones for the fronts to some vw/cr people.
When I used wrinkle paint I had to lay much more on than I would ever have if I was painting anything. When I put the wrinkle paint on as if I was painting I had many areas w/out wrinkle but when I really laid it on it came out pretty perfect.
How 'bout a pic with the rears on?
When I used wrinkle paint I had to lay much more on than I would ever have if I was painting anything. When I put the wrinkle paint on as if I was painting I had many areas w/out wrinkle but when I really laid it on it came out pretty perfect.
How 'bout a pic with the rears on?
Reply
0
0
Small update I sold my old flares and some other stuff I had laying around and just ordered a set of RHarris flares. These should fit my wheels awesome and add to the overall look of the car. I am working on the car when I have time the wastegate is all hooked up and the compressor housing is back on. I also sanded down all the wrinkle paint on my charge pipe and painted it gloss black. I started a little miata side project to make latches that use the factory striker plates with my aftermarket hardtop. I had my hardtop bolted on but would like the option of easy removal and use of a soft top when needed. I ordered some latches from McMaster Carr I will let you all know how it works out.
Reply
0
0
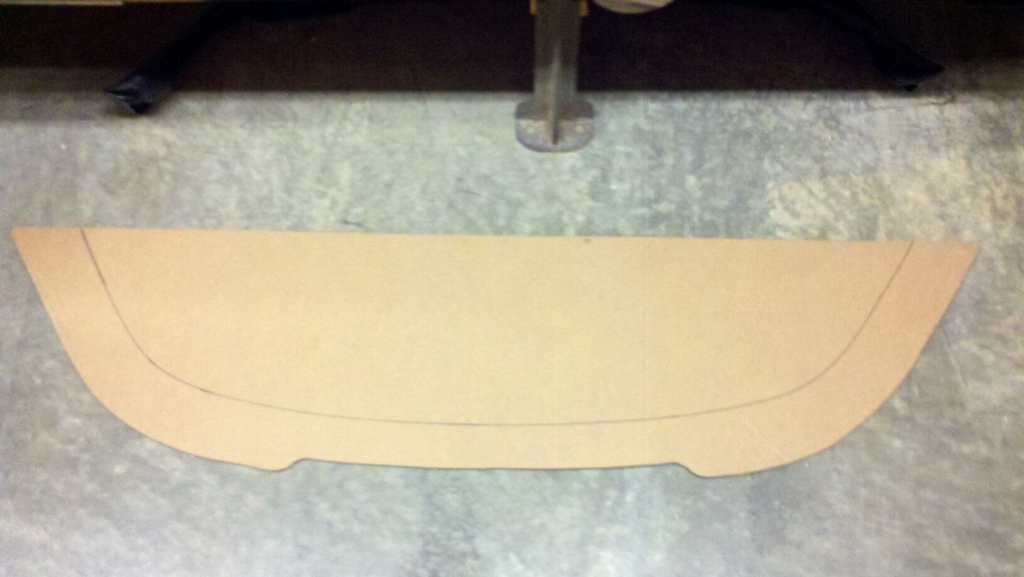
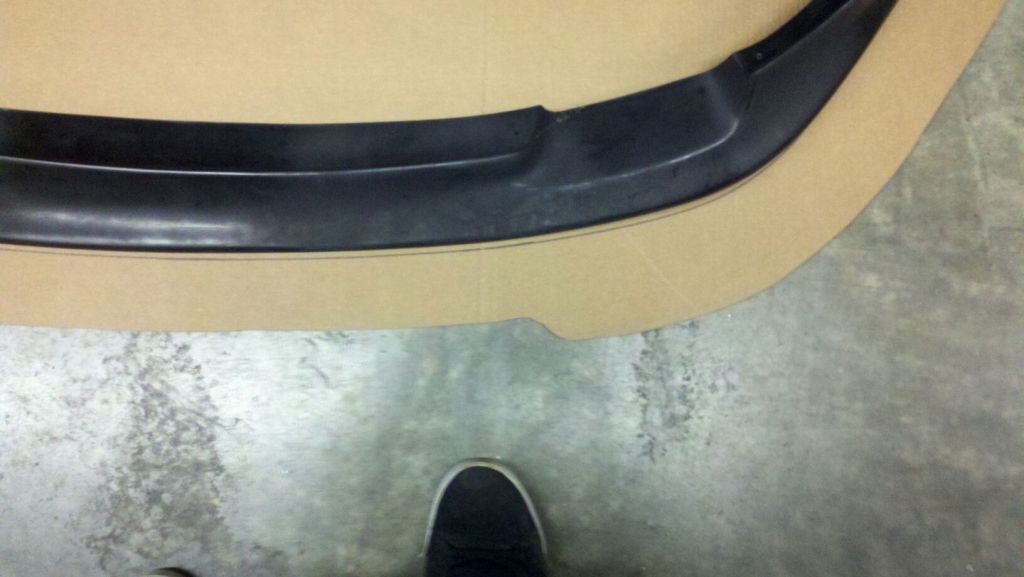
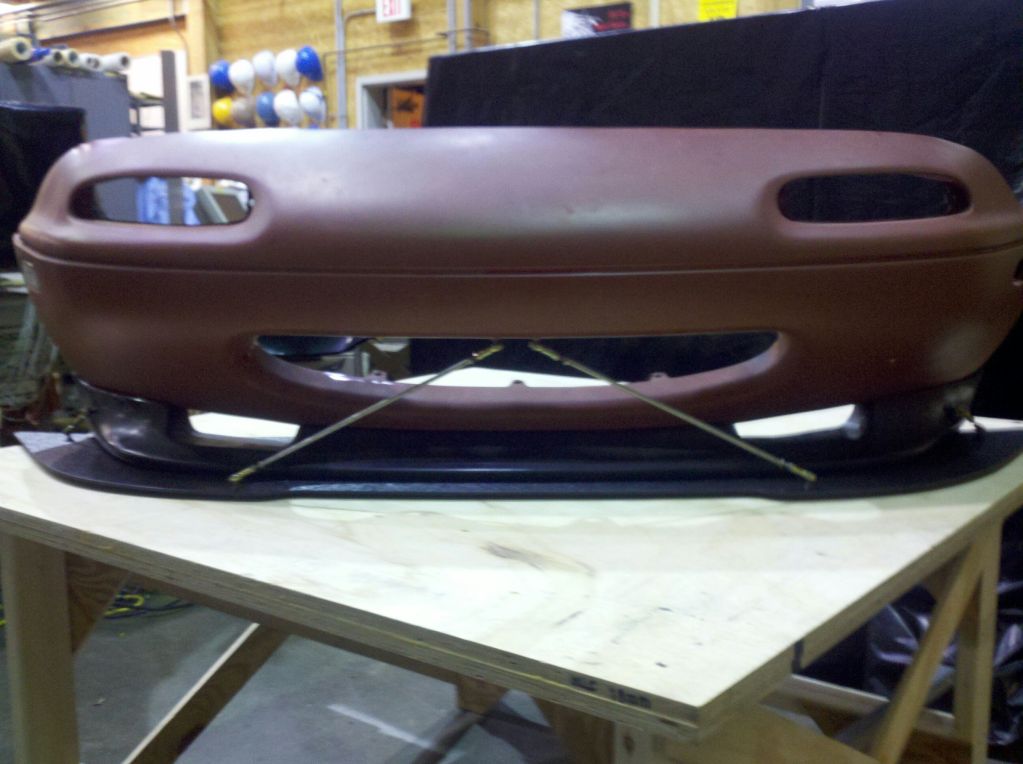
So I got my new EBAY "GV" style lip and it looks pretty good. I had to do a little trimming to take the casting marks off the bottom of the lip so my splitter will sit flat against it. A few minutes on the belt sander and it is good to go. I made a template for my splitter and wanted to see what you guys thought of it before going forward. It sticks out 4" on the sides and 3" in the middle. On a regular NA this would look ridiculous but my thought is with my new Rharris N2 flares this should fit just about perfect. Please let me know what you all think or how I can improve it. Also I would like to add I am not going to make a extension that goes all the way under the engine because I do not feel it is necessary on a street car. If you guys have any input on that let me know if that is a bad idea or not. This is just cardboard the real one will be made with 1/4" black abs and I will attach it with plastic bolts. It is also hard to tell in the picture but the splitter does go all the way to the back bottom edge of the lip.

Reply
0
0

Thank you devin mac and I hope to keep up the good work.
On another note does anyone have a good source for splitter supports. I know arp sells them but they are $90 a pair and I do not like that at all. All suggestions will be taken.
On another note does anyone have a good source for splitter supports. I know arp sells them but they are $90 a pair and I do not like that at all. All suggestions will be taken.
Reply
0
0
I think the way to go is braided ss wire with I bolts on the splitter and something similar welded to the chassis. Get some crimps and it is good to go, then if you hit something (not that anybody intends to but ---- happens) it can deflect rather than bend the supports. You can even throw a turnbuckle in between the splitter and car for adjustments.
Reply
0
0
I have some really nice stainless wire at work but I also have a bunch of 10-32 L.H. and R.H. rod ends. Straight ones and one with the 90 deg stud sticking out, male and female. I was going to order some intermediate links but they are $30 each so I think I am going to use both right handed rod ends and threaded rod. I will put a piece of stainless tubing over it to make it look nice just wanted something cheaper than the $100 solution. I also snagged a set of brainstorm lights off ebay last night so those should be coming in soon. I am really trying to make some progress but I have to do as much at work as I can and keep up this 75 hour work week. :(
Reply
0
0
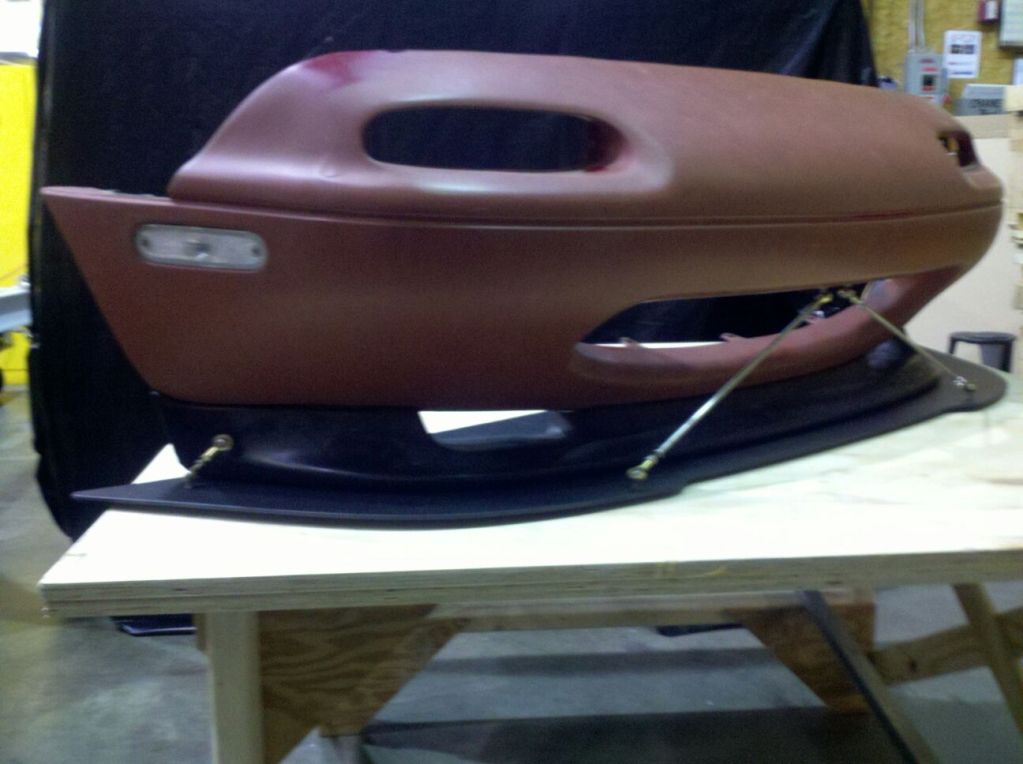
So today I figured out even when working long hours I can still get some things done. Enter stage left amazing new front bumper splitter set up. So I used rod ends for the splitter support and they are mounted in the middle because one it still looks good. Two they work and three that is the most drastic angle I could get on the rod ends. Before you flame me for using rod ends I look for a decent price set of splitter support and everything worth getting is $100 or more this was done for free with stuff I had at work. The center rods for the supports are 10-32 threaded rod and I put a stainless sleeve on them to make them look better nothing more.
So here is a semi idea of how I did it. I got frustrated and didnt take picture of some steps.
1. Make template of splitter you want.

2. Cut splitter out of splitter material I used 1/4" abs.
3. Mount lip to bumper ( optional if you have a lip)
4. Find awesome way to attach splitter to lip. Mark and drill holes.
5. Line bumper/lip assembly up on splitter making sure everything is nice and straight and it all lines up the way you wanted.
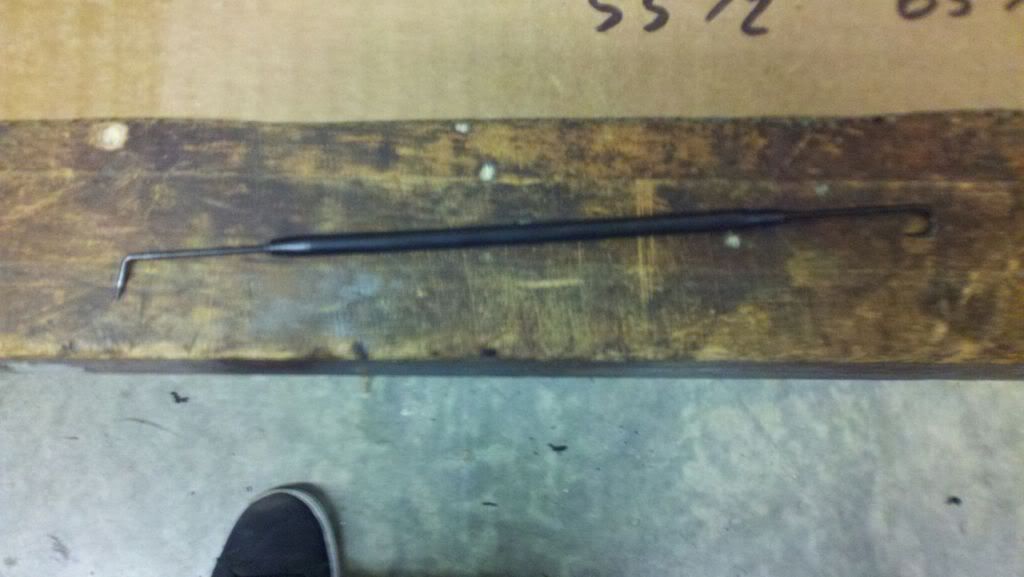
6. Mark holes on splitter material any way you can. I used this nice 90 deg pick to scratch the location and I was able to reach up to the front holes with little problems.
7. drill splitter material.
8. Mount splitter to lip/bumper assembly.
9. Make splitter support rods and mount to splitter and bumper. This is where I did not take any pics.
10. Put all the pieces together step back and look at your awesome new splitter set up. I am hoping this will really help keep the front of the car down at high speed. I do not want the front to lift at all at speed.
Let me know what you all think of the new setup.
So here is a semi idea of how I did it. I got frustrated and didnt take picture of some steps.
1. Make template of splitter you want.
2. Cut splitter out of splitter material I used 1/4" abs.
3. Mount lip to bumper ( optional if you have a lip)
4. Find awesome way to attach splitter to lip. Mark and drill holes.
5. Line bumper/lip assembly up on splitter making sure everything is nice and straight and it all lines up the way you wanted.
6. Mark holes on splitter material any way you can. I used this nice 90 deg pick to scratch the location and I was able to reach up to the front holes with little problems.
7. drill splitter material.
8. Mount splitter to lip/bumper assembly.
9. Make splitter support rods and mount to splitter and bumper. This is where I did not take any pics.
10. Put all the pieces together step back and look at your awesome new splitter set up. I am hoping this will really help keep the front of the car down at high speed. I do not want the front to lift at all at speed.
Let me know what you all think of the new setup.
Reply
0
0

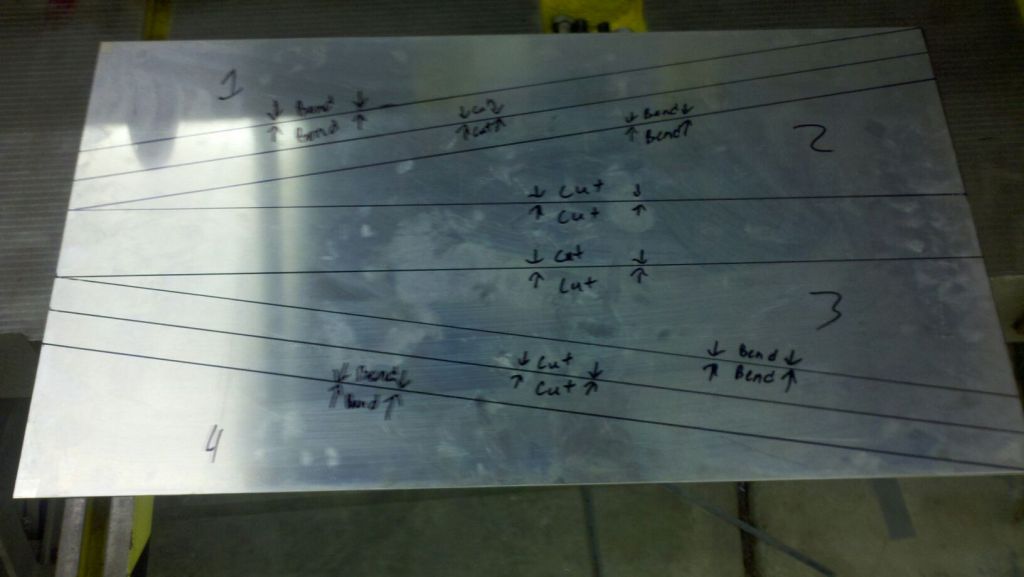
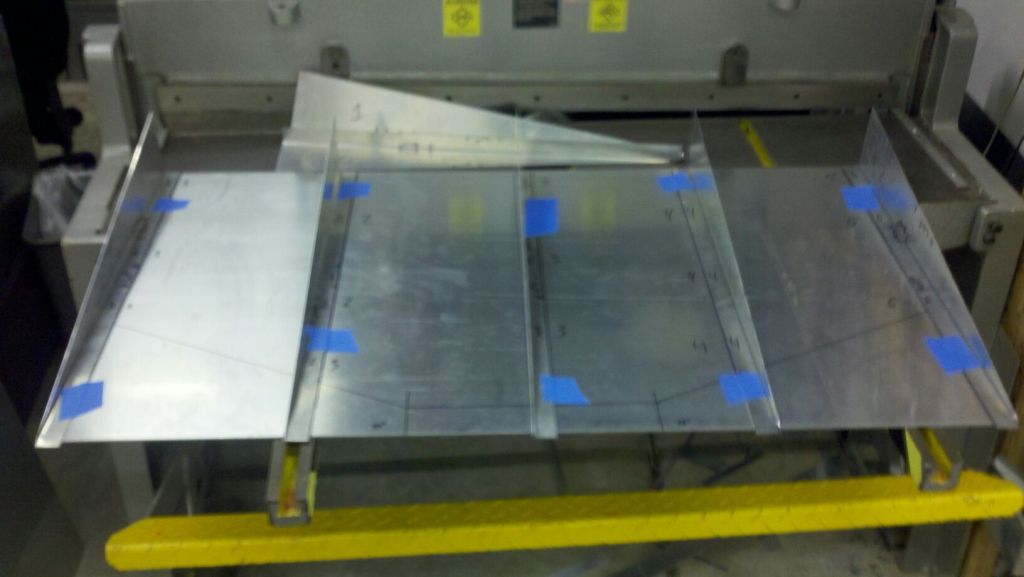
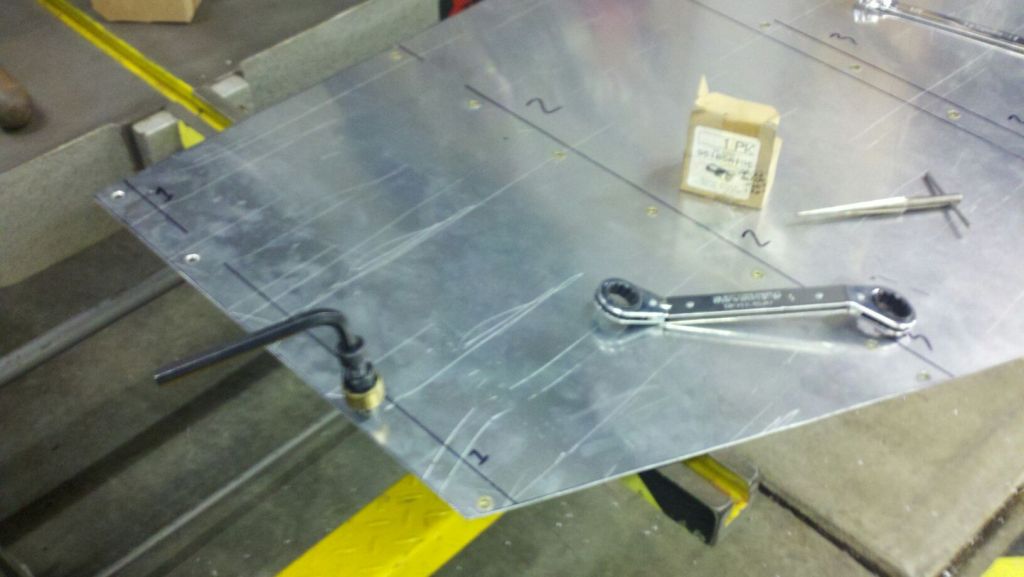
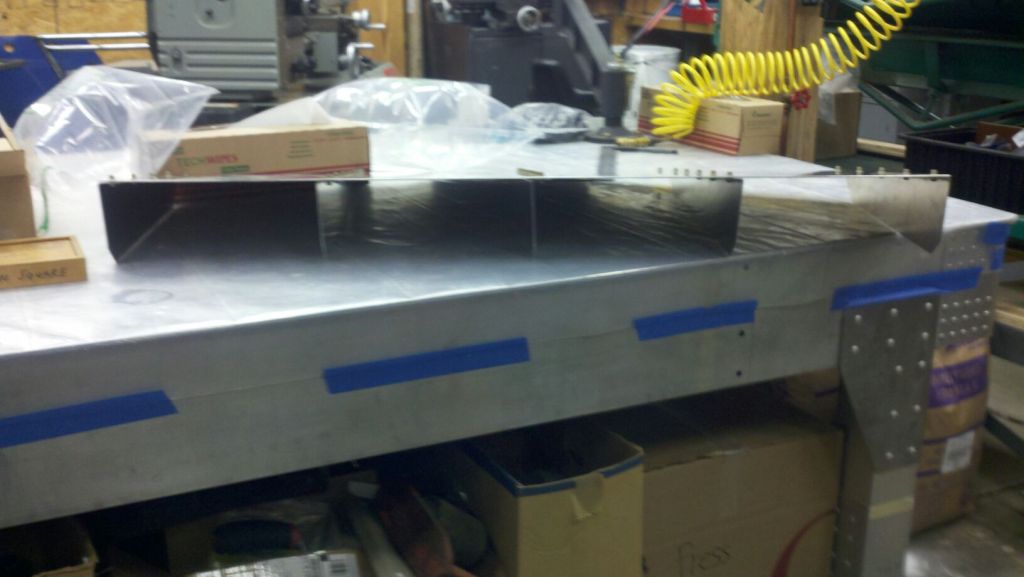
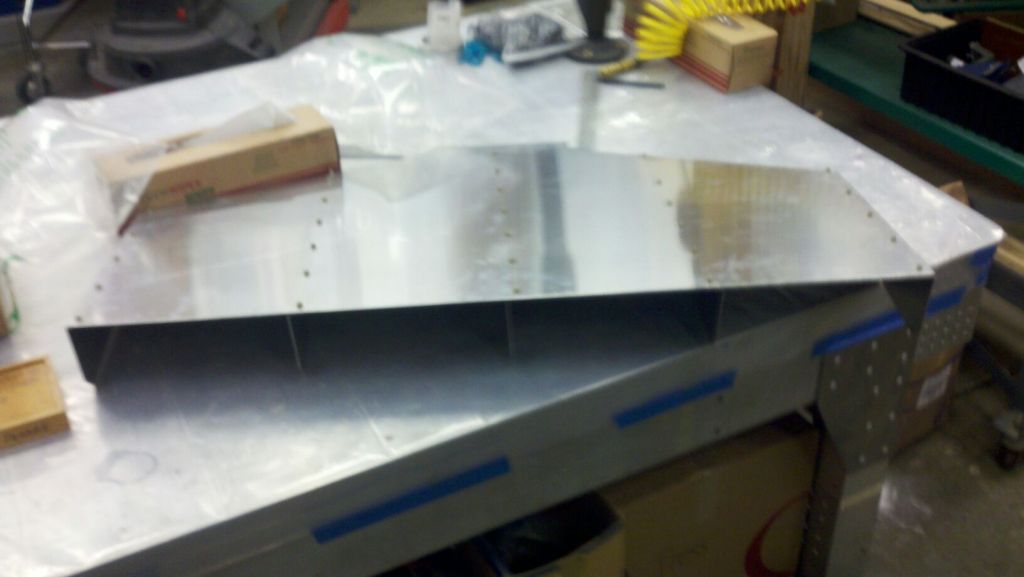
So even though I have not been able to work directly on the car I have been able to get some more stuff done for the car. The fender flares should be in next week as well as the headlights. I got some extra time at work today so I was able to make my rear diffuser. I no nothing about aero so I just looked at some pictures and made what I think would work and what I could make. The main plate is 1/16 6061 aluminum and the fins are .050" 3003 aluminum. I made two extra fins in case they get damaged and I can always make more. I used rivnuts to attach them so if should be easy to repair if need be. Here are the pics of it being built and it done. Let me know what you all think.
This rear diffuser is 46" wide by 27" long. The fins are 4.5" tall at the back. I think this will be a great addition to my aero.
Marking out the fins
Bending the fins

Fin and base plate layout
Installing rivnuts in base plate
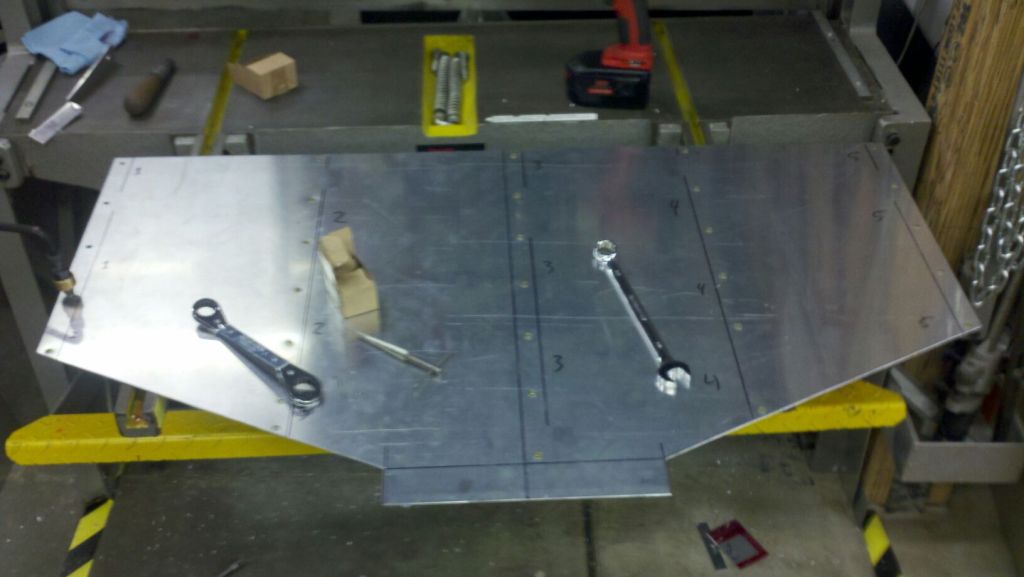
Rivnuts in base plate cleaned and ready for assembly
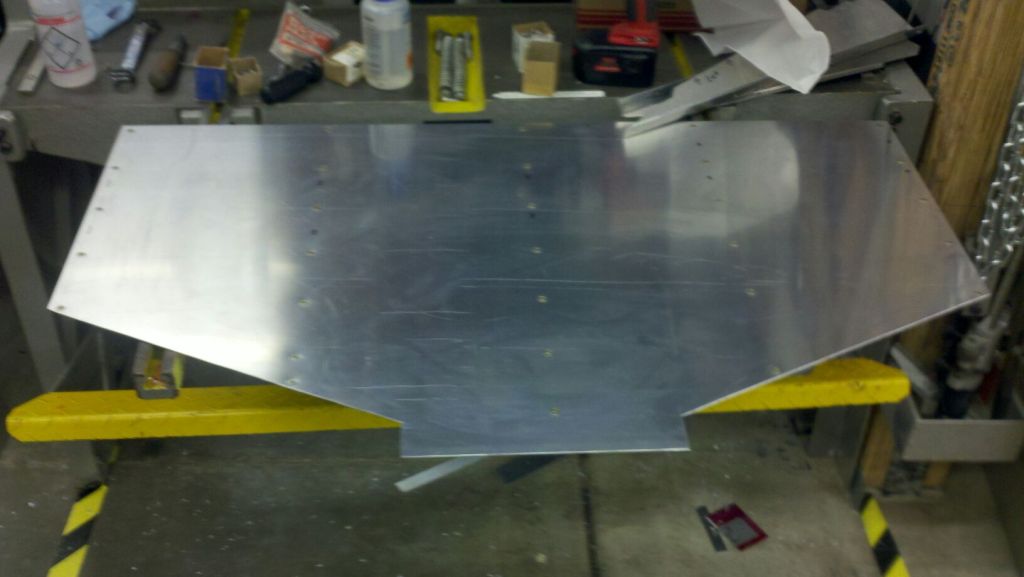
Rear diffuser complete.
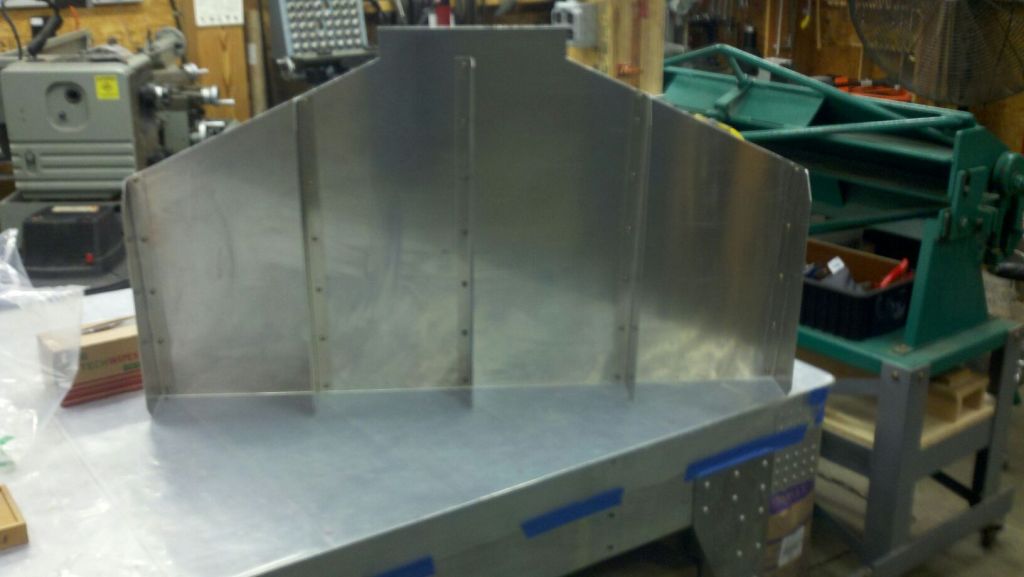
This rear diffuser is 46" wide by 27" long. The fins are 4.5" tall at the back. I think this will be a great addition to my aero.
Marking out the fins
Bending the fins
Fin and base plate layout
Installing rivnuts in base plate
Rivnuts in base plate cleaned and ready for assembly
Rear diffuser complete.
Reply
0
0


