
93' Miata stolen and flipped build thread


If I understand correctly they aren't needed. Dunno about 1.6l coolant stuff. No need for coolant through there. Emissions blah blah no care. Don't drive it in the ice age maybe.
Reply
 1
1

1

Elite Member
Joined: Oct 2013
Posts: 2,764
Total Cats: 951
From: Cedar City, UT
You are awesome. I was trying to figure out why the hell you'd run coolant there; that connected the missing dot in my head. Car won't be driven during the winter, and if it is driven it will only be in St George where it is never winter here(except for the odd 3-5 days a year it snows.)
Reply
0
0

Yes. They are to warm it up in cold weather. Not necessary where you are.
Reply
1
1


Ask me how I know.

Reply
0
0

I'd say St. George is a dry enough climate that you shouldn't have to worry about it. I capped mine and haven't had any issues.
Reply
0
0
Elite Member
Joined: Oct 2013
Posts: 2,764
Total Cats: 951
From: Cedar City, UT
===
Not a ton done, just a lot of time wasted trying to get everything trying to line up right and little odd things to organize to clean up the engine bay.
I painted my center caps. They were this ugly fake chrome and it looked like ****. Lots of sanding followed by plastic adhesion promoter and some good satin black and it looks good. Not great, but good. Trying to think of a good sticker I could place in the middle since these were just blank.

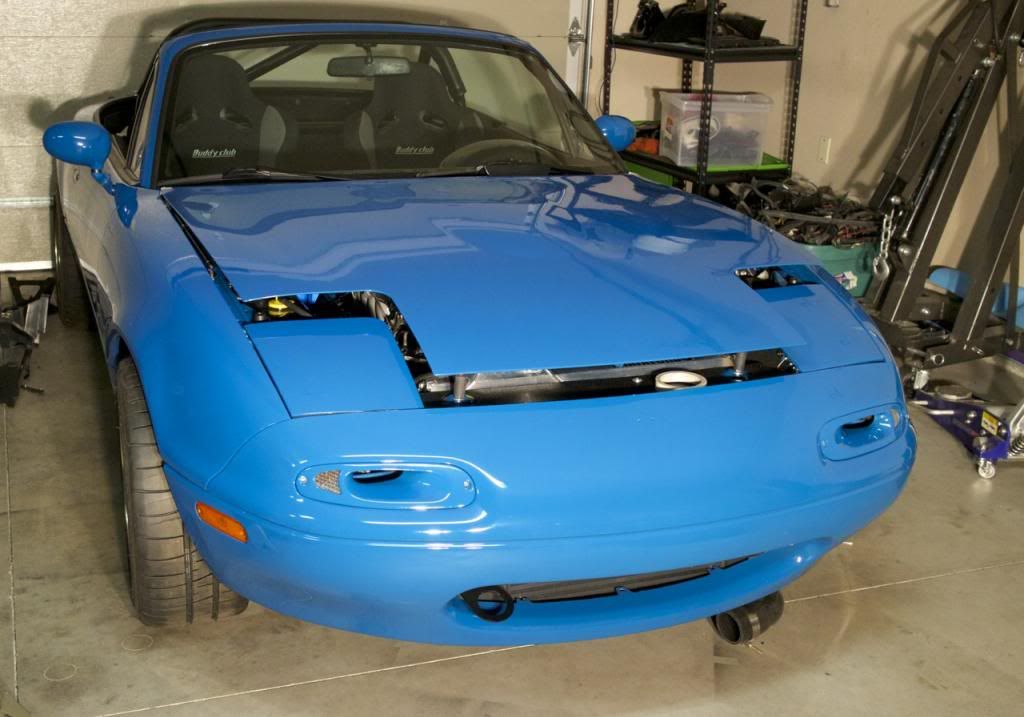
Started getting my bumper ready to put back on.
Cleaned all the dirt off the bumper support

Removed all the white paint overspray off these things and then put some sealant on it.

More white paint removal

and boom goes the dynamite. I am going to make an undertray out of ABS plastic since the new intercooler position really makes it impossible to use the front air guide. Haven't tried to put the undertray on yet so we'll see how finicky that will be.


I need to bondo the front lip and then sand out all the scratches and then spray it with "bumper spray paint". Basically highly flexible rubberish paint that is pretty dang durable.
I was going to replace it but they are so expensive(even for replicas) and this one is so scratched I don't want to put it back on the car without some work. I know it will chip but for "now" it will do. Sometime later I'll replace it.
Reply
3
3

...
I painted my center caps. They were this ugly fake chrome and it looked like ****. Lots of sanding followed by plastic adhesion promoter and some good satin black and it looks good. Not great, but good. Trying to think of a good sticker I could place in the middle since these were just blank.
...
I painted my center caps. They were this ugly fake chrome and it looked like ****. Lots of sanding followed by plastic adhesion promoter and some good satin black and it looks good. Not great, but good. Trying to think of a good sticker I could place in the middle since these were just blank.
...


Good progress doe, car is starting to look like a car again!
Reply
1
1
Elite Member
Joined: Oct 2013
Posts: 2,764
Total Cats: 951
From: Cedar City, UT
Reply
0
0


Interesting bit of information - It's to avoid ice build up inside the TB. It sounds crazy but if you're familiar with the "wind chill" effect and think about the velocity of air coming through your TB it starts to make sense. Some slight humidity, a nice cold morning and you've got ice buildup. Probably not a likely scenario for Jeff or maybe even anyone who owns a Miata but that's why it's there.
Reply
0
0
I need to bondo the front lip and then sand out all the scratches and then spray it with "bumper spray paint". Basically highly flexible rubberish paint that is pretty dang durable.
I was going to replace it but they are so expensive(even for replicas) and this one is so scratched I don't want to put it back on the car without some work. I know it will chip but for "now" it will do. Sometime later I'll replace it.
I was going to replace it but they are so expensive(even for replicas) and this one is so scratched I don't want to put it back on the car without some work. I know it will chip but for "now" it will do. Sometime later I'll replace it.
Reply
0
0
Elite Member
Joined: Oct 2013
Posts: 2,764
Total Cats: 951
From: Cedar City, UT
Reply
0
0
Elite Member
Joined: Oct 2013
Posts: 2,764
Total Cats: 951
From: Cedar City, UT
How to put a hood on with no help:
Used my old climbing rope that I had to retire and strung it over the garage door guides. After I got it in position I slowly lowered it until I could angle the hood correctly to slip it on to the brackets.

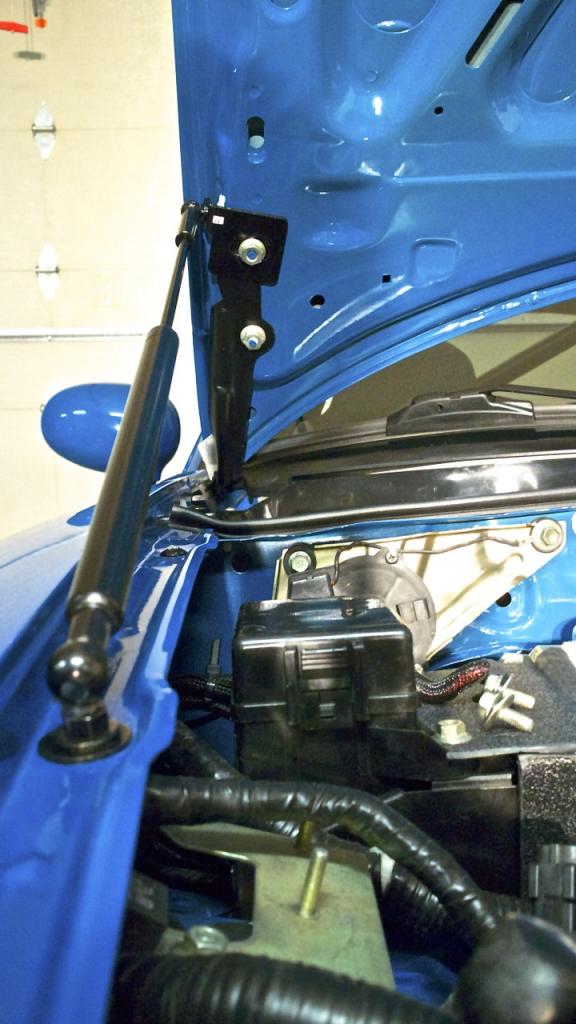
Then I slipped the bolts on and installed the hood props
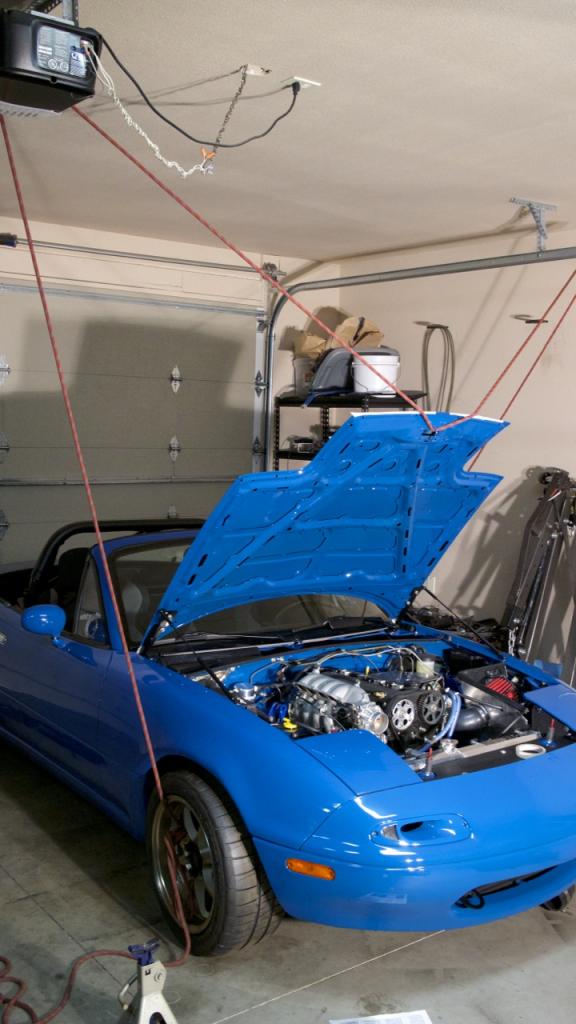
Turned out really good. Still need to drill the holes and cut the hood for the aerocatch latches, but I need to remove the pins and make sure the alignment of the hood is perfect before I drill the initial hole. I'll be honest, a little nervous about it!
Used my old climbing rope that I had to retire and strung it over the garage door guides. After I got it in position I slowly lowered it until I could angle the hood correctly to slip it on to the brackets.

Then I slipped the bolts on and installed the hood props


Turned out really good. Still need to drill the holes and cut the hood for the aerocatch latches, but I need to remove the pins and make sure the alignment of the hood is perfect before I drill the initial hole. I'll be honest, a little nervous about it!

Reply
2
2

Elite Member
Joined: Oct 2013
Posts: 2,764
Total Cats: 951
From: Cedar City, UT
Constant cleaning is how. It really does just get dusty sitting there doesn't it? I started doing all my sanding in the driveway to help cut down on it.
You were right Sven, aligning the hood is a bitch! The sides and rear are perfect but my headlight gap is terrible on the passenger side. Scratching my head on how to fix it.
You were right Sven, aligning the hood is a bitch! The sides and rear are perfect but my headlight gap is terrible on the passenger side. Scratching my head on how to fix it.
Reply
0
0


Reply
0
0


