
93' Miata stolen and flipped build thread


Elite Member
Joined: Oct 2013
Posts: 2,764
Total Cats: 951
From: Cedar City, UT
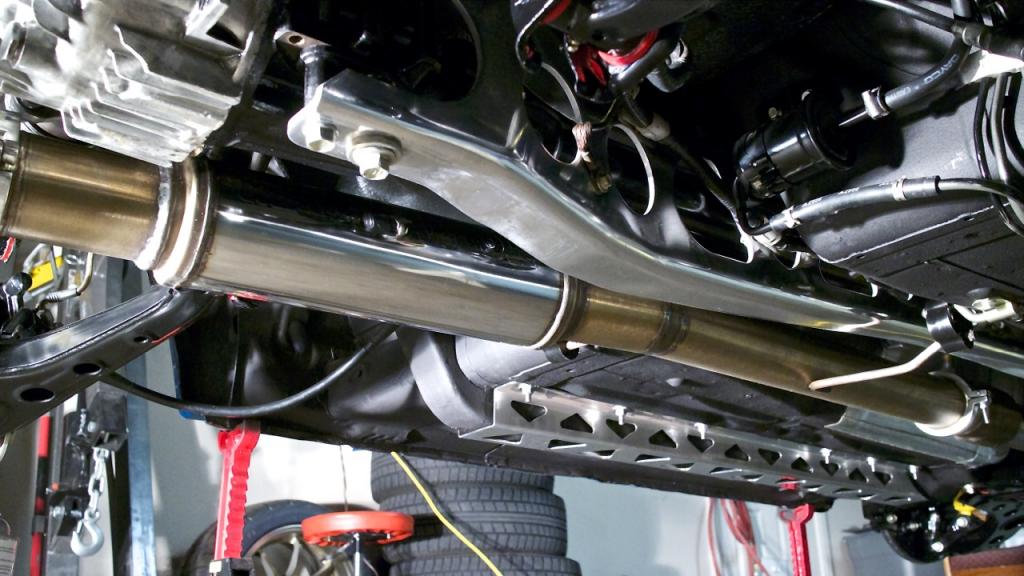
Needed to take a break from wiring so I decided to put the exhaust back on. It isn't perfect but after taking metal polish to the pipes for a while I decided that is as far as I wanted to take it.
The Magnaflow resonators have some scratches and dents in them from the crash so there wasn't a ton I could do. Not to concerned about it though.
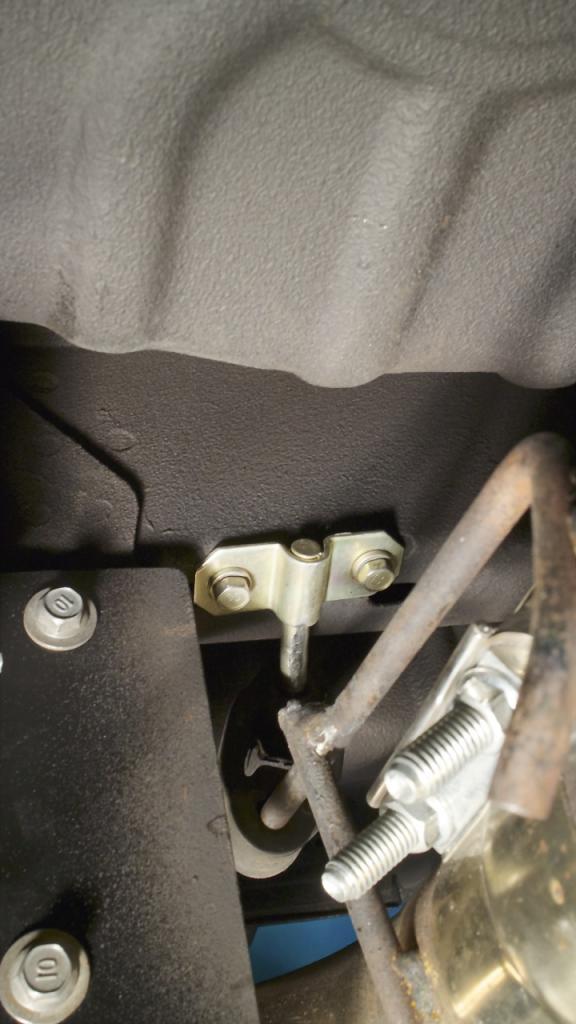
I had to make an exhaust hanger for the drivers side tailpipe due to the weight of the exhaust. I would have ignored it but I know how much these things move without the proper amount of hangers. The previous owner had a bracket made but it was pretty shaky looking.
So I grabbed an extra exhaust hanger from the other car and hammered it flat, drilled a couple M8x1.25 holes and a class 8 bolts with a compression washer and put red loctite on them for security.
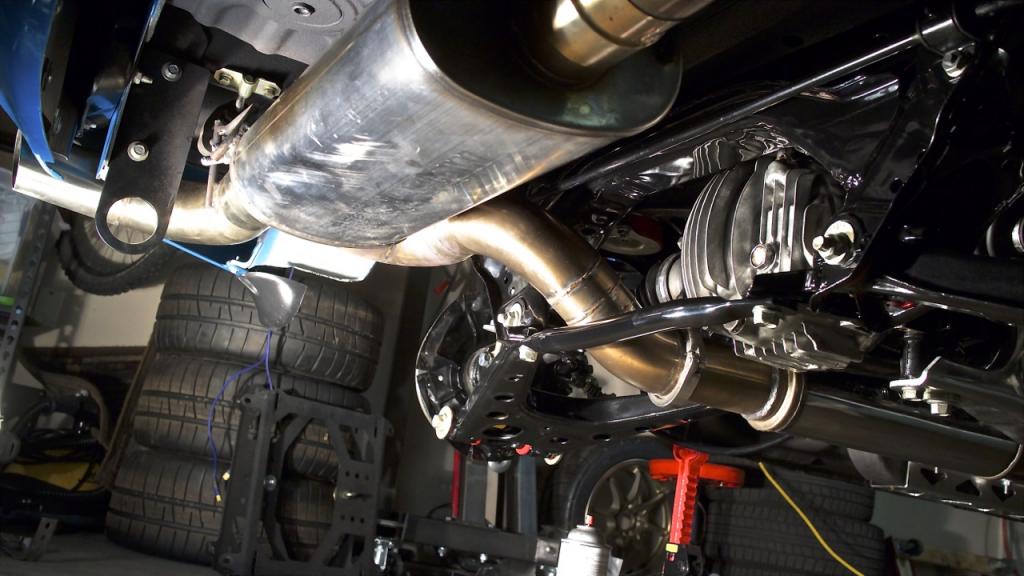
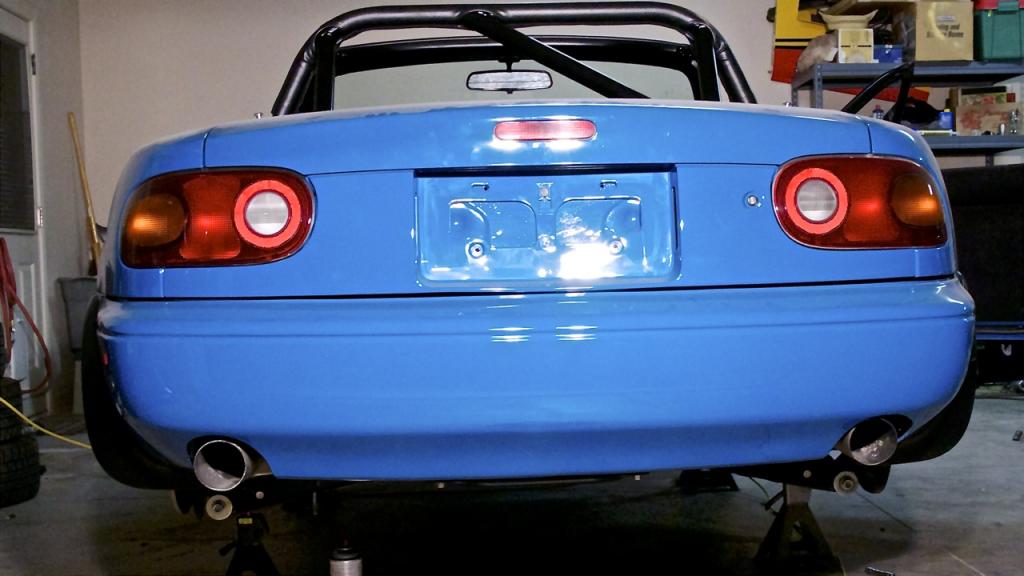
Not done with adjusting it. The right side is pulled in too much but the left side is perfect. I might remove the coupling on the right exhaust pipe and pull it out a little bit for some equilibrium. I've messed with trying to do it with the poly hangers and it just resettles back to its static position after a while.
Time to drive up to Cedar and pick up my wiring supplies I ordered for my headlights. Going to build a proper harness a la Revlimiter style.
The Magnaflow resonators have some scratches and dents in them from the crash so there wasn't a ton I could do. Not to concerned about it though.
I had to make an exhaust hanger for the drivers side tailpipe due to the weight of the exhaust. I would have ignored it but I know how much these things move without the proper amount of hangers. The previous owner had a bracket made but it was pretty shaky looking.
So I grabbed an extra exhaust hanger from the other car and hammered it flat, drilled a couple M8x1.25 holes and a class 8 bolts with a compression washer and put red loctite on them for security.


Not done with adjusting it. The right side is pulled in too much but the left side is perfect. I might remove the coupling on the right exhaust pipe and pull it out a little bit for some equilibrium. I've messed with trying to do it with the poly hangers and it just resettles back to its static position after a while.

Time to drive up to Cedar and pick up my wiring supplies I ordered for my headlights. Going to build a proper harness a la Revlimiter style.
Reply
 2
2

2

Elite Member
Joined: Oct 2013
Posts: 2,764
Total Cats: 951
From: Cedar City, UT
 I took a picture of myself with the car once...a while back. Apparently too many of our glitter brony members were turned on and several recommended I not include myself in pictures!
----
OK back to business. As I said earlier I ordered a bunch of connectors and parts to completely redo the headlight harness. Moss includes 6 wires...of which are all uninsulated male spade connectors...pretty crappy for $500 headlights if you ask me. They could have at least ponied out 30 more cents for insulated spades!
So I followef in the footsteps of Revlimiter(he is much much smarter than I) and followed his Moss lopro rewire guide. Not only does it make it a real harness but it allows you to run all 4 headlights at once, when the brights are on. (source- revlimiter.net - Low Profile Headlight Wiring )
This literally took me all night to do, and I am not ashamed to admit that. Wiring as you guys have found out from the last several pages, scares the **** out of me. Mostly due to my complete ignorance on the subject. Unfortunately for my ignorance, this is sink or swim time with the car, so better late than never to learn right?
Not going to touch into specifics too much since Adam covers it all extremely thoroughly on his site, but I will give some background on what you are seeing, seeing as Adam doesn't have photos of the wiring itself, just a wiring diagram(not complaining Adam!
 )
)I played around with mounting ideas and came up with the fuse box bracket as the best way to go. Drilled and tapped 2 m6x1.0 holes and mounted it up. Ran power off the fuse box main bolt with 10 gauges wires and then wrapped ehm up all pretty like. Tossed in 2 30 amp fuses for security.

I didn't think to take some pictures of the wiring effort, but I'm glad I didn't. It was messy and aggravating so I thought it best not to divert my attention. Each bundle of wires is painstakingly heat shrink wrapped with 1/2" and all the connectors protected with an additional bit of shrink wrap. Moisture is no bueno.

I bought an additional H4 bulb so that I didn't have to splice into the factory connector and make it all ugly looking. The bottom pair of wires are paired to the low beam relay and the high beam has a diode(bottom wire, the little round heat shrinked pustule). The diode makes it so that when you have the low beams on only, the high beams won't come on as well.
Middle wires are the grounds(black) and the high beam connector for the high beam relay. I color coded the H4 heat shrink with the factory wire colors. White is high beams, red low beams, black ground.

Left harness is the drivers side. I ran the ground to the drivers side firewall ground. Power wires get run to the passenger side to connect to the relays. Right harness is passenger, and the same setup only ground is being run to the alternator.
Routed the wires through the upper fan brackets

Drivers side grounds

God I got lucky that everything was long enough. All the wires hide neatly under the passenger fender.

I originally bought the bases for the relay but they sent me the wrong base for the relays so I used insulated spade connectors. I'll eventually order the base to clean it up a little. I think it turned out rather nice though! Out of the way, not terrible looking, and very convenient if there is a problem.

I'm not gonna lie, even though Adam's guide held my hand through this...this was a big project for my lack of electrical knowledge. But as with all wiring...slow and low is the tempo! I'm extremely pleased...we'll see how please I am when I try to get them to work though!

Reply
3
3


Elite Member
Joined: Oct 2013
Posts: 2,764
Total Cats: 951
From: Cedar City, UT
Reply
0
0

Looks good! Although, for an even cleaner (and more serviceable) you may want to use a pair of these:
Bosch/TYCO 3-334-485-008 Relay Socket- Mounting Tab included | TESSCO
Keep up the great work!
Bosch/TYCO 3-334-485-008 Relay Socket- Mounting Tab included | TESSCO
Keep up the great work!
Reply
0
0
Elite Member
Joined: Oct 2013
Posts: 2,764
Total Cats: 951
From: Cedar City, UT
Looks good! Although, for an even cleaner (and more serviceable) you may want to use a pair of these:
Bosch/TYCO 3-334-485-008 Relay Socket- Mounting Tab included | TESSCO
Keep up the great work!
Bosch/TYCO 3-334-485-008 Relay Socket- Mounting Tab included | TESSCO
Keep up the great work!
Reply
0
0


Most recent updates..

Reply
0
0


Elite Member
Joined: Oct 2013
Posts: 2,764
Total Cats: 951
From: Cedar City, UT
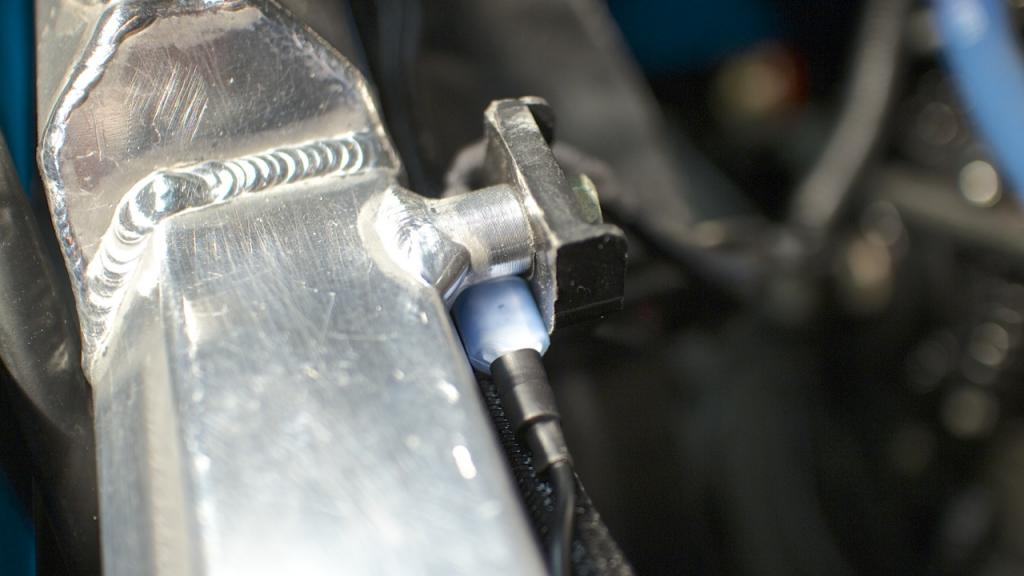
Would that be this cable I was wondering about a while back?

-----
Getting the dash ready to put back in, so I hooked the dash harness back up to it and tied it down with zip ties and non-abrasive tape. Also secured all the radio harness/unused connectors to keep them from rattling around.

Also took the old rotted padding off the top of the dash and put new foam down.

Reply
2
2
Elite Member
Joined: Oct 2013
Posts: 2,764
Total Cats: 951
From: Cedar City, UT
Some how I forgot the dash project and switch back to wiring mode.
This connector had snapped off but the wire end was so short I couldn't strip the sheath off it. So I disassembled the connector and was lucky to have just enough wire to solder with.
Pin was a bitch to remove
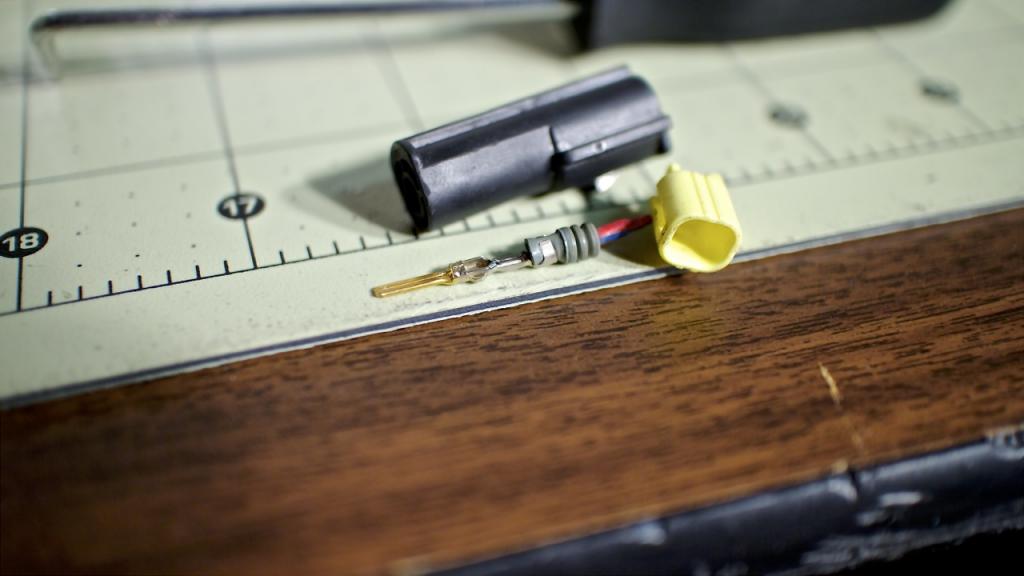
Reconnected and cleaned up.
Also did the dual fan mod to the AC fan. Tap into the yellow wire on the drivers side fan and connect it with passenger side black/blue wire. Add an insulated spade connector so that when you remove the radiator and/or fans you don't have to cut the wire.
Then I decided to clean up the headlight wiring a little. Tucked the harness even further under the fender and zip tied them together.
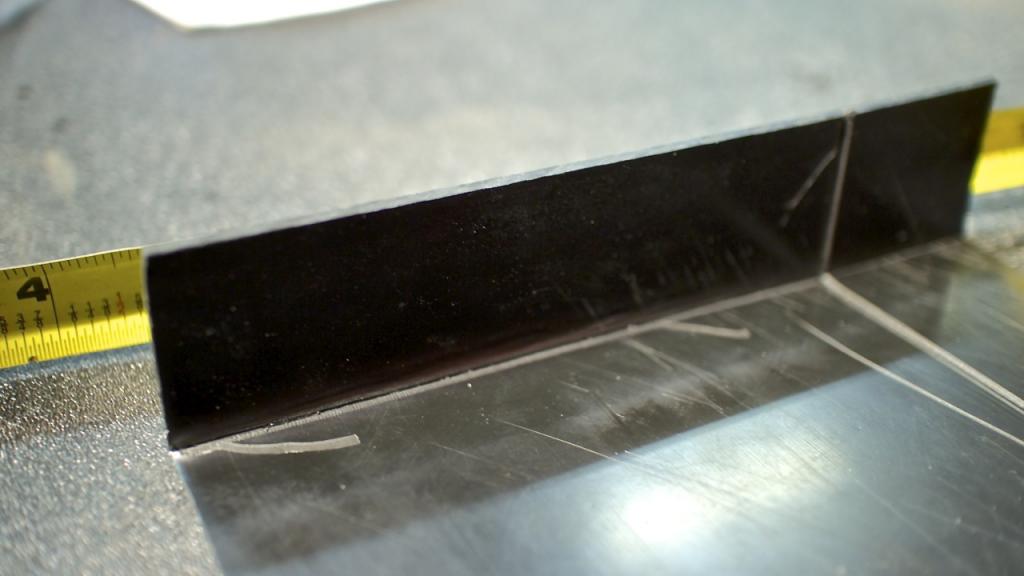
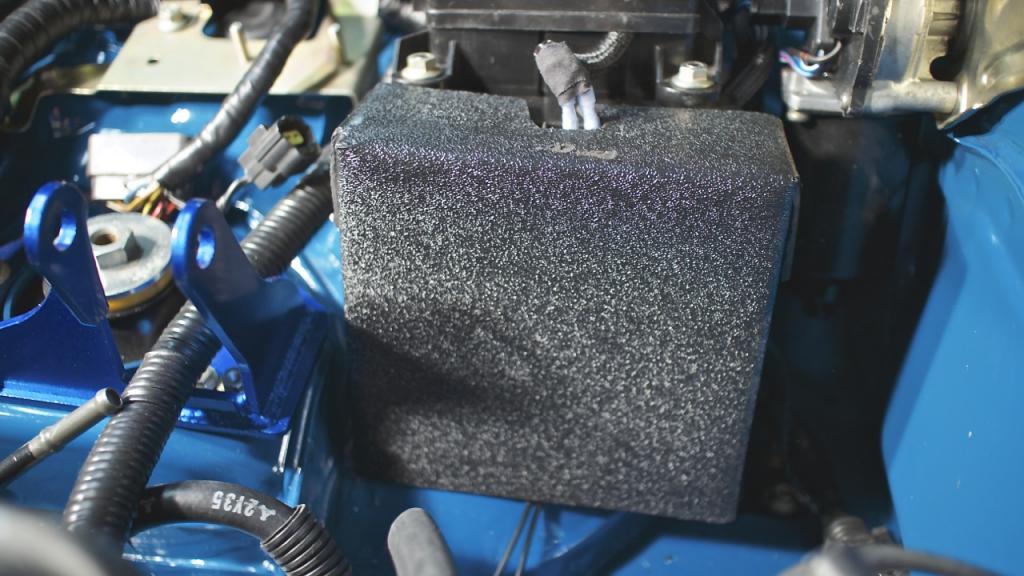
I always wanted to make a little box to cover up the relays and the connectors. Since I have a ton of ABS plastic leftover I made it out of that. Instead of cutting it and trying to use plastic epoxy I decided to try bending it and molding it with heat.
So the problem in my head was how do I get the plastic to bend straight and not wavy? So I added a weak point to the plastic so that when I heat it up it bends at the spot with the least resistance.
I measured and used my linoleum cutter to cut deep relief channels in the plastic and routed the edges so that it wouldn't jam up before it made the full bend.
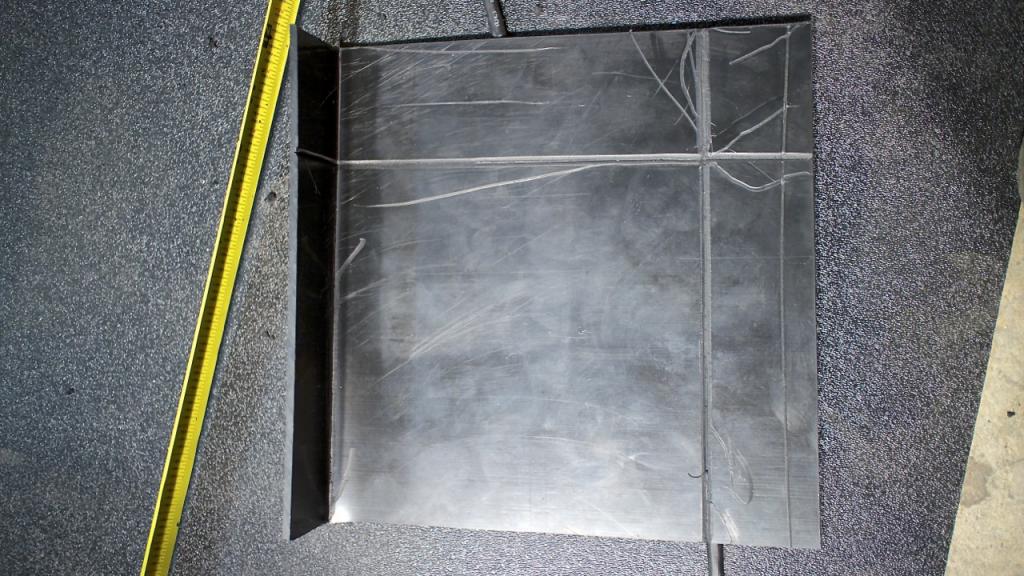
It worked perfectly. Just heat it up until you feel it start to become flexible, then moving fast, using an object with a perfect 90 degree angle on it, bend the plastic over the object and hold it in place until you feel it start to harden up. Then just repeat!
Turned out great, I used industrial strength velcro to attach it to the side of the fuse box mount. I am going to make one more and refine it a little using the measurements from the first box.
Not sure what I could do to clean up the "lid" portion of the box. If I cut the edges off the edges will be exposed on the side. I guess I could cut the entire lid off and then make a separate lid that slides over the front and side 1/2".
What do you guys think?
This connector had snapped off but the wire end was so short I couldn't strip the sheath off it. So I disassembled the connector and was lucky to have just enough wire to solder with.
Pin was a bitch to remove

Reconnected and cleaned up.

Also did the dual fan mod to the AC fan. Tap into the yellow wire on the drivers side fan and connect it with passenger side black/blue wire. Add an insulated spade connector so that when you remove the radiator and/or fans you don't have to cut the wire.

Then I decided to clean up the headlight wiring a little. Tucked the harness even further under the fender and zip tied them together.
I always wanted to make a little box to cover up the relays and the connectors. Since I have a ton of ABS plastic leftover I made it out of that. Instead of cutting it and trying to use plastic epoxy I decided to try bending it and molding it with heat.
So the problem in my head was how do I get the plastic to bend straight and not wavy? So I added a weak point to the plastic so that when I heat it up it bends at the spot with the least resistance.
I measured and used my linoleum cutter to cut deep relief channels in the plastic and routed the edges so that it wouldn't jam up before it made the full bend.

It worked perfectly. Just heat it up until you feel it start to become flexible, then moving fast, using an object with a perfect 90 degree angle on it, bend the plastic over the object and hold it in place until you feel it start to harden up. Then just repeat!

Turned out great, I used industrial strength velcro to attach it to the side of the fuse box mount. I am going to make one more and refine it a little using the measurements from the first box.
Not sure what I could do to clean up the "lid" portion of the box. If I cut the edges off the edges will be exposed on the side. I guess I could cut the entire lid off and then make a separate lid that slides over the front and side 1/2".

What do you guys think?
Last edited by Jeffbucc; Mar 18, 2014 at 02:28 AM.
Reply
3
3

Elite Member
Joined: Oct 2013
Posts: 2,764
Total Cats: 951
From: Cedar City, UT
Reply
0
0

Elite Member
Joined: Oct 2013
Posts: 2,764
Total Cats: 951
From: Cedar City, UT
He knows, that I know, it is wrong, but yes, so so cruel.
------
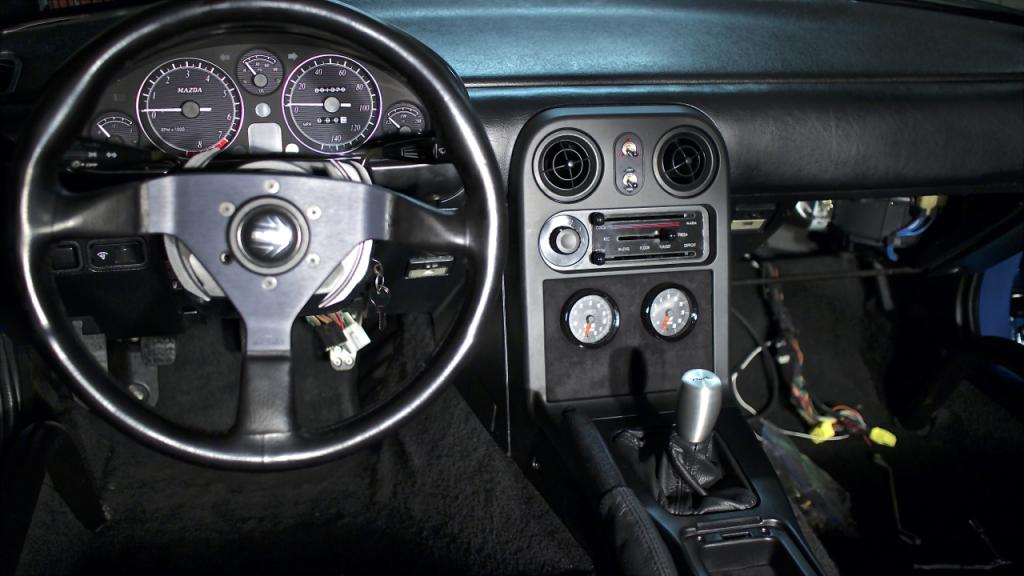
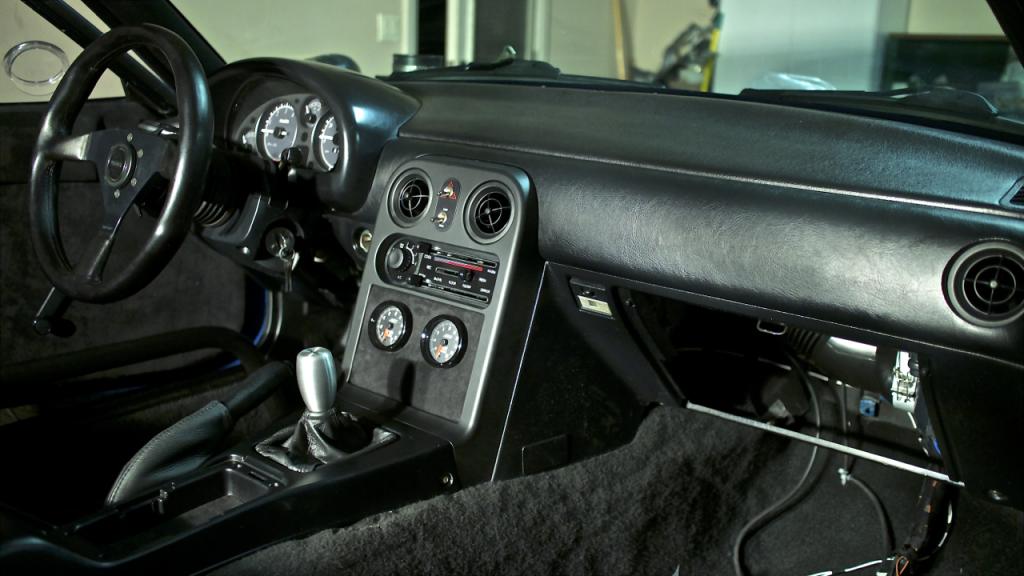
Got the dashboard in, haven't gotten the wiring hooked up under the steering wheel since I accidentally zip tied the connectors too tight, so I need to clip it and pull it down.
The HVAC pull wires are hooked up and work flawlessly, AFR/Boost gauges hooked up, blower box as well. Steering wheel is missing a bolt, but the gauges are all hooked up too. Which is pointless since I need to pull the plastic off so when and if the car starts I can zero the needles after the Revlimiter gauge face install.
So all that is left on the interior is the seat rails, seat, and the rear finish panel carpeting. Also need to find a way to put the Rennenmetal brackets on with out cutting the plastic to make it look more polished.

------
Got the dashboard in, haven't gotten the wiring hooked up under the steering wheel since I accidentally zip tied the connectors too tight, so I need to clip it and pull it down.
The HVAC pull wires are hooked up and work flawlessly, AFR/Boost gauges hooked up, blower box as well. Steering wheel is missing a bolt, but the gauges are all hooked up too. Which is pointless since I need to pull the plastic off so when and if the car starts I can zero the needles after the Revlimiter gauge face install.
So all that is left on the interior is the seat rails, seat, and the rear finish panel carpeting. Also need to find a way to put the Rennenmetal brackets on with out cutting the plastic to make it look more polished.


Reply
2
2


