
Building a blonde young beefcake wearing nothing but skimpy shorts named Rocky


Reply
 0
0

0


Joined: Sep 2010
Posts: 8,157
Total Cats: 1,095
From: Lake Forest, CA

Reply
0
0


Reply
0
0


Thread Starter
Senior Member
iTrader: (7)
Joined: Sep 2009
Posts: 754
Total Cats: 68
From: Royal Oak Michigan
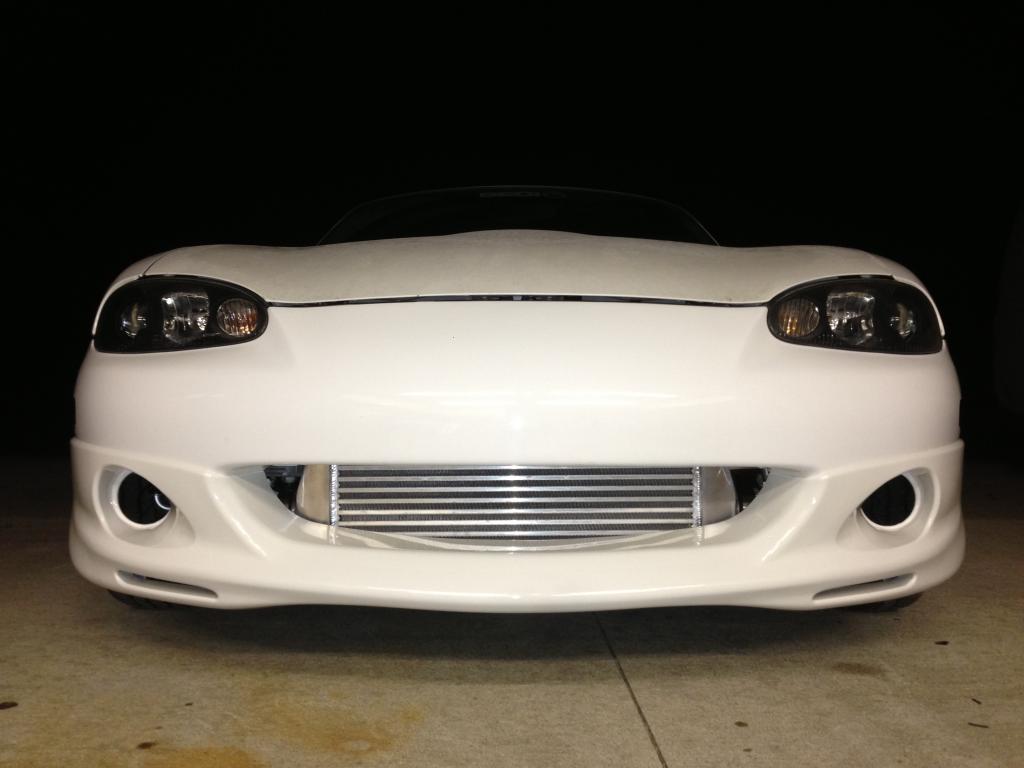
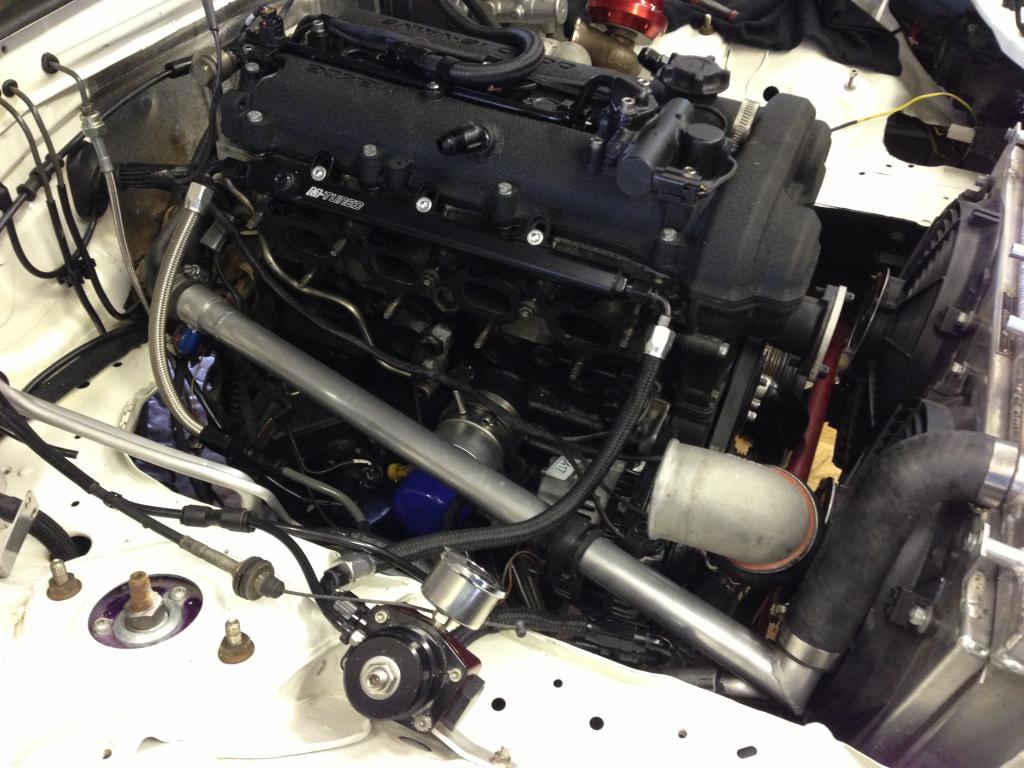
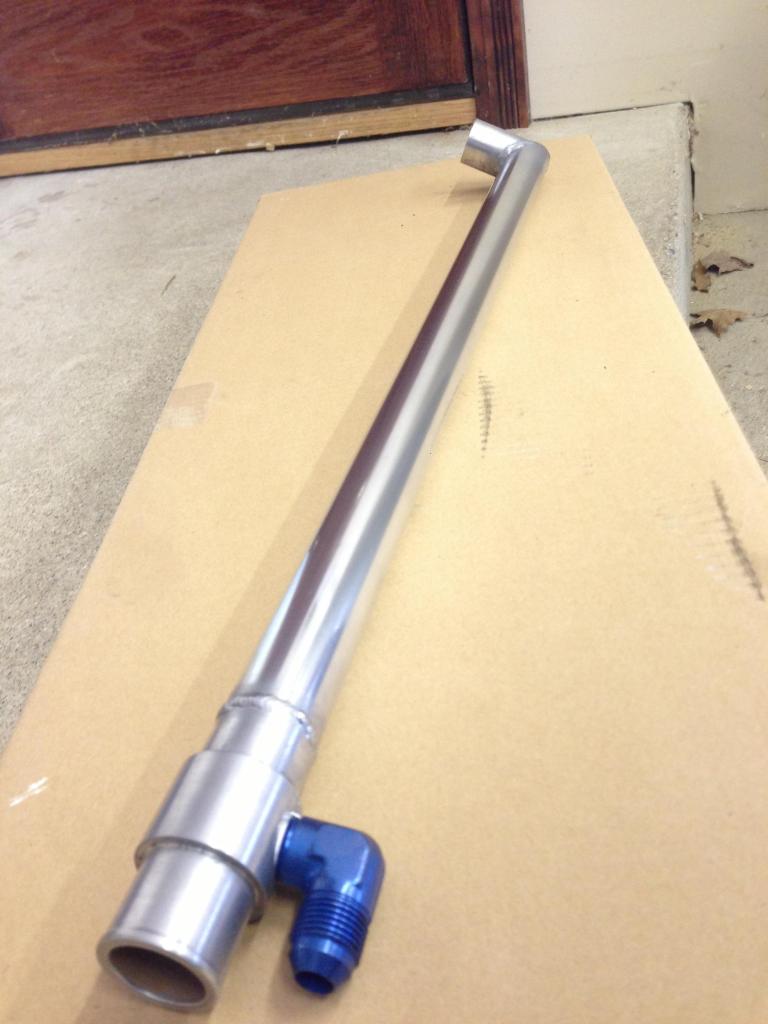
My previous coolant reroute was annoying me so I decided to re-do the bish. I picked up some aluminum tubing from the local hardware store and made this with my fancy new tig welder.
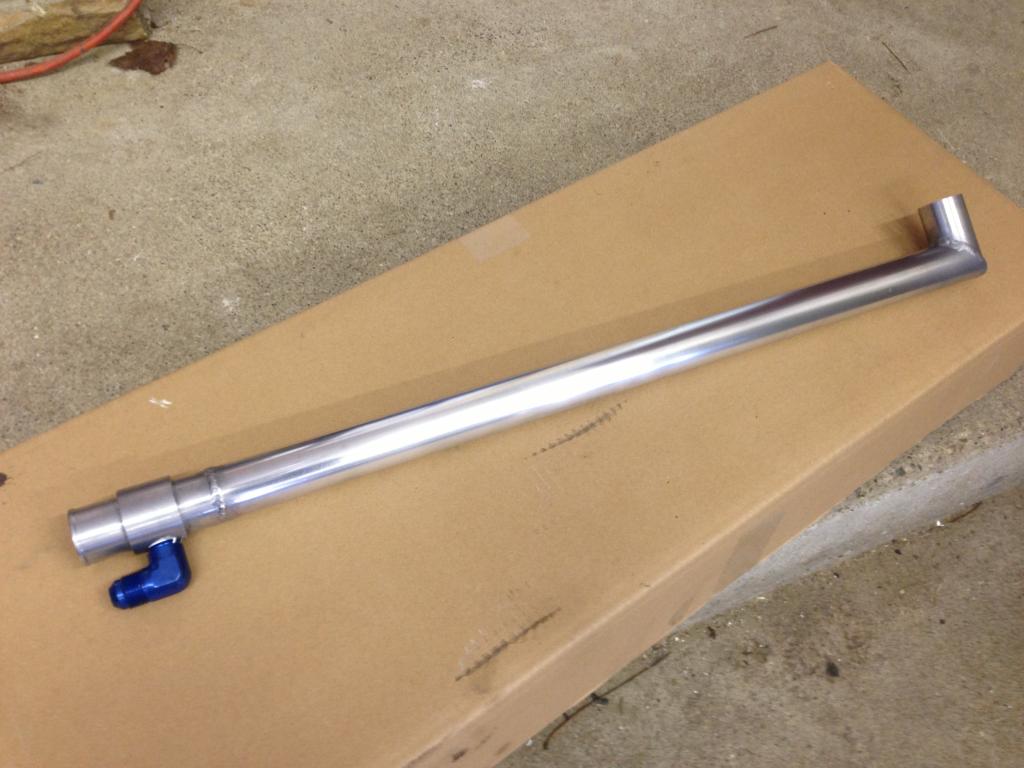
She goes a little something like this:
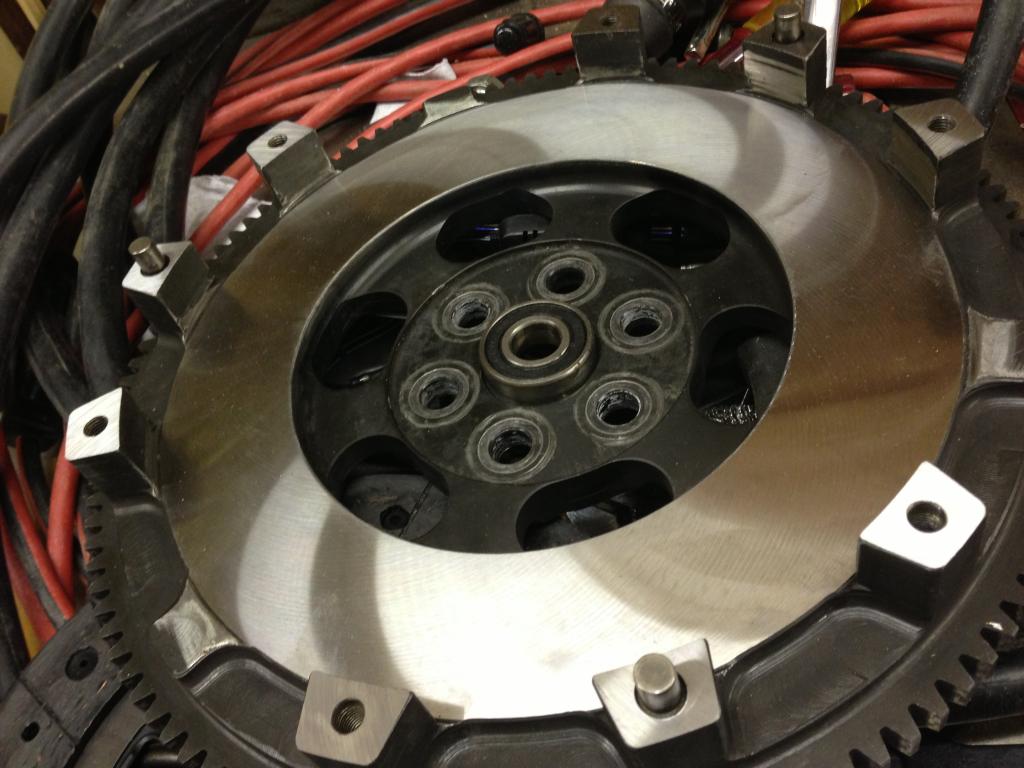
Also installing a 6 puck sprung clutch disk on my Flyin Miata pressure plate and ACT lightweight flywheel. The flywheel looked pretty bad so I took her to the machine shop and had it freshened up.
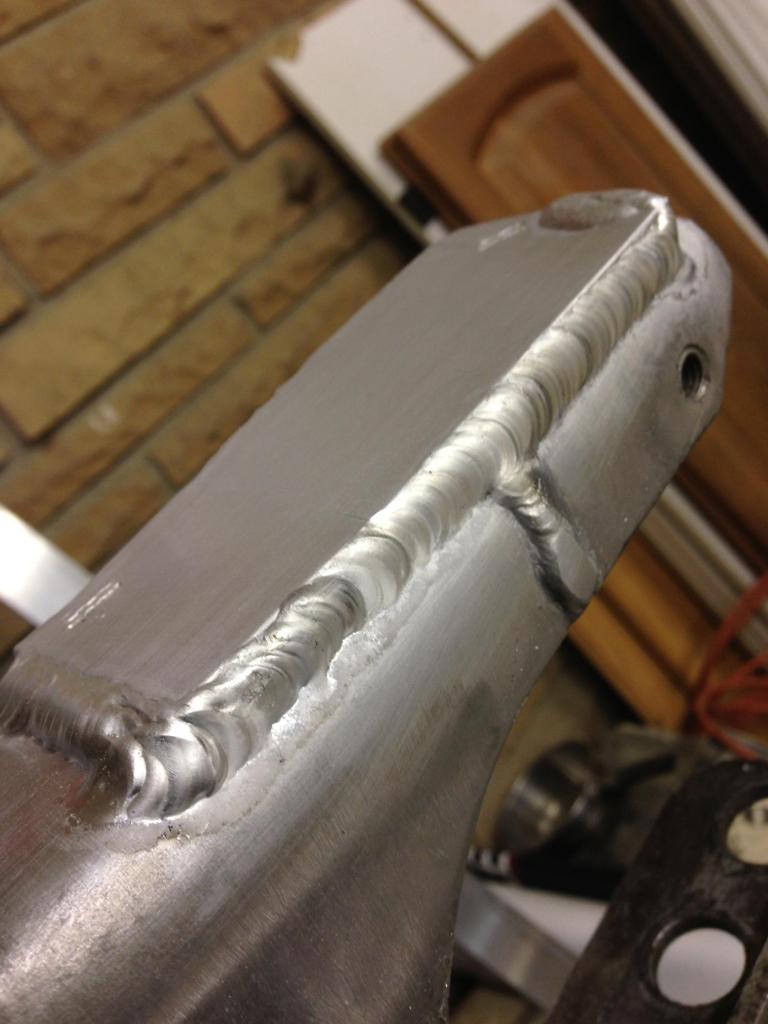
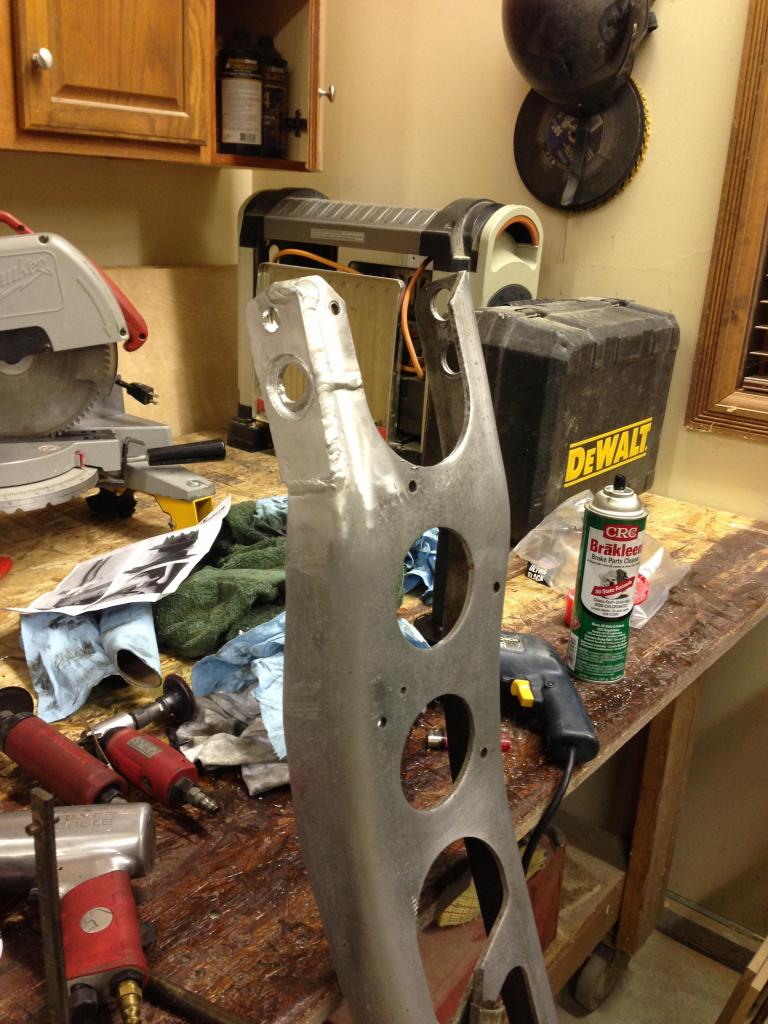
While disassembling the car my PPF brace came out in two pieces! The tab on the bottom of the diff fell completely off the car.. I picked up some material and again took advantage of my new tig welding skills.
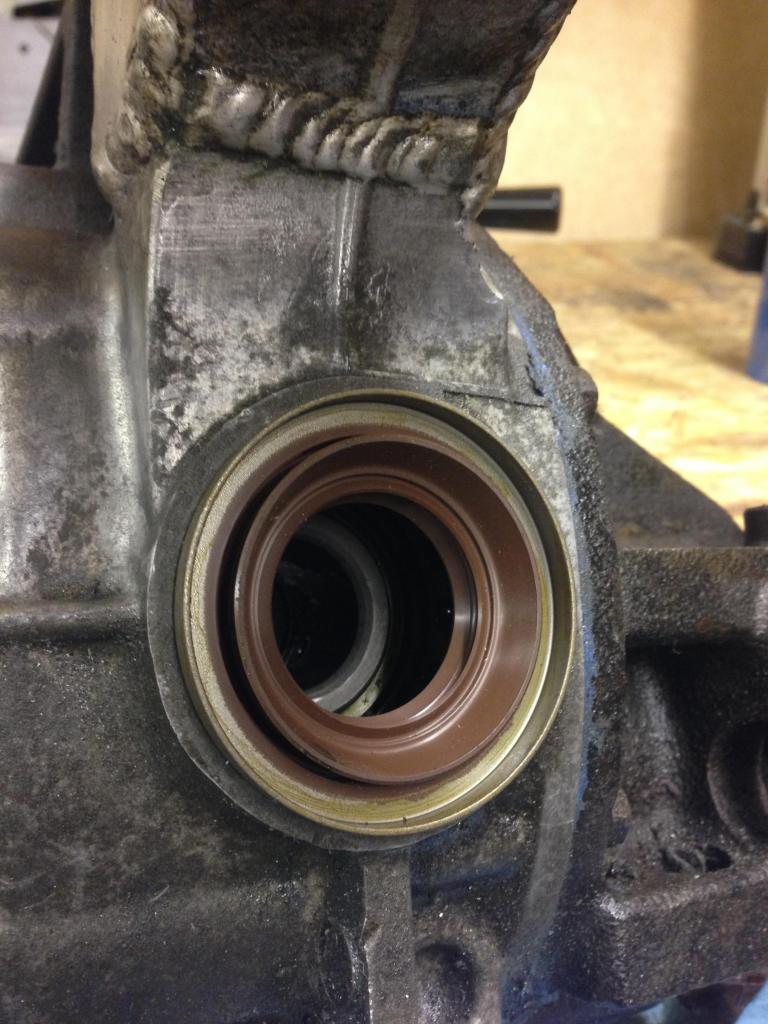
I noticed the diff seals were leaking, probably from me having to change my CV shafts every 6 weeks this past summer.. So I popped in some fresh ones.
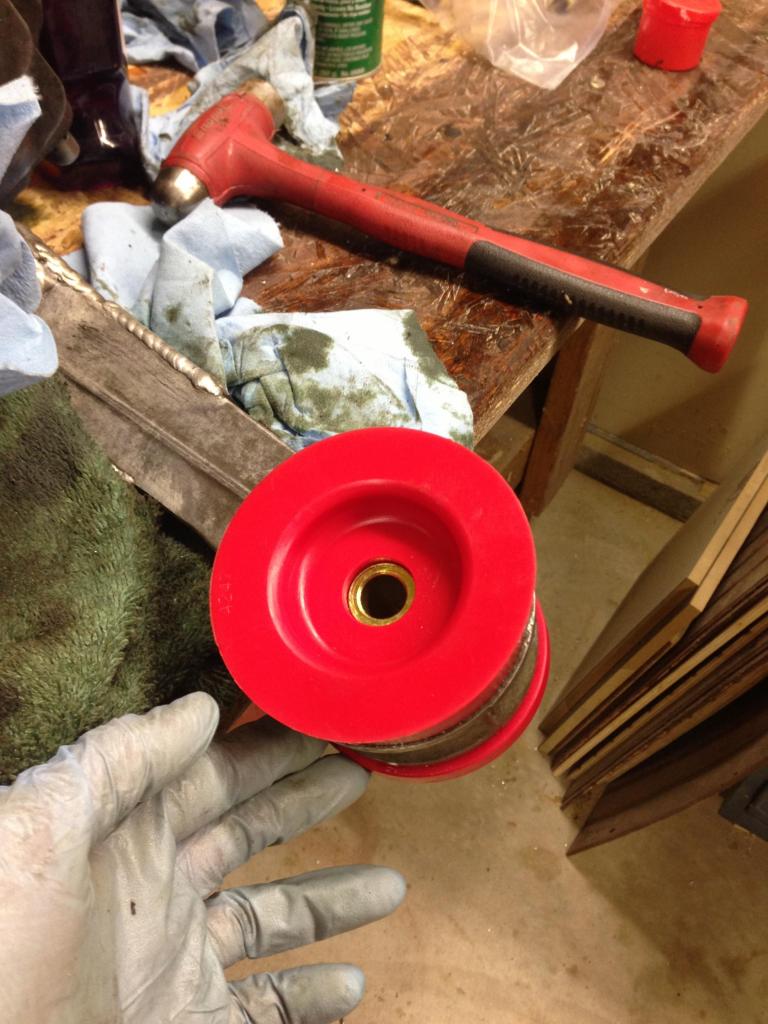
Much like everything else thus far, my diff mounts were pretty blown out so I picked up the Energy Suspension master kit for the car and swapped these out.
She goes a little something like this:
Also installing a 6 puck sprung clutch disk on my Flyin Miata pressure plate and ACT lightweight flywheel. The flywheel looked pretty bad so I took her to the machine shop and had it freshened up.
While disassembling the car my PPF brace came out in two pieces! The tab on the bottom of the diff fell completely off the car.. I picked up some material and again took advantage of my new tig welding skills.
I noticed the diff seals were leaking, probably from me having to change my CV shafts every 6 weeks this past summer.. So I popped in some fresh ones.
Much like everything else thus far, my diff mounts were pretty blown out so I picked up the Energy Suspension master kit for the car and swapped these out.
Reply
0
0
Do you have a metal lip on your axles? I wonder if the current seals for miata axles ('94-'05) are for the one piece axles. There's a lip on the stub axles that stops it from locking in.
Reply
0
0
Thread Starter
Senior Member
iTrader: (7)
Joined: Sep 2009
Posts: 754
Total Cats: 68
From: Royal Oak Michigan
I have AC - Most of the units I've shipped so far have gone to guys who have AC. Do you have an NB with the canister? Even if so - The 350 core will clear that just fine! Direct bolt in.. Let me know.
Reply
0
0
I have an NA, so my clearance for intercoolers is the absolute worst. I'd need something that could handle 500~hp. I'm just on the fence about yanking the a/c, is all. Feel free to send me a PM if you have some ideas.
Reply
0
0
Thread Starter
Senior Member
iTrader: (7)
Joined: Sep 2009
Posts: 754
Total Cats: 68
From: Royal Oak Michigan
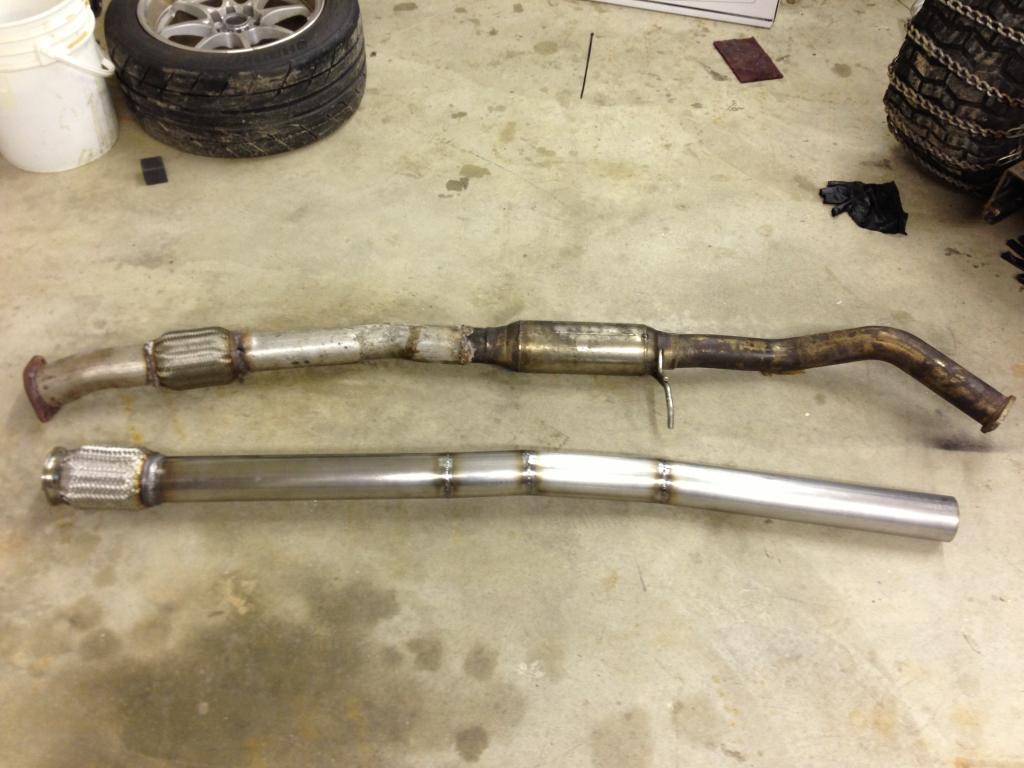
My exhaust system was due for an update since the turbo system went on. After the down pipe I basically had some busted ash exhaust shop tack in some crush bent piece of crap.
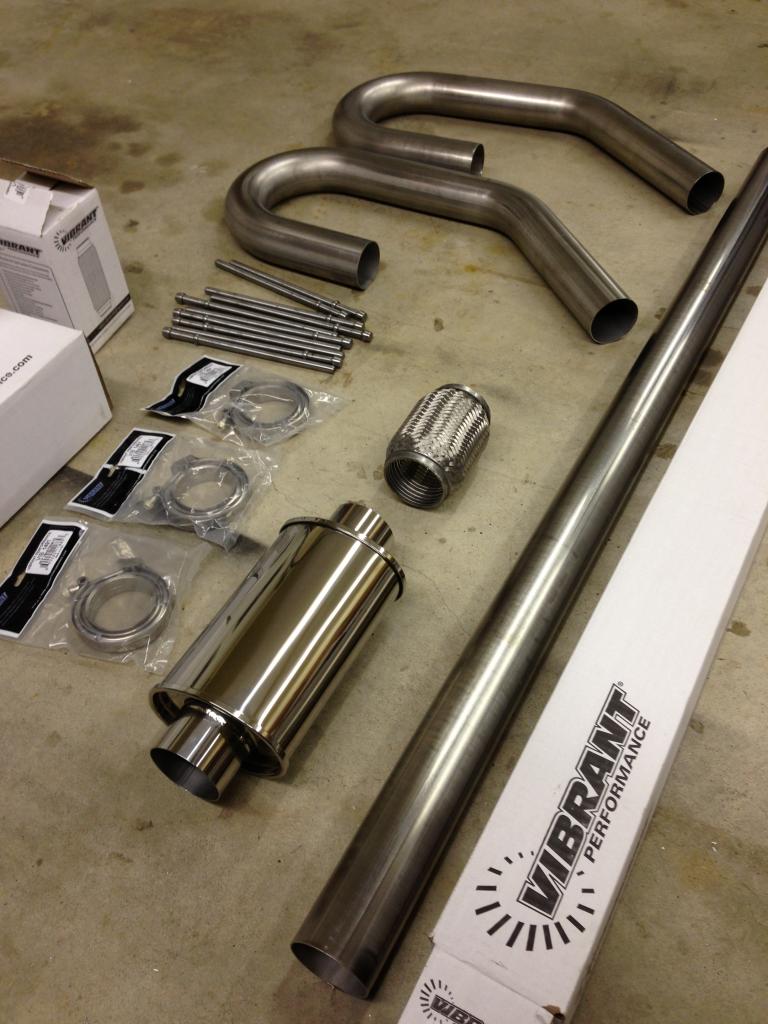
I picked up 3 inch stainless from Vibrant. The build list went a little something like this:
2X - VIBRANT – 3” MANDERAL BENT UNIVERSAL BEND
1X - VIBRANT – 3” 5 FOOT STRAIGHT TUBE
1X - VIBRANT – 3” ULTRA QUIET RESONATOR
1X - VIBRANT – EXHAUST HANGERS
3X - VIBRANT – V-BAND ASSEMBLIES
1X - VIBRANT – 3” TURBO FLEX PIPE
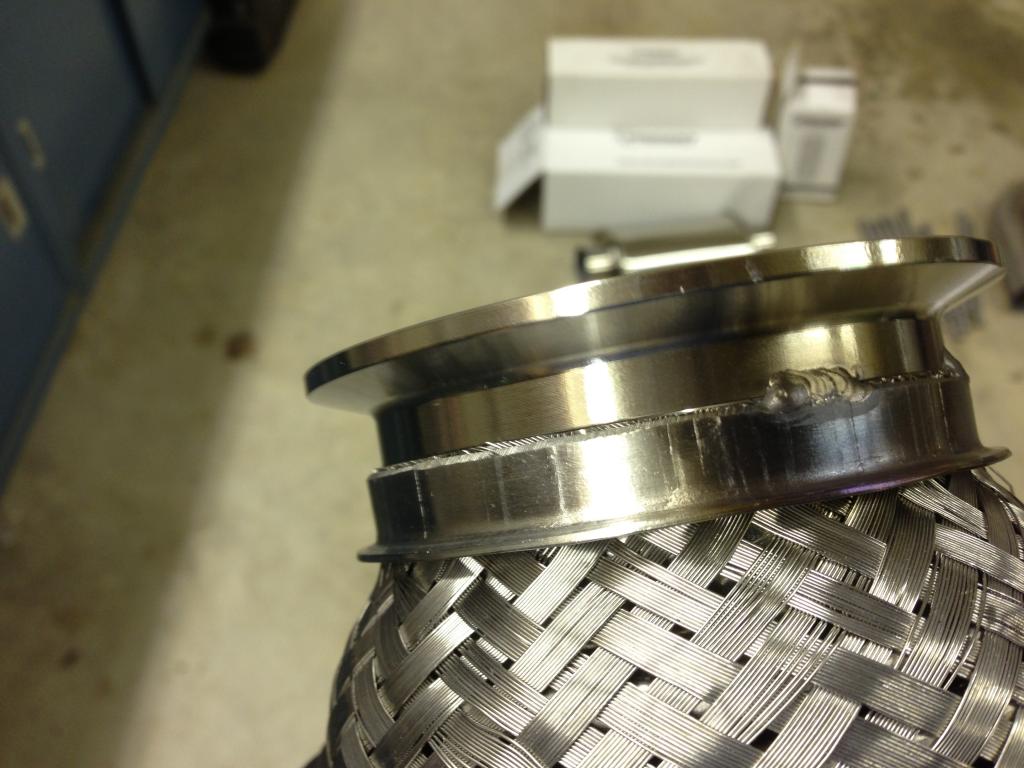
I started with the downpipe – Leaving my V-Band to turbo flange slightly loose to allow for some rotation while mocking up the rest of the system. I wanted to start out with the flex pipe to keep stress off of my manifold. I had to knock some of the stainless wire off of the end of the flex pipe and then I mated the V-Band flange to it for a couple of quick tacks.
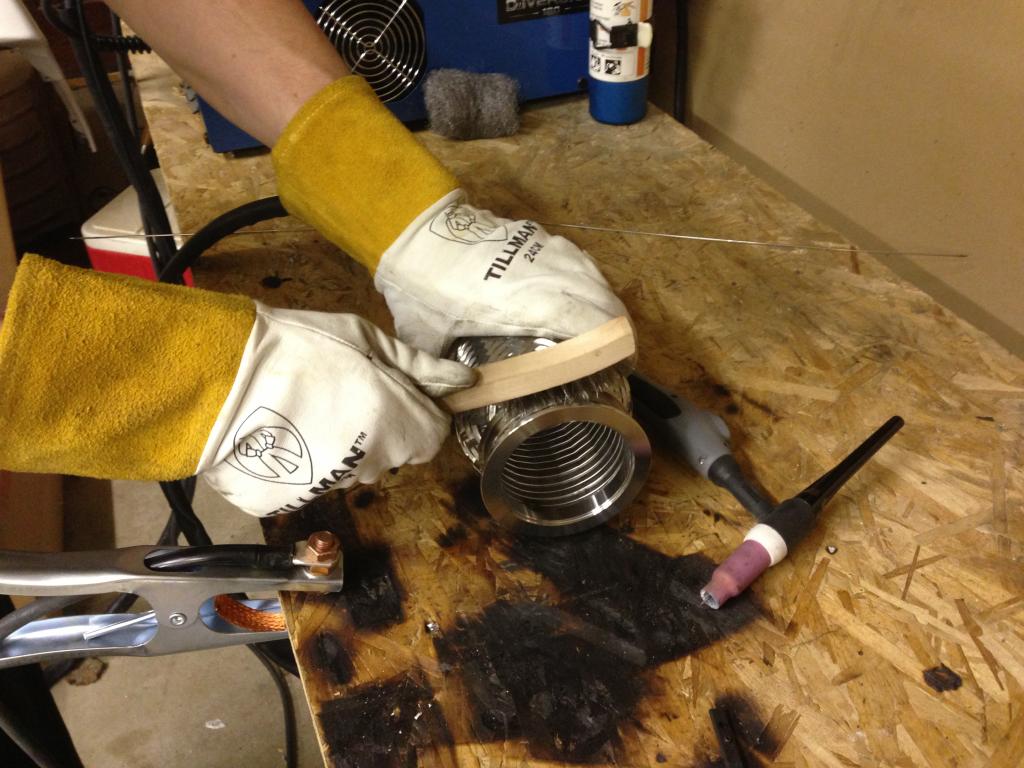
I’m no professional welder by any means but I do know that you must tack v-band flanges in multiple areas before you make your pass or else you’ll end up with a warped flange that wont seat properly.
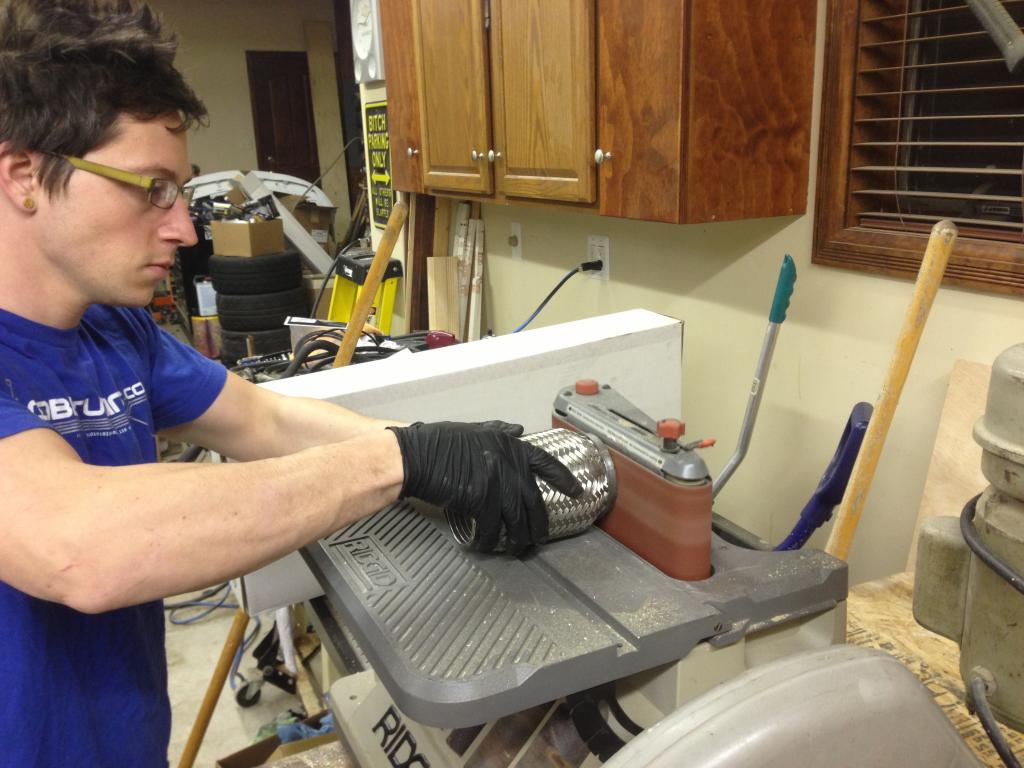
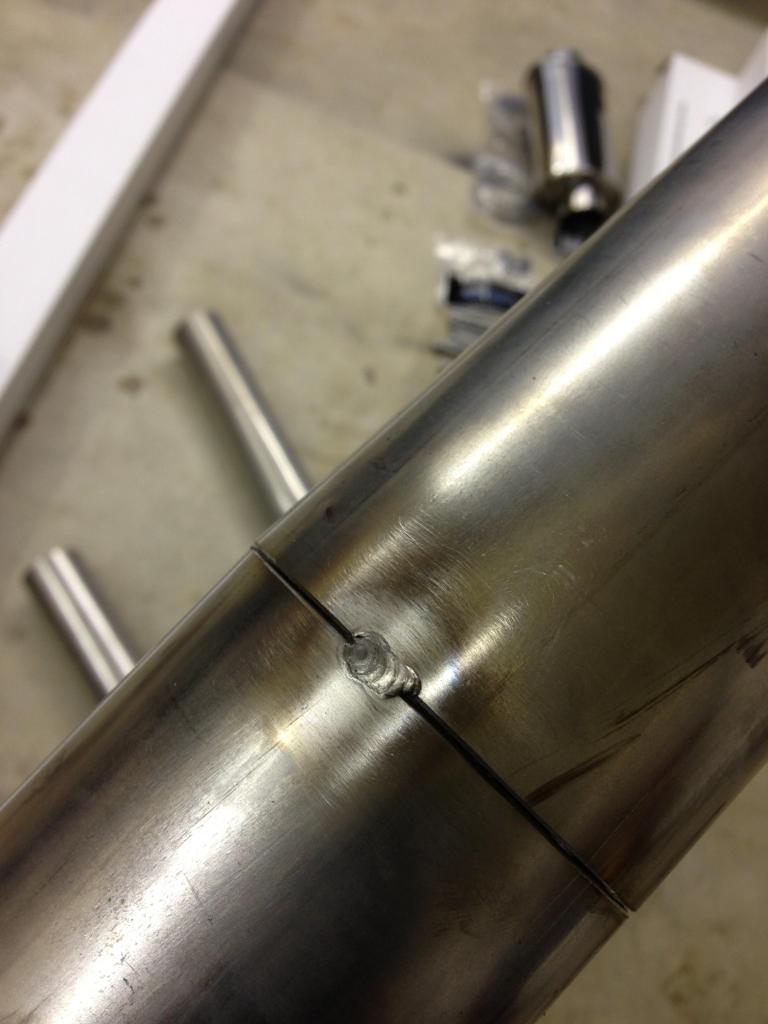
Then I slid under the car and started to mock up my slight bends before the differential. It always looks like one straight shot will work but it won’t, especially when using 3 inch pipe. After each piece was determined I tacked it together.
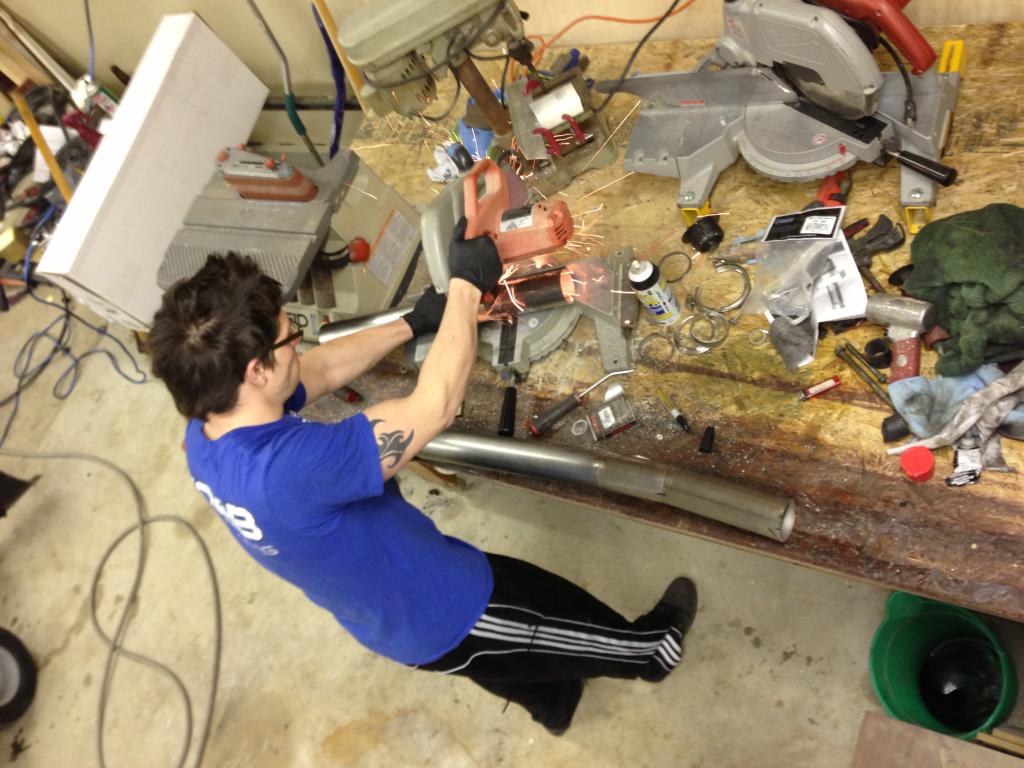
Chop chop:
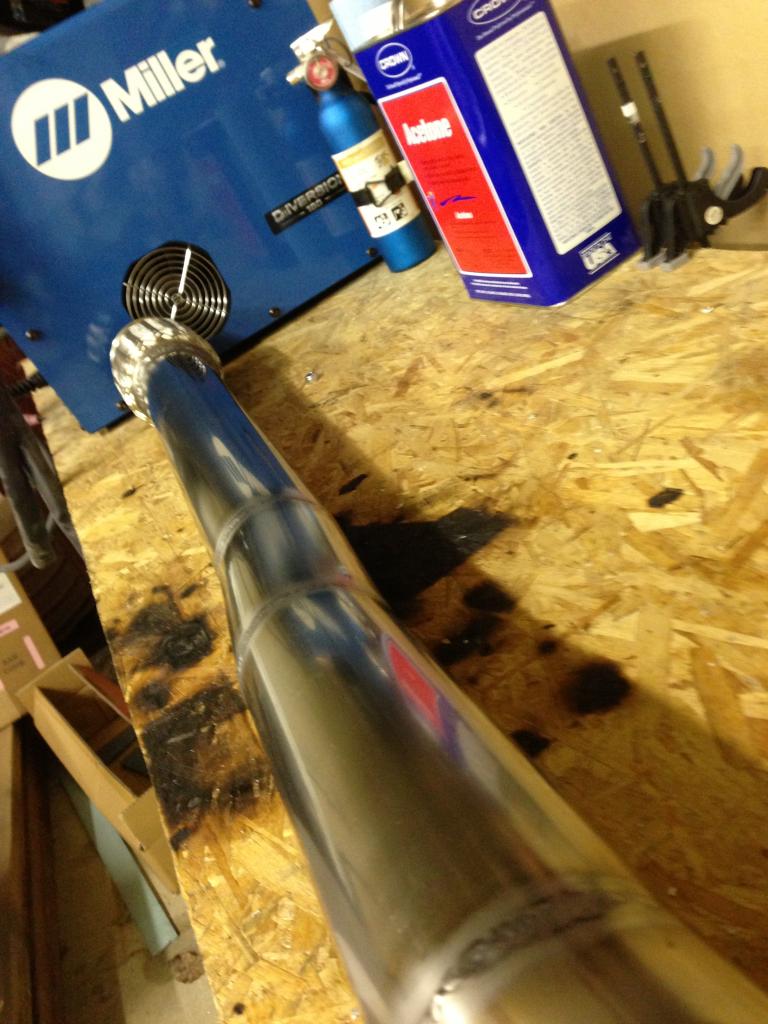
Tig tig:
Old vs New – and I’m calling it a night.
I picked up 3 inch stainless from Vibrant. The build list went a little something like this:
2X - VIBRANT – 3” MANDERAL BENT UNIVERSAL BEND
1X - VIBRANT – 3” 5 FOOT STRAIGHT TUBE
1X - VIBRANT – 3” ULTRA QUIET RESONATOR
1X - VIBRANT – EXHAUST HANGERS
3X - VIBRANT – V-BAND ASSEMBLIES
1X - VIBRANT – 3” TURBO FLEX PIPE
I started with the downpipe – Leaving my V-Band to turbo flange slightly loose to allow for some rotation while mocking up the rest of the system. I wanted to start out with the flex pipe to keep stress off of my manifold. I had to knock some of the stainless wire off of the end of the flex pipe and then I mated the V-Band flange to it for a couple of quick tacks.
I’m no professional welder by any means but I do know that you must tack v-band flanges in multiple areas before you make your pass or else you’ll end up with a warped flange that wont seat properly.
Then I slid under the car and started to mock up my slight bends before the differential. It always looks like one straight shot will work but it won’t, especially when using 3 inch pipe. After each piece was determined I tacked it together.
Chop chop:
Tig tig:
Old vs New – and I’m calling it a night.
Reply
0
0


