
diy "turbo no hit block" '00 BP miata


Joined: Sep 2010
Posts: 8,157
Total Cats: 1,095
From: Lake Forest, CA
Reply
 0
0

0
I also have the Weir crush sleeve I bought a while back. My guess if anything is failing in your diff, it's the OEM crush sleeve moving, letting the gears walk and destroy themselves.
Reply
0
0

Thread Starter
Junior Member

Joined: Nov 2013
Posts: 396
Total Cats: 56
From: Sardinia, Italy
Who is assembling the diff? Given the short life, I'm really thinking it's not setup correctly since you're the first person I've ever heard of going through 3 diffs this quickly!
I also have the Weir crush sleeve I bought a while back. My guess if anything is failing in your diff, it's the OEM crush sleeve moving, letting the gears walk and destroy themselves.
I also have the Weir crush sleeve I bought a while back. My guess if anything is failing in your diff, it's the OEM crush sleeve moving, letting the gears walk and destroy themselves.
about the weir's solid spacer: I asked them a couple of weeks ago (16 days actually) and never get the answer. They don't have an e-shop, just mail contacts
Now I'm finding another r&p...
I'm hopeless
Reply
0
0
The assembly was made by the local machine shop.. following the mazda specs
about the weir's solid spacer: I asked them a couple of weeks ago (16 days actually) and never get the answer. They don't have an e-shop, just mail contacts
Now I'm finding another r&p...
I'm hopeless
about the weir's solid spacer: I asked them a couple of weeks ago (16 days actually) and never get the answer. They don't have an e-shop, just mail contacts
Now I'm finding another r&p...
I'm hopeless
I would question them setting up the diff since it's failed for you so soon. You can buy this paint they sell for checking the pattern on the gears, and check it yourself when you get the diff back to verify that the gears are meshing correctly. You'll need a 6-7" micrometer to measure the caps to check those.
Reply
0
0


Thread Starter
Junior Member
Joined: Nov 2013
Posts: 396
Total Cats: 56
From: Sardinia, Italy
The car was still waiting the fourth diff (on its way to home, I hope the adventure is finished)
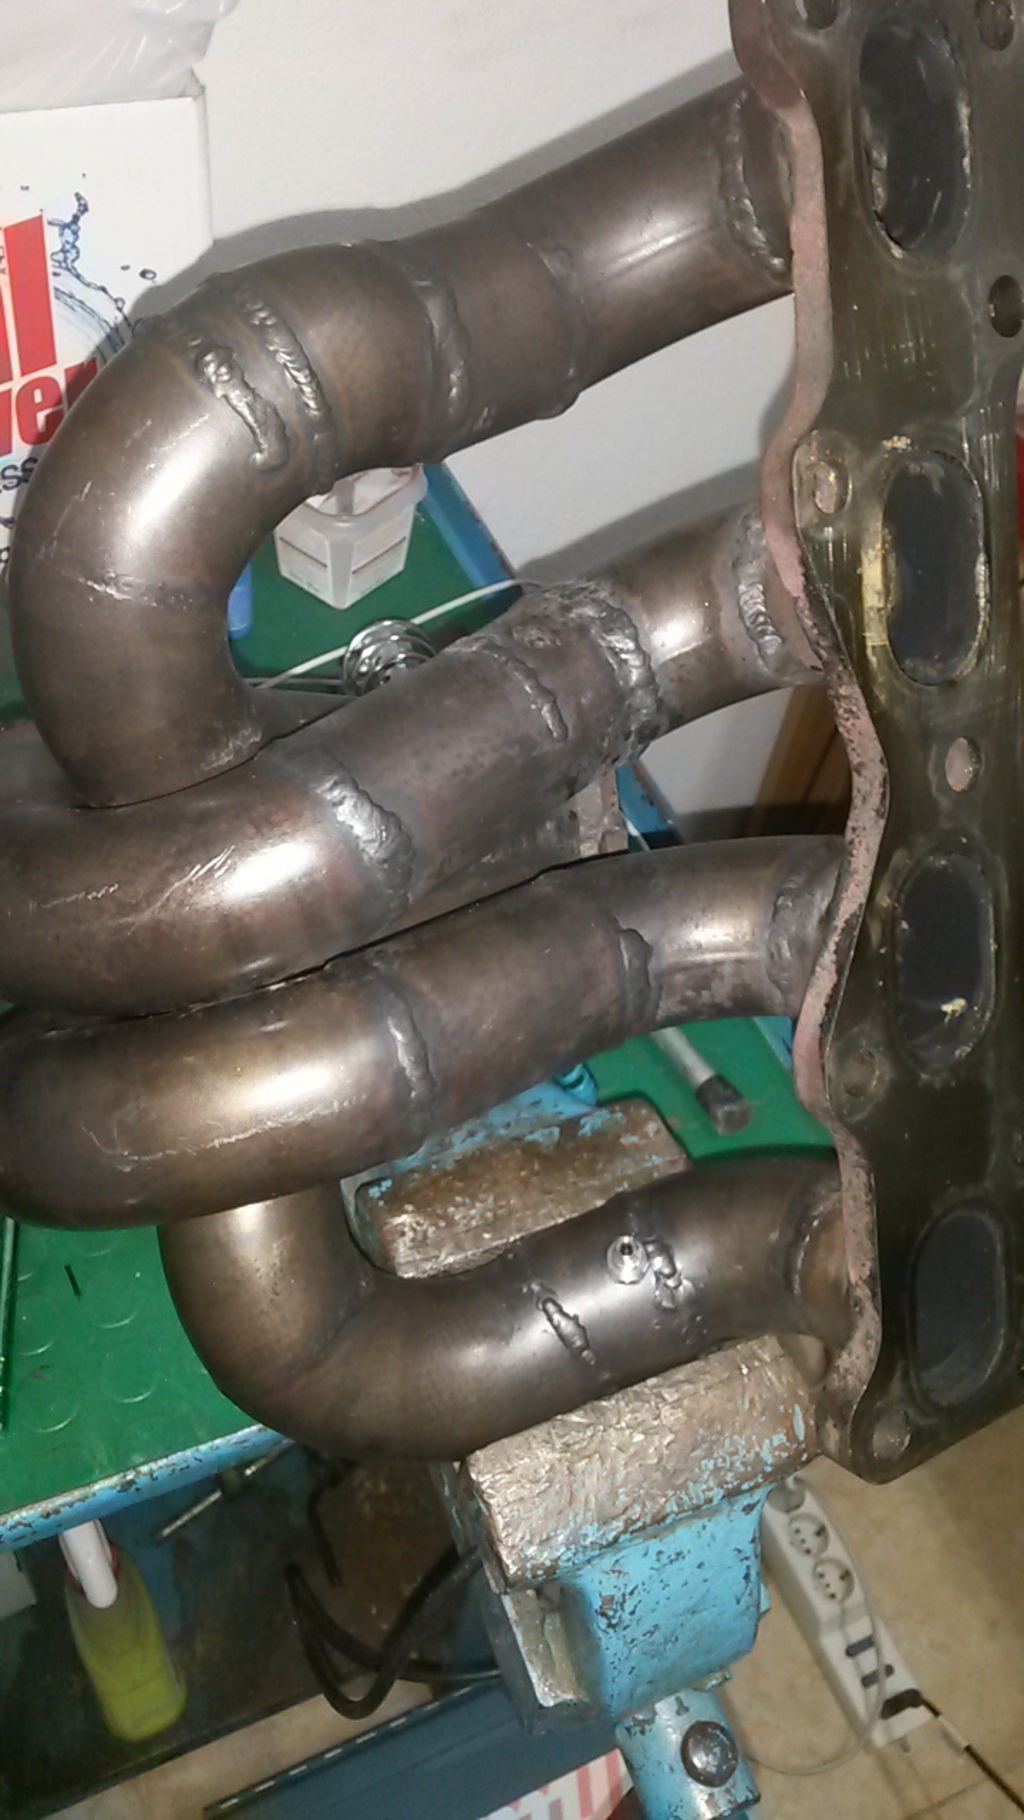
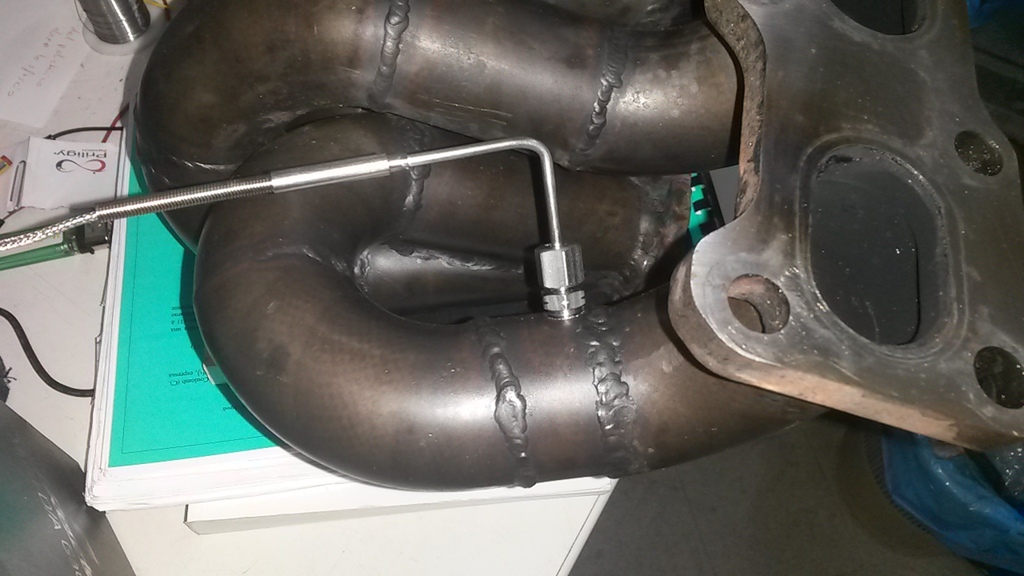
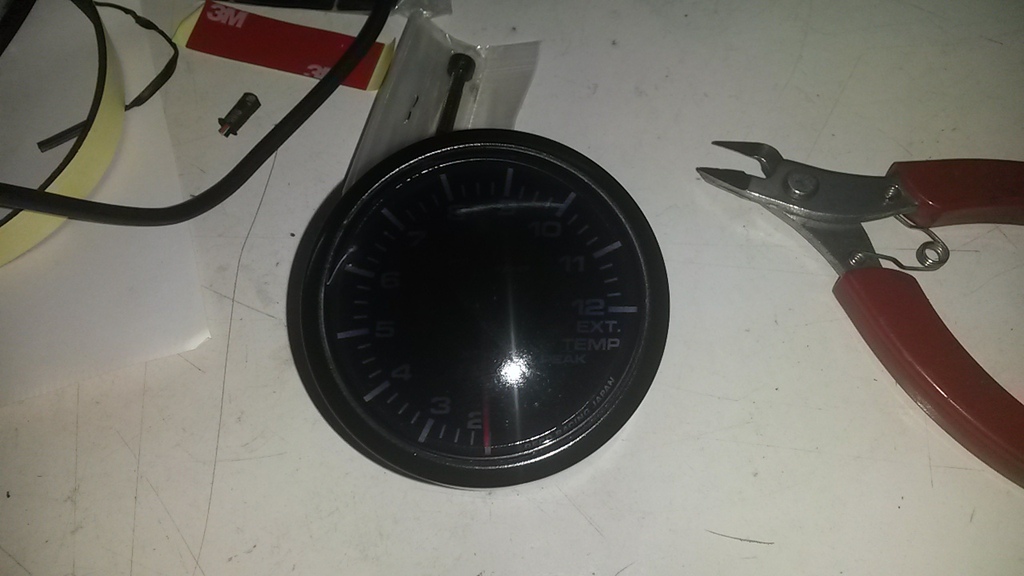
the only mod that I've done is an ld bluetooth module for the ms2 and an egt sensor fron depo racing. Cool gauge: uses a stepper motor like the greddy one
I choose to read the cilynder #4, as close as possible to the head

The gauge, painted black (was silver)
couple of days ago: my car at the center, the one at the right is a BP supercharged (stock engine), at the left a stock B6 prepping for turbo build (stage2 clutch and lightweight flywheel), and the silver one is stock (for now )
)

the only mod that I've done is an ld bluetooth module for the ms2 and an egt sensor fron depo racing. Cool gauge: uses a stepper motor like the greddy one
I choose to read the cilynder #4, as close as possible to the head


The gauge, painted black (was silver)

couple of days ago: my car at the center, the one at the right is a BP supercharged (stock engine), at the left a stock B6 prepping for turbo build (stage2 clutch and lightweight flywheel), and the silver one is stock (for now
)
Reply
0
0
Thread Starter
Junior Member
Joined: Nov 2013
Posts: 396
Total Cats: 56
From: Sardinia, Italy
Today I linearized the oem oil pressur gauge, because I've bought a 100psi pressure transducer a couple of mounths ago and now it's the time to install it.

I choose the oem gauge because is cheap and easy to use.
The concept is intuitive: the gauge has three terminals: 12v, GND and oil pressure. If you put the third terminal to gnd, the gauge indicates zero, and if you leave the terminal open, it indicate the maximum.
Since the transducer is an active 5v sensor (like the mpx4250 map sensor) the simplest interface is to use a micro. A cheap one, like the attiny85 is way more than enough.
A BC639 will put the terminal to gnd, but using pwm we have a resolution of 256 steps.
Here is a video of me using a pot as an analog input:
A led is lit up when the pressure is under 1 bar (14.5 psi) o whatever pressure you want.
what I used:
stripboard, an attiny85, a 78L05 (or L7805), a BC639 or equivalent, a 220 and 1k 1/4W resistor,and a led.
Tomorrow some updates
Reply
0
0


