
Building a blonde young beefcake wearing nothing but skimpy shorts named Rocky


BG Synchroshift is the absolute jam. The DSM guys are only half joking when they call it a rebuild in a bottle. It's expensive, but it revived my last DSM trans from completely worthless to daily drivable when I put it in place of the synchromesh that was in it. buy it from these guys.
http://www.jnztuning.com/product_inf...a122fe3f252c18
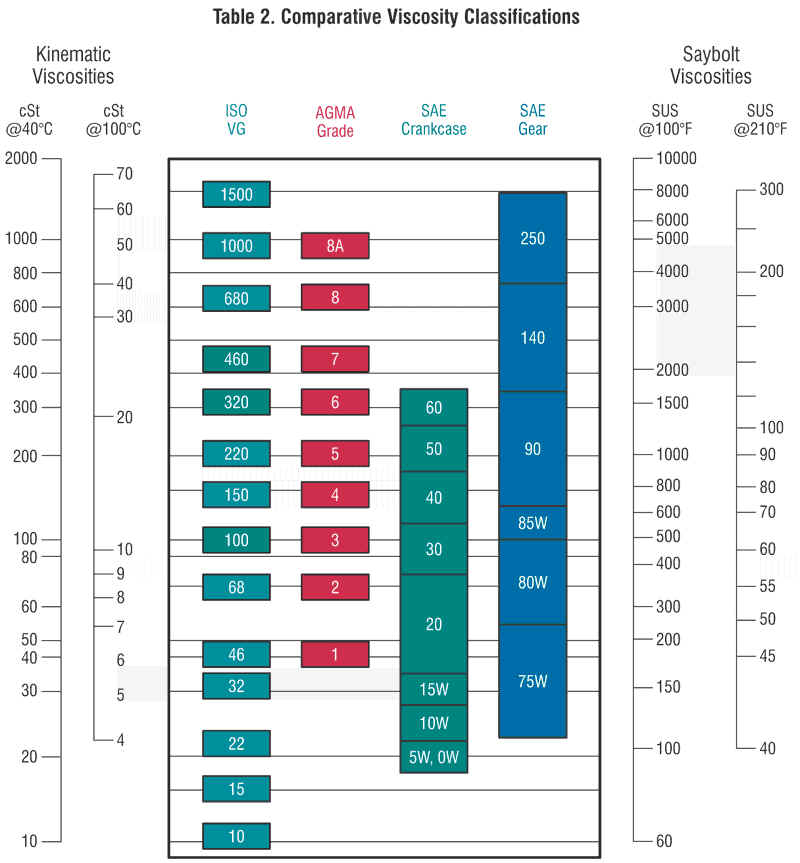
Before you bitch about it being 75w-90, gear oil is only thicker when its cold, and if you try to smash shifts when the car is cold you deserve broken parts. See below for evidence:
http://www.jnztuning.com/product_inf...a122fe3f252c18
Before you bitch about it being 75w-90, gear oil is only thicker when its cold, and if you try to smash shifts when the car is cold you deserve broken parts. See below for evidence:
Reply
 0
0

0


Thread Starter
Senior Member
iTrader: (7)
Joined: Sep 2009
Posts: 754
Total Cats: 68
From: Royal Oak Michigan
18PSI that's funny you said that.. I just did my lights last night.
Went back today to make some progress after the clear coat had hardened.. Extended some wires and figured while it was apart I'd bake the lights. It had been on my list of things to do.
Painting the housings is an easy thing. I've done probably over 50 sets of lights. Someone asked me - so here is a quick how to:
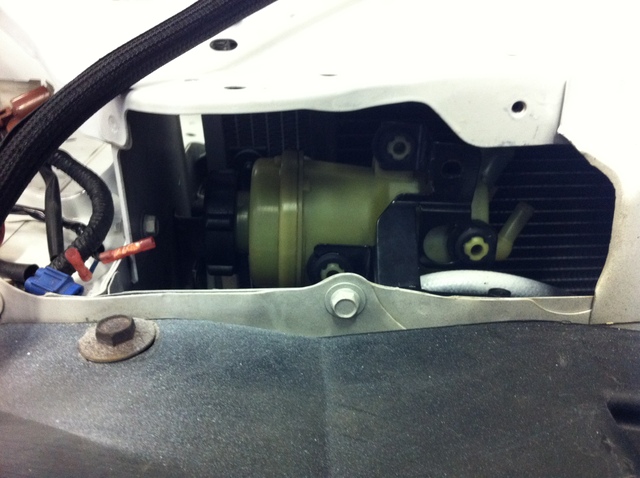
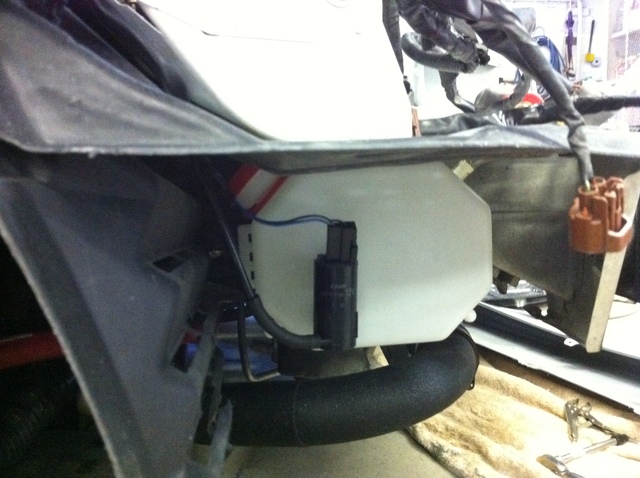
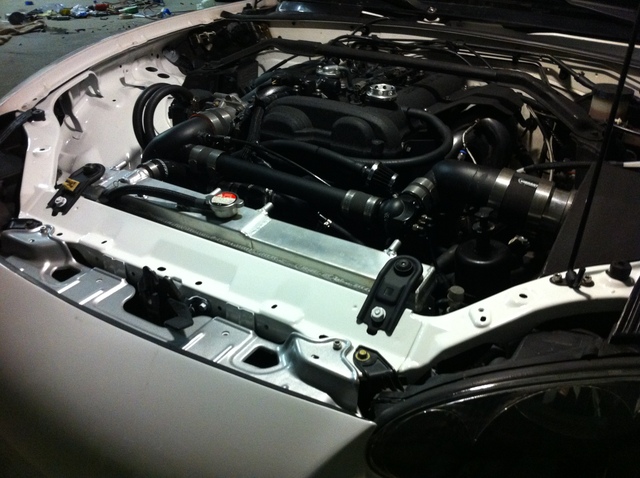
Needed to relocate my overflow and my washer fluid so I got a bit creative. For the coolant overflow I ended up using a 2012 Ford Focus power steering tank. The Ford mount was slightly modified and tucked it nicely under the core support.
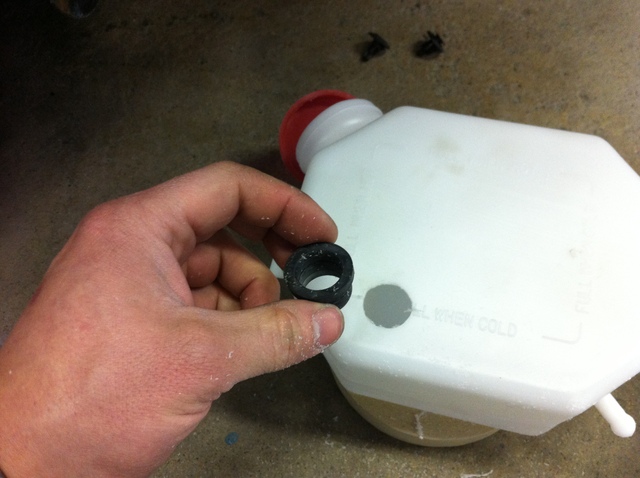
For the washer fluid I wasn't about to go without. This isn't an 86 Honda. I decided to use a universal tank from the local parts store. Intended for coolant but it'll work nicely.

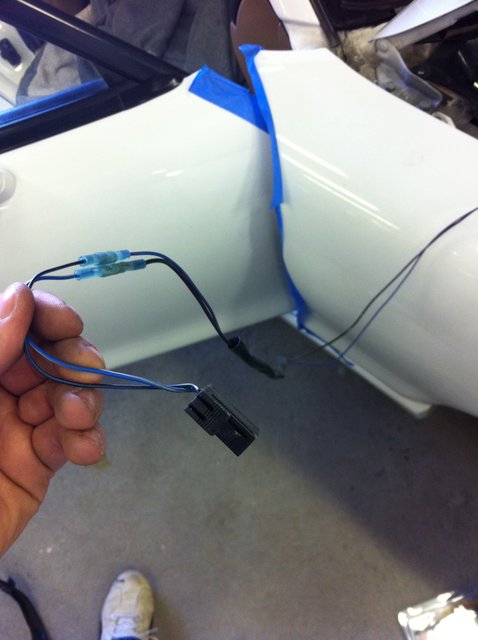
Just needed to find a place to put it and transplant the pump.
I found a good spot behind the bumper, against the frame rail.
I extended the pump wires and mounted the tank up.
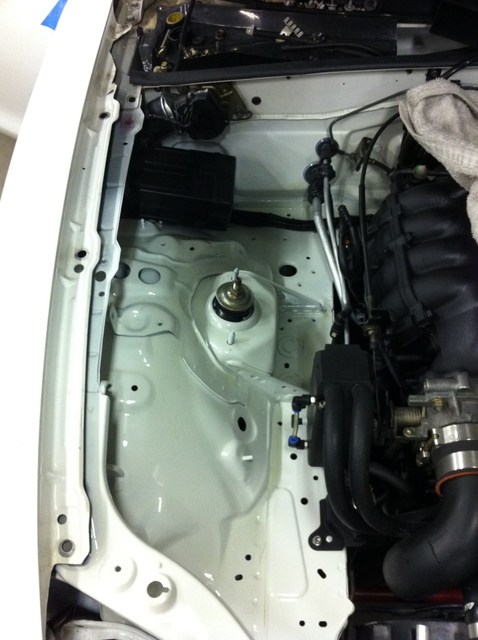
I had planned on extending the fuse box harness and tossing it behind my glove box but after removing the mount and re-wraping the harness I was satisfied with how clean it looked. I made a mount out of flat steel I had laying around and ended up trimming off one of the mounting ears.
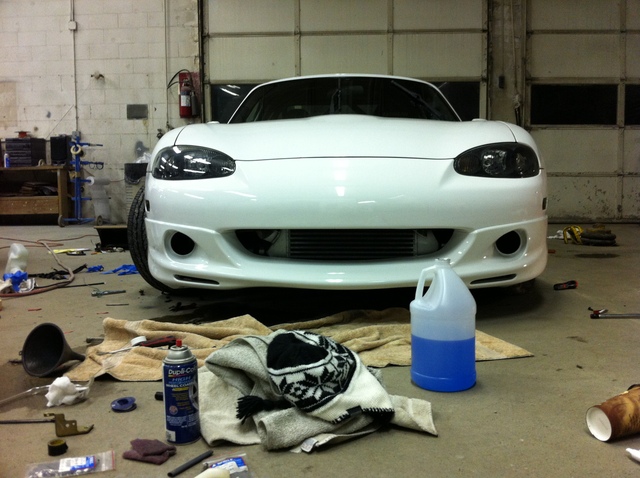
The aluminum piece on the front bumper has always been an eye sore.. Oxidized and faded raw aluminum. I scuffed it, hit it with etching primer, then coated it with that durable wheel coating paint.

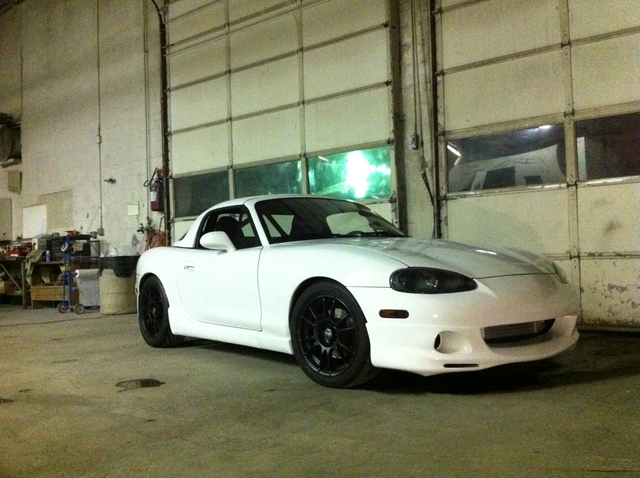
The job wrapped up pretty nicely. Next I'll do the drivers side.
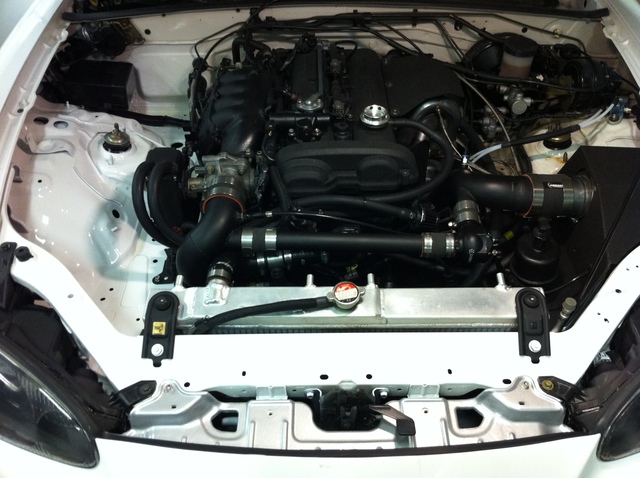
The lights were a much needed touch.
Went back today to make some progress after the clear coat had hardened.. Extended some wires and figured while it was apart I'd bake the lights. It had been on my list of things to do.
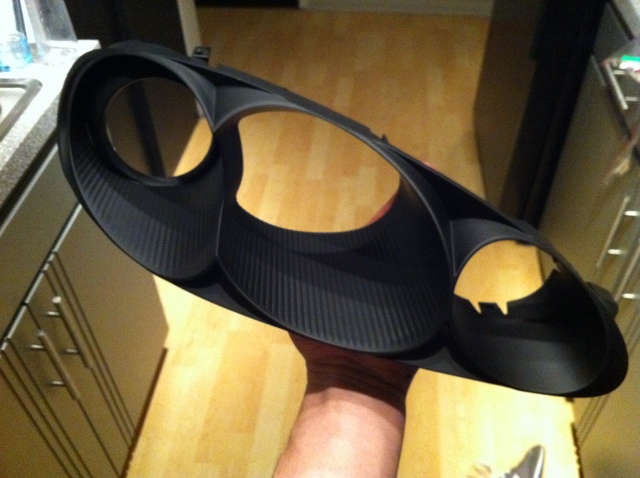
Painting the housings is an easy thing. I've done probably over 50 sets of lights. Someone asked me - so here is a quick how to:
- Remove the headlights from the car - leave the bulbs in or remove them - doesn't matter.
- Remove the screws from the backside of the light that run along the seam. If you find them hard to remove skip this step until after we pull the lights out of the oven (sometimes the adhesive makes these hard to remove when the lights are not hot)
- Most automotive lights are held together with urethane. It's very playable at around 200 degrees and it usually the same consistency as the 3M window weld used to hold your windshield in, before it's dry. Do not pre-heat your oven. Set it to 215-220 and put your lights in the oven- It probably wont hurt your lights to drop them directly into 220 degrees but the slower change in temps are a better bet.
- Give them about 15 minutes and pull your first light out. It will be hot but start at one end and work your way down the seam with a plastic pry tool of some sort. Separate the light all the way around and pull the backing from the lens. Be careful of the stringy urethane and not to get it onto any of the inside surfaces of the light. It's nasty stuff.
- Next you'll notice that the chromed part is still inside of the clear lens - These usually only come out from one side first so don't force anything until you try both ends.
- Now that you have it removed - Clean it with a prep- alcohol or even a window cleaner. Don't worry about scuffing the surface just use a durable flat black paint. The insides of your lights don't see much abuse.
- Start with an extremely light coat. If you go heavy on a hard surface like the chromed plastic you'll notice the paint will cling to itself on the surface, creating little spots that aren't covered at all (fisheyes). Just a few light dusting for the first coat. Then start with the areas that will be missed with straight even coats. The little cracks and deep areas, followed up by some nice even passes until the housing is covered to your satisfaction.
- I usually speed up the drying process by dropping the freshly painted housing back into the oven for a minute or two, then set it back into the clear lens.
- Putting the light together is simple. Take the lens and the headlight and press them together, they wont seat very well because the urethane has cooled but just make sure they line up, then drop them back in the oven stuck together, to re-heat the urethane. After a couple of minutes you can pull it out and finish pressing them together. If you find it hard, double check that you are lined up and install the screws. They will pull the housings together. Drop it back in the oven to help everything settle and move on to the next light.
Needed to relocate my overflow and my washer fluid so I got a bit creative. For the coolant overflow I ended up using a 2012 Ford Focus power steering tank. The Ford mount was slightly modified and tucked it nicely under the core support.
For the washer fluid I wasn't about to go without. This isn't an 86 Honda. I decided to use a universal tank from the local parts store. Intended for coolant but it'll work nicely.
Just needed to find a place to put it and transplant the pump.
I found a good spot behind the bumper, against the frame rail.
I extended the pump wires and mounted the tank up.
I had planned on extending the fuse box harness and tossing it behind my glove box but after removing the mount and re-wraping the harness I was satisfied with how clean it looked. I made a mount out of flat steel I had laying around and ended up trimming off one of the mounting ears.
The aluminum piece on the front bumper has always been an eye sore.. Oxidized and faded raw aluminum. I scuffed it, hit it with etching primer, then coated it with that durable wheel coating paint.
The job wrapped up pretty nicely. Next I'll do the drivers side.
The lights were a much needed touch.
Last edited by miatauser123; Feb 13, 2012 at 10:29 AM.
Reply
0
0


OMG...sooooo subscribed...You are my hero. This is EXACTLY the kinda build I want to do...maybe not rods and pistons (until I break something), but this year I am prepping the car very slowly to go turbo next Spring (I'm a  ), and I will be doing a lot of the same stuff.
Did you do a write-up on your headlight housings or tail-light tint? I wouldn't mind do the same, but want to be SURE it is clean. Your attention to detail is FLAWLESS; I can't wait to see what else you come up with.
), and I will be doing a lot of the same stuff.Did you do a write-up on your headlight housings or tail-light tint? I wouldn't mind do the same, but want to be SURE it is clean. Your attention to detail is FLAWLESS; I can't wait to see what else you come up with.
Reply
0
0
Thread Starter
Senior Member
iTrader: (7)
Joined: Sep 2009
Posts: 754
Total Cats: 68
From: Royal Oak Michigan
OMG...sooooo subscribed...You are my hero. This is EXACTLY the kinda build I want to do...maybe not rods and pistons (until I break something), but this year I am prepping the car very slowly to go turbo next Spring (I'm a ), and I will be doing a lot of the same stuff.
Did you do a write-up on your headlight housings or tail-light tint? I wouldn't mind do the same, but want to be SURE it is clean. Your attention to detail is FLAWLESS; I can't wait to see what else you come up with.
), and I will be doing a lot of the same stuff.Did you do a write-up on your headlight housings or tail-light tint? I wouldn't mind do the same, but want to be SURE it is clean. Your attention to detail is FLAWLESS; I can't wait to see what else you come up with.
SIDE NOTE: Vote for the MiataForumz.com feature of the month?
http://www.miataforumz.com/showthread.php?t=694
Last edited by miatauser123; Feb 13, 2012 at 11:26 AM.
Reply
0
0
Updated my post with some step-by-step.
SIDE NOTE: Vote for the MiataForumz.com feature of the month?
http://www.miataforumz.com/showthread.php?t=694
SIDE NOTE: Vote for the MiataForumz.com feature of the month?
http://www.miataforumz.com/showthread.php?t=694

Reply
0
0

How is your fleabay radiator holding up? And who was the source?
Also, have you considered Toyota COPs or maybe a self-made big spark kit with LSx coils? Why or why not? I have a VVT motor as well, which makes for issues with most available COPs because of the valve cover.
Ill have a standalone (prob e420c because they seem to pop up pretty regularly) in a couple of months at the most, which means I would like to go for sequential spark...You going to do the same? Get your high idle worked out?
-Joe
Reply
0
0
Thread Starter
Senior Member
iTrader: (7)
Joined: Sep 2009
Posts: 754
Total Cats: 68
From: Royal Oak Michigan
Radiator is holding up just fine. Car got a little warm on the Dyno so it's still too early to tell. I don't have a reroute on the car and I've yet to drive the built setup in heat, but before the build, the radiator had solved my overheating issues, don't recall the source or purchase - Just eGay.
I have yet to experience any spark blow out issues or ignition issues in general so I'm not going to touch it. I think as far as wasted spark goes- the NBB setup is about as good as it gets. 2 COP and a really short plug wire for the "wasted" cylinders, but if I find it a necessary I'll of course make the switch. Plus from what I understand unless you're having issues - Sequential will only provide better fuel economy, power wouldn't be any different compared to Wasted Spark. The earlier MX-5's had the problems if memory serves me.
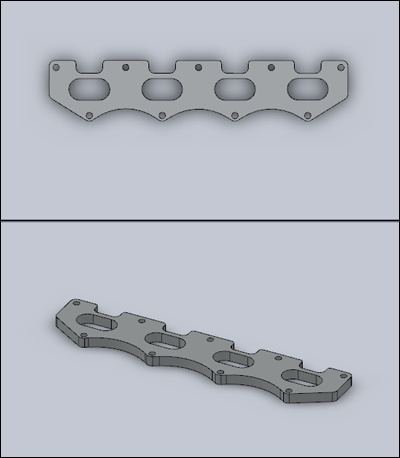
I think my next move is going to be intake mani related. From what I've gathered from the thread of 24 something pages of nearly worthless information about the Honda intake manifold- Someone needs to do it properly and show before and after results to prove it's a worthwhile solution.
Need to source a flange - If anyone has a source - shoot me a PM. Otherwise I'll be asking friends who can source some CNC work.
I have yet to experience any spark blow out issues or ignition issues in general so I'm not going to touch it. I think as far as wasted spark goes- the NBB setup is about as good as it gets. 2 COP and a really short plug wire for the "wasted" cylinders, but if I find it a necessary I'll of course make the switch. Plus from what I understand unless you're having issues - Sequential will only provide better fuel economy, power wouldn't be any different compared to Wasted Spark. The earlier MX-5's had the problems if memory serves me.
I think my next move is going to be intake mani related. From what I've gathered from the thread of 24 something pages of nearly worthless information about the Honda intake manifold- Someone needs to do it properly and show before and after results to prove it's a worthwhile solution.
Need to source a flange - If anyone has a source - shoot me a PM. Otherwise I'll be asking friends who can source some CNC work.
Reply
0
0
I was starting to feel that way about the stock dual COPs too, they work fine, everyone seems to hail the smoothness of the Toyota COPs though, whether running wasted OR sequential. As for the radiator...I found on on there that looks just like yours...you said its complete drop-in with how low-pro the fans are...whats the core thickness? about 35mm?
I can prep CAD Models that will output G-code...IFFF I know exact dimensions haha.
I can prep CAD Models that will output G-code...IFFF I know exact dimensions haha.
Reply
0
0

Joined: Oct 2011
Posts: 5,733
Total Cats: 830
From: Detroit (the part with no rules or laws)

Reply
2
2

Junior Member
Joined: Aug 2010
Posts: 124
Total Cats: 1
From: south africa
Toooo much win for one thread...
Awesomeness by the truck load for the attention to detail...love the head lights, although copy rights still remain with the Boss.(18psi)
Great to hear no spark problems and nearly filled my pants with mud pie after hearing about the M6?
SHOULD HAVE TOLD THE SHITTY M6.....
KEEP DROOLIN I'M SPOOLIN!
Awesomeness by the truck load for the attention to detail...love the head lights, although copy rights still remain with the Boss.(18psi)
Great to hear no spark problems and nearly filled my pants with mud pie after hearing about the M6?
SHOULD HAVE TOLD THE SHITTY M6.....
KEEP DROOLIN I'M SPOOLIN!
Reply
0
0

Your car made me miss my white one so much, that I just picked up a white 01 just like yours
I too am curious about the egay rad you got: did you have any fitment issues whatsoever? You're still on stock fans right? Any feedback appreciated since I'm getting one soon.
Also what are the spring rates on those HKS?
I too am curious about the egay rad you got: did you have any fitment issues whatsoever? You're still on stock fans right? Any feedback appreciated since I'm getting one soon.
Also what are the spring rates on those HKS?
Reply
0
0
Oh and your plans to fully document intake manifold build are FANTASTIC.
Check here for IM flange:
http://www.weir-tech.com/
Also there is a current and active thread in another section with a link to an Intake Manifold DIY site with pretty much every single IM related item for sale.
You could also check with our resident fabricators: Artech, Turbotim, gotpsi?, and a few others who I'm sure either have these flanges or have access to them.
Reply
0
0


